AnyConnect: Installing a Self-Signed Certificate as a Trusted Source
Available Languages
Objective
The objective of this article is to guide you through creating and installing a self-signed certificate as a trusted source on a Windows machine. This will eliminate the “Untrusted Server” warning in AnyConnect.
Introduction
The Cisco AnyConnect Virtual Private Network (VPN) Mobility Client provides remote users with a secure VPN connection. It provides the benefits of a Cisco Secure Sockets Layer (SSL) VPN client and supports applications and functions unavailable to a browser-based SSL VPN connection. Commonly used by remote workers, AnyConnect VPN lets employees connect to the corporate network infrastructure as if they were physically at the office, even when they are not. This adds to the flexibility, mobility, and productivity of your workers.
Certificates are important in the communication process and are used to verify the identity of a person or device, authenticate a service, or encrypt files. Self-signed certificate is a SSL certificate which is signed by its own creator.
When connecting to AnyConnect VPN Mobility Client for the first time, users may encounter an “Untrusted Server” warning as shown in the image below.
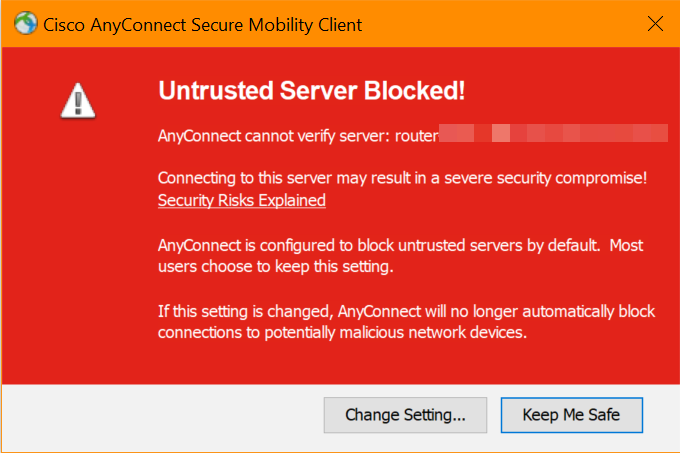
Follow the steps in this article to install a self-signed certificate as a trusted source on a Windows machine, to eliminate this issue.
AnyConnect Software Version
- AnyConnect - v4.9.x (Download latest)
Check Time Settings
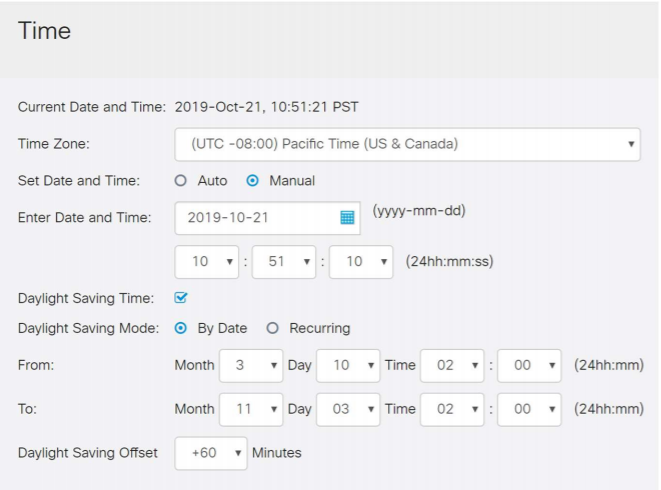
As a prerequisite, you need to ensure that your router has the correct time set, including time zone and daylight savings time settings.
Step 1
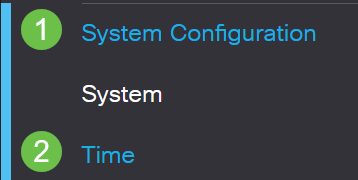
Navigate to System Configuration > Time.
Step 2
Ensure that everything is set correctly.
Create a Self-Signed Certificate
Step 1
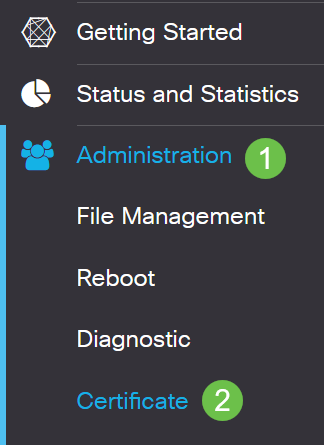
Log into the RV34x series router and navigate to Administration > Certificate.
Step 2
Click on Generate CSR/Certificate.

Step 3
Fill out the following information:
- Type: Self-Signed Certificate
- Certificate Name: (Any name that you choose)
- Subject Alternative Name: If an IP address will be used on the WAN port, select IP Address below the box or FQDN if you will be using the Fully Qualified Domain Name. In the box, enter the IP address or FQDN of the WAN port.
- Country Name (C): Select the Country where the device is located
- State or Province Name (ST): Select the State or Province where the device is located
- Locality Name (L): (Optional) Select the Locality where the device is located. This could be a town, city, etc.
- Organization Name (O): (Optional)
- Organization Unit Name (OU): Company Name
- Common Name (CN): This MUST match what was set as the Subject Alternative Name
- Email Address (E): (Optional)
- Key Encryption Length: 2048
- Valid Duration: This is how long the Certificate will be valid. The default is 360 days. You can adjust this to any value you want, up to 10,950 days or 30 years.
Click on Generate.

Step 4
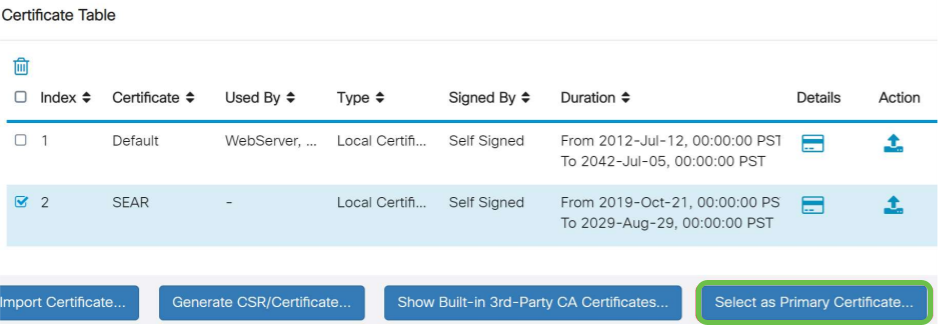
Select the Certificate that was just created and click on Select as Primary Certificate.
Step 5
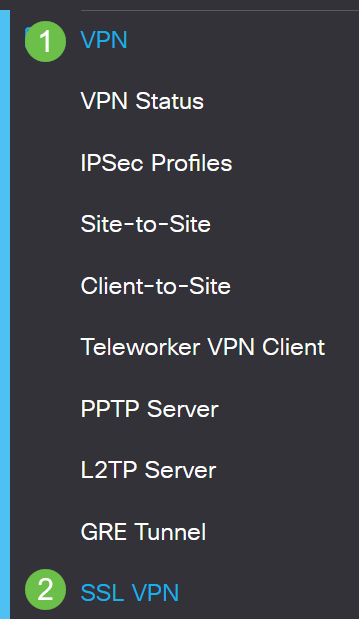
Refresh the Web User Interface (UI). Since it is a new certificate, you will need to log in again. Once you have logged in, go to VPN > SSL VPN.
Step 6
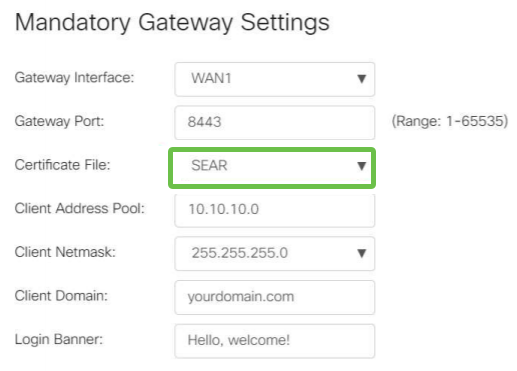
Change Certificate File to the newly created Certificate.
Step 7
Click Apply.

Installing a self-signed certificate
To install a self-signed certificate as a trusted source on a Windows machine, to eliminate the “Untrusted Server” warning in AnyConnect, follow these steps:
Step 1
Log into the RV34x series router and navigate to Administration > Certificate.

Step 2
Select the default self-signed Certificate and click on the Export button to download your Certificate.

Step 3
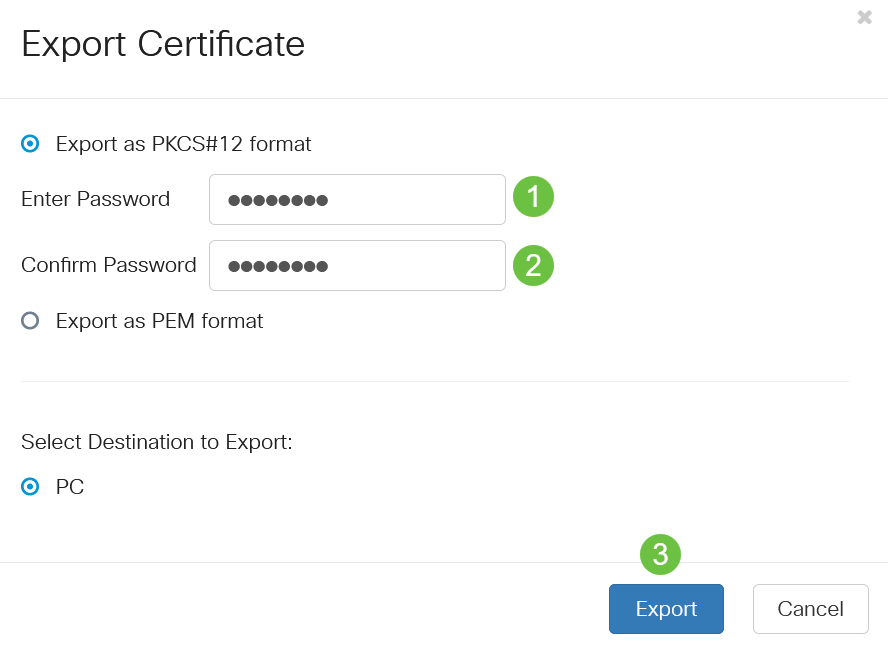
In the Export Certificate window, enter a password for your Certificate. Re-enter the password in the Confirm Password field and then click Export.
Step 4
You will see a pop-up window to notify that the Certificate has been downloaded successfully. Click Ok.

Step 5
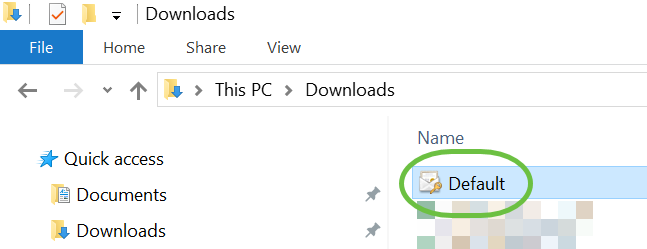
Once the Certificate has been downloaded to your PC, locate the file, and double click it.
Step 6
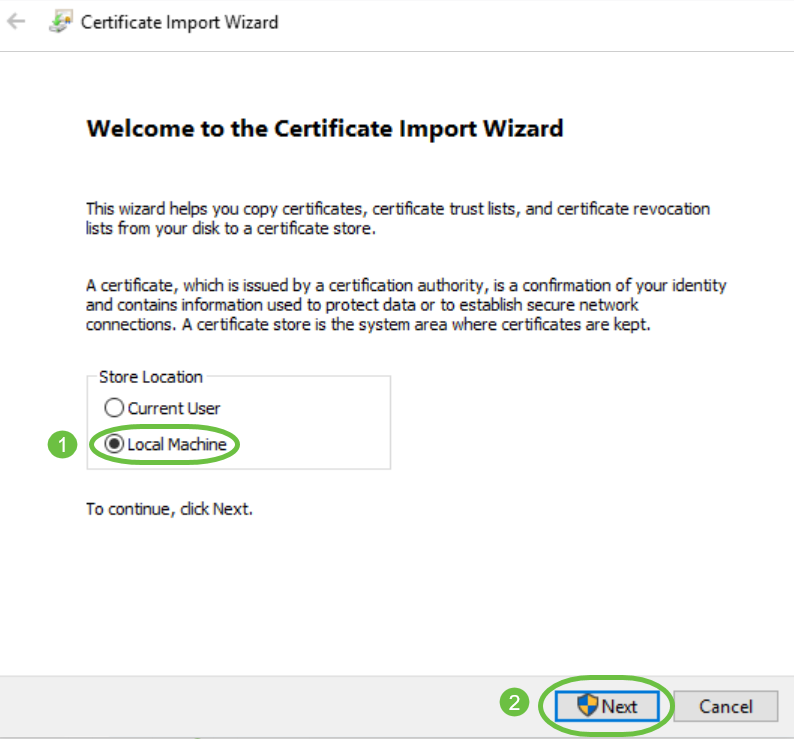
The Certificate Import Wizard window will appear. For the Store Location, select Local Machine. Click Next.
Step 7
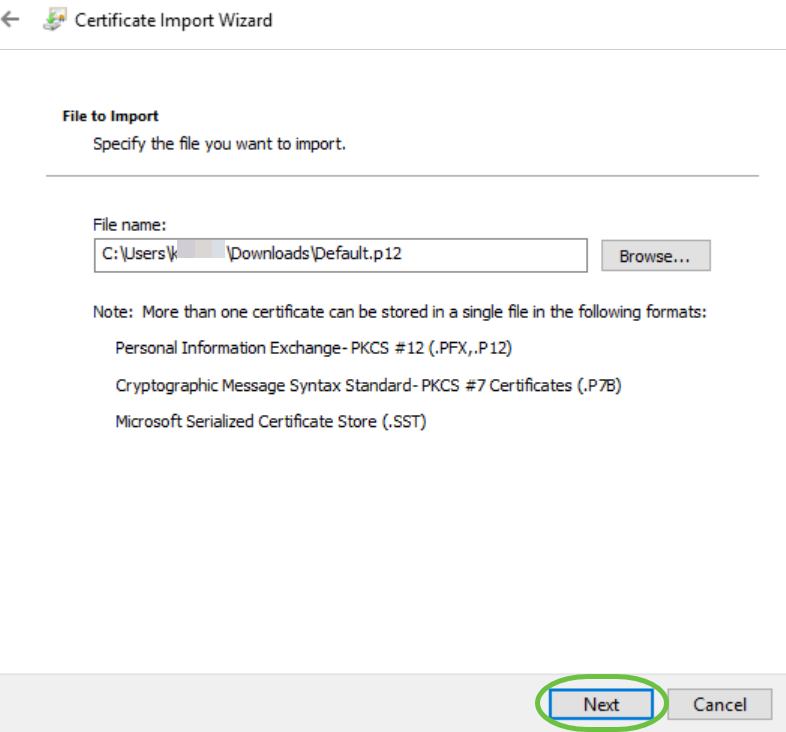
On the following screen Certificate location and information will be displayed. Click Next.
Step 8
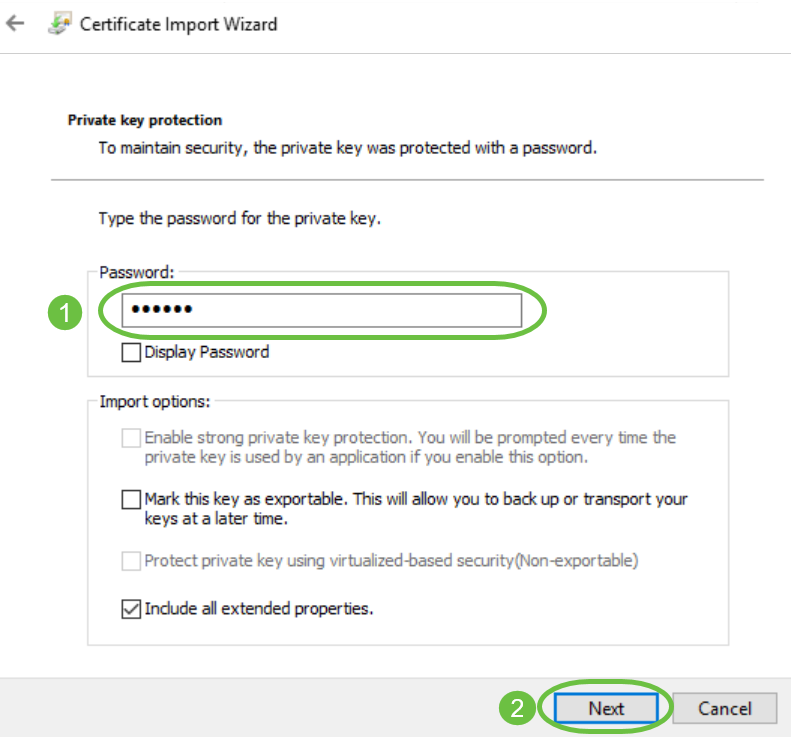
Enter the Password you selected for the Certificate and click Next.
Step 9
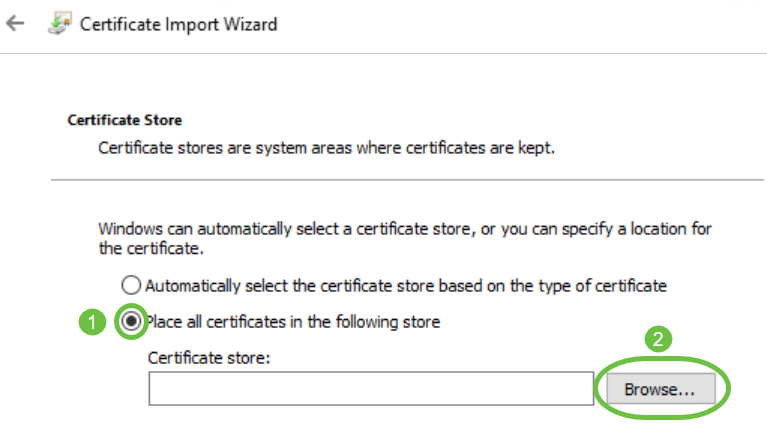
On the next screen, select Place all certificates in the following store and then click on Browse.
Step 10
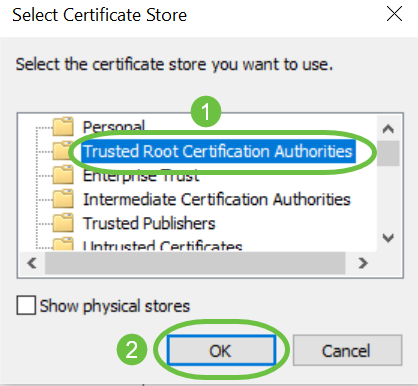
Select Trusted Root Certification Authorities and click OK.
Step 11
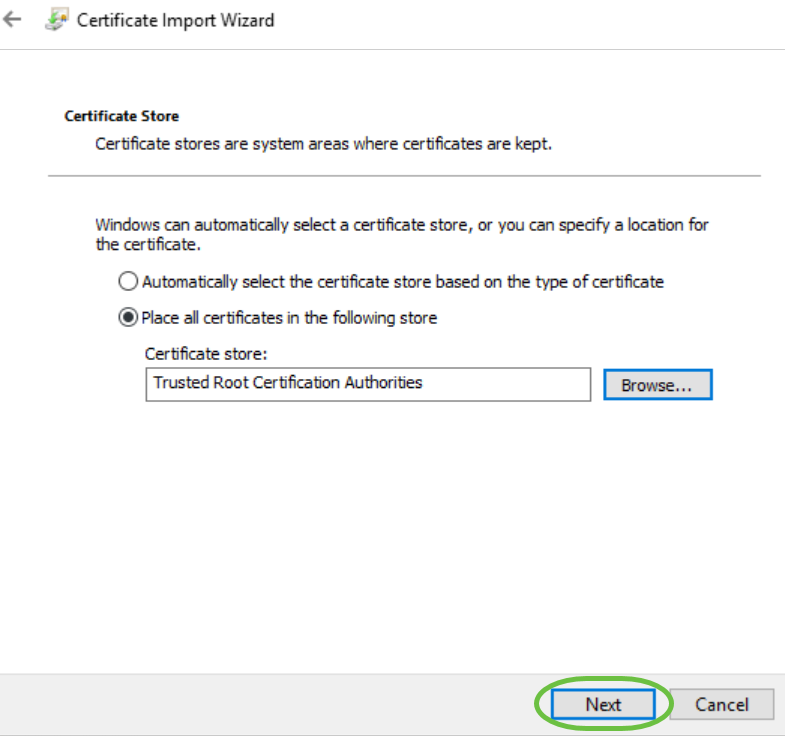
Click Next.
Step 12
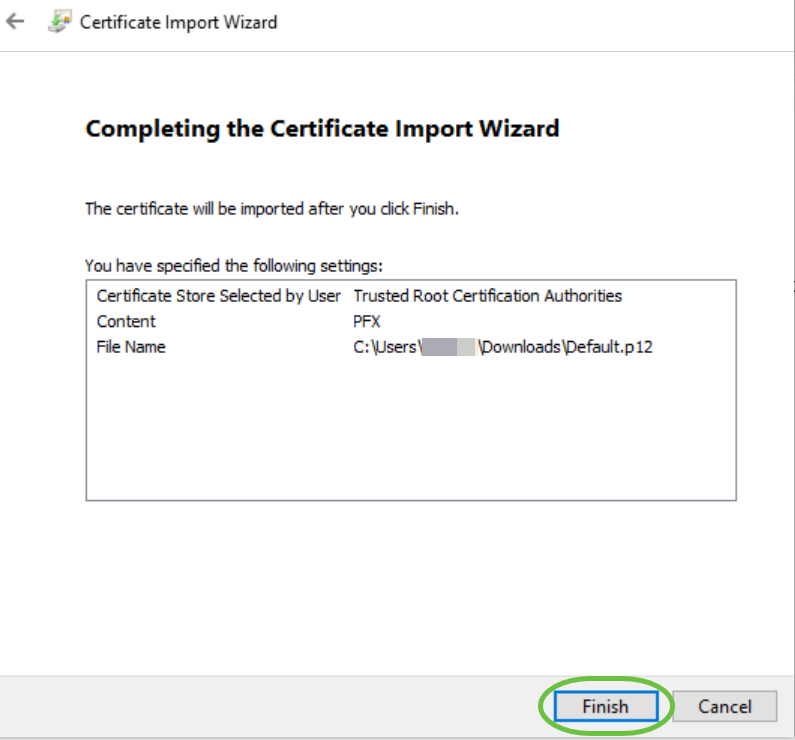
A summary of the settings will be displayed. Click Finish to import the Certificate.
Step 13
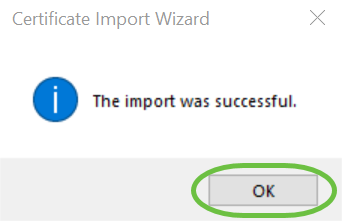
You will see a confirmation that the Certificate was imported successfully. Click OK.
Step 14
Open Cisco AnyConnect and attempt to connect again. You should no longer see the Untrusted Server warning.
Conclusion
There you have it! You have now successfully learned the steps to install a self-signed certificate as a trusted source on a Windows machine, to eliminate the “Untrusted Server” warning in AnyConnect.
 Feedback