Configuring Remote Logging on RV160 and RV260 Routers
Available Languages
Objective
Remote logging can be an effective tool in debugging network issues. Log options on the RV160x and RV260x include: local, email and remote server. This article illustrates the steps in setting up remote logging on an RV160W. Before getting started, we'll provide some additional context to help you determine if this article is for you.
Requirements
- RV160x [Link to Administration Guide]
- RV260x [Link to Administration Guide]
- A previously configured Syslog server or endpoint, with an assigned IP address
Who would use remote logging?
This article would be for a few different types of people. Some are looking to create a data "pipeline" between the RV160x/RV260x and a remote cloud location. Or this could apply to someone sending the logs to an internal network or network endpoint. Thirdly, you may be looking to check in on your network programmatically via a third party provider. The purpose of remote logging is for analysis, monitoring, or storing log contents. With modern data mining techniques, such providers would be able to derrive insight from the logs. Whether or not you're internally or externally storing the logs, the needs of the "pipeline" have different considerations.
This pipeline is very much like a water mainline, it will spray logs wherever you direct it. But to derive value from these logs, some people choose to use a 3rd party to contextualize the logs.
If your Syslog Server isn't yet setup
There are many solutions out there for setting up a remote syslog server. We won't recommend one over the other, here are a couple links to some well options.
Configuring Remote Logging
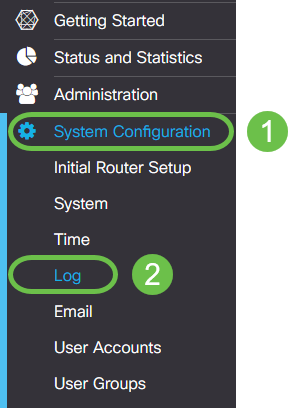
Step 1. After logging into the router, click System Configuration > Log.
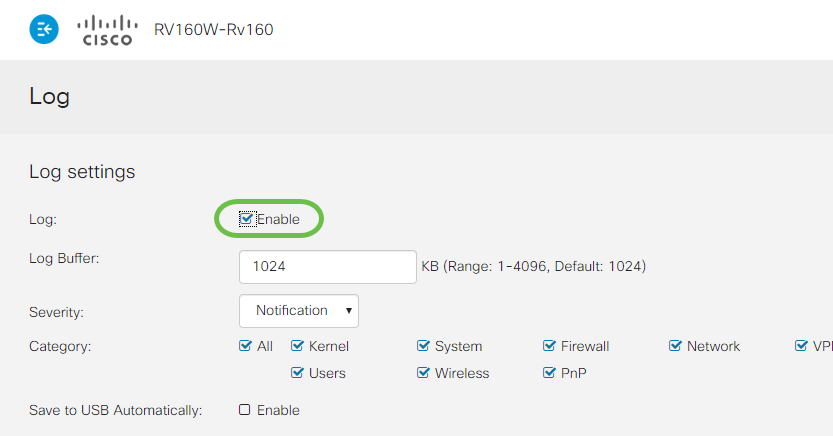
Step 2. Click the Enable checkbox under the Log Settings heading.
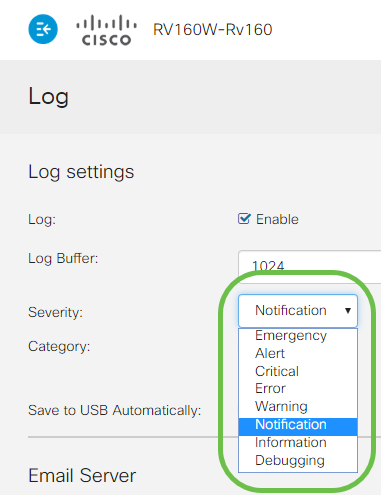
Step 3. Logs range eight distinct levels of impact. Selecting the appropriate amount of information for your purposes will vary. Keep in mind over time, directories containing logs can grow larger than you may initially anticipate. See below for the list ranked from least to most impact:
- Debugging - Logs the most amount of information, for troubleshooting.
- Information - Non-performance impacting details.
- Notification - Normal but significant condition.
- Warning - functional but in danger of toggling into error mode.
- Error - Function or feature is unavalable because of error.
- Critical - crucial conditions.
- Alert - Immediate action is required.
- Emergency - Device is unusable or unreachable.
Note: Only enable Debugging if you are actively working with the logs.
Note: Be selective about the settings selected here, but you can dial it into your needs via experimenting.
Step 4. Further decisions in this section require the same amount of judcious review. All categories selected is by default, which is what we've selected.
- Kernel
- System
- Firewall
- Network
- VPN
- OpenVPN
- Users
- Wireless
- PnP

Note: When selecting which categories if you're using a third party to analyze the logs, check their documentation for which categories to include.
Step 5. Scroll to the bottom of the page (if applicable). Then click the Enable checkbox below the Remote syslog Servers heading.
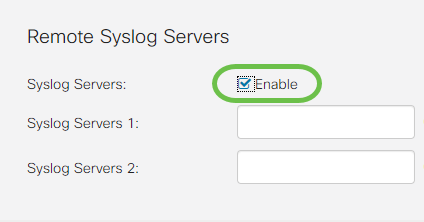
Step 6. Enter the IP Address of the remote server.
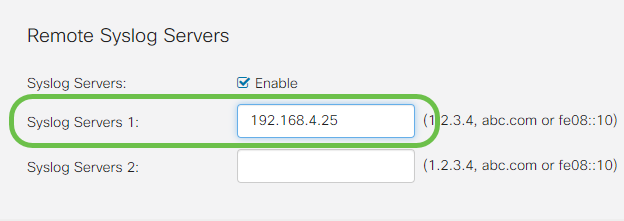
Note: The remote logging server must be a valid endpoint for the delivery of syslog files.
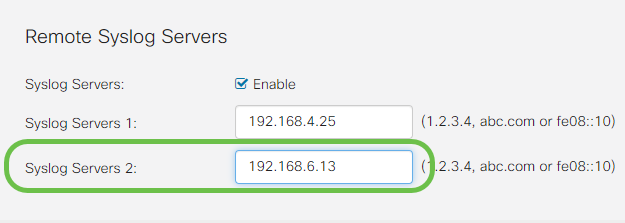
Step 7. (Optional) For redundancy, add an additional IP address.
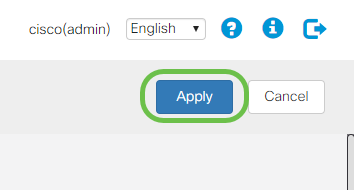
Step 8. Click Apply to complete the configuration.
Step 9. Be sure to Save the configuration from running config > startup config.
Conclusion
In this configuration guide, we reviewed directing the RV160x/RV260x routers to send logs to an endpoint via IP address. Note that logs are only generated after activation, they are not generated in a retroactive method.
 Feedback