Configure Bridge Settings on the RV34x Router
Available Languages
Objective
This article aims to show you how to configure the RV34x router to be on Bridge mode.
Introduction
A Wide Area Network (WAN) is a network that covers a broad area. A user or network of users can connect to the Internet through an Internet Service Provider (ISP) who offers various methods to set up a client with an Internet connection. These methods can be automatic Dynamic Host Configuration Protocol (DHCP), Static Internet Protocol (IP), Point-to-Point Protocol over Ethernet (PPPoE), Point-to-Point Tunneling Protocol (PPTP), Layer 2 Tunneling Protocol (L2TP), Bridge, and Stateless Address Auto-configuration (SLAAC) for IPv6.
Configuring the right WAN settings on the router is necessary in order to properly set up Internet connections based on your network requirements and setup. Some WAN settings to be used on your router such as Usernames, Passwords, IP addresses, Netmask, Default Gateway, and DNS servers should be provided to you by your ISP.
In this scenario, the setup from the ISP requires your router to be on Bridge mode in order to connect to the Internet. This connection type connects two or more separate networks and enables communication between them. This will allow the networks to share network resources from the main router or server, within themselves.
When setting the router to bridge mode, its routing capability is automatically disabled to prevent conflict with the capabilities of the main router, which is from your ISP. This setup is ideal if you are using the router as an additional device to extend an already existing network, or if the routing capabilities on your router need to be disabled in order to accommodate other devices or when playing online games.
Applicable Devices
- RV340
- RV340W
- RV345
- RV345P
Software Version
- 1.0.02.16
Configure Bridge Mode
Step 1. Access the router web-based utility and choose WAN > WAN Settings.

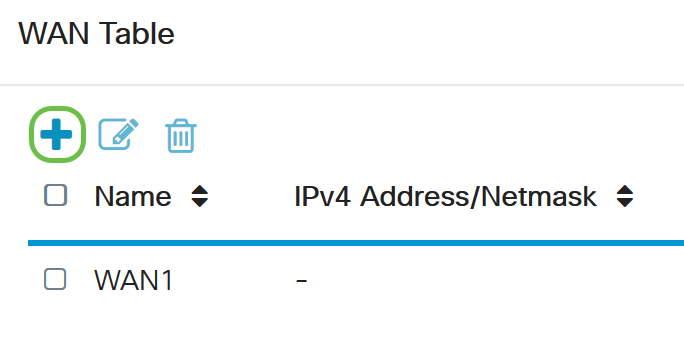
Step 2. In the WAN Table, click the Add button.

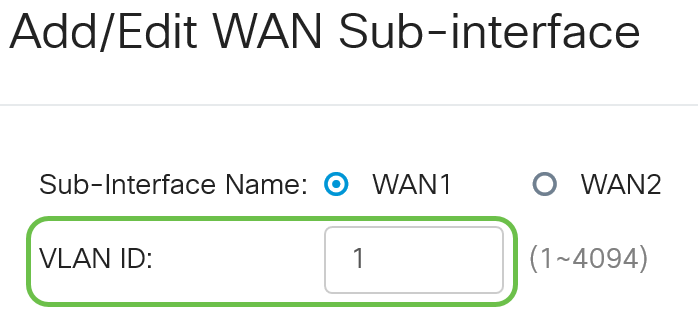
Step 3. In the Add/Edit WAN Sub-interface window that appears, click on the WAN interface that you want to configure.

Note: In this example, WAN1 is chosen. This is the default setting.
Step 4. Enter the VLAN ID in the field provided. In this example, 1 is used.

Note: The Sub-Interface Name area automatically updates based on the WAN and VLAN ID entered. In this example, WAN1.1 is displayed indicating WAN 1 and VLAN 1.
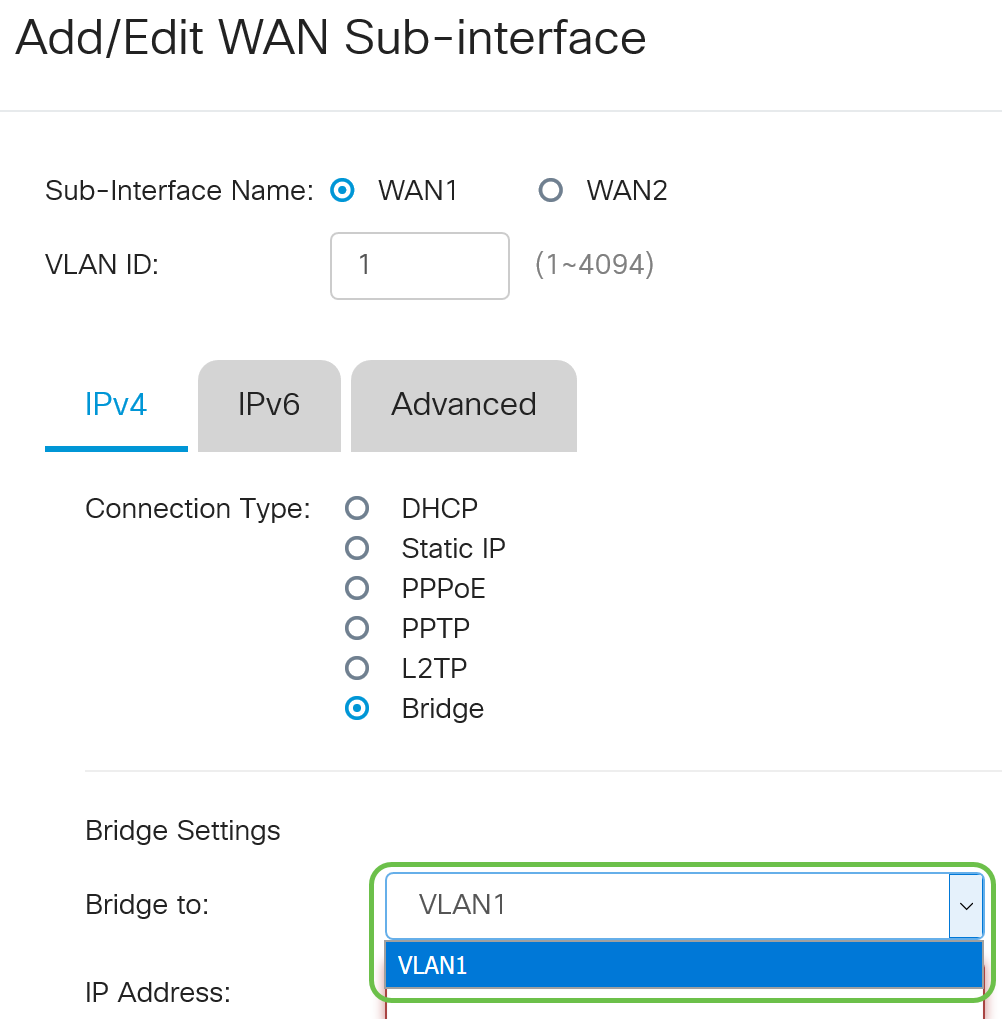
Step 5. Click the IPv4 tab.
Step 6. Click on the Bridge radio button to choose the Connection Type.

Step 7. Under Bridge Settings, click the Bridge to drop-down menu and choose which VLAN is going to be bridged to.

Note: In this example, VLAN1 is chosen. This is the default setting.
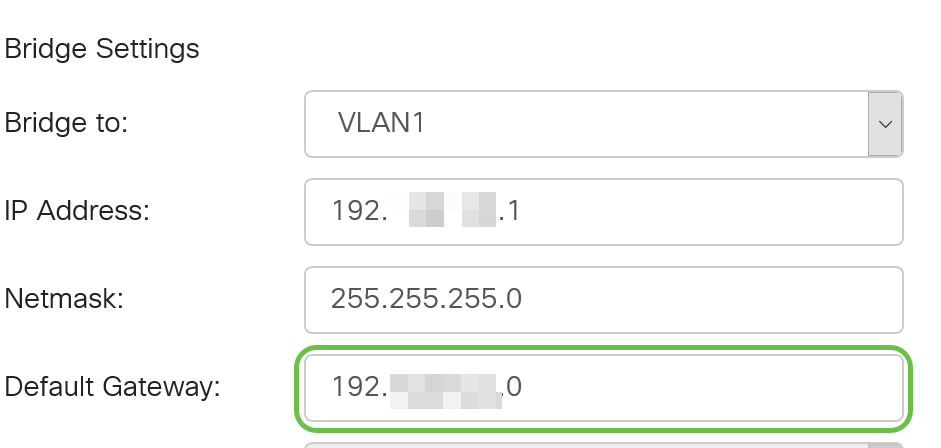
Step 8. Enter the IP address for the router in the field provided.

Note: In this example, 192.xxx.xxx.1 is used.
Step 9. Enter the Netmask in the field provided.

Note: In this example, 255.255.255.0 is used.
Step 10. Enter the IP address of the main router from your ISP in the Default Gateway field.

Note: In this example, 192.xxx.xxx.0 is used.
Step 11. Enter the first Static DNS in the Static DNS 1 field.

Note: In this example, 192.xxx.xxx.0 is used.
Step 12. (Optional) Enter the second Static DNS in the Static DNS 2 field.

Note: In this example, 192.xxx.xxx.2 is used.
Step 13. Click Apply.
You have now successfully set your RV34x router WAN settings to Bridge.
 Feedback