External Captive Portal in Cisco Business Dashboard
Available Languages
Objective
The objective of this article is to go over the steps to configure the external Captive Portal feature in Cisco Business Dashboard (CBD) version 2.5.1 and later.
Applicable Devices | Software Version
Cisco Business Dashboard | 2.5.1 (Download latest)
CBW140 Series | 10.8.1.0 (Download latest)
CBW150 Series | 10.3.2.0 (Download latest)
Introduction
CBD version 2.5.1 has implemented an external Captive Portal page for CBW140 and CBW150 series networks. This can be used as a guest network authentication page and offers several advantages over local captive portal pages.
Instead of redirecting the client to the local Captive Portal Page at 192.0.2.1, it redirects to CBD using the CBD’s FQDN and SSL certificate. This avoids triggering the enhanced HTTP Strict Transport Security (HSTS) that modern browsers have implemented.
The external Captive Portal page has a simplified deployment that makes it easy to manage multiple sites with guest networks.
All the settings for the page and authentication policies are configured within CBD.
When you set up the guest network, it supports Web Consent, Email Address, and logging in CBD accounts or going to another RADIUS server.
Table of Contents
- Guest Network Requirements
- Configure Guest Authentication
- Configure Wireless LAN
- CBW Guest Network Settings
- Captive Portal Page
Guest Network Requirements
To use the new Guest Network Authentication page, you must have
CBD version 2.5.1
CBW140 Series Firmware 10.8.1.0 (or later)
CBW150 Series Firmware 10.3.2.0 (or later)
Configure Guest Authentication
To configure the captive portal web page:
Step 1
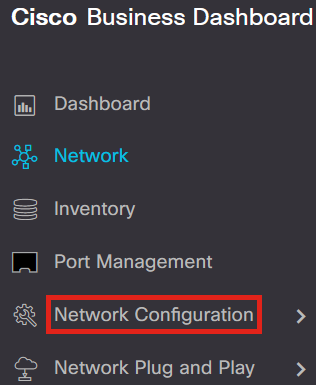
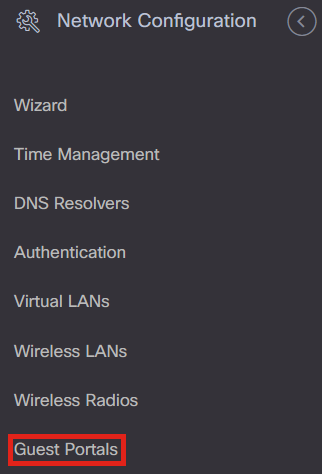
Login to your CBD and navigate to Network Configuration > Guest Portals.
Step 2
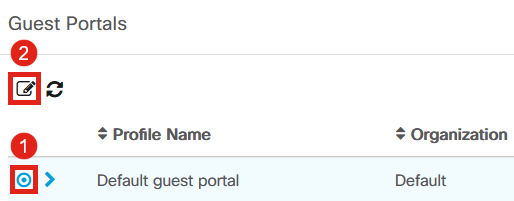
The Guest Portals page shows each CBD Organization’s web page. To edit a page, select the profile and press the edit button.
If you have two or more networks that need unique captive portal pages, you will need to set up separate CBD organizations and have each network join the separate organization.
Step 3
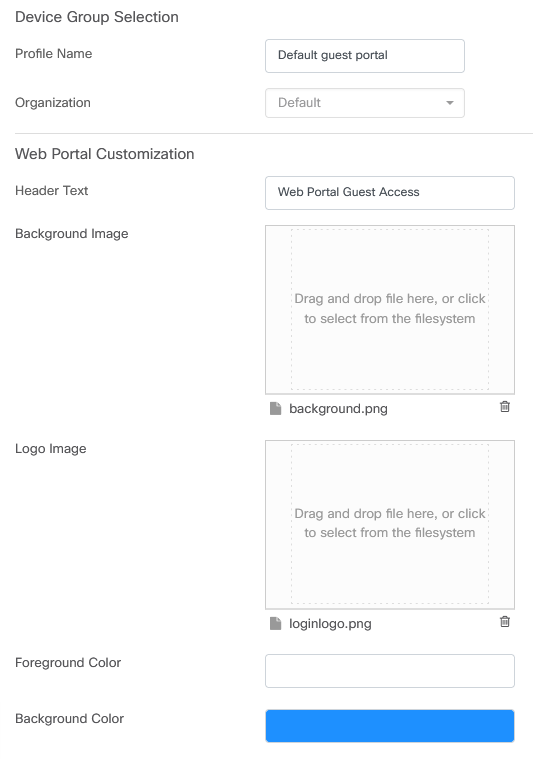
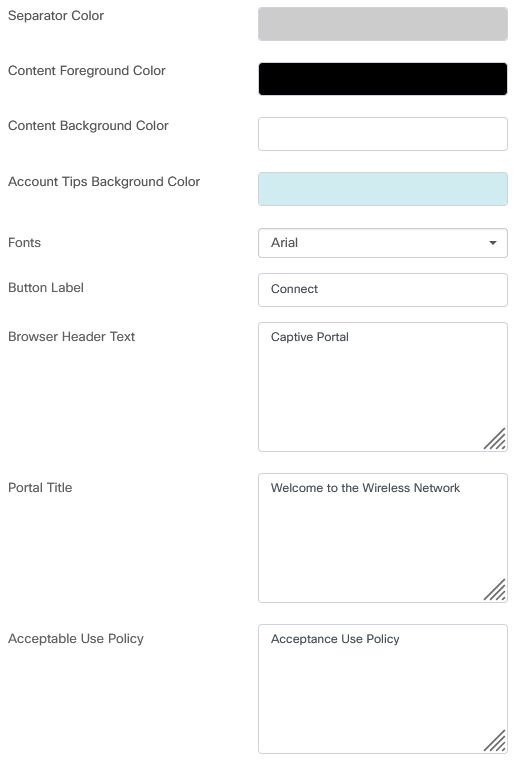
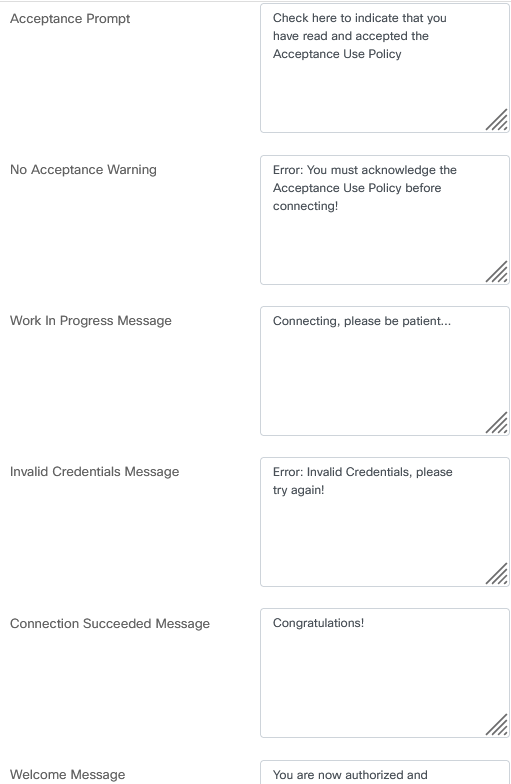
The configuration options include
- Profile Name - It is a unique identifier within CBD so you can easily keep track of what page goes with each organization.
- Organization - Shows what organization the captive portal is connected to.
- Header Text - Shows the header that will be displayed by the web browser.
- Background Image and Logo Image show where you can drag and drop in graphics to be displayed on your captive portal page.
- The foreground, background, separator, content foreground, content background, and account tips background color fields all allow you to change the color of the respective aspects of your display.
- The Fonts menu allows you to choose the font used on the captive portal page.
- The other fields allow you to edit the text that displays on the page.
Step 4
Click on one of the following tabs to configure the text options for authentication.
- Username/Password
- Web Consent
- Email Address
Click the Preview button to see how each of the menu options will be displayed.

Step 5
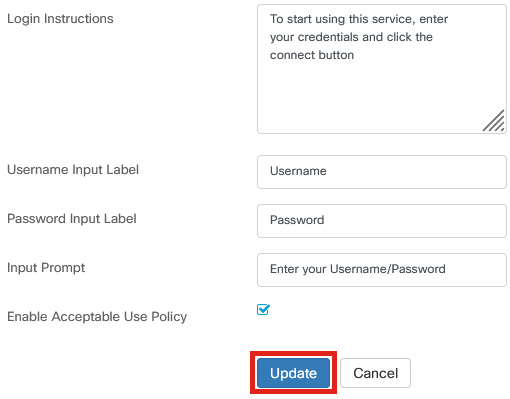
Once you have customized the web page, click on Update or Cancel.
Configure Wireless LAN
Step 1
Navigate to Network Configuration > Wireless LANs.


Step 2
You can either add or edit an existing Wireless LANs Profile. In this example, add is selected.

Step 3
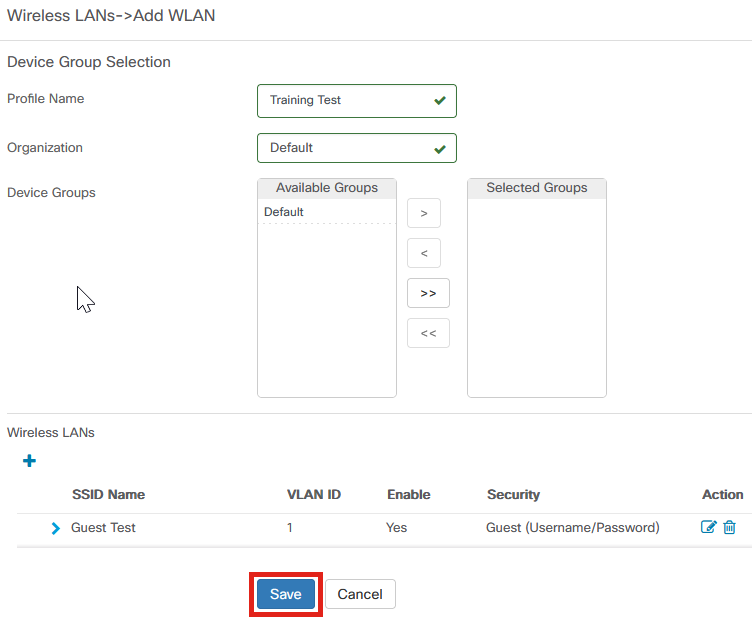
Specify the Profile Name, Organization, and Device Groups within the organization that this will apply to.
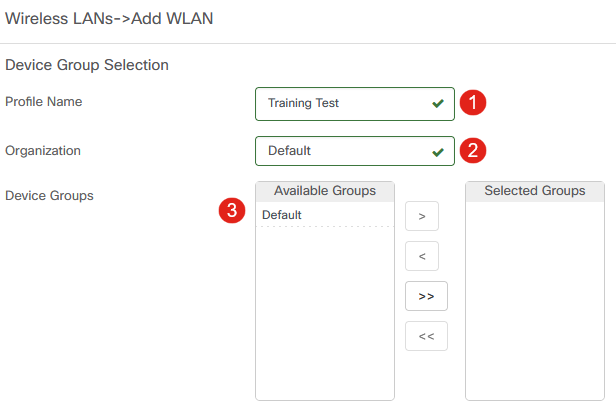
You may simply choose the Default organization and the Default Device Group.
Step 4
Add a Wireless LAN by clicking the plus icon.

Step 5
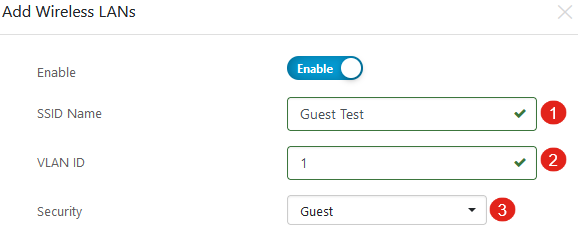
Specify SSID Name and VLAN ID. Choose Guest from the Security drop-down menu.
Step 6
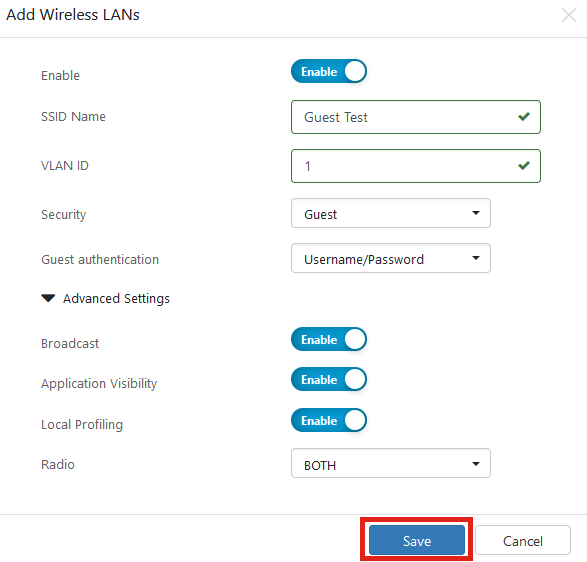
Select the Guest authentication method. The options are:
- Username/Password
- Web Consent
- Email Address

Step 7
Under Advanced Settings, you can also specify if you want the SSID to Broadcast, the Application Visibility, Local Profiling, and Radio settings.

In most cases, you will leave these at the default setting.
Step 8
Click Save.
Step 9
Click Save once again.
CBW Guest Network Settings
Step 1
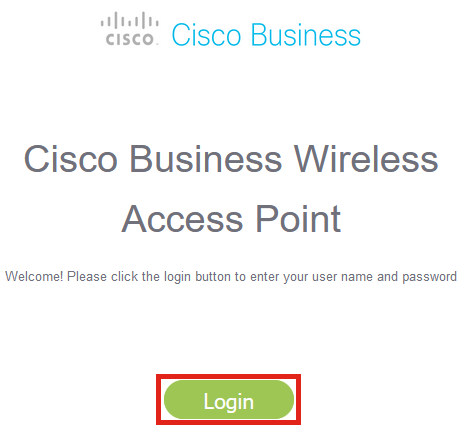
Login to your Cisco Business Wireless (CBW) access point.
Step 2
Navigate to Wireless Settings > WLANs.
Step 3
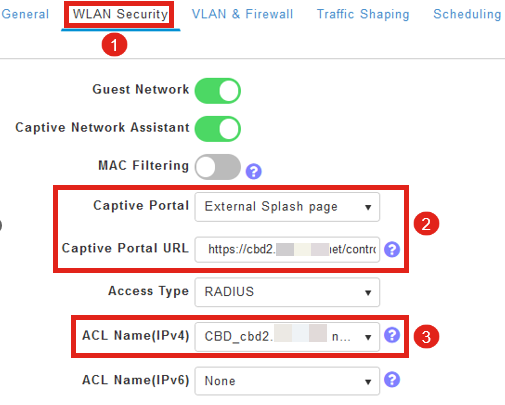
You can edit the WLAN and go to the WLAN Security tab. The Captive Portal will be set to the External Splash page with the Captive Portal URL of your CBD server. The ACL Name will be automatically configured.
Step 4
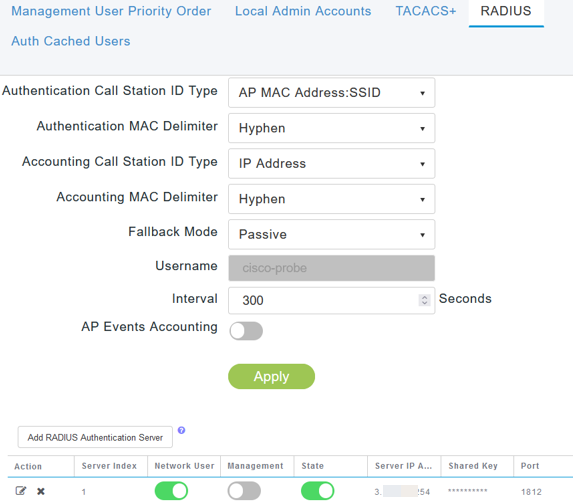
The RADIUS server is automatically configured. To view it, switch to Expert View by clicking the bi-directional arow at the top of the page.

Step 5
Navigate to Management > Admin Accounts.

Step 6
Click on the RADIUS tab.
Step 7
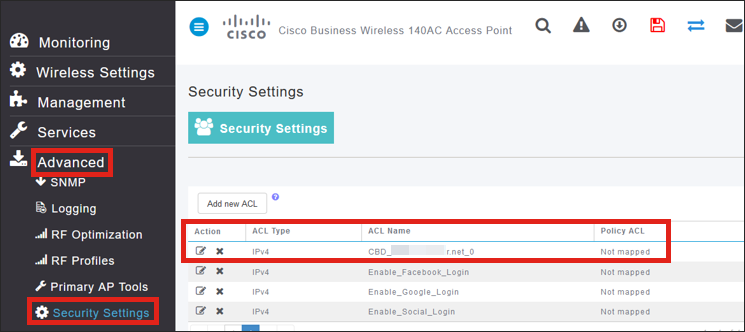
It will also dynamically add a security ACL for CBD under Advanced > Security Settings.
Captive Portal Page
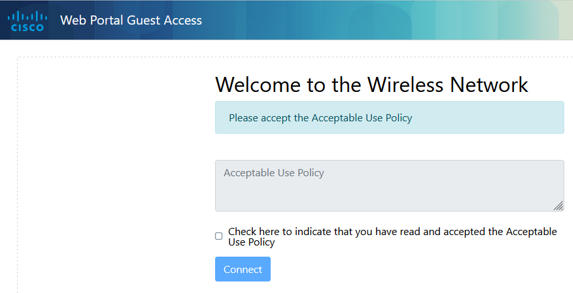
Based on how you have configured the settings, the captive portal page will look like the following:
Username/Password Authentication

Web Consent
Email Authentication

Conclusion
You did it! You have successfully set up the external Captive Portal page using CBD.
Revision History
| Revision | Publish Date | Comments |
|---|---|---|
1.0 |
08-Dec-2022 |
Initial Release |
Contact Cisco
- Open a Support Case

- (Requires a Cisco Service Contract)
 Feedback