Scheduled Actions with Cisco Business Dashboard
Available Languages
Objective
The objective of this document is to show you how to schedule actions using Cisco Business Dashboard (CBD) version 2.3.0.
Introduction
CBD provides tools that help you monitor and manage your Cisco Business network. CBD automatically discovers your network and allows you to configure and monitor all supported Cisco Business devices such as switches, routers, and wireless access points.
CBD version 2.3.0 adds the ability to schedule actions at either the device or network level. This includes:
- Reboot a device
- Backup a device configuration
- Restore a device configuration
- Upgrade firmware of device
- Save running configuration of a device
- Delete offline device
- Change Window
To find out more, keep reading!
Applicable Devices | Software Version
- Cisco Business Dashboard | 2.3.0
Table of Contents
- Schedule Actions at the Network Level
- Schedule Actions at the Device Level
- Schedule Profile
- View Jobs
- Managing Change Windows
- Modify Change Window for an Organization
- Modify Change Window for a Network
Schedule Actions at the Network Level
Step 1
Log in to the CBD Administration User Interface (UI).
Step 2
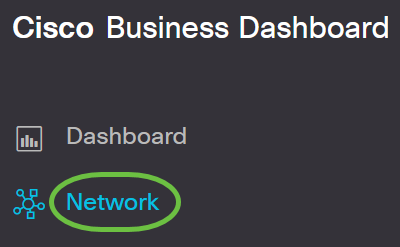
Navigate to Network.
Step 3
Click on a Network from the list. Or create a new network by clicking on the plus icon.
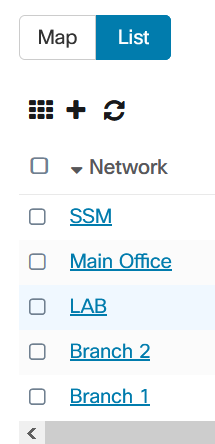
In this example, Branch 1 is chosen.
Step 4
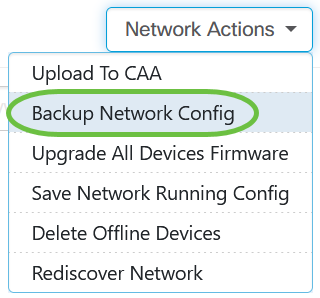
Click on Network Actions and choose an option from the drop-down menu. In this example, Backup Network Config is selected.
Step 5
Select Schedule.

Step 6
Choose a Recurrence period from the drop-down menu. In this example, Weekly is selected.

Step 7
Choose the preferred day by checking the check box next to it.

Step 8
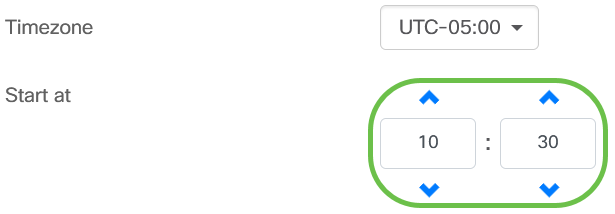
Enter the Start at time.
Step 9
Choose the End time option from the drop-down menu.

Step 10
Enter a description in the Backup Configuration field.

Step 11
Click Save.

Schedule Actions at the Device Level
Step 1
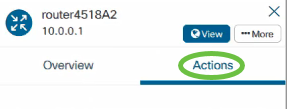
Select a device from the topology map. In this example, a router is selected.

Step 2
Select Actions tab.
Step 3
Choose the option that you want to schedule. In this example Backup Configuration is selected.

Step 4
Click Schedule.

Schedule Profile
Any tasks or actions carried out by CBD are referred to as Jobs and are tracked in the Job Center. Jobs include both user-initiated jobs and jobs initiated automatically by the system. The Job Center lists all jobs that are currently executing or have occurred in the past on the Jobs tab, including details such as the type of job, affected devices, and the status or whether the job completed successfully. In addition to showing currently executing and historical jobs, the Job Center has a second tab for Schedule Profiles.
A Schedule Profile represents a job that is yet to occur because it has been scheduled for a later date. Schedule Profiles include tasks that will run only once, as well as tasks that have been defined to run periodically.
To schedule a profile, follow the steps below.
Step 1
Click on the hourglass icon (Job Center) at the top of the page.

If a number badge is present on the icon, it indicates the total number of currently executing jobs.
Step 2
Choose Schedule Profiles tab.

The scheduled actions will be listed.

Step 3
To create a new schedule profile, click on the plus icon.

Step 4
In the Job Detail section, select a job type, organization, and target devices or networks.

Network/Device option will depend on the Job Type selected.
Step 5
In the Schedule section, select a recurrence period and specify a start time for the job. For recurring jobs, also specify when the job should end.

Step 6
Click Save.

Step 7
To edit an existing schedule profile, identify the Job Type and click the edit icon under Actions.

You cannot change the job type of a profile.
Step 8
To delete a Job Type, identify the profile you wish to remove and click the delete icon under Actions.

View Jobs
The View Jobs icon allows you to see the jobs related to the schedule.

The view switches to the Jobs tab to show only jobs that are associated with this profile. To see additional details, click on a specific Job Type.

Click on View detail to see more data regarding the success or failure of a job.


Managing Change Windows
Change windows are periods of time that may be used to perform actions without impacting users. A change window is generally defined to occur outside working hours on a weekend or during the night but can be set to any time that suits the requirements of the organization.
A change window is a recurring interval and is set by default in CBD to occur every week on Sunday between 2:00 am and 3:00 am. Change windows can be defined either at the organization level or at the network level.
Modify Change Window for an Organization
To modify the change window for an organization, do the following:
Step 1
Navigate to Administration > Organizations.
Step 2
Click on the desired organization to view its basic information.

In this example, Default is selected.
Step 3
Click the edit icon next to the Change Window Summary.

Step 4
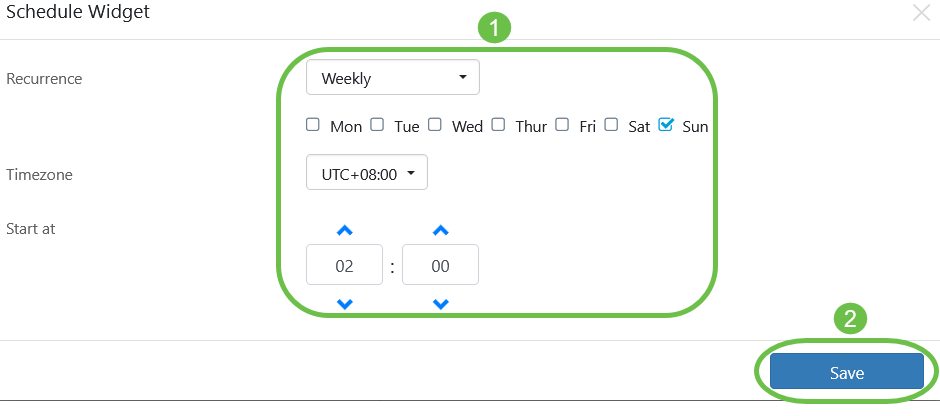
A pop-up window opens allowing you to change the frequency that the change window occurs and the day and time the window should start. By selecting the appropriate Timezone, you can specify the start time as a local time for the organization which reduces the potential for error. When your updates are complete, click Save.
Step 5
You should also set the duration of the change window. A change window may be specified in minutes or hours and must be at least 30 minutes long.

Step 6
Click Save. To discard any changes, click Cancel.

Modify Change Window for a Network
To set a change window for a particular network that is different from the change window for the organization, do the following:
Step 1
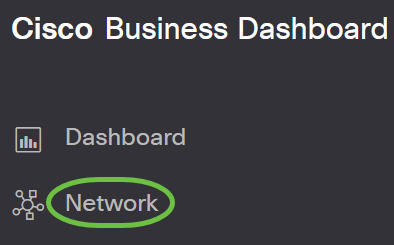
Navigate to the Network.
Step 2
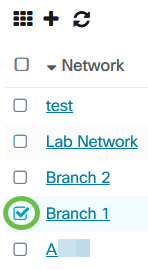
Select the checkbox for the network to be modified and click Settings in the Network Info panel that appears.

Step 3
Click the edit icon located at the top left next to the name of the network.

Step 4
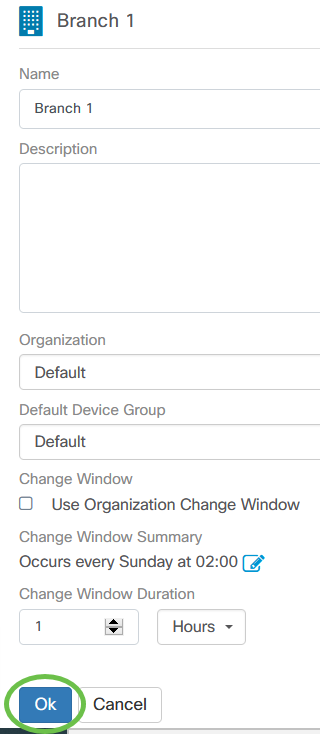
Under Change Window, uncheck the Use Organization Change Window checkbox.

This box should be checked if you want to configure a network to use the organization change window.
Step 5
Click the edit icon next to the Change Window Summary.
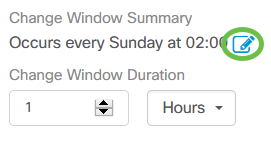
A pop-up window opens allowing you to change the frequency that the change window occurs and the day and time the window should start. By selecting the appropriate Timezone, you can specify the start time as a local time for the organization which reduces the potential for error. When your updates are complete, click Save to close the pop-up.

Step 6
You should also set the duration of the change window. A change window may be specified in minutes or hours and must be at least 30 minutes long.

Step 7
When you are satisfied with your changes, click Ok. To discard any changes, click Cancel.
Conclusion
You did it! You have scheduled actions in your network using CBD. Now enjoy the ease with which you can manage your devices and networks.
Contact Cisco
- Open a Support Case

- (Requires a Cisco Service Contract)
 Feedback