Manage Users on Cisco Business Dashboard
Available Languages
Objective
The User Management page allows you to define users that can access Cisco Business Dashboard, and also allows you to change settings that affect how those users interact with the Dashboard.
Cisco Business Dashboard Network supports four types of users:
- Administrator - An Administrator has full access to Dashboard features including the ability to maintain the system
- Organization Administrator — An Organization Administrator is limited to managing one or more organizations, but cannot make changes to the system
- Operator — An Operator has similar power to an Organization Administrator, but cannot manage users
- Readonly — A Readonly user can only view network information, they cannot make any changes
When the Cisco Business Dashboard is first installed, a default Administrator is created with the username and password both set to cisco.
User settings can be managed by Administrators and Organization Administrators only
This article provides instructions on how to add, edit, or delete users, and change password complexity and user session settings.
Applicable Devices | Software Version
- Cisco Business Dashboard | 2.2
Manage Cisco Business Dashboard Network Management Users
Add a New User
Step 1
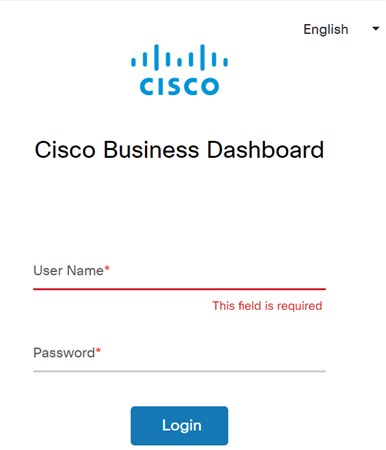
Log in to the Cisco Business Dashboard Administration User Interface.
Step 2
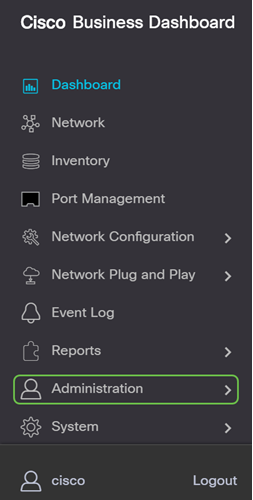
Click the menu button.

Step 3
Select Administration.
Step 4
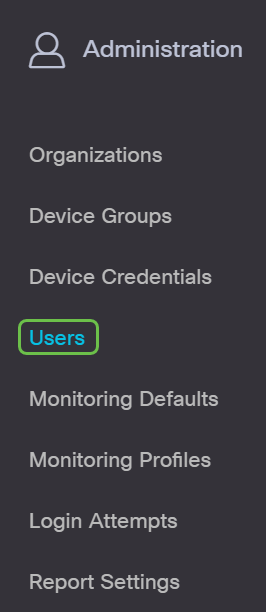
Select Users.
Step 5
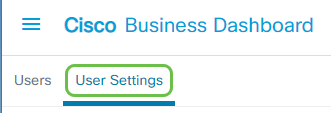
Click the User Settings tab.
Step 6
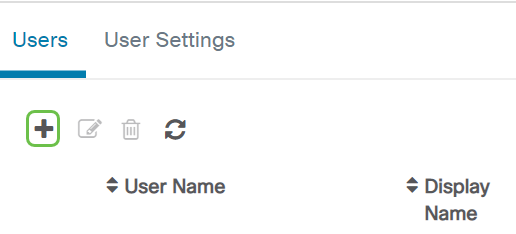
Click the plus icon to add or create a new user.
Step 7
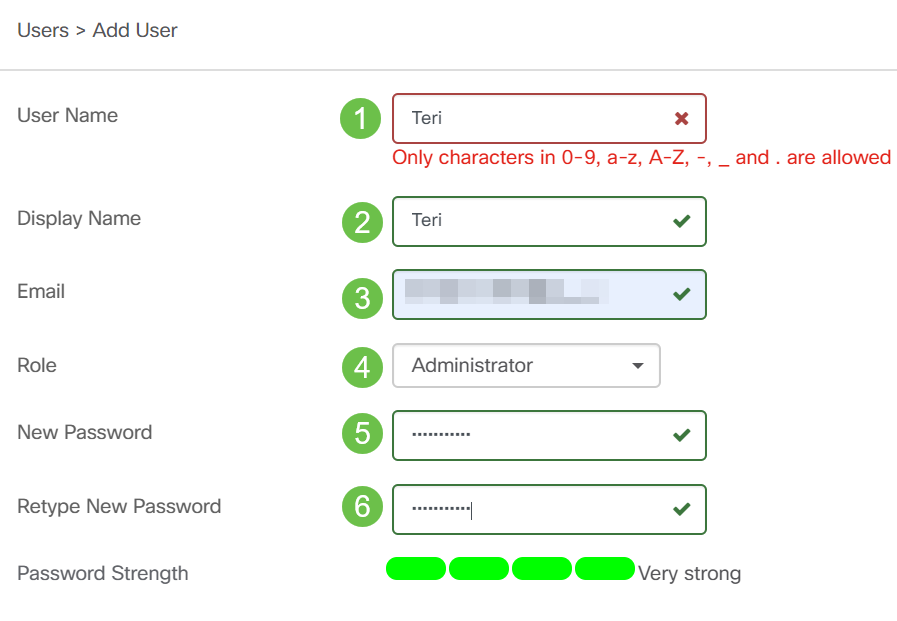
In the fields provided, enter a username, display name, email address, role, and password.
Step 8
(Optional) You may also provide contact details for the user.

Step 9
Click Save.

You should now have added a new user and will receive a notification on the User Interface.

Modify a User
To modify an existing user, do the following:
Step 1
Select Administration.

Step 2
Select Users.

Step 5
Click the User Settings tab.

Step 3
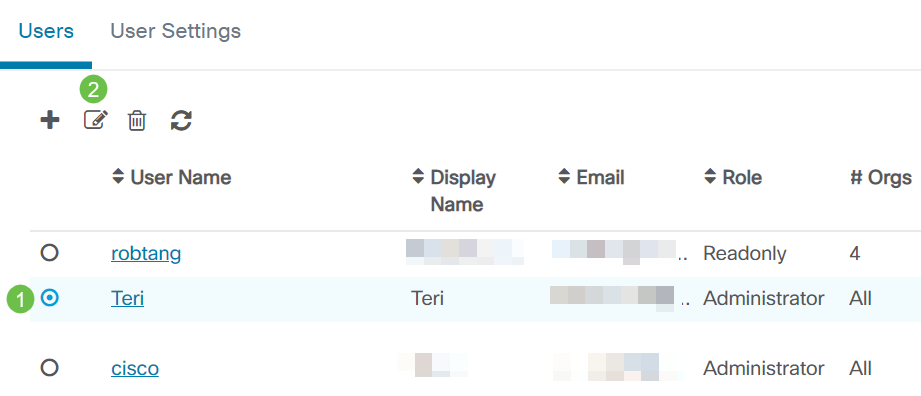
Check the checkbox next to the user name that you want to modify then click the Edit icon.
Step 4
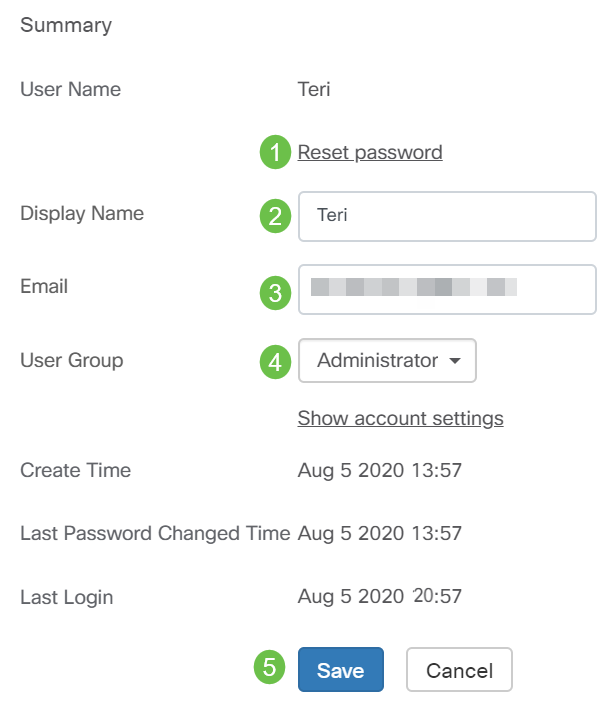
From here you can reset the password. You can also change the display name, email, or user group. Be sure to hit Save if you have made changes.
You should now have modified an existing user and will receive a notification on the User Interface.

Delete a User
To delete an existing user, do the following:
Step 1
Select Administration.

Step 2
Select Users.

Step 3
Click the User Settings tab.

Step 4
Check the checkbox next to the user name that you want to modify then click the Delete button.
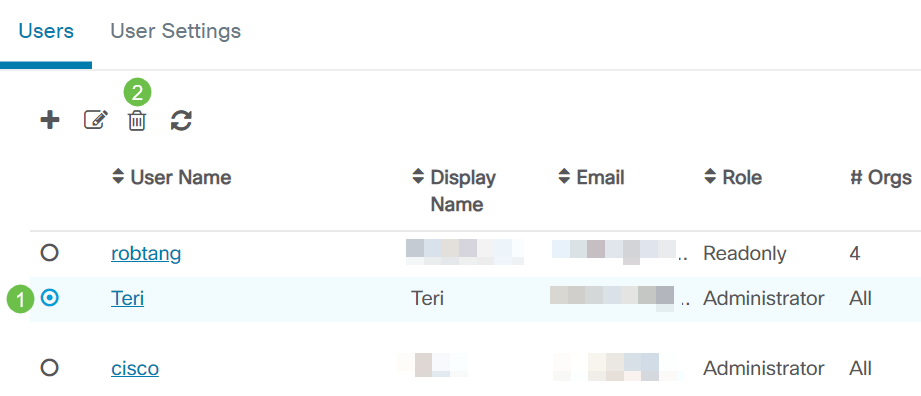
Step 5
You should now have deleted a user and will receive a notification on the User Interface.

Configure Password Complexity
To enable or change password complexity requirements, do the following:
Step 1
Select Administration.

Step 2
Select Users.

Step 3
(Optional) Check the Password Complexity Settings checkbox to enable complexity rules for passwords. If this feature is enabled, new passwords must conform to the following default settings:
- Should have a minimum length of eight characters.
- Should contain characters from at least three character classes (uppercase letters, lowercase letters, numbers, and special characters available on a standard keyboard).
- Should be different from the current password.

Alternatively, you can uncheck this checkbox to disable the password complexity settings of the local user.
Be sure to click the Save button if you have made changes.

You should now have changed the password complexity settings for local users.
Configure User Session Setting
To enable or change password complexity requirements, do the following:
Step 1
Select Administration.

Step 2
Select Users.

Step 3
Click the User Settings tab and scroll down to the User Session section.

Step 4
Enter a value in the Idle Timeout (min) field. The default value is 60, but the range is 10 to 120 minutes.
Enter a value in the Absolute Timeout (hour) field. This is the maximum amount of time a session can be active. The default value is 24, and the range is 1 to 24 hours.
Click Save.

You should now have configured the user session settings.
Conclusion
Now you know the steps to add, edit, or delete users. You can also change password complexity and user session settings.
Contact Cisco
- Open a Support Case

- (Requires a Cisco Service Contract)
 Feedback