Save Time by Launching Your Next IT Project with Cisco Business Dashboard and Network Plug and Play
Available Languages
Objective
Launch new IT infrastructure quickly and easily by using Cisco Business Dashboard to automatically scan for and provision new devices. The Network Plug & Play (Network PnP) feature underpins Cisco's zero-touch deployment. Out of the box the Cisco Business Dashboard is equipped with Network PnP.
Applicable Software | Version
- Cisco Business Dashboard | 2.2
For a detailed list of supported clients and devices click here.
What problem does Network PnP solve?
Network PnP removes much of the legwork involved in rolling out new IT infrastructure. From provisioning to device discovery, you could manage your network rollout from a remote interface with customizable options for access. Without Network PnP, network technicians would need to unpack and configure devices one by one. Now with zero-touch, you can provision firmware or update the startup configuration of devices within your project.
How does Network PnP work?
Devices that support this feature can connect to the Network PnP server. When the device connects to the Network PnP server, it is identified by a series of rules and stored in a list of PnP enabled devices. Devices are provisioned according to the precision of the method used to match that device. There are four ways for a PnP enabled device to discover the address on the Network PnP server, which is the Cisco Business Dashboard. The four discover methods are manual configuration, DHCP, DNS, and Plug and Play Connect Service.
PnP can work without using DHCP discovery. However, if you want the PnP enabled device to discover the address of the PnP server via DHCP, the device must connect to the DHCP server with an option 60 flag. This option 60 flag contains a string "ciscopnp" signifying the device's request for the address of the Network PnP server. When the DHCP server receives the option 60 flag, it responds in kind with an option 43 tag which includes the full address of the Network PnP server. To learn more about setting up PnP on a switch, click here.
Ok, I'm ready to get started, what's next?
While your first urge may be to begin adding devices, click on either Images or Configurations instead. The options you choose will depend on the needs of your network. This guide covers both examples.
Step 1
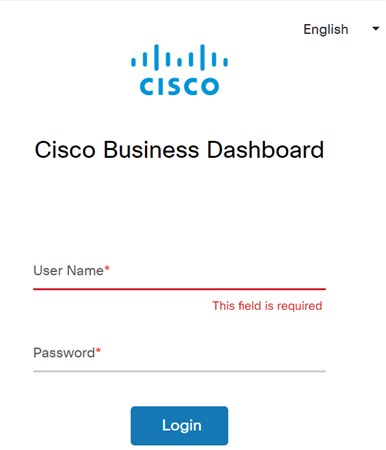
Log in to the Cisco Business Dashboard Administration User Interface (UI).
Step 2
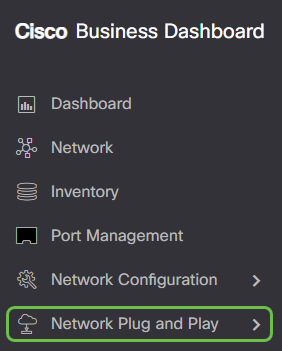
Click the menu button.

Step 3
Click the Network Plug and Play button.
Step 4
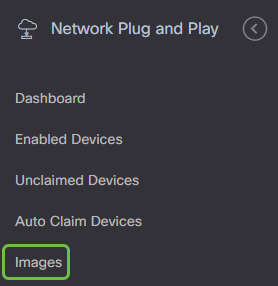
Click the Images button.
Step 5
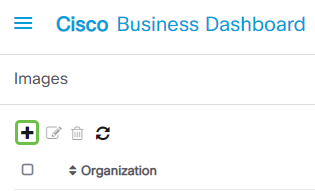
Click on the plus icon.
Step 6
If you have more than one organization, you will need to click the drop-down arrow to pick the appropriate organization. This image will only be listed for devices in that organization.

Step 7
At this point, the Dashboard will display a screen asking you to drag and drop a file into the box or click within the box to open a file upload dialog in the browser. Select the desired file and click on the Upload button.
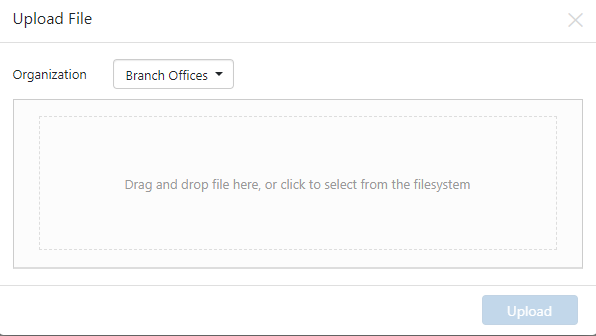
To learn more about templates, click to view the Plug and Play Configuration Templates article.
Please remember that the Cisco Business Dashboard will only accept a particular file type. In the case of firmware images, a Firmware_File.Bin file. The configuration file function accepts either Config_File.XML or Config_File.TXT.
Step 8
Repeat steps for adding the configuration or image files if needed. The Configurations section button is immediately below the Images button.

The configurations applied to the devices are for the startup and not running configurations.
Diverging paths, based on your needs
Manual Method: Select this if you want to control the configuration and image for each individual device.
Auto Claim Method: Select this option if you want to provision devices based solely on product ID. This is a simple option.
Ignore: Select this option to notify the Network PnP that you will handle all configuration or firmware installations.
The deciding factor is how precisely you need to control the provisioning options, by individual device, or device category.
| Method | Provisioning Precision | Information Required |
| Manual | Low | N/A |
| Auto Claim | Medium | PID |
| Ignore | Very High* | N/A |
At this point, the path you take depends on your needs for this project. If you intend to use the Auto Claim Method, keep reading. Alternatively, you can jump to the section Manually Claim or Ignore Devices.
Using the Auto Claim Method
Think of Auto Claim as a filter-based feature; for devices to be dynamically migrated to your project, you will need to confirm the product IDs (PID) intended for the project. Then Network PnP scans for the matching PID and adds to its list of PnP enabled devices.
Step 1
Begin this process by clicking on Auto Claim Devices.
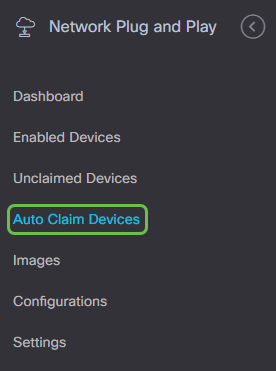
Step 2
Click the plus icon.
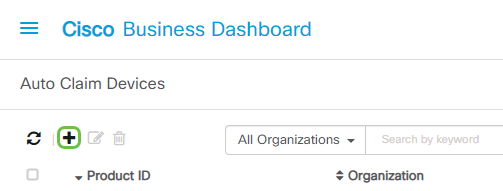
Step 3
Enter the Product ID, Organization, Network, Device Group, and device type for the devices you wish to be auto claimed.
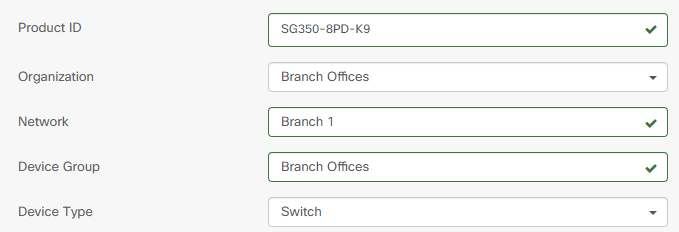
Step 4
Click Next.
Step 5
Select the desired firmware and configuration from the dropdown boxes.
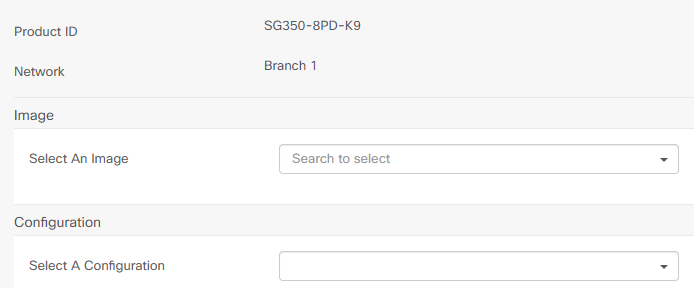
Step 6
Click Finish.
Once this action is complete, moving forward, the Network PnP server will use the Image and Configuration to provision any device connecting to the network and matching that PID.
Step 7
Alternatively, if you would like to edit an Auto Claim device, click the checkbox next to the device and then the edit icon.

Manually Claiming or Ignoring Devices
Devices that do not match your filter but still support network PnP will be displayed in the Unclaimed Devices section of network PnP only if it is a device that isn't already in the CBD inventory.
Step 1
On the Network Plug and Play navigation pane, click Unclaimed Devices.
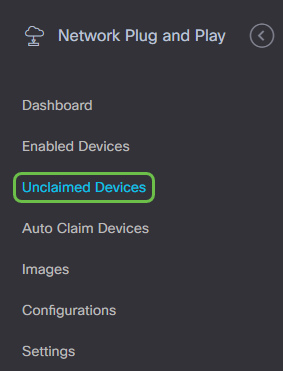
Step 2
Select a listed device and then click Claim or Ignore.
Ignoring devices prevents the Network PnP server from ever provisioning devices with configurations or firmware. This option is for those who wish to manually update configurations and firmware on each device. When devices are added to the ignore list they are not touched by Network PnP.

Step 3
If you select Claim, fill out the following information.

Step 4
Click Next.
Step 5
Select the desired firmware and configuration from the dropdown boxes.
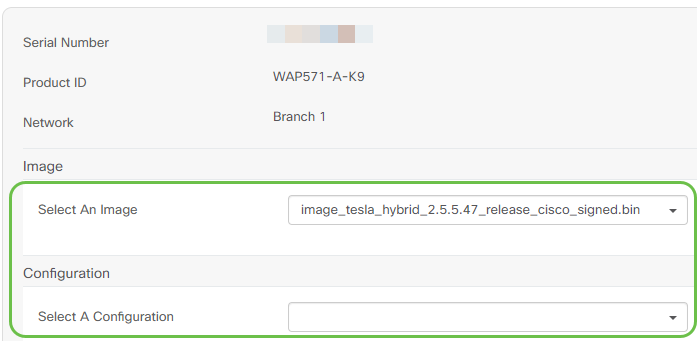
Step 6
Click Next.
Step 7
You will see a summary page for this device. Click Finish.
Grab a coffee or tea and take a break, you have just ignored or claimed your selected device(s).
When should your devices check back in for updates?
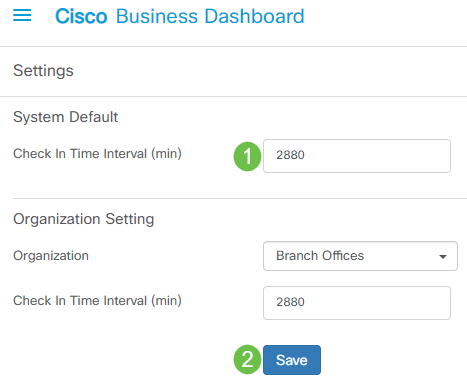
You can modify the length of time before your devices will check back in for updates. Under Plug and Play, select Settings.
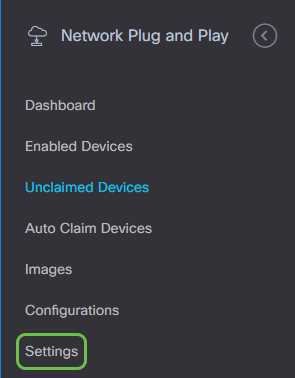
You can change how often the device checks for updates within limits. 0 is not accepted. 2880 is the maximum time. Click Save once you have entered a new interval time.
Conclusion
Congrats, you are now ready to take your upcoming projects from concept to execution faster than before. If you want to learn more about Cisco Business Dashboard, check out the CBD Support Page.
If you want to learn more about Plug and Play, check out Network Plug and Play Solution Guide for Cisco Business.
Revision History
| Revision | Publish Date | Comments |
|---|---|---|
1.0 |
04-Nov-2020 |
Initial Release |
Contact Cisco
- Open a Support Case

- (Requires a Cisco Service Contract)
 Feedback