Configure Switch Ports from Port Management Using the Cisco Business Dashboard Probe
Available Languages
Objective
The Cisco Business Dashboard Network Management provides tools that allows you to easily manage your whole network including your Cisco devices through your web browser. It automatically discovers, monitors, and configures all supported Cisco devices in your network.
The Port Management feature in the Cisco Business Dashboard Network Management provides a panel view of each device in the network that includes switch ports. This feature allows you to view the status of the ports including traffic counters. You can also make changes to the configuration of the port such as its Speed/Duplex, Power over Ethernet (PoE) settings, Energy Efficient Ethernet (EEE), and Virtual Local Area Network (VLAN). This page also allows you to view and configure the Smartports role for ports on devices that support Smartports. The search box can also be used to limit the displayed devices. You can enter all or part of a device name, product ID, or serial number in order to find the desired device.
The Port Management presents two different views of the devices:
- Physical - This view allows you to see the status and change the configuration of the port at the physical layer. You may view or change settings for speed, duplex, flow control, EEE, PoE, and VLANs. Each port is shown with a green LED indicating link, and a yellow LED indicating that power is being supplied to the attached device.
- Smartports - This view allows you to see the current Smartports role, and change the role of each port. Each port is overlaid with an icon indicating the current role.
The objective of this document is to show you how to view and configure the switch ports on your device using the Port Management feature in the Cisco Business Dashboard Probe.
Applicable Devices | Software Version
- Cisco Business Dashboard | 2.2
View and Configure Switch Ports
View and Configure Switch Port in the Physical View
Step 1. Log in to the Administration GUI of the Cisco Business Dashboard Probe and choose Port Management.
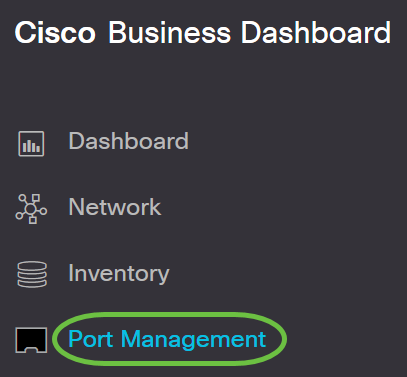
The page will then display the front panel of the devices in your network that have switch ports in the Physical view.
Step 2. Click on the port that you want to check or configure.

Note: All information about the specific port will be displayed such as current configuration, status, traffic counters, VLANs, and so on.
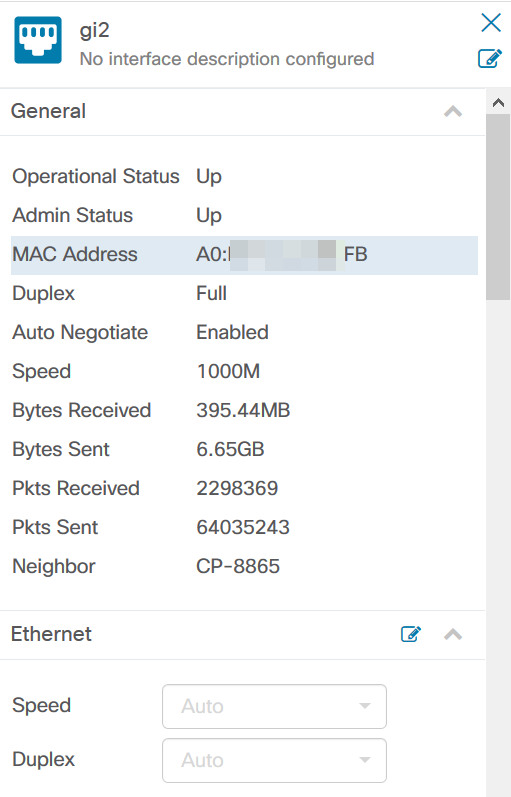
Note: In this example, gi2 is chosen.
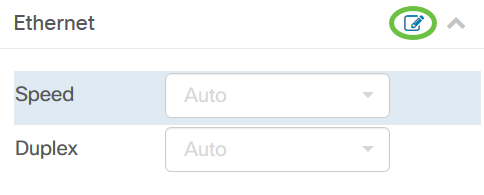
Step 3. Click on the edit icon next to Ethernet to configure Speed/Duplex settings.
Note: All the steps are optional, depending on which setting you want to configure.
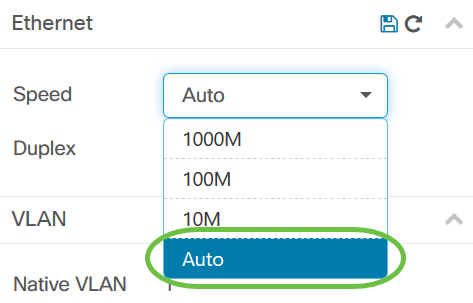
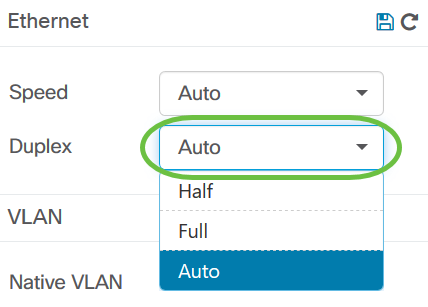
Step 4. Click on the Speed/Duplex drop-down list to choose your preferred speed and duplex.
Configuring PoE Settings
Step 5. To configure PoE, click the edit icon.

Step 6. Check the PoE Enable check box to enable PoE and set the PoE settings below:
- PoE Priority - Sets the priority of the specific port to receive power first before other ports on the device depending on the priority number.
- PoE Schedule - Sets a schedule for the PoE Ports to shut down and power on to save energy.
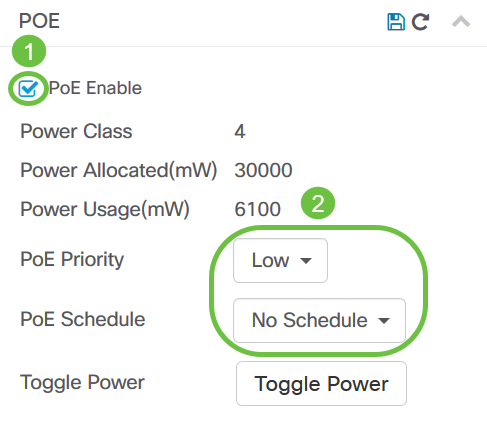
Note: This feature is enabled by default.
Step 7. Click on the PoE Priority drop-down list to choose the PoE Priority. The options are:
- Critical - This priority class always receives power. If there is not enough power to provide on all of the ports, the ports assigned in this class are prioritized.
- High - Receives power only if all Critical-priority ports are receiving power.
- Low - Receives power only if all Critical-priority and High-priority ports are receiving power.
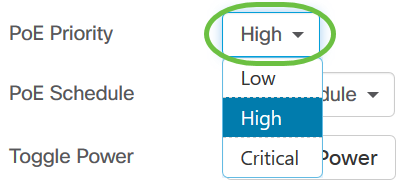
Note: In this example, High is chosen.
Step 8. Click on the PoE Schedule drop-down list to set the PoE schedule.

Enabling EEE
Step 9. Click the Edit icon next to Green Ethernet.
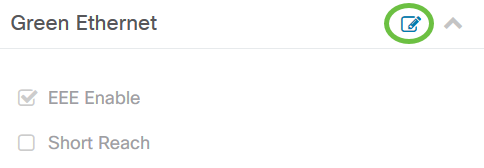
Step 10. Check the EEE Enable check box to enable EEE. This allows less power consumption during periods of low data activity within the network.

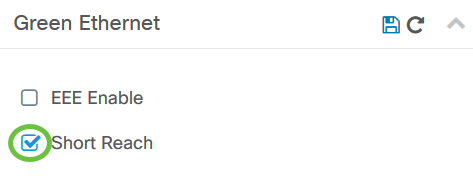
Step 11. Check the EEE Short Reach check box to enable EEE Short Reach. This mechanism allows you to run the links with less power than the link can normally handle. It was mainly used in Gigabit Ethernet links due to the limitations of some pluggable modules which had a limit of power it could carry which was less than the normal power, therefore, it became necessary to reduce the power in the gigabit link. This mode is only possible if there are Gigabit Ethernet ports in the switch.
Note: If you choose to enable Short Reach, EEE mode must be disabled.
Configuring VLAN
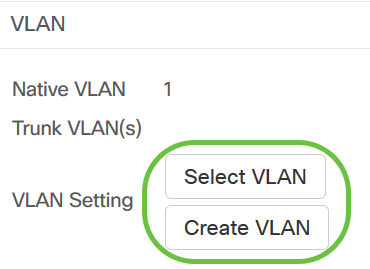
Step 12. Under VLAN Setting, click either the Select VLAN button to assign the Native or Access VLAN from the existing VLANs or the Create VLAN button to create a new VLAN. In this example, Create VLAN is chosen.
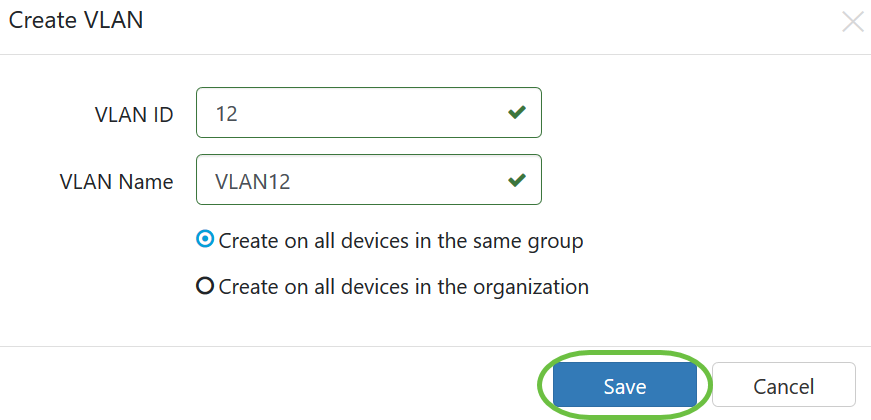
Step 13. Enter the VLAN ID in the VLAN ID field.

Note: In this example, the VLAN ID used is 12.
Step 14. Enter the VLAN name in the VLAN Name field.

Note: In this example, VLAN12 is used.
Step 15. Click on a radio button to choose which devices you want the VLAN to be created.

Step 16. Click Save.
View and Configure Switch Port in the Smartports View
Step 1. Log in to the Administration GUI of the Cisco Business Dashboard Probe and choose Port Management.

Step 2. Click on the Smartports tab.
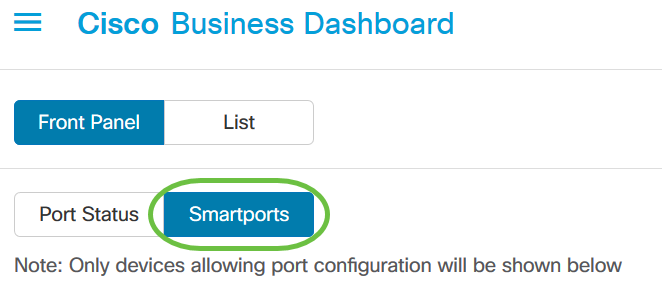
Step 3. Click on the specific port that you want to check or configure.
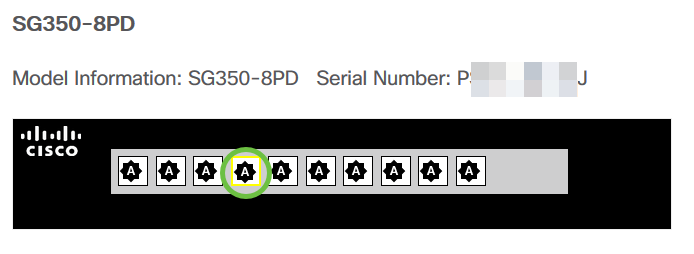
Note: In this example, gi4 is chosen.
The General information panel will then appear showing information about the Smartport such as its current role and method.
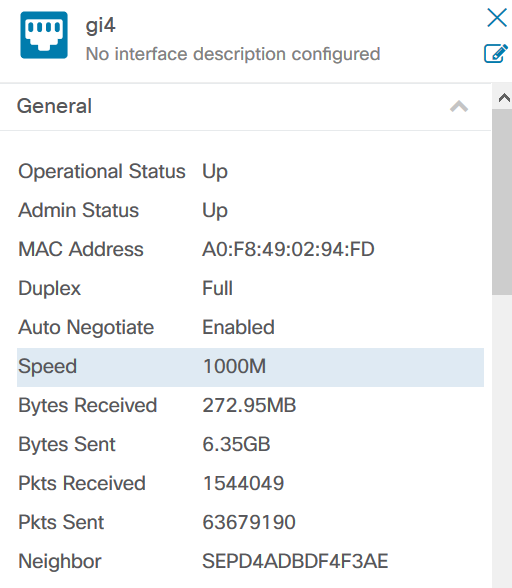
Step 4. Choose an action from the displayed icons.
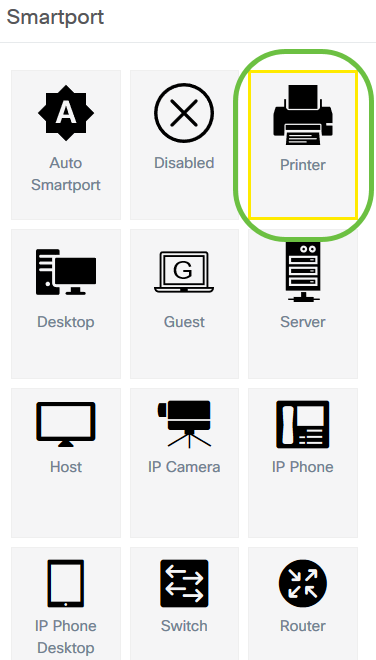
- Auto Smartport - Assigns the port as an Auto SmartPort.
- Disabled - Disables the port.
- Printer - Assigns a Printer icon to the port to easily identify that the port connects to a printer.
- Desktop - Assigns a Desktop icon to the port to easily identify that the port connects to a desktop.
- Guest - Assigns a Guest icon to the port to easily identify that the port is for guests.
- Server - Assigns a Server icon to the port to easily identify that the port connects to a server.
- Host - Assigns a Host icon to the port to easily identify that the port connects to the host computer.
- IP Camera - Assigns an IP Camera icon to the port to easily identify that the port connects to an IP camera.
- IP Phone - Assigns an IP Phone icon to the port to easily identify that the port connects to an IP phone.
- IP Phone Desktop - Assigns an IP Phone Desktop icon to the port to easily identify that the port connects to an IP phone desktop.
- Switch - Assigns a Switch icon to the port to easily identify that the port connects to a switch.
- Router - Assigns a Router icon to the port to easily identify that the port connects to a router.
- Wireless AP - Assigns a Wireless AP icon to the port to easily identify that the port connects to a Wireless Access Point (WAP).
Note: In this example, Printer is chosen.
The port will now be overlaid with the Printer icon.

You have now successfully configured your switch ports through Port Management in the Cisco Business Dashboard Probe.
Contact Cisco
- Open a Support Case

- (Requires a Cisco Service Contract)
 Feedback