Introduction
This document describes the process to perform firmware upgrades in all the fabric components in a Cisco UCS Domain. This includes the two Fabric Interconnects (FIs), I/O modules (IOM), and blade servers through Intersight Managed Mode (IMM).
Prerequisites
Requirements
Cisco recommends that you have knowledge of these topics:
- Intersight
- Cisco Unified Computing System (UCS)
Before you upgrade your Intersight managed FI firmware, consider these prerequisites:
- Only Cisco UCS 6400 Series FIs in a Cisco UCS Domain can be upgraded.
- You must have at least the next available storage in the FI partitions to download the firmware bundle:
- 90 percent free space in /var/tmp
- 20 percent free space in /var/sysmgr
- 30 percent free space in /mnt/pss
- 18 percent free space in /bootflash
- All servers in the Cisco UCS domain must be at license tier Essentials or higher.
- The minimum bundle release version is 4.1(2a).
Components Used
The information in this document is based on these software and hardware versions:
- Cisco UCS 6400 Series FI, initial firmware 4.2(1e)
- UCSB-B200-M5 blade server, initial firmware 4.2(1a), Premier license tier
- Intersight SaaS
The information in this document was created from the devices in a specific lab environment. All of the devices used in this document started with a cleared (default) configuration. If your network is live, ensure that you understand the potential impact of any command.
Fabric Firmware Upgrade
In order to start with the infrastructure firmware upgrade, you can choose any of the two FIs and click Upgrade firmware.

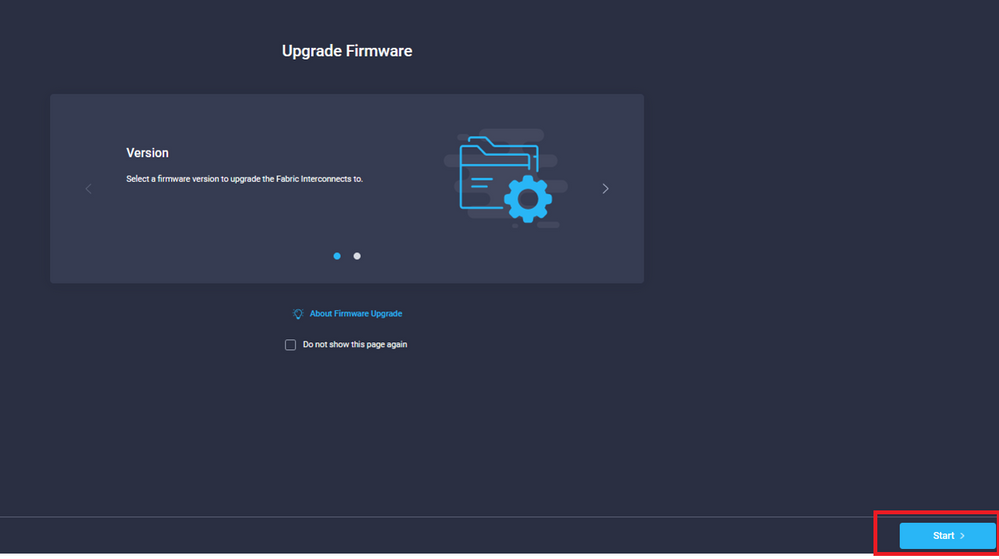
This redirects to the screen where the upgrade wizard initializes.
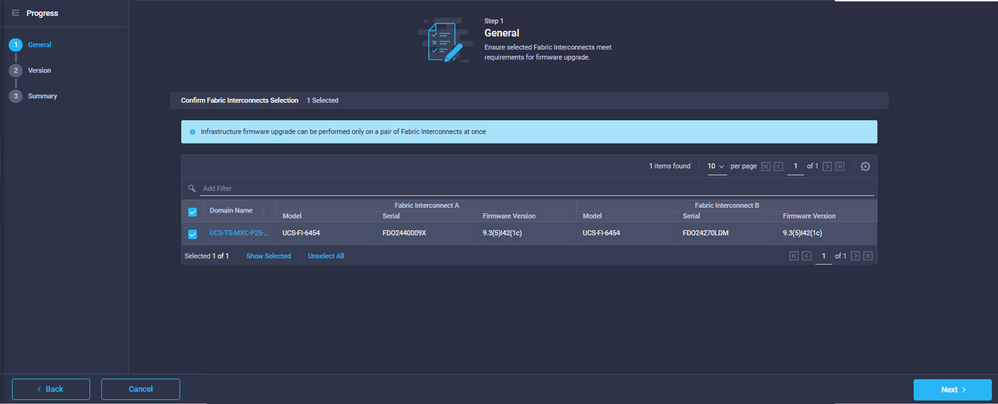
Step 1. Confirm the UCS environment (columns Fabric Interconnect A and Fabric Interconnect B) and current firmware version. Click Next.
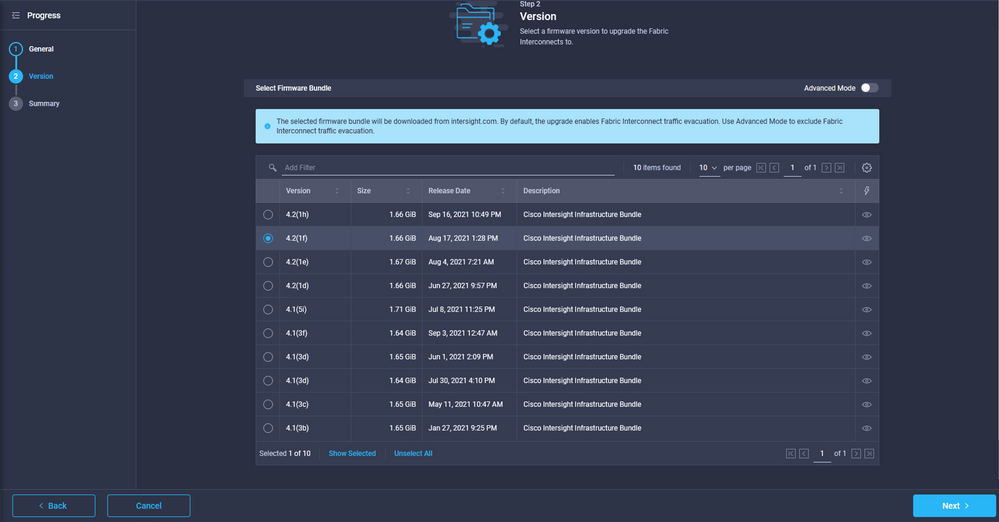
Step 2. Click the target firmware version. Click Next.
Step 3. This is a summary that shows the selected devices and the target firmware versions. A green arrow shows on the firmware version when the target firmware is higher than the current version, otherwise, it shows a yellow arrow.
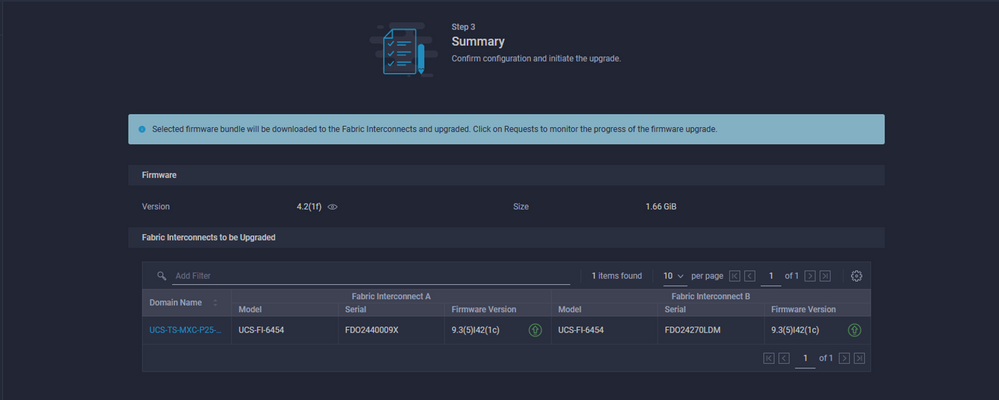
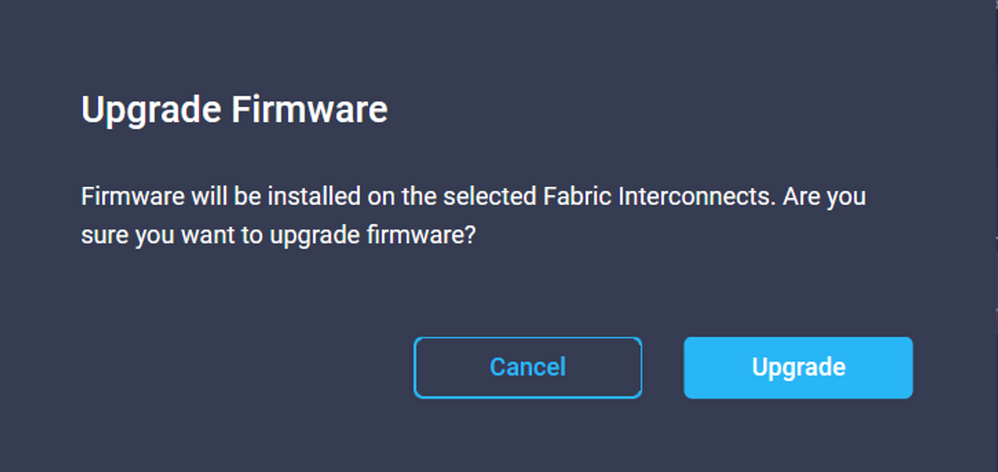
Once you click upgrade you must confirm it one last time. At this point the FIs do not require a reboot yet.
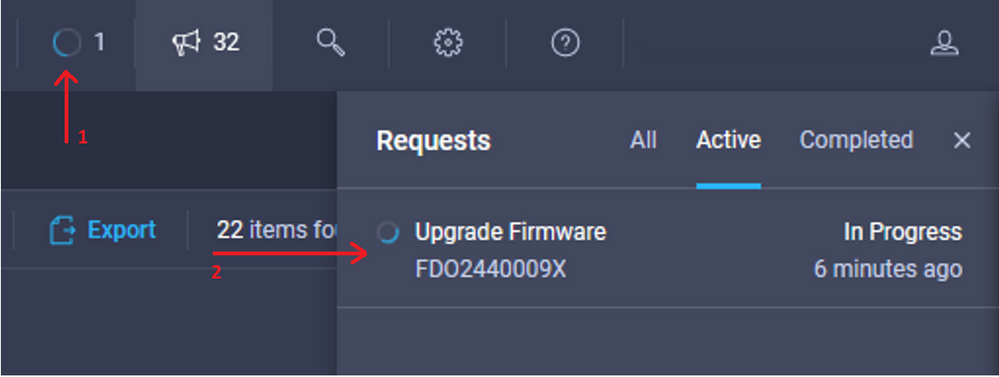
In order to monitor the upgrade, navigate to Requests and click Active. Click the activity's name to see the complete workflow tasks.
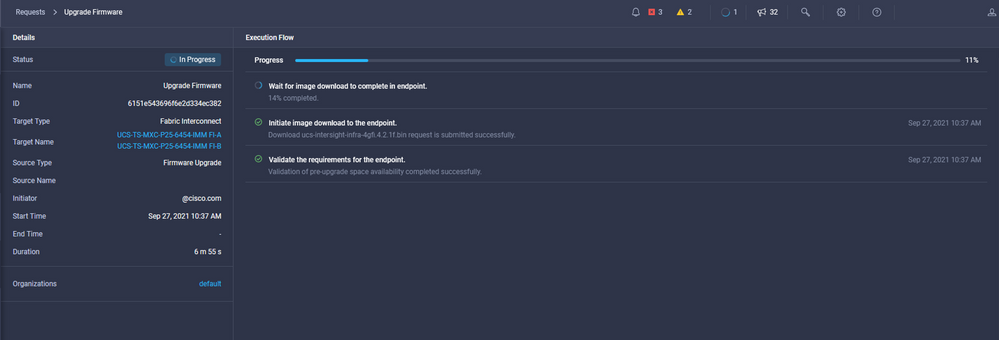
In order to complete the process you must acknowledge the reboot for Fabric B and then for Fabric A.
Note: Before you proceed with the reboot of the second FI, ensure that the data path is ready on the first fabric. In order to verify this you can use the API or the CLI with the command (nxos)# show pinning border-interfaces.
Workflow tasks are as follows:
- Download intersight FI bundle from Intersight software repository
- Upgrade IOMs
- Evacuate data traffic on FI B
- Activate FI B
- Wait for User Ack : for FI reboot
- Wait for activate to complete
- Evacuate data traffic on the FI A
- Activate FI A
- Wait for User Ack : for FI reboot
- Wait for activate to complete
Server Firmware Upgrade
Choose the server you want to upgrade and from the Actions drop-down list, choose Upgrade Firmware.

This initializes the firmware upgrade.
Step 1. Confirm it is the correct server and verify the current firmware version.

Step 2. Click the radio button next to the target firmware version.
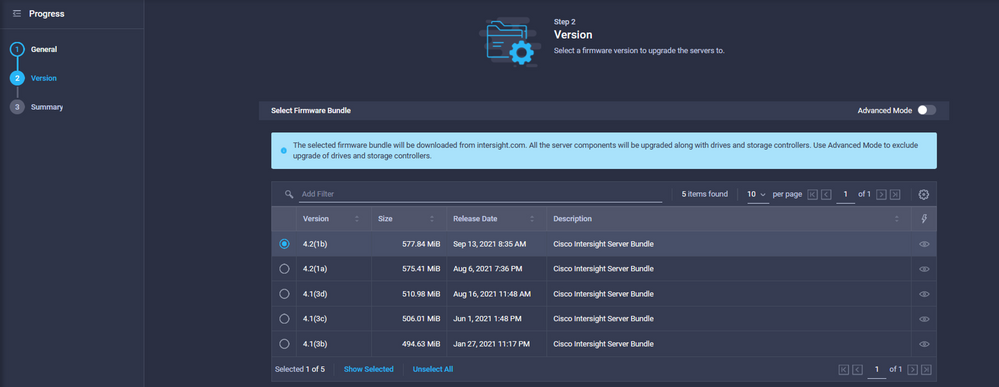
Step 3. This is a summary that shows the server and the target firmware version. A green arrow shows on the firmware version when the target firmware is higher than the current version, otherwise, it shows a yellow arrow.

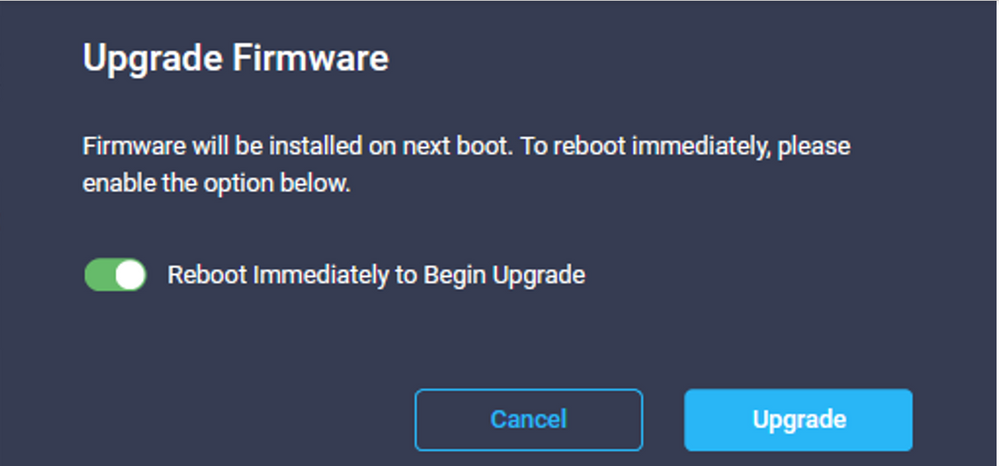
In the Upgrade Firmware dialog box, you can choose immediately reboot or you can acknowledge the reboot later.
In order to monitor the upgrade, navigate to Requests and click Active.

Click the activity's name to see the complete workflow tasks.
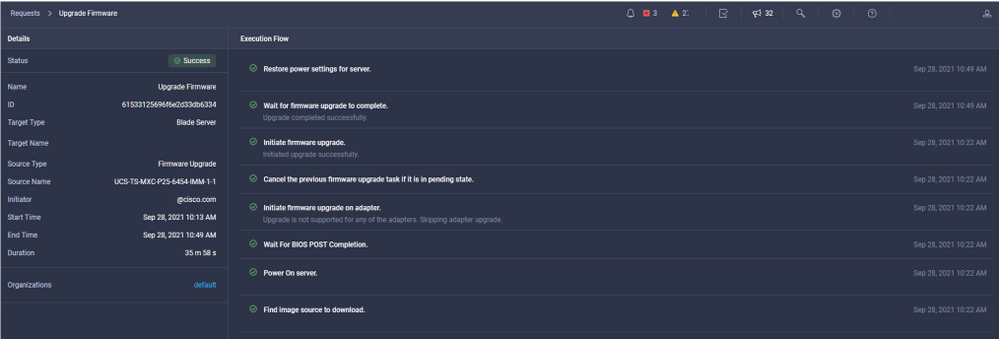
The workflow tasks are as follows:
- Download Intersight server bundle from Intersight software repository
- Upgrade the adapters (for blade)
- Upgrade the server
- Wait for the server to reboot
- Wait for the completion of the upgrade
Verify
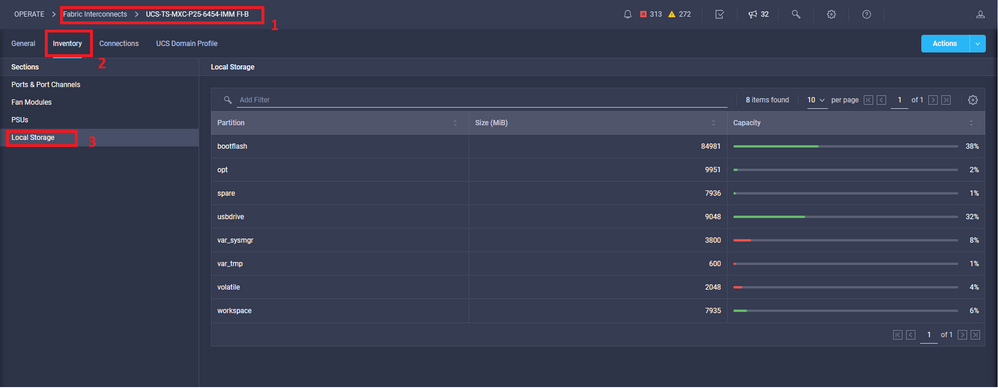
- In order to verify the FI local storage free space, choose one of the FIs, click Inventory, and click Local Storage.
After the infrastructure upgrade, you can verify the installation log. This shows the new version, the timestamps of the upgrade and allows you to confirm a successful upgrade.
UCS-TS-MXC-P25-6454-IMM-A(nx-os)# show install all status
This is the log of last installation.


<Mon Sep 27 07:01:30>
Verifying image bootflash:/ucs-6400-k9-system.9.3.5.I42.1e.bin for boot variable "nxos".
-- SUCCESS <Mon Sep 27 07:02:18>

<Mon Sep 27 07:02:18>
Verifying image type.
-- SUCCESS <Mon Sep 27 07:02:24>

<Mon Sep 27 07:02:25>
Preparing "nxos" version info using image bootflash:/ucs-6400-k9-system.9.3.5.I42.1e.bin.
-- SUCCESS <Mon Sep 27 07:02:26>

<Mon Sep 27 07:02:26>
Preparing "bios" version info using image bootflash:/ucs-6400-k9-system.9.3.5.I42.1e.bin.
-- SUCCESS <Mon Sep 27 07:02:28>

<Mon Sep 27 07:03:14>
Performing module support checks.
-- SUCCESS <Mon Sep 27 07:03:16>

<Mon Sep 27 07:03:16>
Notifying services about system upgrade.
-- SUCCESS <Mon Sep 27 07:03:29>


Compatibility check is done:
Module  bootable     Impact       Install-type Reason
------ --------   --------------  ------------ ------
  1      yes        disruptive        reset     default upgrade is not hitless


Images are upgraded according to following table:
Module      Image                     Running-Version(pri:alt)       New-Version       Upg-Required
------   ----------   ----------------------------------------   --------------------   ------------
   1         nxos                     9.3(5)I42(1c)                   9.3(5)I42(1e)           yes
   1         bios           v05.42(06/14/2020):v05.40(01/17/2020)     v05.42(06/14/2020)      no
   1         fpga                        IO-0x19 MI-0x10              IO-0x22 MI-0x10         yes


Install is in progress, please wait.

<Mon Sep 27 07:03:31>
Performing runtime checks.
-- SUCCESS <Mon Sep 27 07:03:32>

<Mon Sep 27 07:03:32>
Setting boot variables.
-- SUCCESS <Mon Sep 27 07:04:11>

<Mon Sep 27 07:04:11>
Performing configuration copy.
-- SUCCESS <Mon Sep 27 07:04:14>

Module 1: <Mon Sep 27 07:04:14>
Refreshing compact flash and upgrading bios/loader/bootrom.
Warning: please do not remove or power off the module at this time.
-- SUCCESS <Mon Sep 27 07:05:11>

<Mon Sep 27 07:05:11> Install has been successful.
Related Information


 Feedback