Introduction
This document describes the steps to configure Cisco Boot-optimized M.2 RAID controller on Standalone C-Series via Cisco Integrated Manager Controller.
Contributed by Sergio Mora, Ana Montenegro Cisco TAC Engineer.
Prerequisites
Cisco recommends that you have knowledge of these topics:
- Cisco Integrated Management Controller (CIMC)
- RAID Configuration
Components Used
The information in this document is based on these software and hardware versions:
- UCSC-C220-M6S
- CIMC Version: 4.2(1a)
- M.2 Drives
- UCS-M2-HWRAID
- PCIe Slot MSTOR-RAID
- Model: ATA
- Type: SSD
- ESXI 7.0 U2
The information in this document was created from the devices in a specific lab environment. All of the devices used in this document started with a cleared (default) configuration. If your network is live, ensure that you understand the potential impact of any command.
Background Information
On C220 M6 and C240 M6 servers, you have the option to use two SATA M.2 modules and configure them from CIMC as RAID 0 or 1 for Booting.
There are two types of controllers that can be chosen for M.2 modules, Noe Valley (UCS-M2-HWRAID) and Fort Point (UCS-MSTOR-M2).
Fort Point M.2 module
- SATA is GEN3 from PCH sSATA controller
- PCIe is GEN3 x2
- I2C OOB from Pilot4
- Cannot mix SATA and PCIe M.2 modules
- SATA, AHCI mode only
Noe Valley M.2 module
- SATA from RAID Controller
- Hardware RAID 0/1 support
- No PCIe M.2 support
Configure
Verify the current physical and virtual drive information
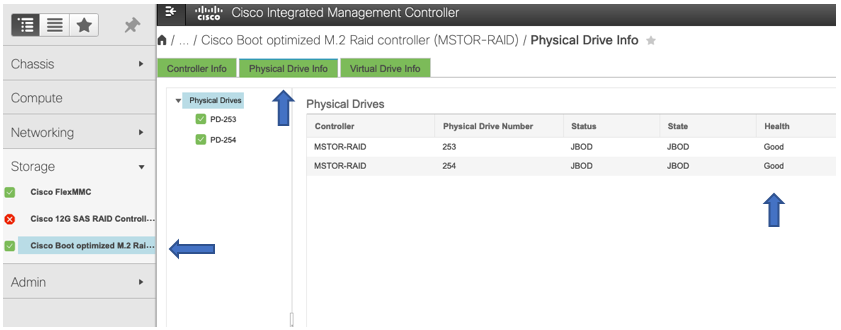
- From the CIMC menu, select Storage, then select the Cisco Boot optimized M.2 Raid controller (MSTOR-RAID).
- Select Physical Drive Info.
- Verify drives are correctly read and health is Good.
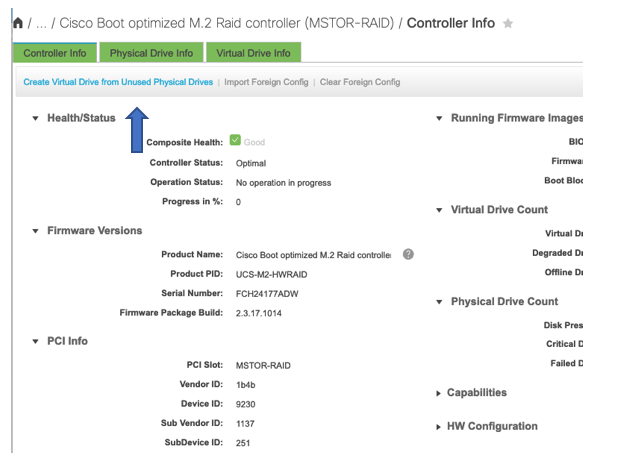
Create Virtual Drive from Controller Info Tab
- Navigate to the option Create Virtual Drive from Unused Physical Drives.
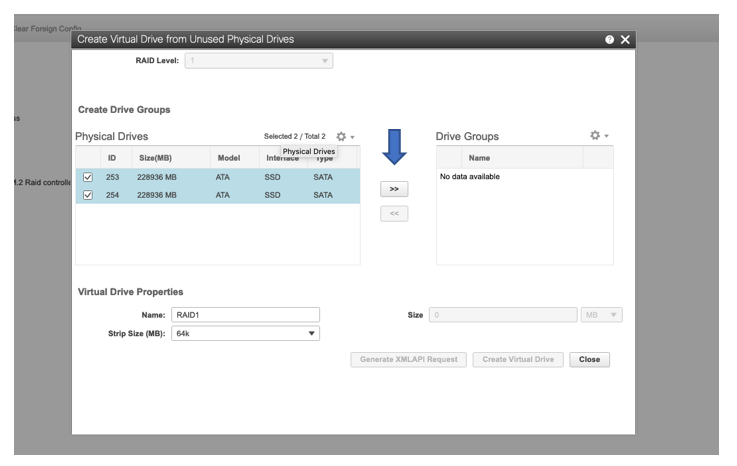
- Select M.2 drives and click on the arrow in order to move them into Drive Groups.
- You can select RAID Level 0 or 1.
Note: for UCS-M2-HWRAID, RAID 1 is the only option.
- Optionally you can modify the virtual Drive name and strip size.
- Click Create Virtual Drive.
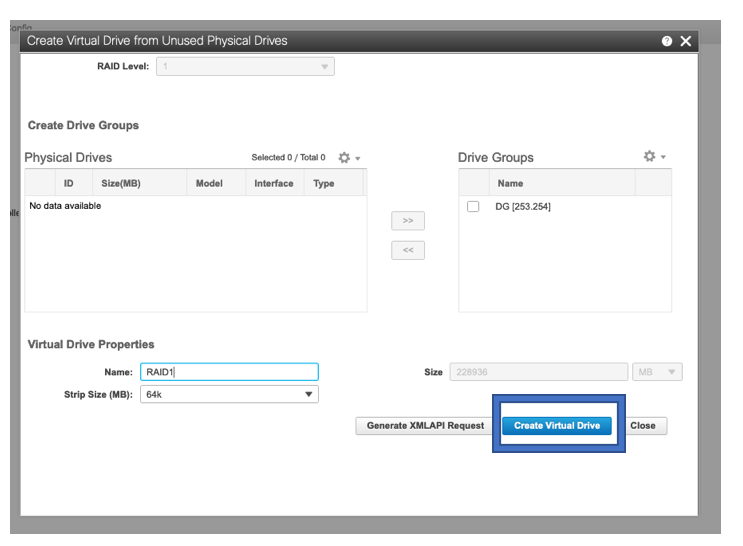
Verify Virtual Drive information
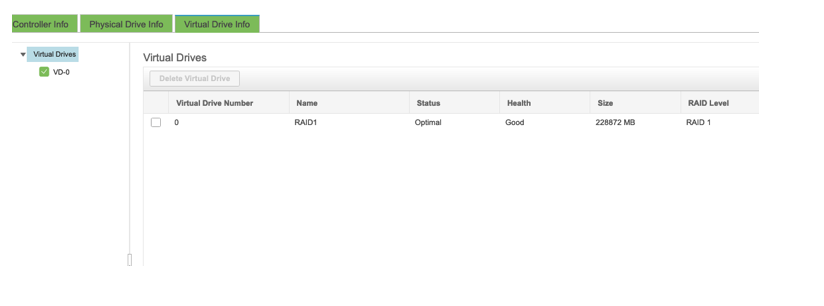
- Navigate to Virtual Drive Info and verify if the virtual drive is created.
- Details as status, health, RAID Level are visible under the Virtual Drive Info.
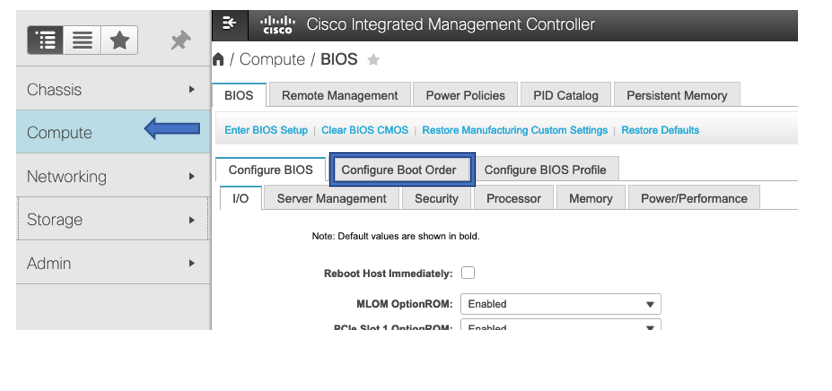
Configure Boot Order
- Navigate to Compute and select Configure Boot Order.
- Navigate to Advance option.
- Select the Add Local CDD and Add Embedded Storage.
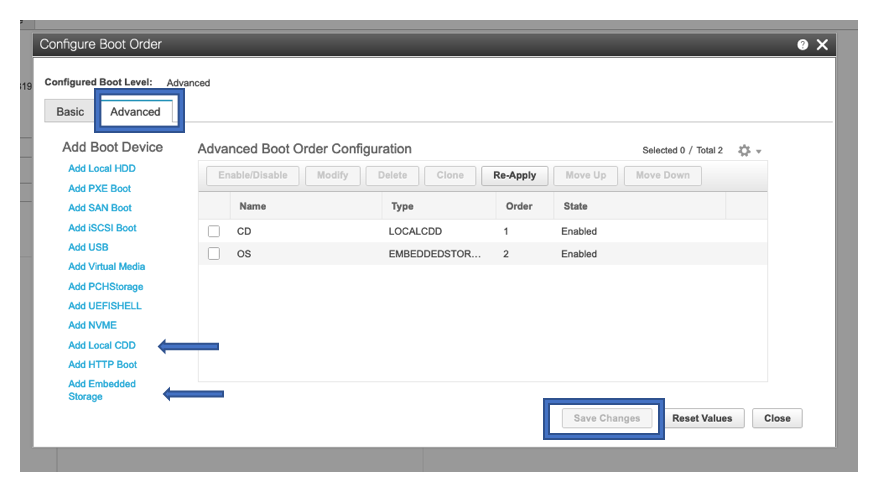

Note: Alternatively you can use the boot option Add Local HDD and select slot MSTOR-RAID
Map ISO image on KVM
- Select Launch vKVM, a new window is opened
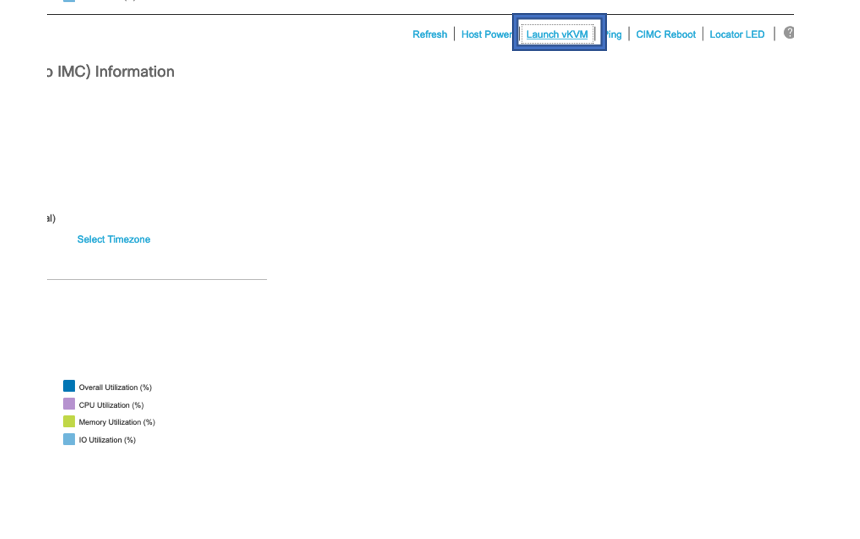
- Select Virtual Media and select the respective map option.
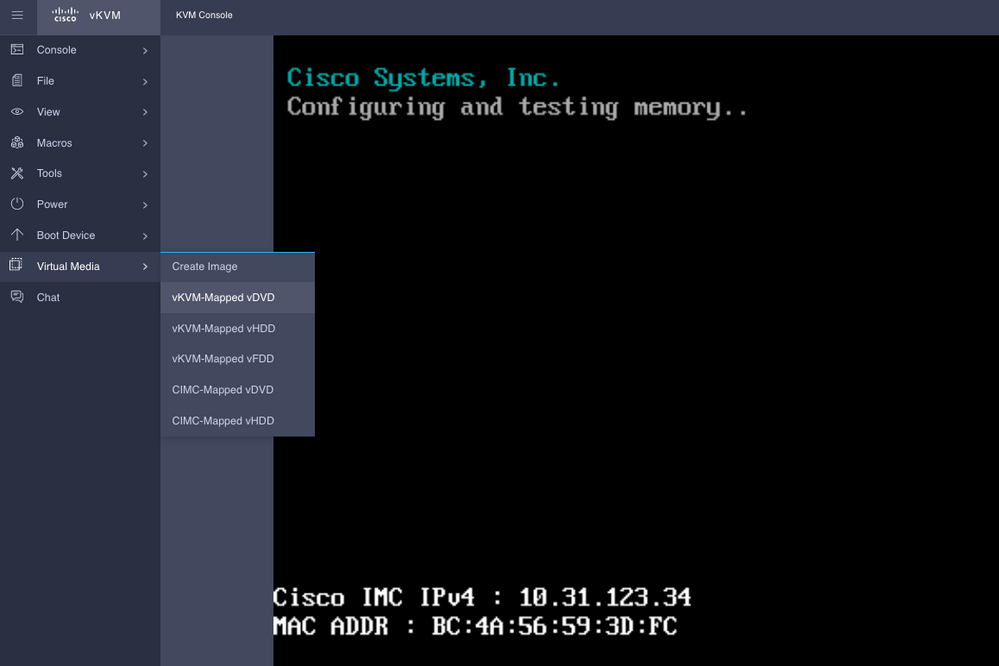
- Browse the ISO file from your local computer and select Map Drive.
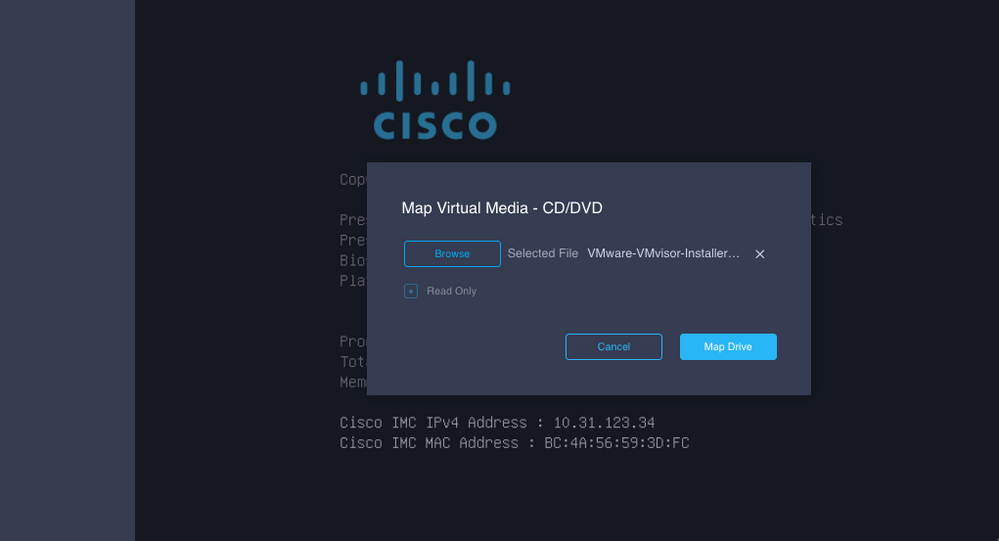
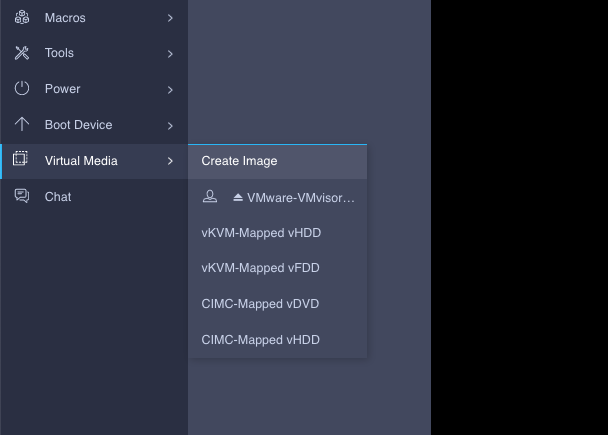
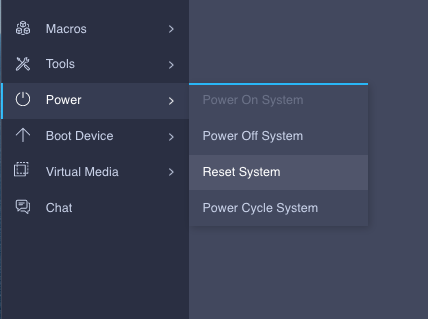
- Reboot the server to start the installation.
Verify
Confirm OS is able to detect Virtual Drive information.
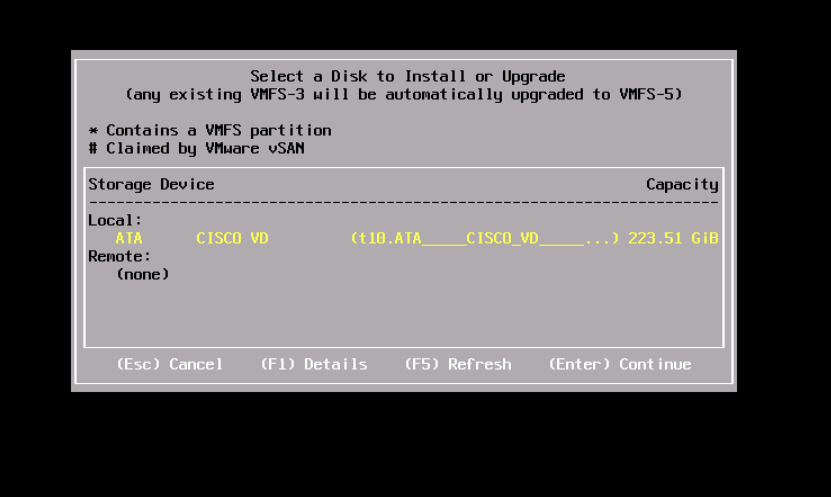
Troubleshoot
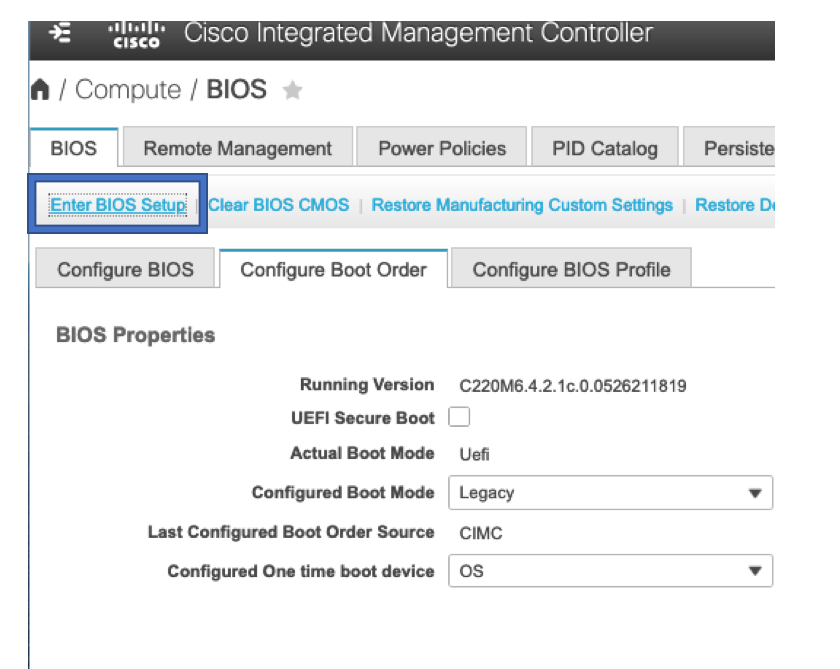
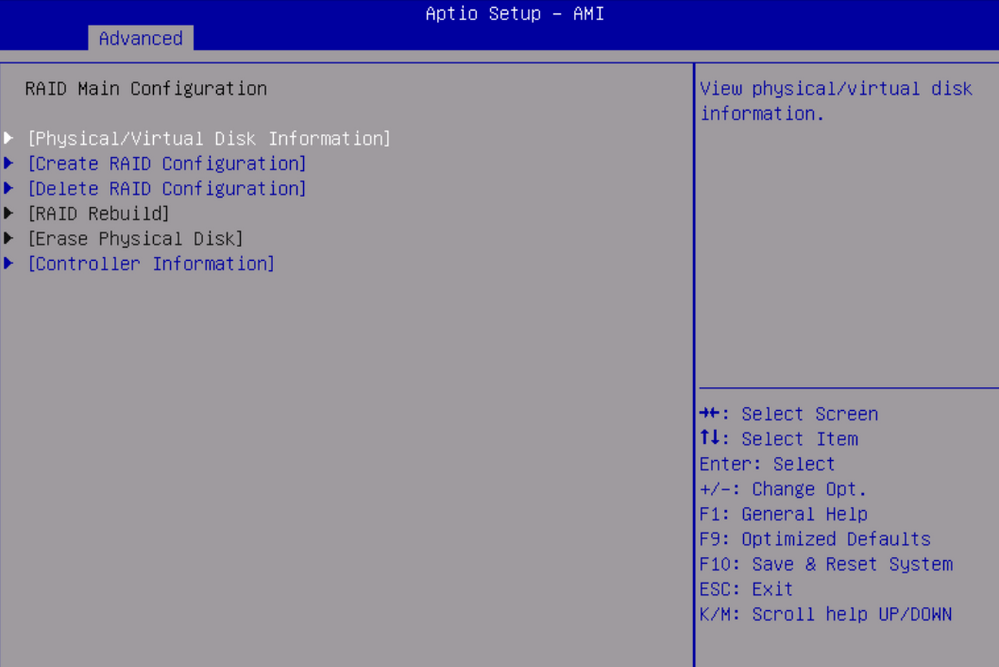
RAID can be configured from Server BIOS Setup if CIMC is not configured.
Select Enter BIOS Setup.
Note: BIOS Setup can be accessed if you press F2 during the server post.
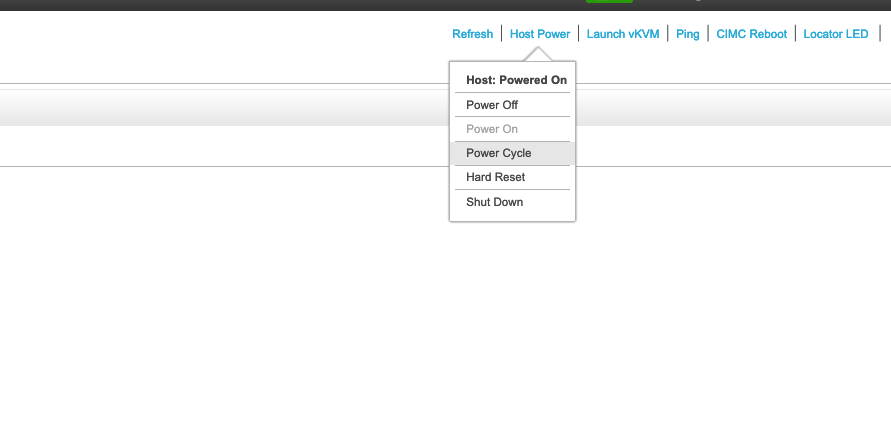
Select the Power Cycle option.
Navigate to Advanced tab and select Cisco Boot optimized M.2 RAID Controller.
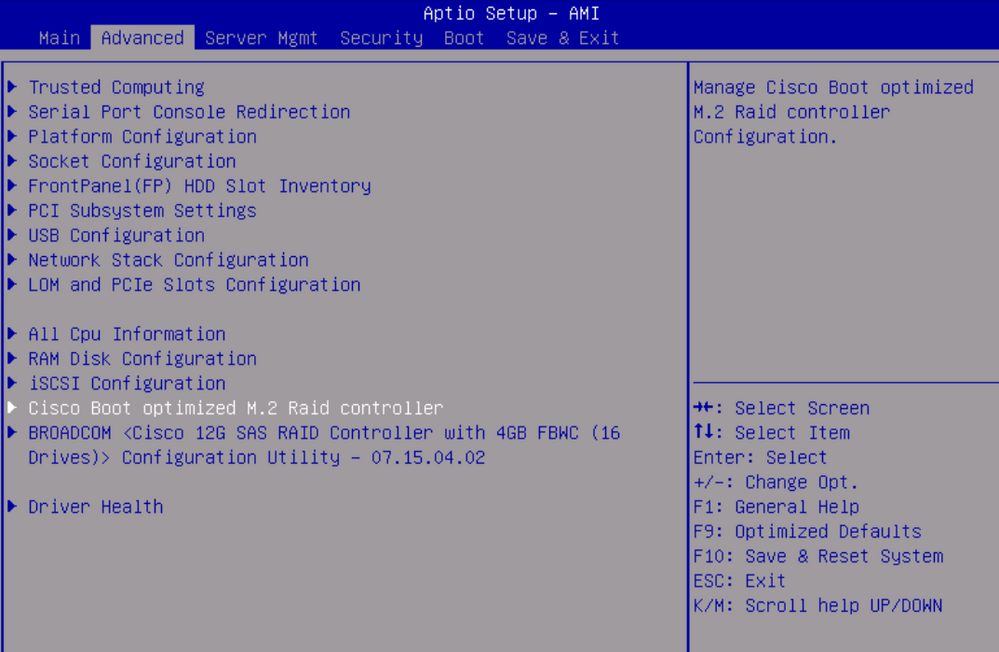
Select the necessary option for RAID configuration.
Related Information


 Feedback