Introduction
This document describes the process in order to install Elastic Sky X Integrated (ESXi) and configure Cisco Integrated Management Controller (CIMC) on BE6/7K server in an event of full hardware failure or a full server replacement. This document helps to set up the server from scratch.
Prerequisites
Requirements
Cisco recommends that you have knowledge of these topics:
- Physical access to server in order to connect keyboard and monitor
- Need access to Keyboard and Monitor
- CIMC Dongle to connect Monitor and Keyboard
- Free account in VMware in order to download Cisco Customer Image
Components Used
This document is not restricted to specific software and hardware versions.
The information in this document was created from the devices in a specific lab environment. All of the devices used in this document started with a cleared (default) configuration. If your network is live, ensure that you understand the potential impact of any command.
Background Information
BE6K/7K are packaged solution i.e. ESXi is pre-installed on the server. At times, you can run into issue with BE6k/7K where you have to replace all the Hard Disk Drive (HDD) or you are not able to recover the data or Virtual Drive (VD) failed or full server replacement, then you have to install ESXi on the new hardware. This document describe the process to follow in order to install the ESXi and configure CIMC in such an event
Process to Follow
Procedure can be split into two parts:
Part 1. Configure CIMC and create VD.
- Connect keyboard and monitor to the console of the Unified Computing System (UCS) server with the Keyboard/Video/Mouse (KVM) dongle
- Power on the server
- Configure CIMC IP
- Ensure that all the physical drives are in a good state
- Create a VD in RAID 5
Part 2. Install ESXi on the created VD.
- Download the Cisco Custom ISO® from VMware
- Log into CIMC and Launch KVM Console. (Ensure JRE is installed on the PC)
- Mount Virtual ISO with the use of KVM Console
- Reboot the UCS server from KVM, press F6 on start-up
- Choose Virtual CD/DVD, press Enter
- Proceed with the ESXi Install
- From Direct Console User Interface (DCUI) press F2, configure ESXi IP, subnet, VLAN (Optional)
- Access the ESXi IP from Vsphere Client
Part 1. CIMC Configuration
Procedure with screenshots.
Step 1. Connect keyboard and monitor to the console of the UCS server with the use of the KVM dongle as shown in the image.

Step 2. Power on the server.
Step 3. At the Power On splash screen Press F8 as shown in the image.

Step 4. Configure CIMC for connectivity as shown in the image.
Once inside the CIMC utility, you have to configure this:
- CIMC IP address
- Default gateway
- Set the password for CIMC

Step 5. Create VD.
In order to create the VD, you have to do this:
- Launch CIMC
- Navigate to Storage
- Navigate to Storage >Controller Info
- Navigate to Controller Info > Create Virtual Drive from Unused Physical Drives
- Select Raid as 5
- Select HDD
Note: You need at least 3 HDD for Raid 5.
- Set name and properties
- Click on Create Virtual Drive
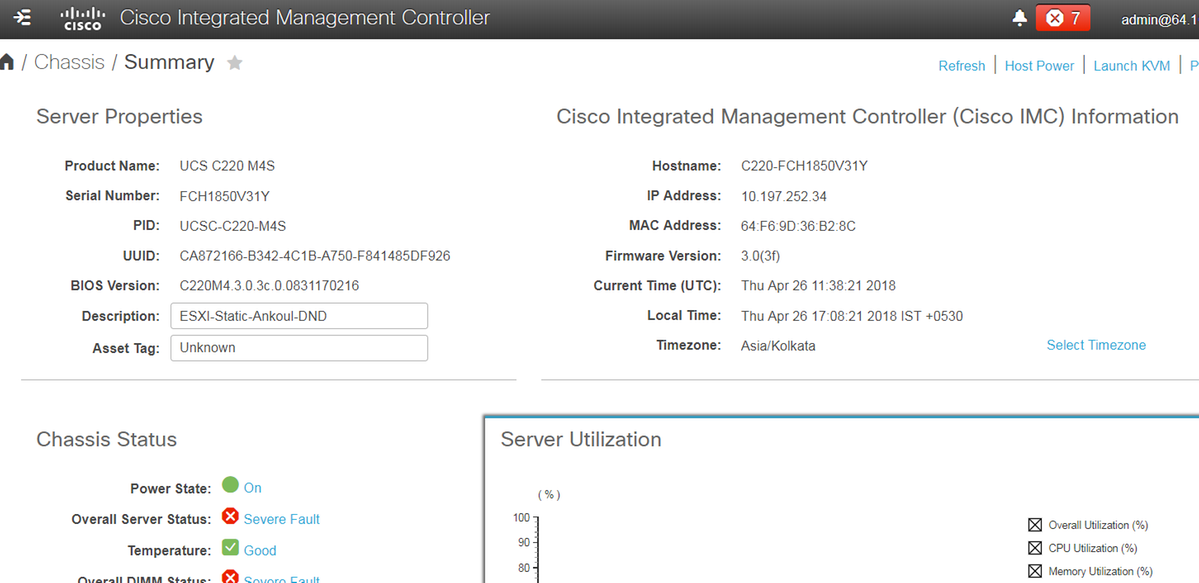
1. Launch CICM from a web browser, Accept all the certs alerts that you get as shown in the image.
2. Navigate to Storage as shown in the image.

3. Navigate to Storage > Controller Info as shown in the image.
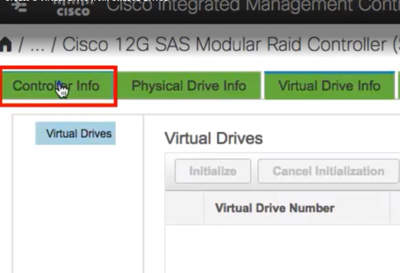
4. Navigate to Controller Info > Create Virtual Drive from Unused Physical Drives as shown in the image.

5. Select RAID Level as 5from the drop down option as shown in the image.

6. Select HDDas shown in the image.
Note: You need at least 3 HDD for Raid 5.

7. Set Name and Properties as shown in the image.
8. Click Create Virtual Drive as shown in the image.

9. Verify that the Drive is created as shown in the images.


Part 2. ESXi Install
Step 1. Download the Cisco Custom ISO® from VMware as shown in the image.

Step 2. Log into CIMC and Launch KVM Console. (Ensure JRE 1.7 or higher is installed on the PC if you use Java based). In this case, you use HTML based KVM as shown in the image.

Step 3. Mount Virtual ISO with KVM Console as shown in the images.


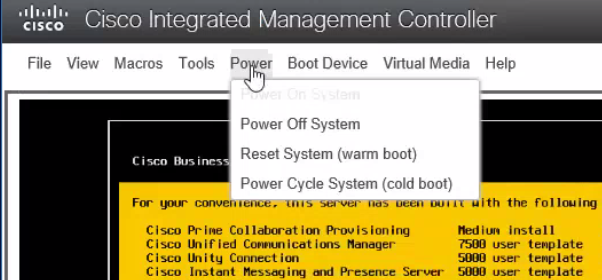
Step 4. Reboot the UCS server from KVM, press F6 on start-up as shown in the images.
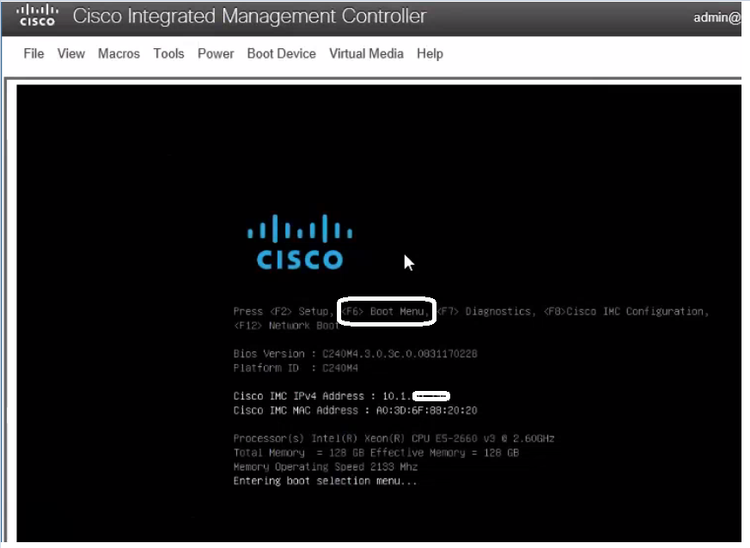
Step 5. Choose Virtual CD/DVD Option, press Enter as shown in the image.

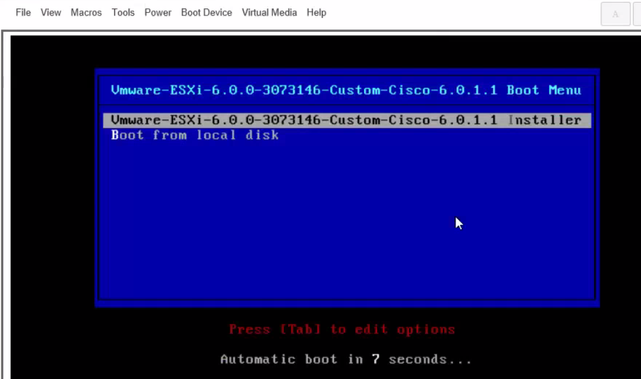
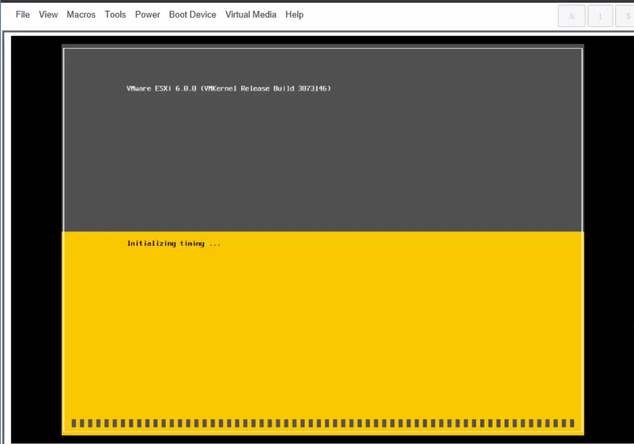
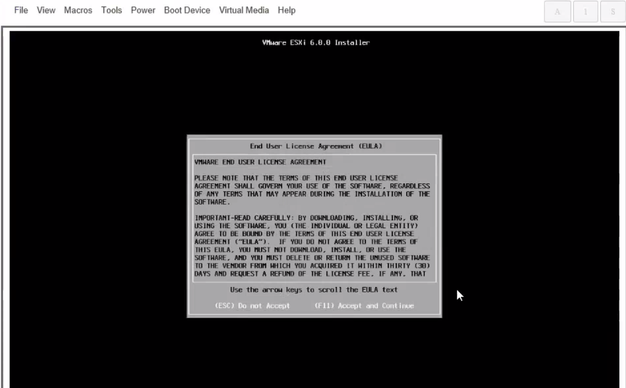
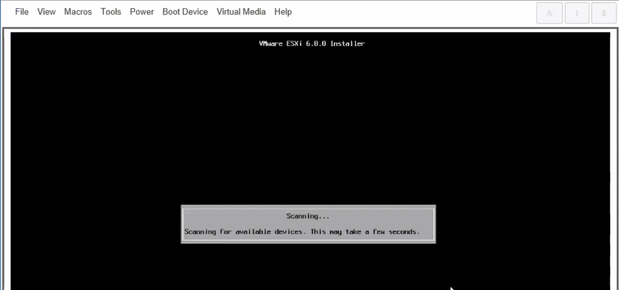
Step 6. Proceed with the ESXi Install as shown in the images.


Note: Select the Drive that you had created in CIMC.

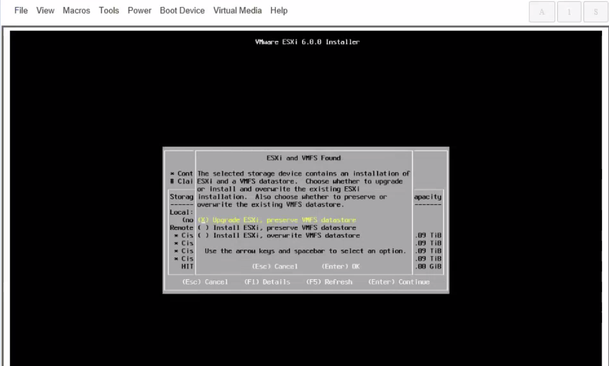
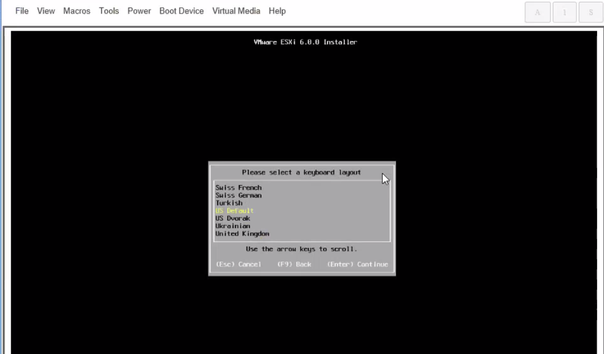

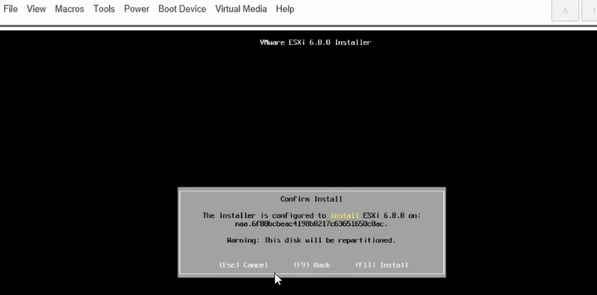


Step 6. From DCUI press F2, configure ESXi IP, subnet, VLAN (Optional) as shown in the images.
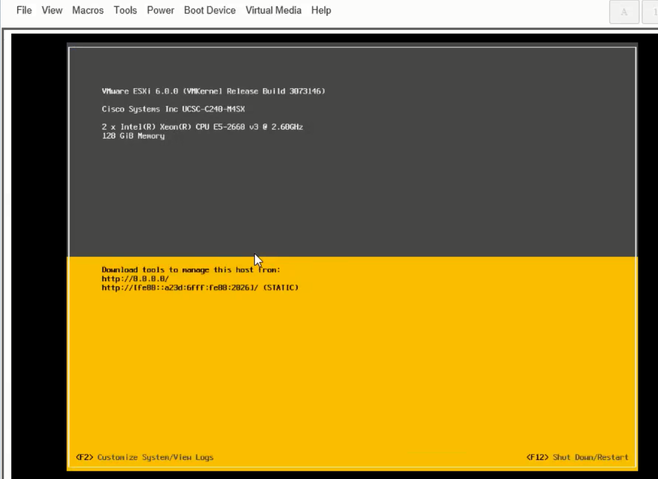


Henceforth, access the ESXi IP from Vsphere Client or a web browser and upload UC ISO to Data store in order to deploy VM.
Verify
Use this section in order to confirm that your configuration works properly.
The verification is covered in Part 1. CIMC Configuration > Step 9. of the article.
Troubleshoot
There is currently no specific troubleshooting information available for this configuration.
