Configuring the Cisco VPN 3000 Concentrator 4.7.x to Get a Digital Certificate and a SSL Certificate
Available Languages
Contents
Introduction
This document includes step-by-step instructions on how to configure the Cisco VPN 3000 Series Concentrators to authenticate with the use of digital or identity certificates and SSL certificates.
Note: In the VPN Concentrator, load balancing must be disabled before you generate another SSL certificate since this prevents the certificate generation.
Refer to How to obtain a Digital Certificate from a Microsoft Windows CA using ASDM on an ASA in order to learn more about the same scenario with PIX/ASA 7.x.
Refer to Cisco IOS Certificate Enrollment Using Enhanced Enrollment Commands Configuration Example in order to learn more about the same scenario with Cisco IOS® Platforms.
Prerequisites
Requirements
There are no specific requirements for this document.
Components Used
The information in this document is based on the Cisco VPN 3000 Concentrator that runs Version 4.7.
The information in this document was created from the devices in a specific lab environment. All of the devices used in this document started with a cleared (default) configuration. If your network is live, make sure that you understand the potential impact of any command.
Conventions
Refer to the Cisco Technical Tips Conventions for more information on document conventions.
Install Digital Certificates on the VPN Concentrator
Complete these steps:
-
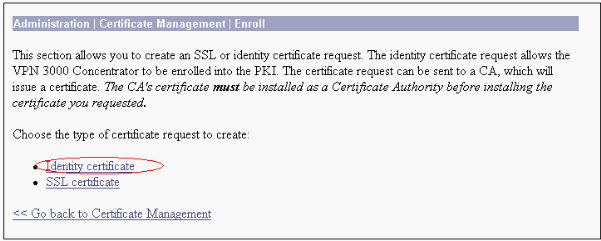
Choose Administration > Certificate Management > Enroll in order to select the digital or identity certificate request.
-
Choose Administration > Certificate Management > Enrollment > Identity Certificate and click Enroll via PKCS10 Request(Manual).

-
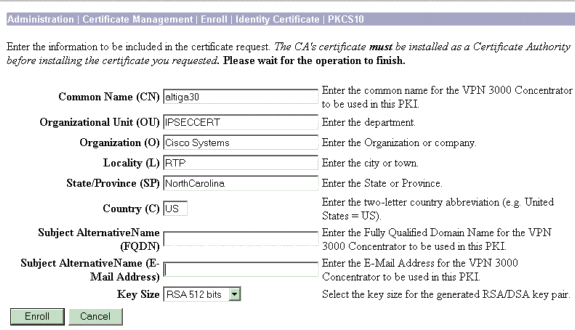
Fill out the requested fields, and then click Enroll.
These fields are filled out in this example.
-
Common Name—altiga30
-
Organizational Unit—IPSECCERT (the OU should match the configured IPsec groupname)
-
Organization—Cisco Systems
-
Locality—RTP
-
State/Province—NorthCarolina
-
Country—US
-
Fully Qualified Domain Name—(not used here)
-
Key Size—512
Note: If you request either an SSL certificate or an identity certificate using Simple Certificate Enrollment Protocol (SCEP), these are the only RSA options available.
-
RSA 512 bits
-
RSA 768 bits
-
RSA 1024 bits
-
RSA 2048 bits
-
DSA 512 bits
-
DSA 768 bits
-
DSA 1024 bits
-
-
After you click Enroll, several windows appear. The first window confirms that you have requested a certificate.

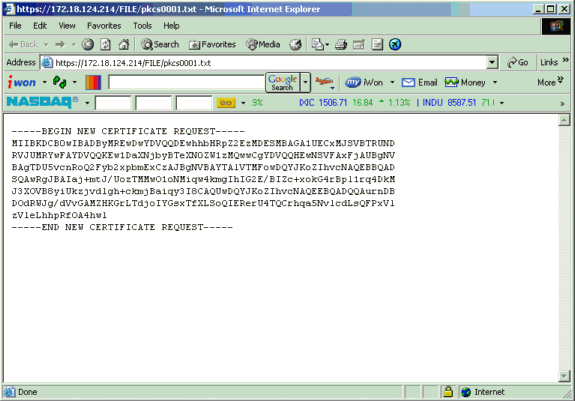
A new browser window also opens and displays your PKCS request file.
-
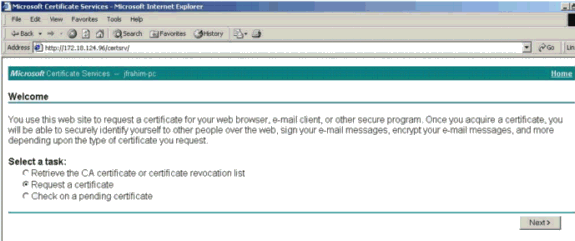
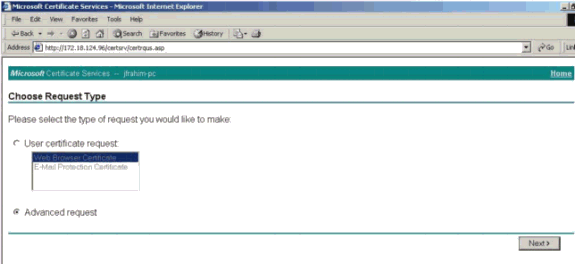
On your Certification Authority (CA) server, highlight the request and paste it in your CA server in order to submit your request. Click Next.
-
Select Advanced request and click Next.
-
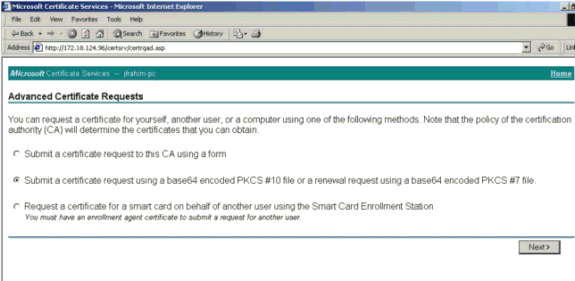
Select Submit a certificate request using a base64 encoded PKCS #10 file or a renewal request using a base64 encoded PKCS #7 file, and then click Next.
-
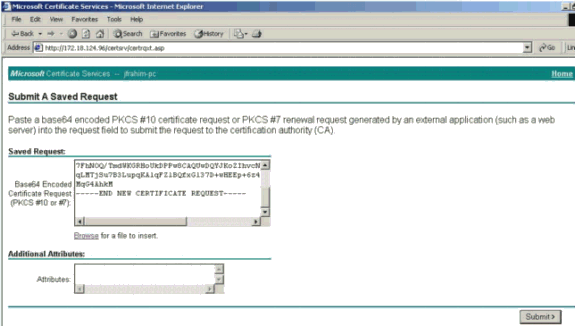
Cut and paste your PKCS file into the text field under the Saved Request section. Then click Submit.
-
Issue the identity certificate on the CA server.

-
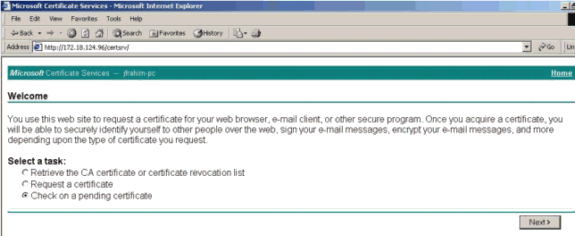
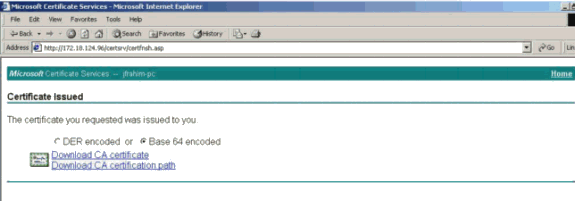
Download the root and the identity certificates. On your CA server, select Check on a pending certificate, and click Next.
-
Select Base 64 encoded, and click Download CA certificate on the CA server.
-
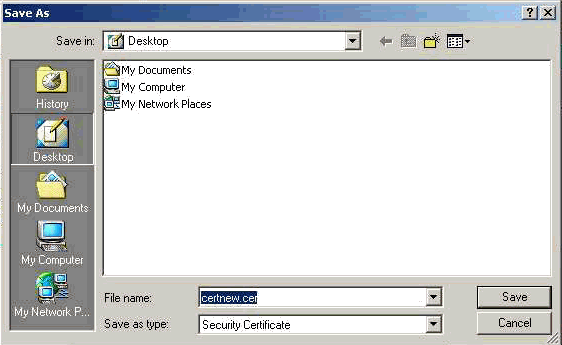
Save the identity certificate on your local drive.
-
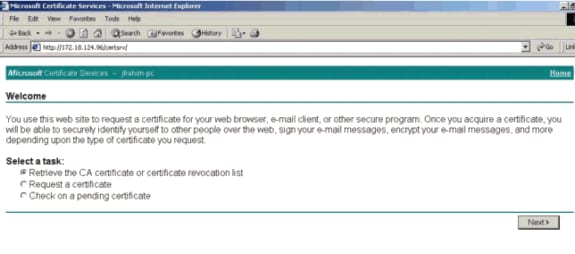
On the CA server, select Retrieve the CA certificate or certificate revocation list in order to get the root certificate. Then click Next.
-
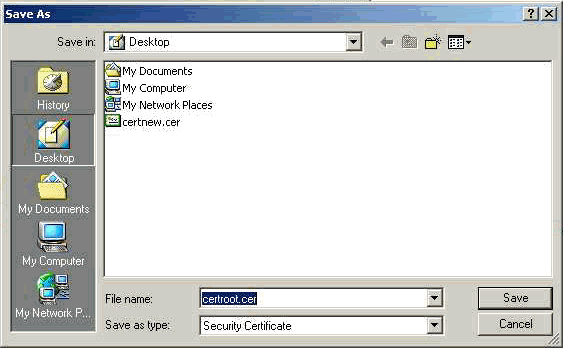
Save the root certificate on your local drive.
-
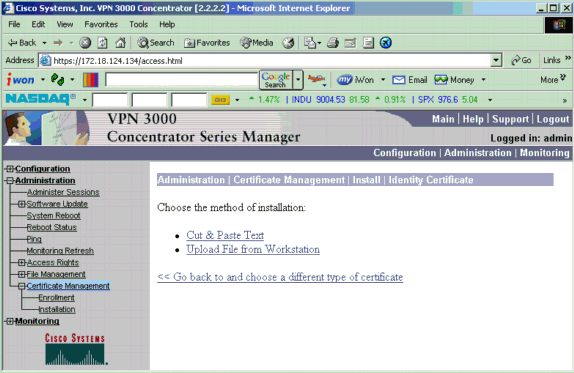
Install the root and identity certificates on the VPN 3000 Concentrator. In order to do this, select Administration > Certificate Manager > Installation > Install certificate obtained via enrollment. Under Enrollment Status, click Install.

-
Click Upload File from Workstation.
-
Click Browse and select the root certificate file that you saved to your local drive.
Select Install to install the identity certificate on the VPN Concentrator. The Administration | Certificate Management window appears as a confirmation, and your new identity certificate appears in the Identity Certificates table.

Note: Complete these steps to generate a new certificate if the Certificate fails.
-
Select Administration > Certificate Management.
-
Click Delete in the Actions box for the SSL Certificate listing.
-
Select Administration > System Reboot.
-
Select Save the active configuration at time of reboot, choose Now, and click Apply. You are now able to generate a new certificate after the reload is complete.
-
Install SSL Certificates on the VPN Concentrator
If you use a secure connection between your browser and the VPN Concentrator, the VPN Concentrator requires an SSL certificate. You also need an SSL certificate on the interface that you use to manage the VPN Concentrator and for WebVPN, and for each interface that terminates WebVPN tunnels.
The interface SSL certificates, if non-existent, are automatically generated when the VPN 3000 Concentrator reboots after you upgrade the VPN 3000 Concentrator software. Because a self-signed certificate is self-generated, this certificate is not verifiable. No Certificate Authority has guaranteed its identity. But this certificate allows you to make initial contact with the VPN Concentrator using the browser. If you want to replace it with another self-signed SSL certificate, complete these steps:
-
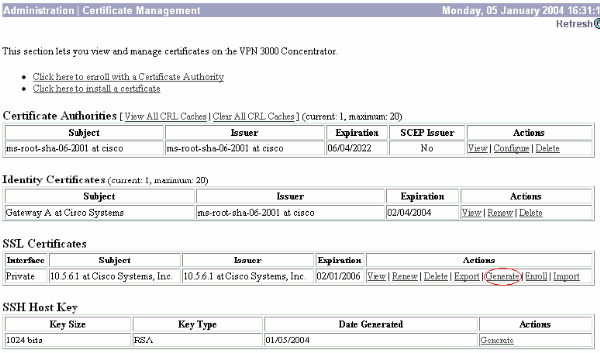
Choose Administration > Certificate Management.
-
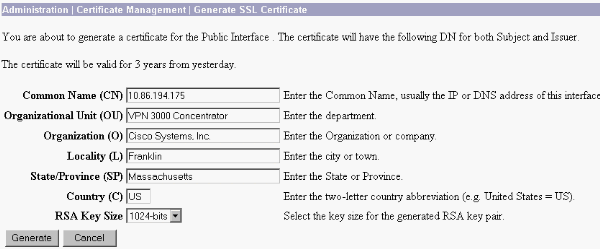
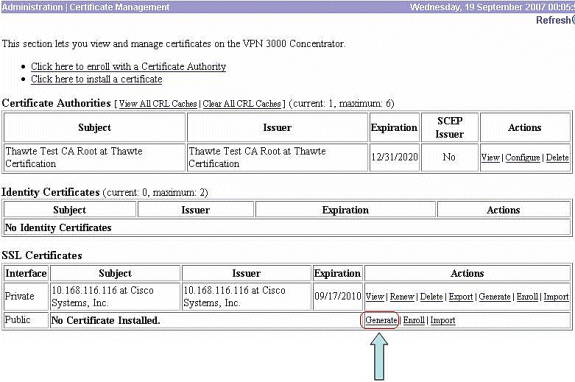
Click Generate in order to display the new certificate in the SSL Certificate table and replace the existing one.
This window allows you to configure fields for SSL certificates the VPN Concentrator generates automatically. These SSL certificates are for interfaces and for load balancing.
If you want to obtain a verifiable SSL certificate (that is, one issued by a Certificate Authority), see the Install Digital Certificates on the VPN Concentrator section of this document in order to use the same procedure you use to obtain identity certificates. But this time, on the Administration > Certificate Management > Enroll window, click SSL certificate (instead of Identity Certificate).
Note: Refer to the Administration | Certificate Management section of VPN 3000 Concentrator Reference Volume II: Administration and Monitoring Release 4.7 for complete information about digital certificates and SSL certificates.
Renew SSL Certificates on the VPN Concentrator
This section describes how to renew the SSL certificates:
If this is for the SSL certificate generated by the VPN Concentrator, go to Administration > Certificate Management on the SSL section. Click the renew option, and that renews the SSL certificate.
If this is for a certificate granted by an external CA server, complete these steps:
-
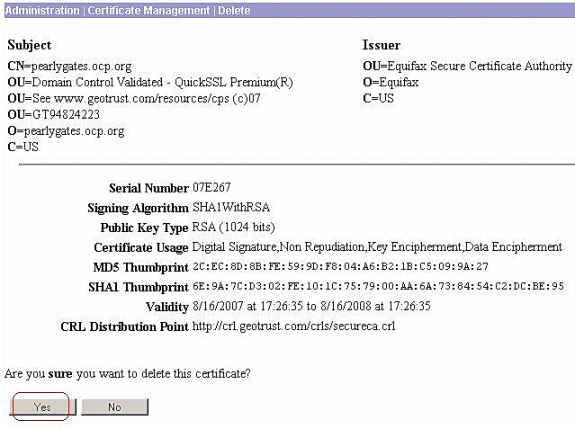
Choose Administration > Certificate Management >Delete under SSL Certificates in order to delete the expired certificates from the public interface.
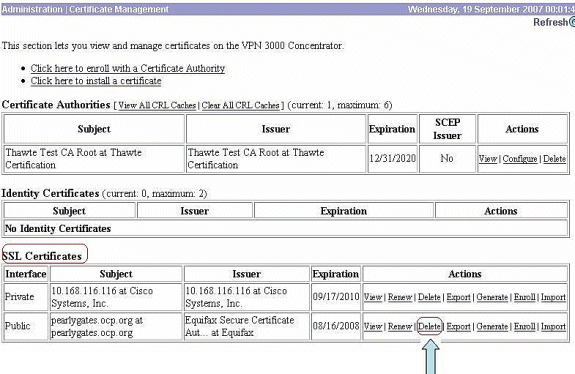
Click Yes in order to confirm the deletion of the SSL certificate.
-
Choose Administration > Certificate Management > Generate in order to generate the new SSL certificate.
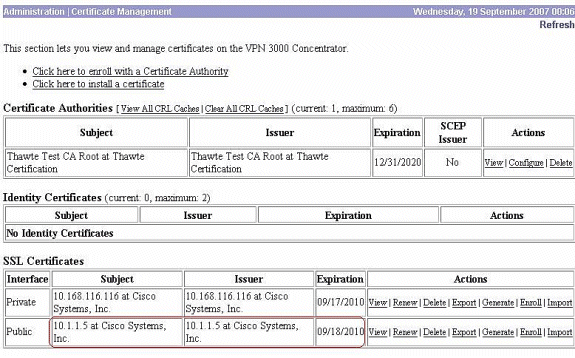
The new SSL certificate for the public interface appears.
Related Information
Revision History
| Revision | Publish Date | Comments |
|---|---|---|
1.0 |
07-Sep-2001 |
Initial Release |
Contact Cisco
- Open a Support Case

- (Requires a Cisco Service Contract)


 Feedback