Introduction
This document describes how to setup an active/standby high availability (HA) pair of Secure Firewall Threat Defense (FTD) managed locally.
Prerequisites
Requirements
It is recommended to have knowledge of these topics:
- Cisco Secure Firewall Threat Defense initial configuration via GUI and/or shell.
Components Used
The information in this document is based on these software and hardware versions:
- FPR2110 version 7.2.5 locally managed by Firepower Device Manager (FDM)
The information in this document was created from the devices in a specific lab environment. All of the devices used in this document started with a cleared (default) configuration. If your network is live, ensure that you understand the potential impact of any command.
Network Topology
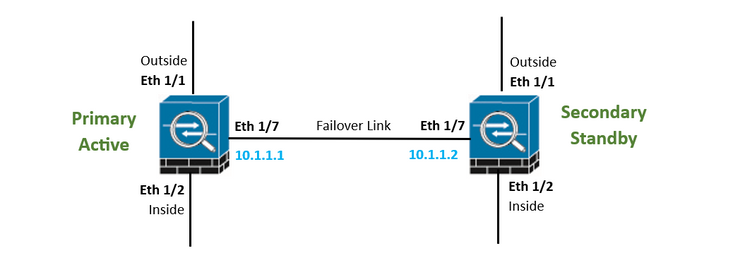
Configure
Configure the Primary Unit for High Availability
Step 1. Click Device and push the Configure button placed at the top right corner, next to the High Availability status.

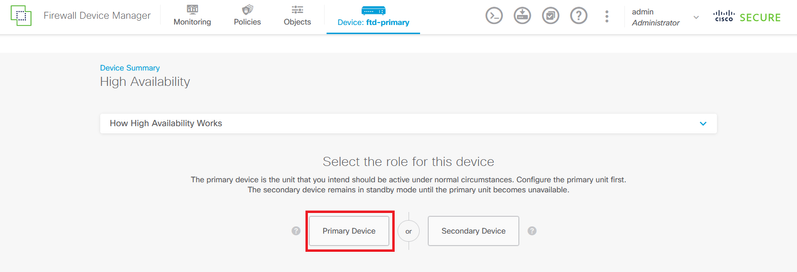
Step 2. On the High Availability page, click the Primary Device box.
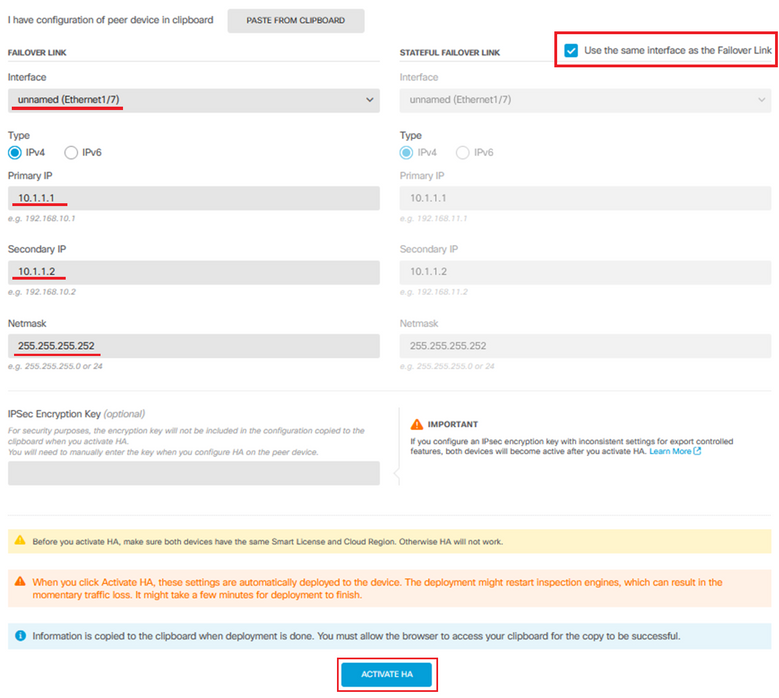
Step 3. Configure the Failover Link properties.
Select the Interface you have connected directly to your Secondary firewall and set the Primary and Secondary IP address as well as the subnet Netmask.
Check the Use the same interface as the Failover Link checkbox for the Stateful Failover Link.
Clear the IPSec Encryption Key box and click Activate HA to save the changes.

Tip: Use a small mask subnet, dedicated for failover traffic only to avoid security breaches and/or network issues as much as possible.

Warning: The system immediately deploys the configuration to the device. You do not need to start a deployment job. If you do not see a message saying that your configuration was saved and deployment is in progress, scroll to the top of the page to see the error messages. The configuration is also copied to the clipboard. You can use the copy to quickly configure the secondary unit. For added security, the encryption key (if you set one) is not included in the clipboard copy.
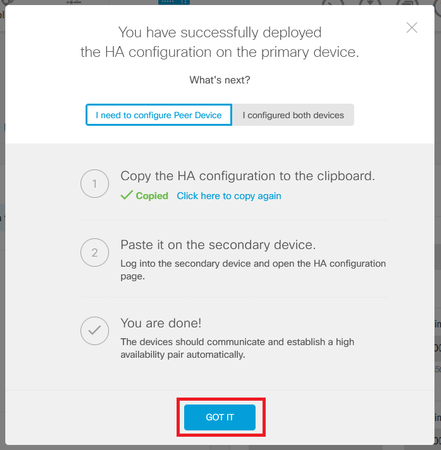
Step 4. After configuration completes, you get a message explaining the next steps. Click Got It after reading the information.
Configure the Secondary Unit for High Availability
Step 1. Click Device and push the Configure button placed at the top right corner, next to the High Availability status.

Step 2. On the High Availability page, click the Secondary Device box.

Step 3. Configure the Failover Link properties. You can paste the settings stored in your clipboard after configuring the Primary FTD, or you can continue manually.
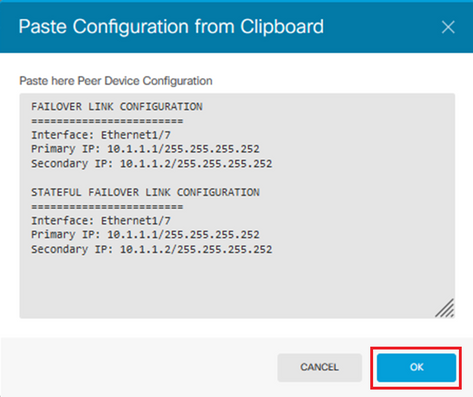
Step 3.1. To paste from clipboard simply click the Paste from Clipboard button, paste in the configuration (push keys Ctrl+v simultaneously) and click OK.

Step 3.2. To proceed manually, select the Interface you have connected directly to your Secondary firewall and set the Primary and Secondary IP address as well as the subnet Netmask. Check the Use the same interface as the Failover Link checkbox for the Stateful Failover Link.
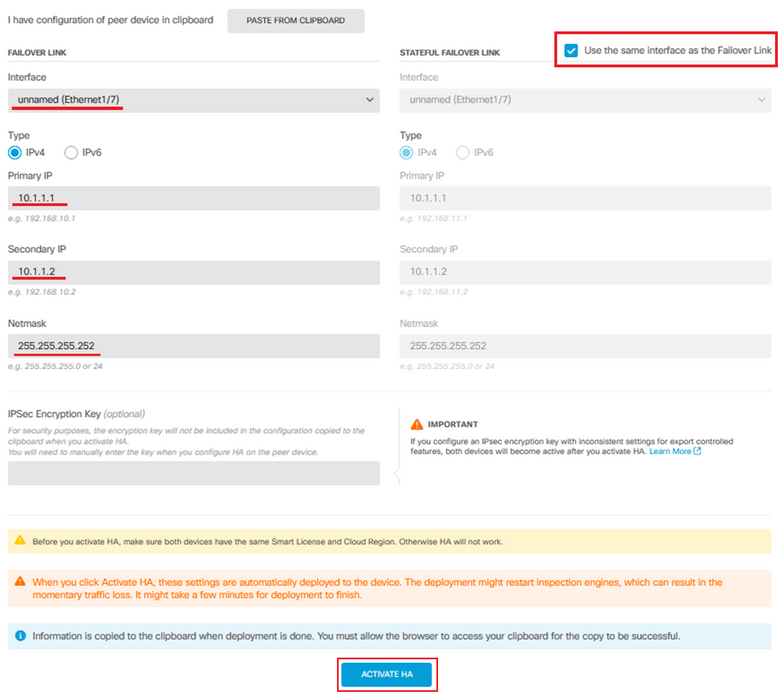
Step 4. Clear the IPSec Encryption Key box and click Activate HA to save the changes.

Warning: The system immediately deploys the configuration to the device. You do not need to start a deployment job. If you do not see a message saying that your configuration was saved and deployment is in progress, scroll to the top of the page to see the error messages.
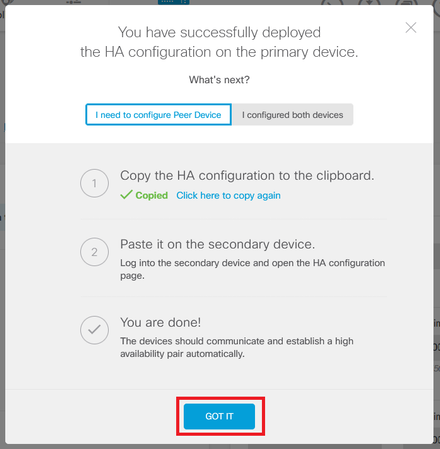
Step 5. After configuration completes, you get a message explaining the next steps you need to take. Click Got It after reading the information.
Verify
- At this point your device status most indicate that this is the secondary device on the High Availability page. If the join with the primary device was successful, the device starts to synchronize with the primary, and eventually the mode is changed to Standby and the peer to Active.

- The Primary FTD most be showing the High Availability status as well, but as Active and Peer: Standby.

- Open an SSH session to the Primary FTD and issue the command show running-config failover to verify the configuration.

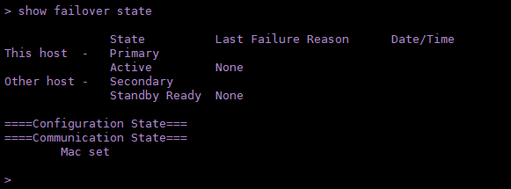
- Validate the current status of the device with the command show failover state.


 Feedback