Introduction
This document describes how to generate reports which provide at-a-glance views of consolidated information about VPN users, including the current status of users, device types, client OS, client applications, and duration of connections on the Firepower Management Center.
Prerequisites
Requirements
Cisco recommends that you have the knowledge of these topics:
- Cisco Firepower Threat Defence (FTD)
- Cisco Firepower Management Center (FMC)
- Anyconnect Secure Mobility Client
Components Used
The information in this document is based on these software versions:
- Cisco FMC for VMware with version 7.x
- AnyConnect Secure Mobility Client 4.x
The information in this document was created from the devices in a specific lab environment. All of the devices used in this document started with a cleared (default) configuration. If your network is live, ensure that you understand the potential impact of any command.
Background Information
The Firepower System provides a flexible reporting system that allows you to quickly and easily generate reports on your Firepower Management Center. You can also design your custom reports from scratch. A report is a document file formatted in PDF, HTML, or CSV with the content you want to communicate while a report template specifies the data searches and formats for the report and its sections. The Firepower System includes a powerful report designer that automates the design of report templates. You can include field parameters like authentication type, connection duration and so on in a template to expand its usefulness.
Remote access VPNs provide secure connections for remote users, such as mobile users or telecommuters. Monitoring these connections provides important indicators of connection and user session performance at a glance. You must be an Admin user in a leaf domain to perform this task. The Firepower System monitoring capabilities enable you to determine quickly whether remote access VPN problems exist and you can then apply this knowledge and use your network management tools to reduce or eliminate problems for your network and users.
Configure
Configurations
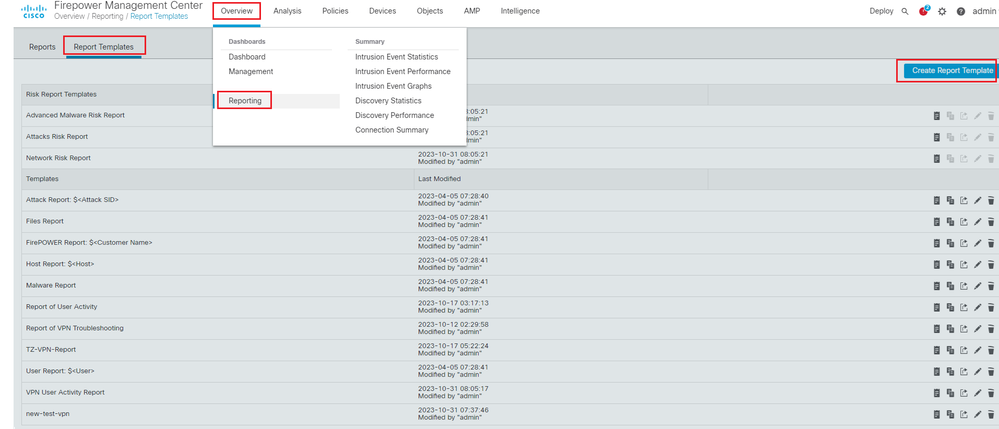
Step 1. Select Overview > Dashboards > Reporting > Report Templates and click on Create Report Template as shown in the image.
 Create Report Template
Step 2. Enter a name for the template in the Report Title field as shown in the image.
 Report Title
Step 3. Select Add Table View from the set of views available on the right side. You can also use charts such as bar charts, line charts, pie charts, and so on as per your requirements.
 Add Table View
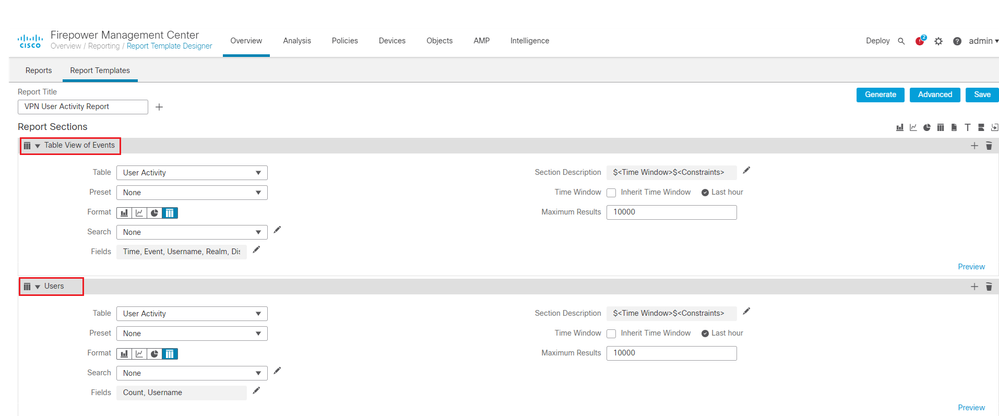
Step 4. Enter a title for the section in the Report Section Title field. Here, Table View of Events and Users table views have been added as shown in the image.
 Title for Report Section
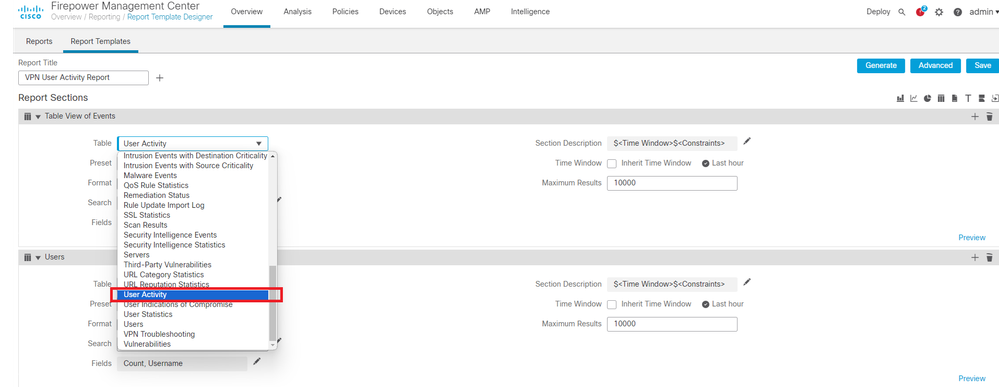
Step 5. Select User Activity under the Table drop-down menu as shown in the image.
 Select User Activity
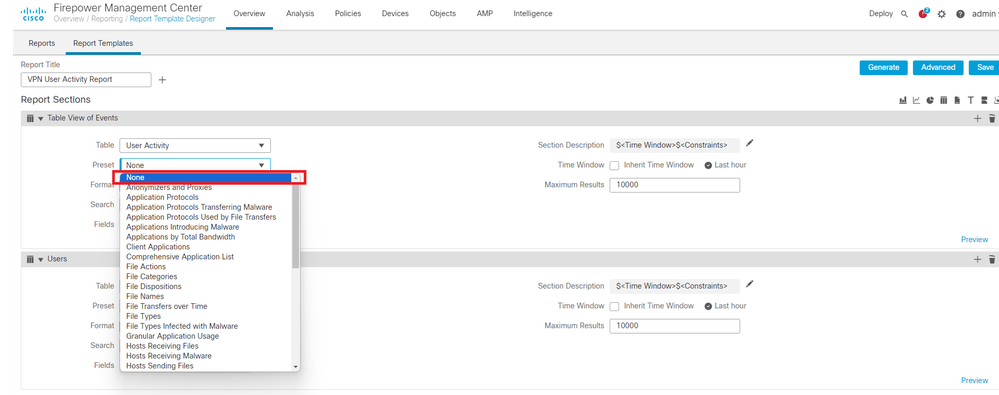
Step 6. Choose a Preset value if required, otherwise, keep it as None .
 Add a Preset Value
Step 7. Select the Table View as the output format as shown in the image.
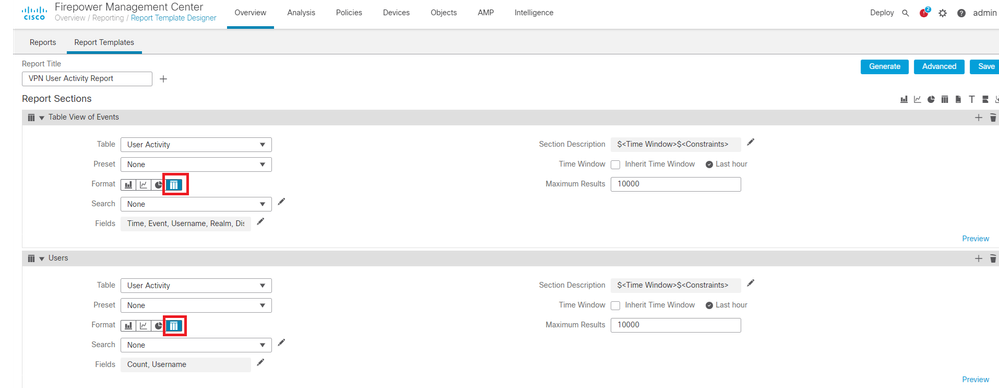 Table View as Output Format
Step 8. (Optional) From the search menu, select the attributes you want to use to constrain the report. Select None if you do not want to enforce any search constraints.
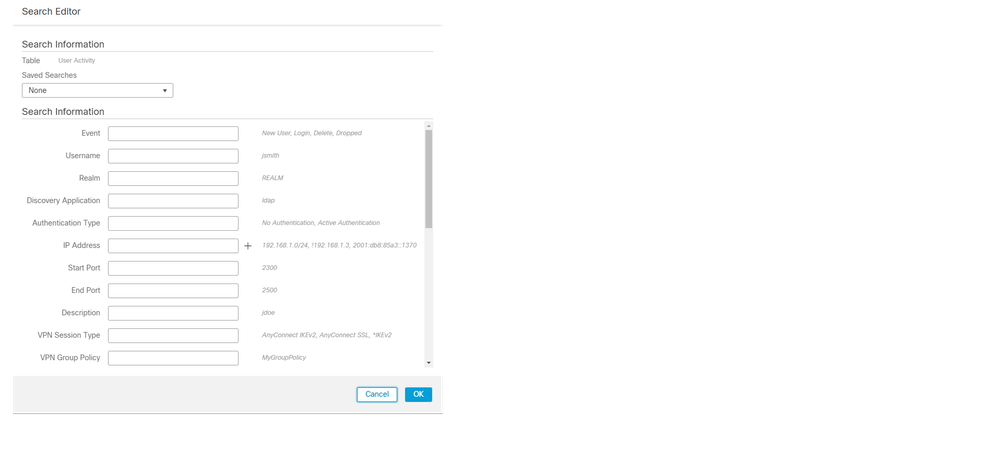 Search Constraints
Step 9. Select the time frame for which you want to generate the report. Click on Last hour and a new pop-up window will open with options of 1 hour, 6 hours, 1 day, 1 month, and so on as shown in the image.
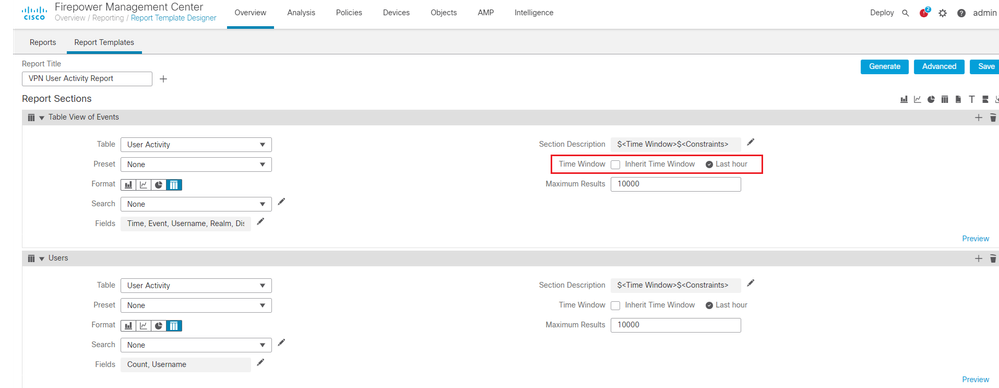 Select Time Frame
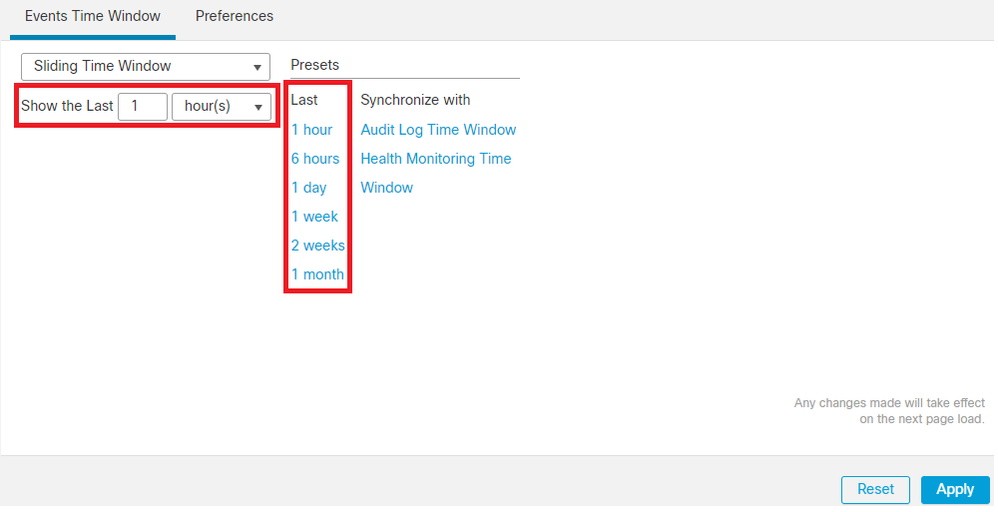 Add TimeFrame
Step 10. To record the specific number of results, provide any value between the range of 1 - 400000 in Maximum Results field.
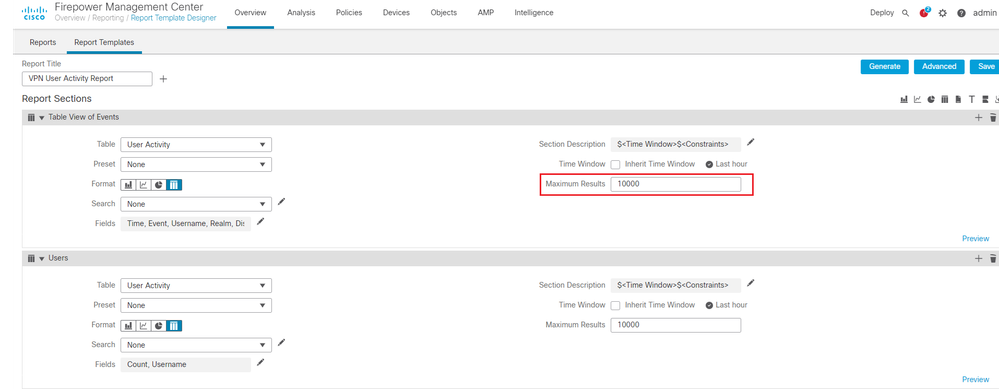 Maximum Results to display
Step 11. Click on the Save button at the top of the report sections for the template to be ready for use.
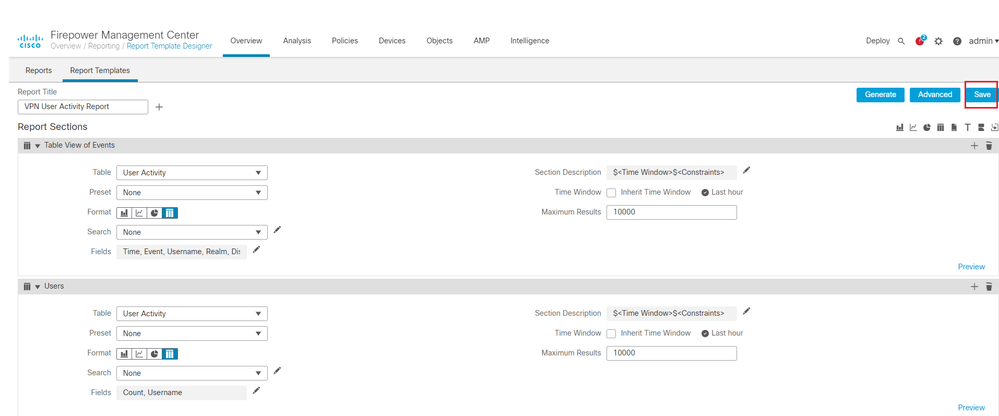 Save Report
Generate Report
Once you create and customize your report template, you are ready to generate the report. There are different output formats like HTML, PDF or CSV to view the user data.

Note: For PDF reports, file names using Unicode (UTF-8) characters are not supported.
Procedure
Step 1. Select Overview > Reporting and click on Report Templates .
Step 2. Click on the Generate Report icon next to the template that you have configured as shown in the image.
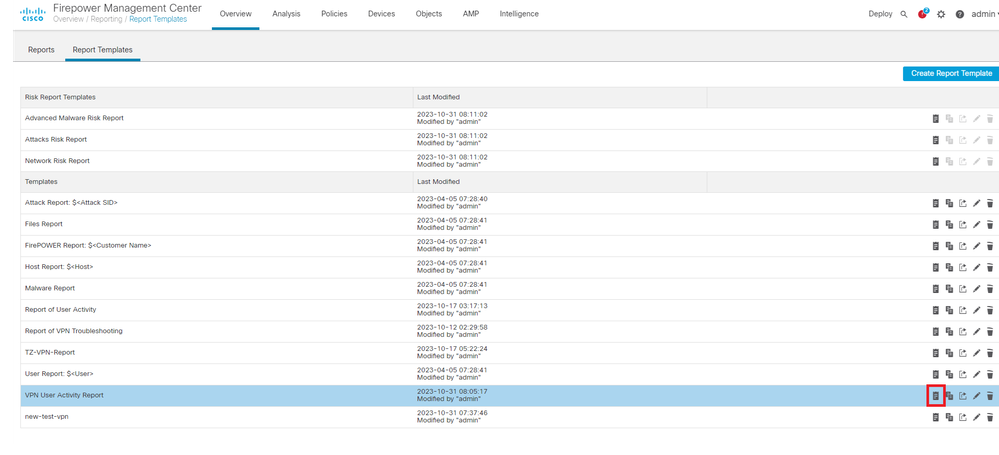 Generate Reports View
Step 3. Enter a new File Name. This name is used to save the report. If you do not enter a new name, the system uses the default name specified in the report template.
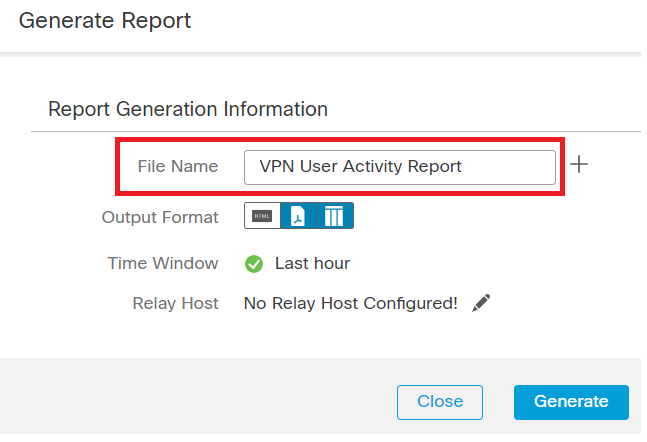 Add Filename
Step 4. Choose the output format for the report by clicking: HTML, PDF, or CSV.
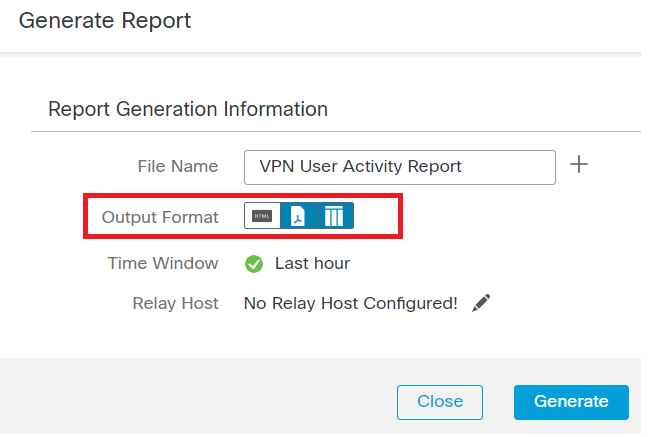 Select File Output Format
Step 5. (Optional) Change the global time frame for the report from "Time Window". This gets ignored if "Inherit Time Window" is not used in the report template.

Note: Setting the global time window affects the content of individual report sections only if they are configured to inherit the global setting.
Step 6. (Optional) If the generated report has to be delivered via email, configure a "Relay Host" on the FMC.
Step 7. Click on Generate and files will be available for download under "Reports". For CSV format, a zip folder will be created with each section of the template as a separate file.
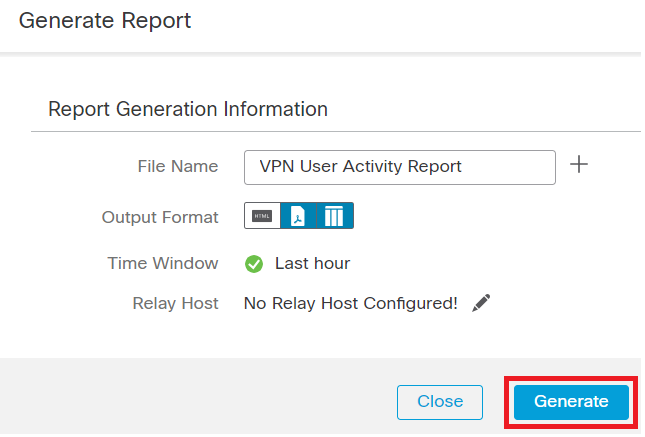 Generate Report
 Report Generated
Result
This section provides the information of the report generated for the VPN user in a PDF format.
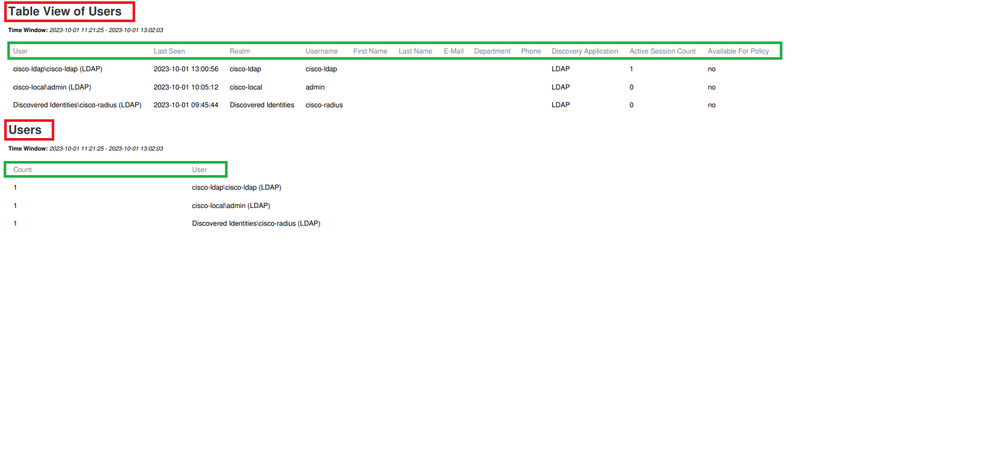 View Generated Reports


 Feedback