Introduction
This document describes the use of Unified Event Viewer on a graphical user interface (GUI) on Firewall Management Center (FMC).
Prerequisites
Requirements
Cisco recommends that you have knowledge of these topics:
- Access to FMC with Admin or Security Analyst privileges
- FMC with version equal or higher than v7.0
Components Used
The information in this document is based on these software and hardware versions:
- Secure Firewall Management Center for VMware v7.2.5
The information in this document was created from the devices in a specific lab environment. All of the devices used in this document started with a cleared (default) configuration. If your network is live, ensure that you understand the potential impact of any command.
Explore
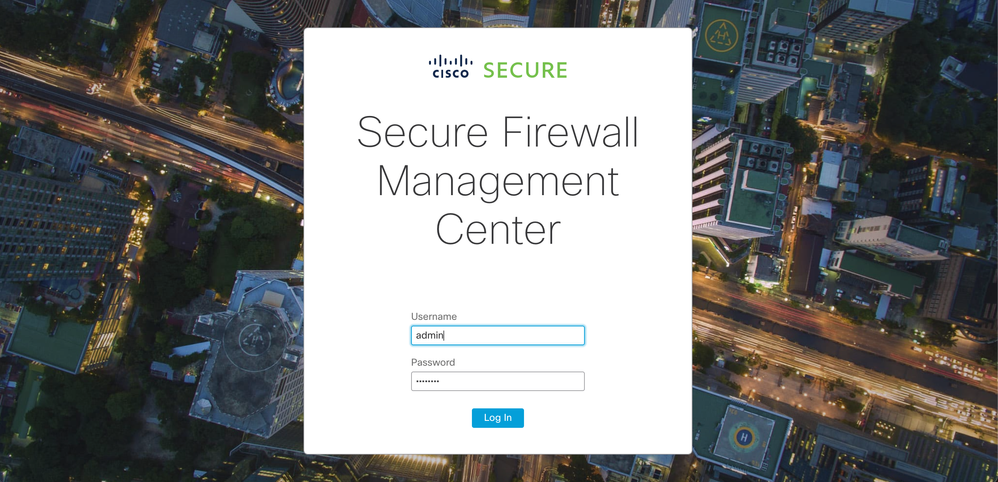
Step 1. Log into the FMC GUI.
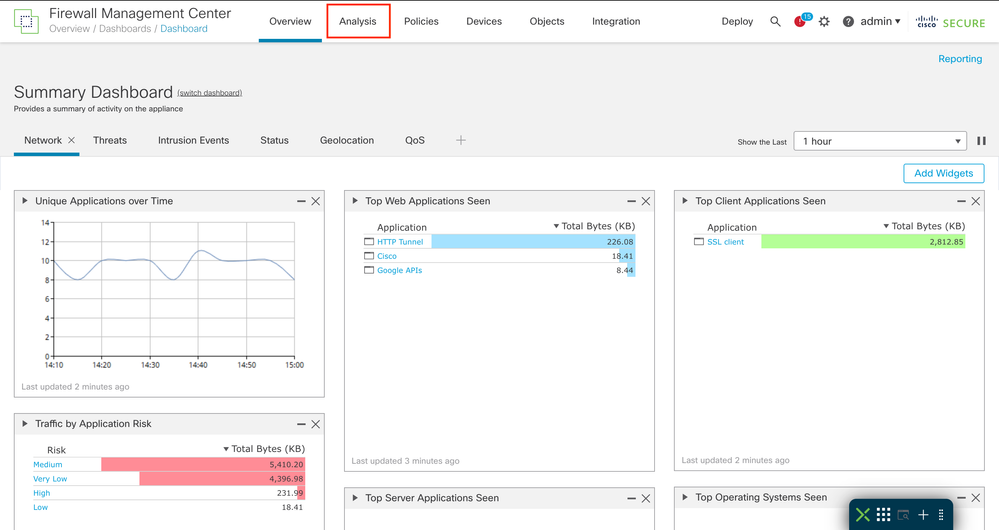
Step 2. Navigate to the Analysis tab.
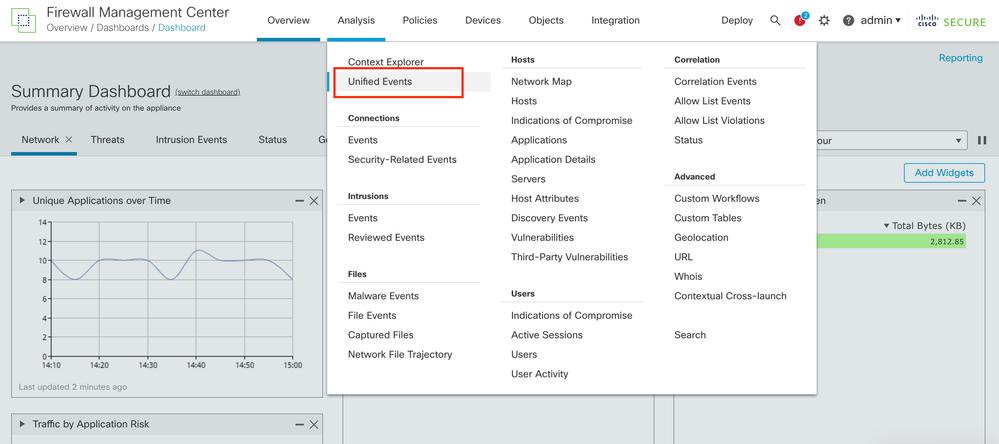
Step 3. From the drop-down menu, click on Unified Events.
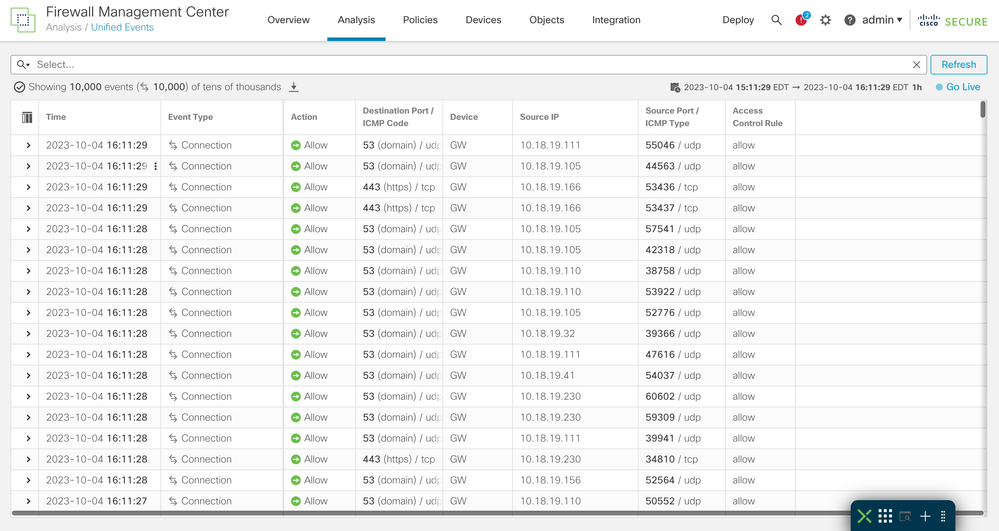
Example of the Unified Event Page
Review Events
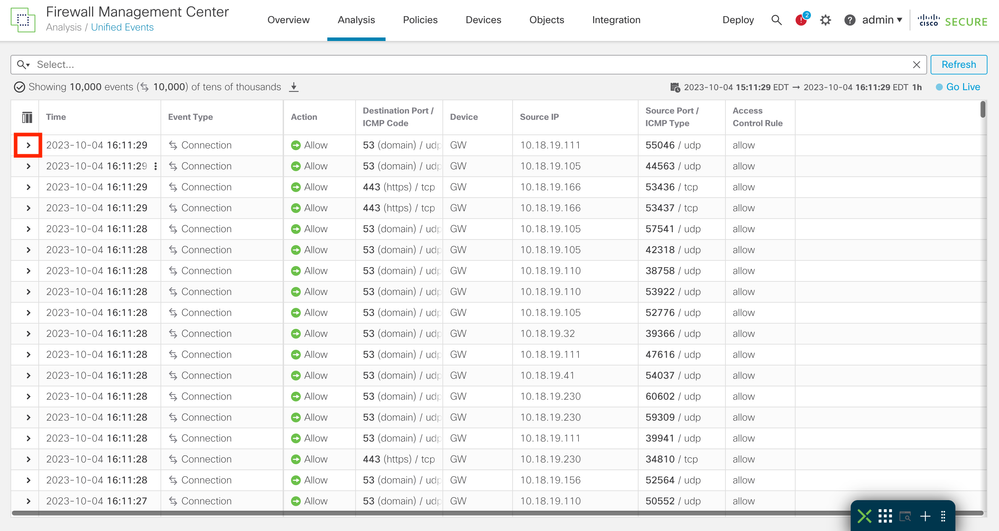
Step 1. Click on the > icon.
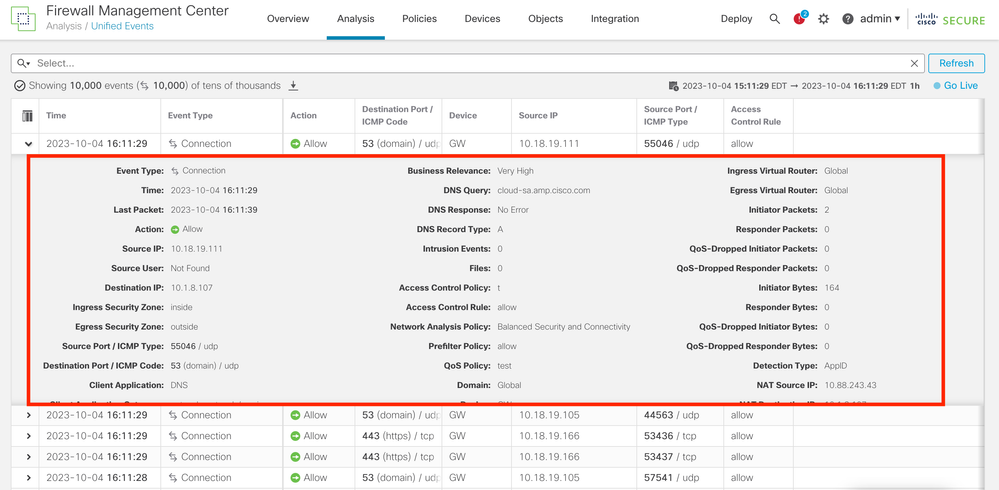
Step 2. The detailed information of the event is shown.
Personalize Columns
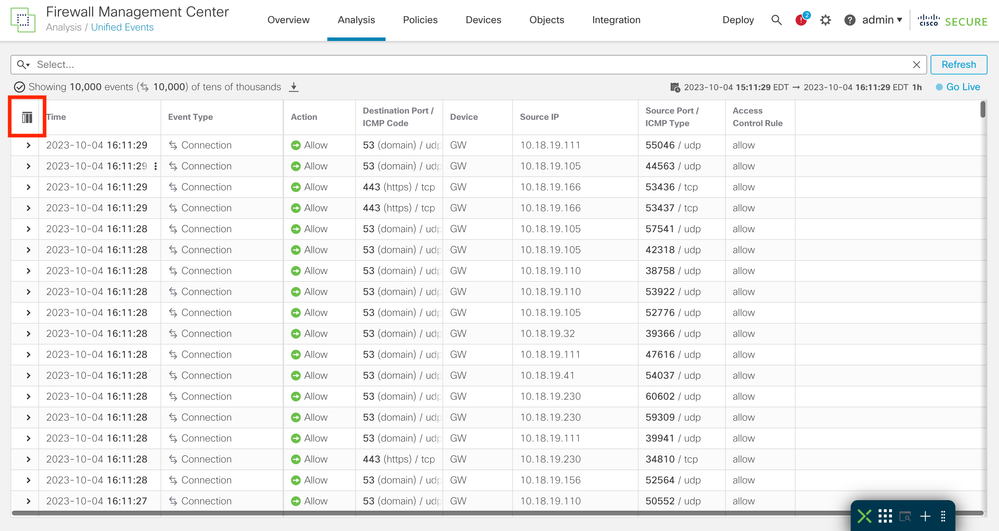
Step 1. Click on the icon  .
.
Step 2. Select the event fields that you want on the table.
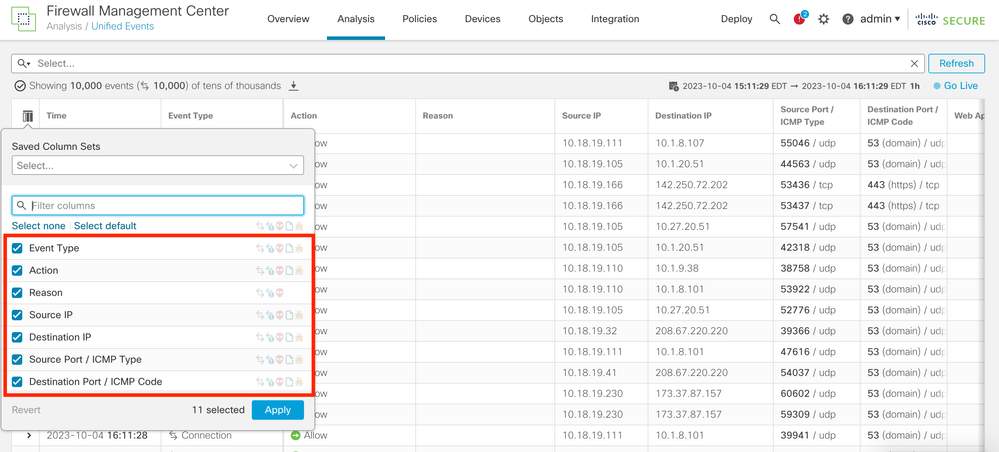
Step 3. (Optional) Search for the field to make navigation easier.
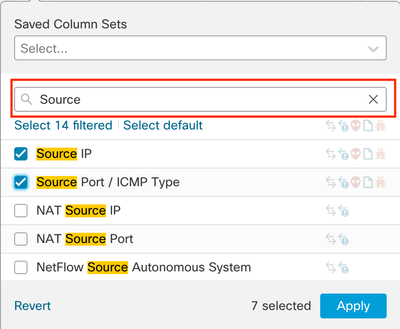
Step 4. Click on an event field to disable or enable.
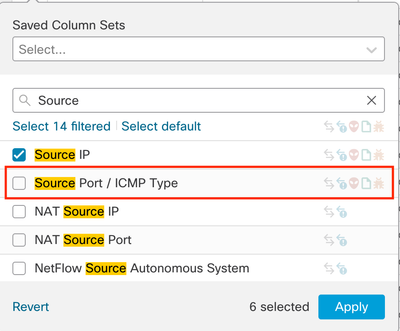
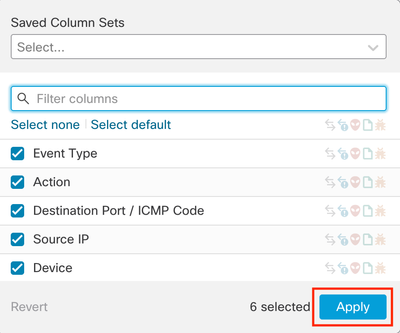
Step 5. Click on Apply.
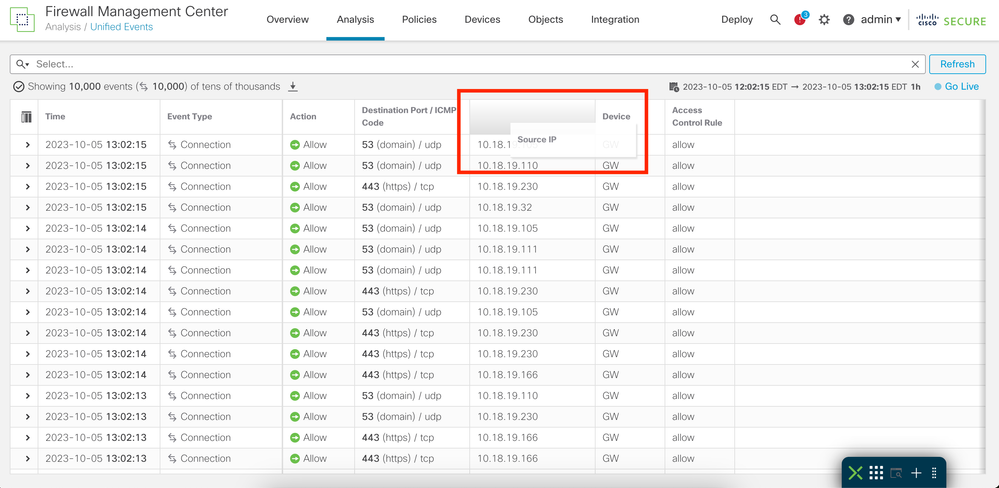
Step 6. (Optional) You can reposition the columns by dragging each one to a different location.
Save Column Set
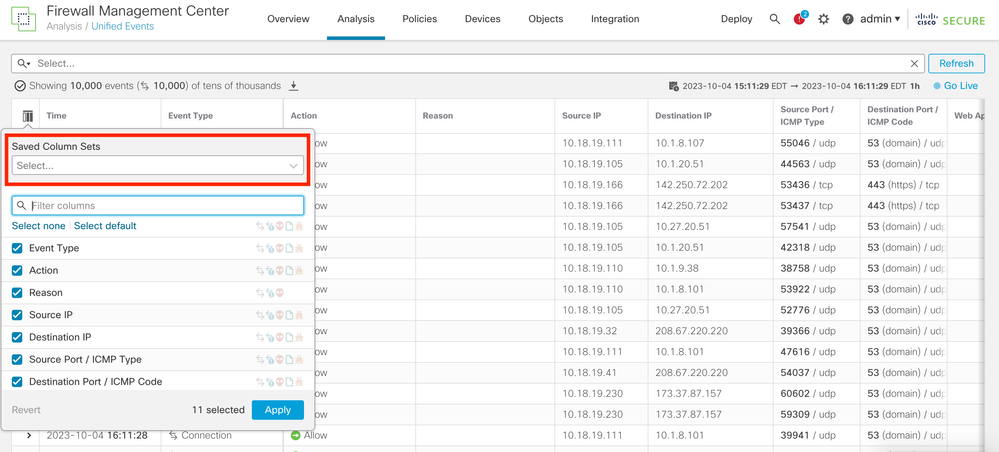
Step 1. Click on Saved Column Sets.
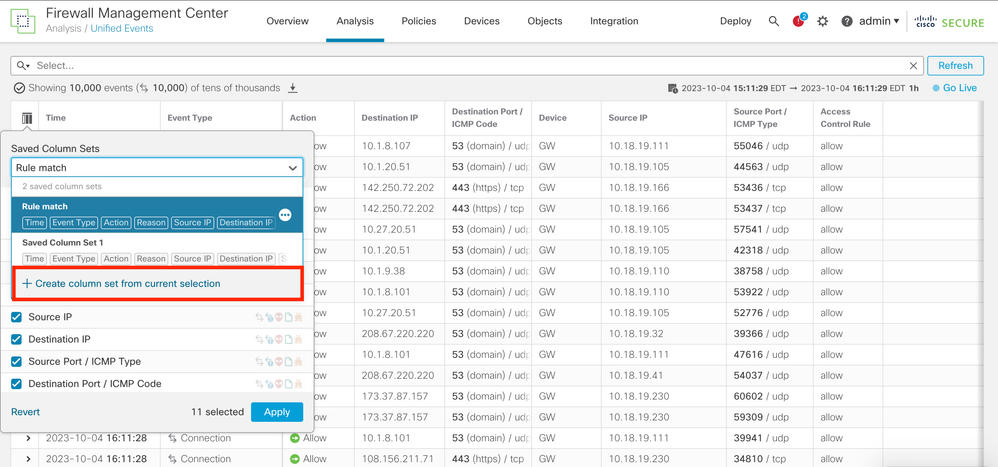
Step 2. Click on Create column set from current selection.
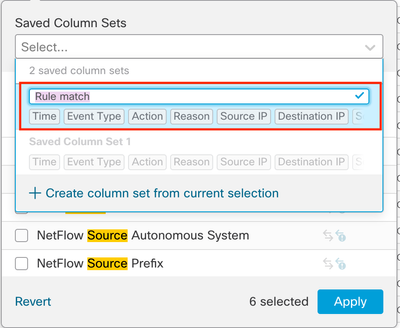
Step 3. (Optional) Change the name of column set.
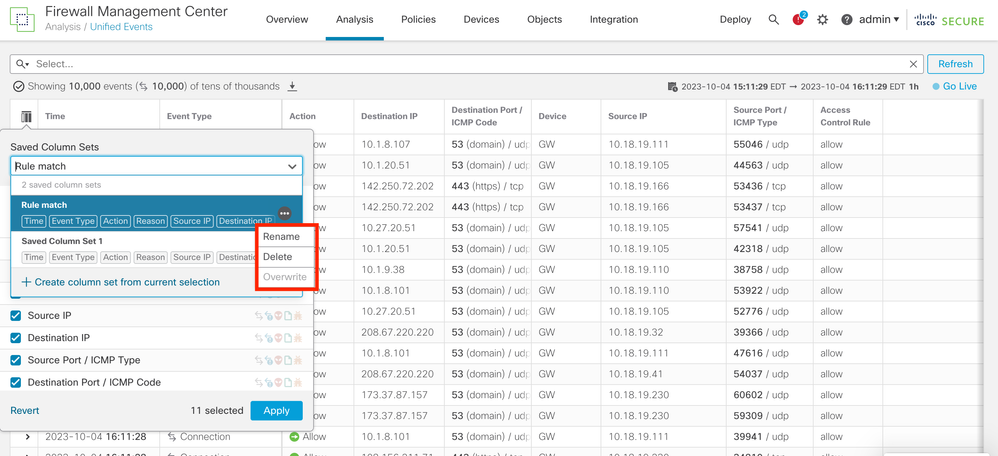
Step 4. You can edit an existing set by clicking on the ellipsis (...).
Event Search
Step 1. To begin searching for specific events click on Select.
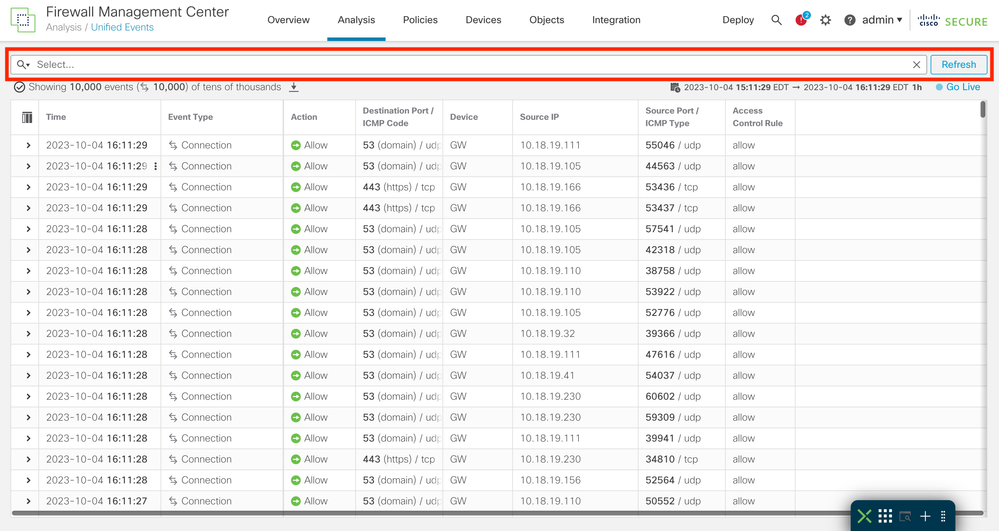
Step 2. Select the field where you want to apply the filter.
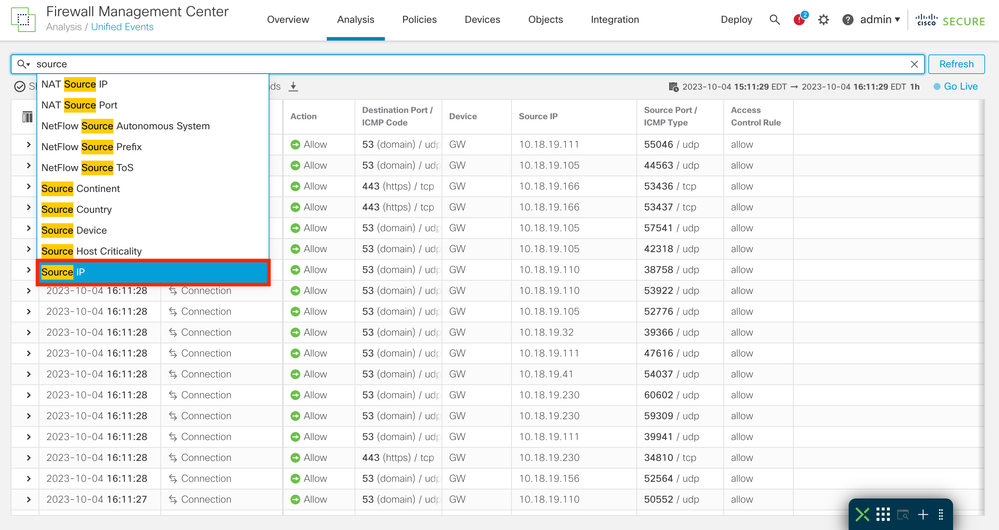
Step 3. Write the values to use as filter.

Step 4. Click on Apply, to configure the filter.

Step 5. (Optional) You can add multiple values to each filter.
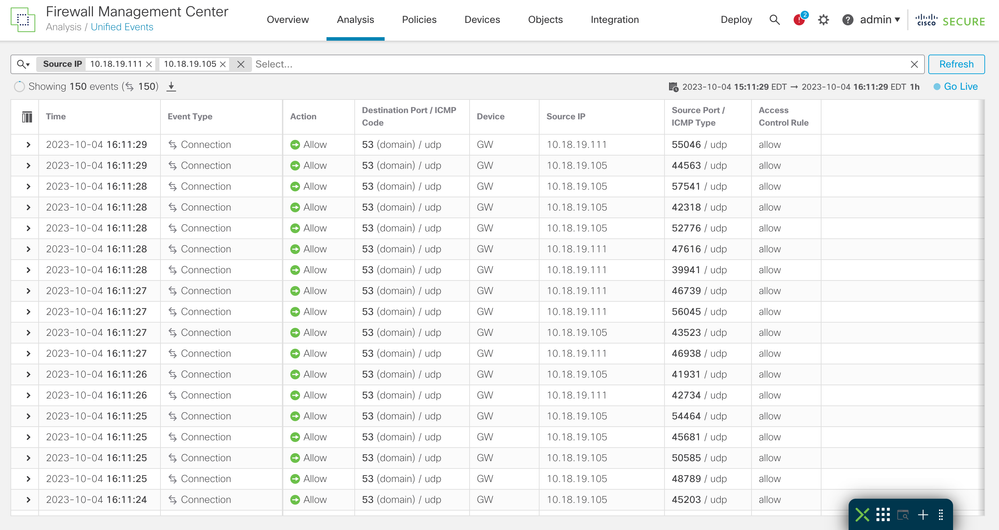
Step 6. (Optional) Add as many filters as you need.
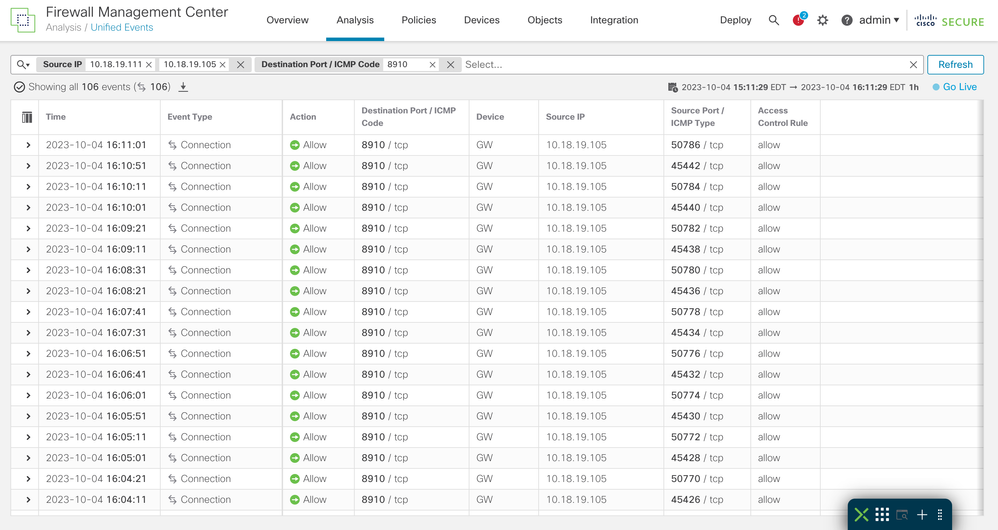

Tip: You can use operators ( >,<, !, and so on) while writing the values.
Save Search
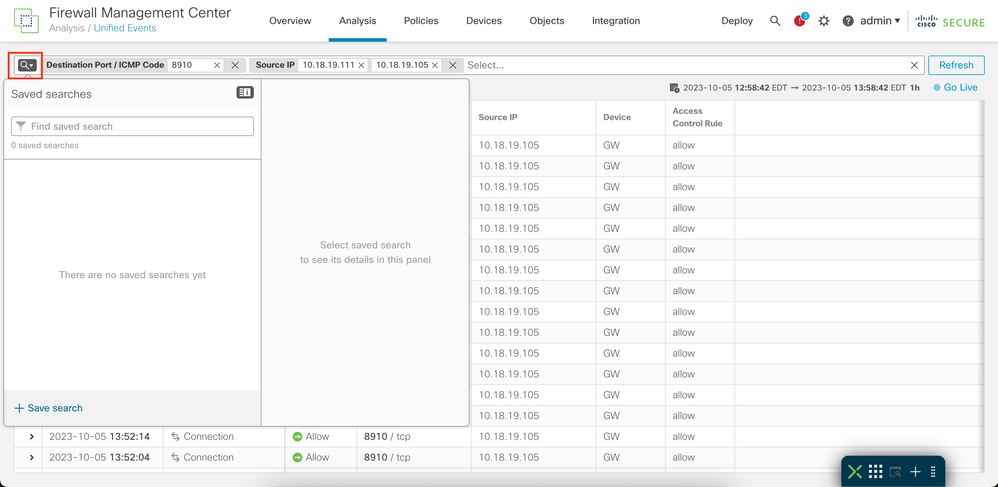
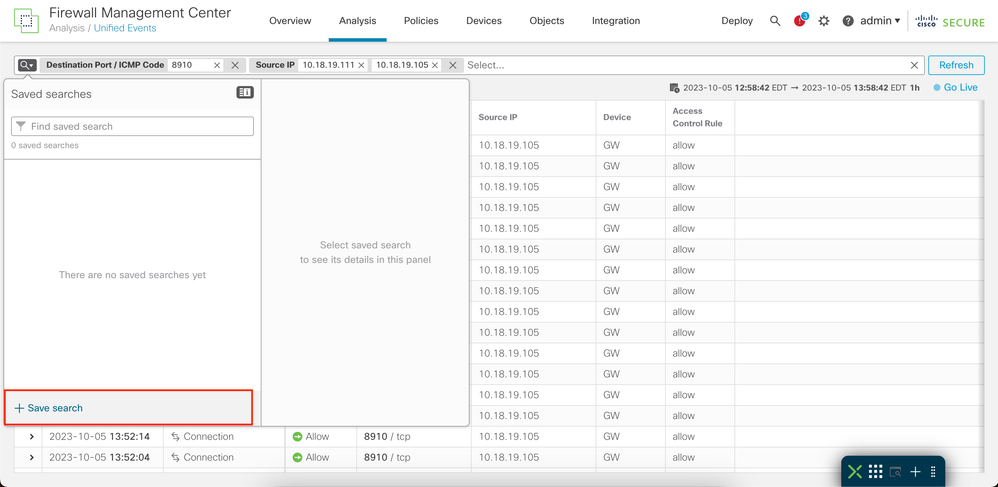
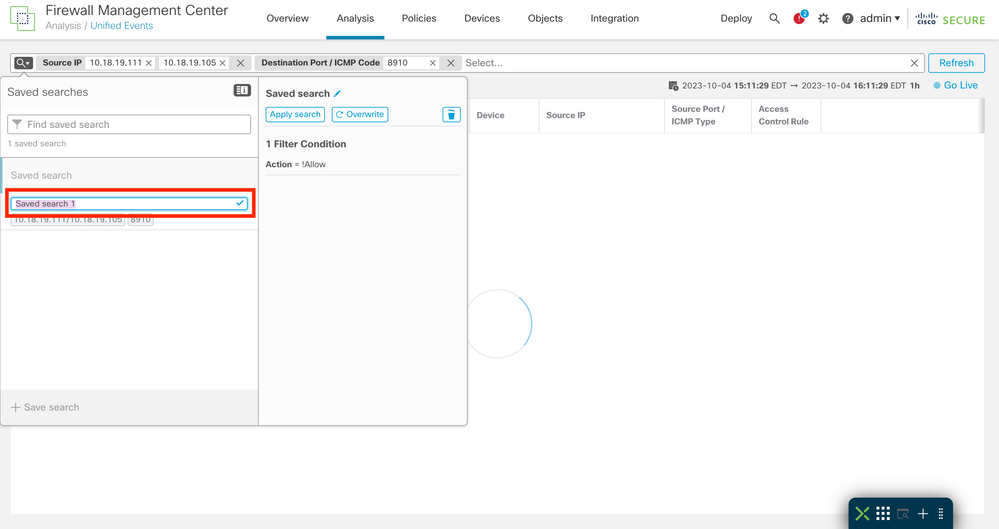
It is possible to save searches so you can reuse the filters you have created.
Step 1. Click on the magnifying glass icon.
Step 2. Click on Save Search.
Step 3. (Optional) Change the name of the search.
Time Window
It is easier to narrow relevant events, based on a specific time, by modifying the time window.
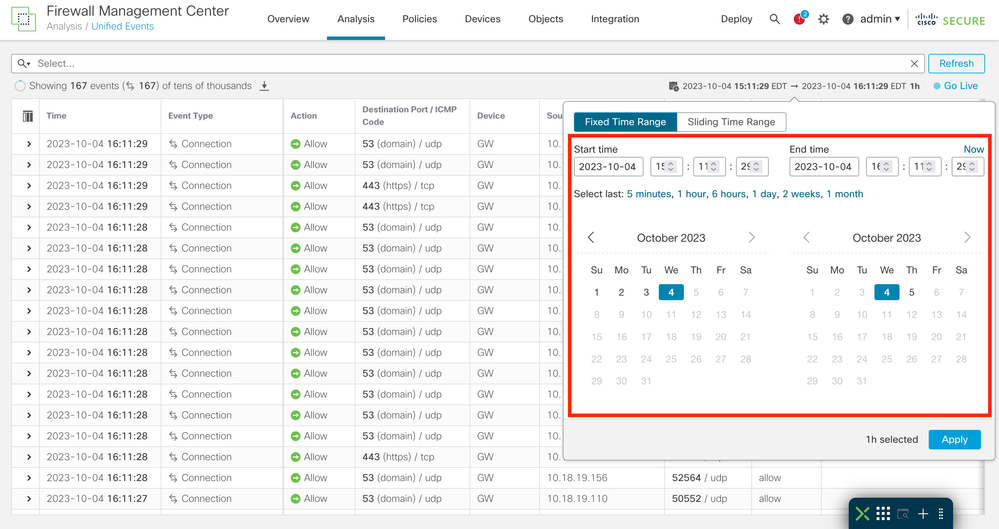
Step 1. To modify the window frame of events, click on date range.
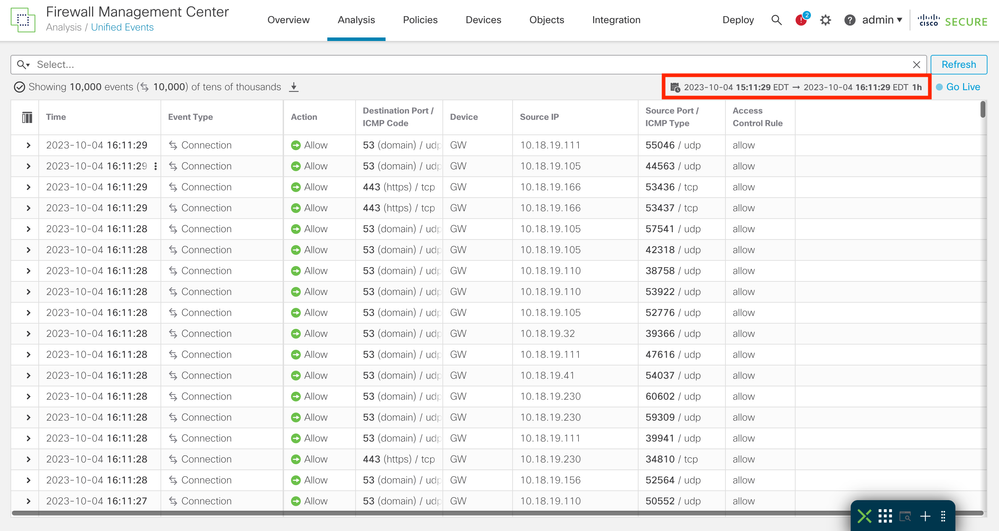
Step 2. Select the range of time in the pop-up window.
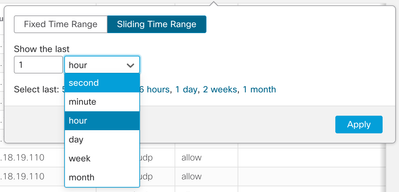
Step 3. (Optional) Use Sliding Time Range to show events from a specific time to your current time.
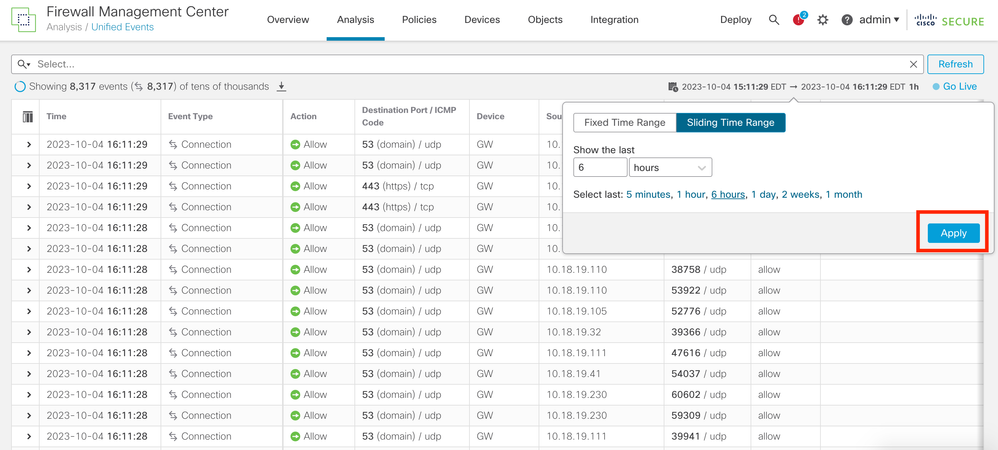
Step 4. Click on Apply to filter the events on the time range configured.
Go Live
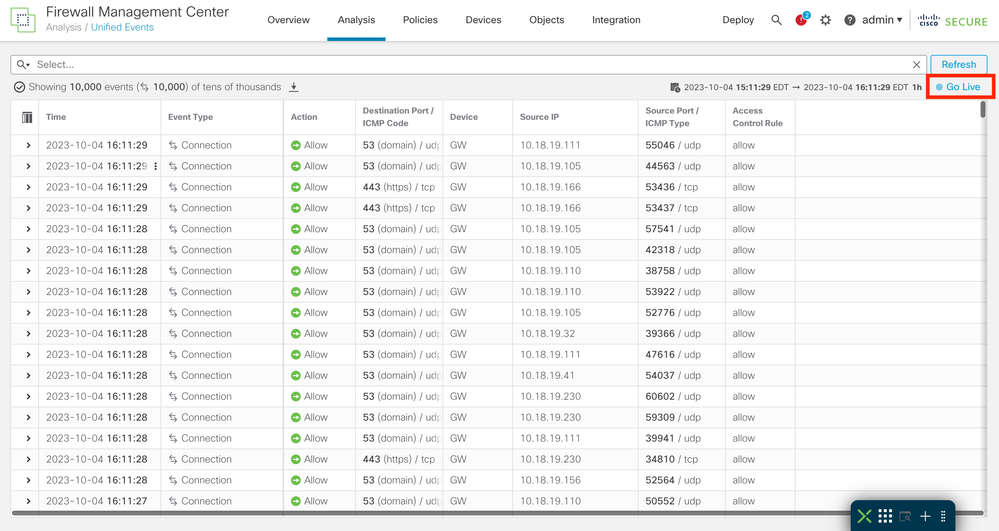
You can enable the Go Live feature to show events in real time. The events appear as they are generated.
To enable, click on Go Live.
Once it is enabled, it displays the word Live.


Caution: When Live is enabled it is not possible to modify the time window. In order to modify the time window,first disable Live option by clicking on it again.
Download Events as Comma-separated Values (CSV)
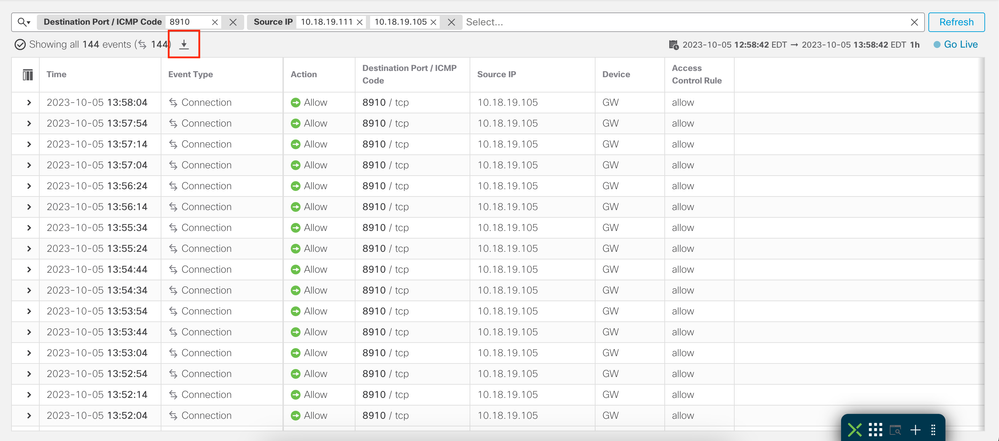
Step 1. Click on the download icon to generate a file containing the events currently showing on the page.
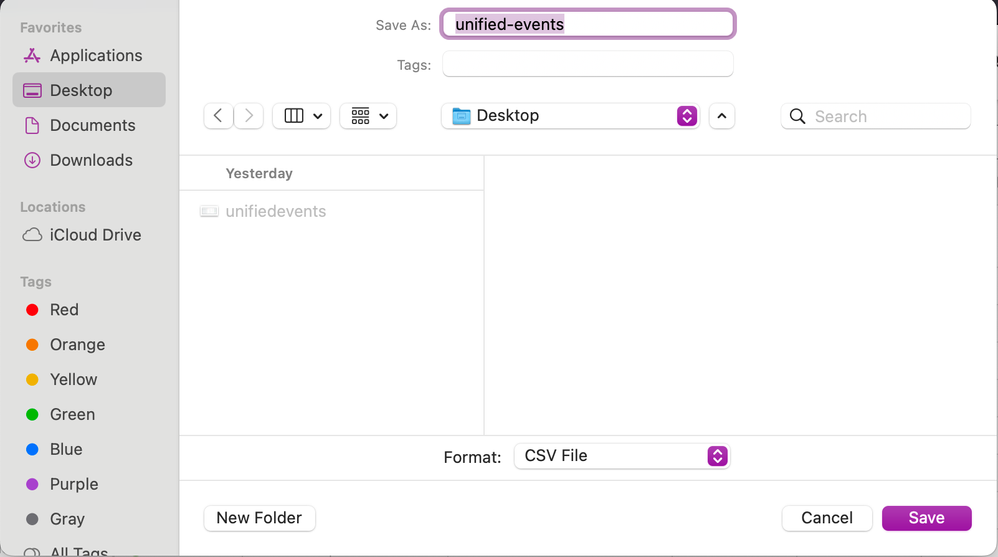
Step 2. Select the download folder, name and click on Save.
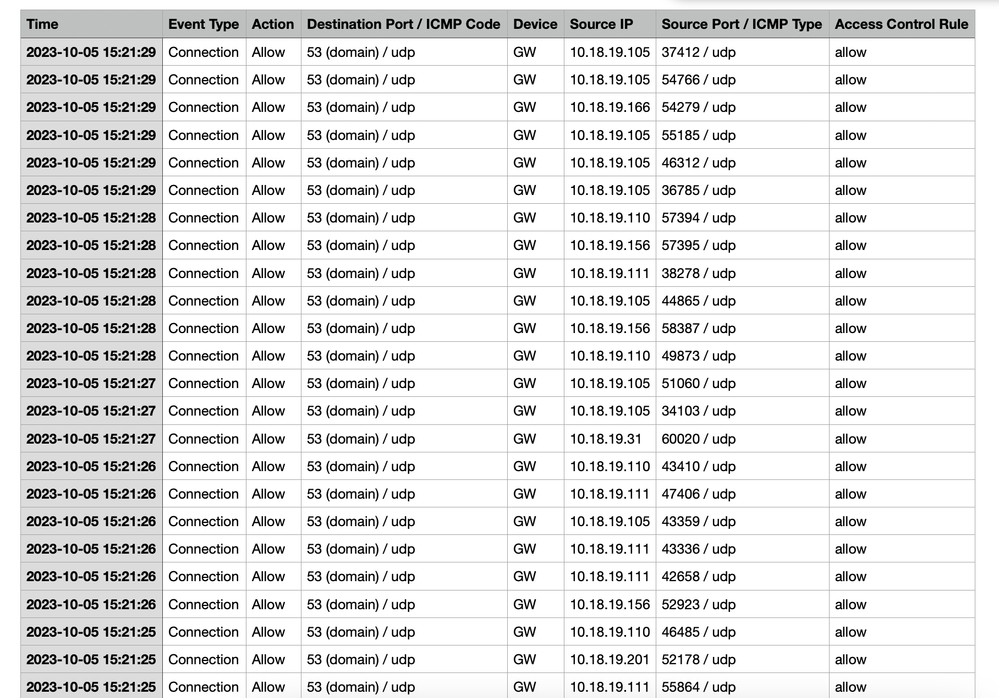
Step 3. Verify the CSV file.
Related Information


 Feedback