Introduction
This document describes Automated Action functionality in Secure Endpoint is tied to the concept of Compromises. Understand the lifecycle and management of Compromises are vital to comprehend the functionality of Automated Actions. This article answers questions about the terminology and functionality of these concepts.
FAQ
What is a compromised machine?
A compromised machine is an endpoint that has an active compromise associated with it. A compromised machine can, by design, only have one compromise active at one time.
What is a compromise?
A compromise is a collection of one or more detections on a machine. Most detection events (Threat Detected, Indications of Compromise, etc) can generate or become associated with a compromise. However, there are pairs of events that may not trigger a new compromise. For example, when a Threat Detected event occurs, but shortly after it has an associated Threat Quarantined event, this does not trigger a new compromise. Logically, this is because Secure Endpoint has handled the potential compromise (we quarantined the threat).
What happens when new detections occur on a compromised machine?
The detection event(s) are added to the existing compromise. No new compromise is created.
Where can I see and manage compromises?
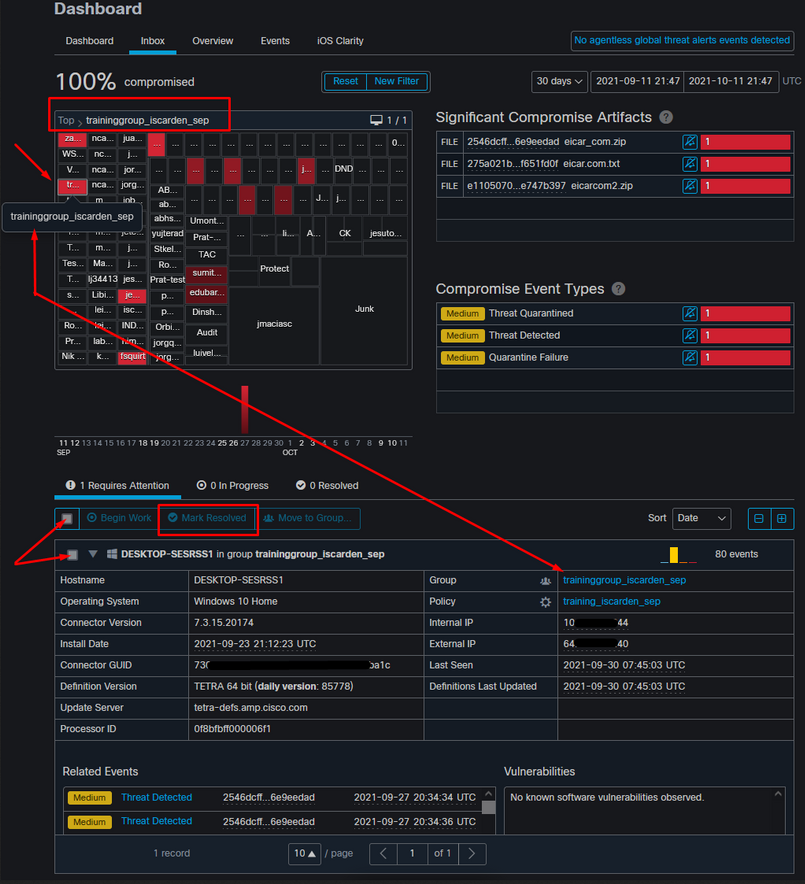
Compromises are managed in the Inbox tab of the Secure Endpoint console (which is https://console.amp.cisco.com/compromises for the North America cloud). A compromised machine is listed under Require Attention section and can be cleared of its compromise by pressing Mark Resolved. Also, compromises are automatically cleared after one month.
How does an automated action* get triggered?
Automated actions get triggered upon a compromise that is to say when an uncompromised machine becomes a compromised machine. If an already-compromised machine encounters a new detection, this detection is added to the compromise, but since this is not a new compromise, it does not trigger an automated action.
How can I re-trigger an automated action?
It is necessary to "clear" the compromise prior to attempt to re-trigger an automated action. Keep in mind that a Threat Detected + Threat Quarantined event is not sufficient to generate a new compromise event (and thus not sufficient to trigger a new automated action).
*Exception: The "Submit File to ThreatGrid" automated action is unaffiliated with compromises, and runs per-detection
#1: As we stated in FAQ section. Forensic snapshots are taken only in case of “compromise”. In other words, if we try to access and download a malicious file from a TEST site and the file is flagged upon download and quarantined that is not considered a compromise and does not trigger the action.
Note: DFC Detection, Quarantine Failure, and pretty much anything that by the logic fall into the category of compromise event should create Forensic Snapshot.
#2: You can only generate Forensic Snapshot once on a unique compromised event it does not generate a snapshot unless you resolve the compromised machine in your inbox. If you don’t resolve the compromised event, you do not generate any other snapshot.
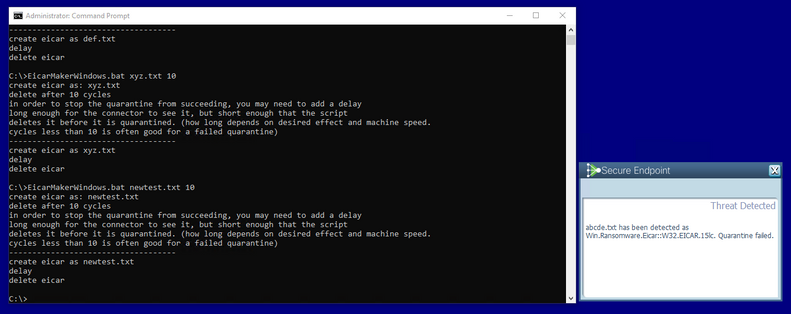
Example: In this lab, a script generates malicious activity, and because the file is deleted as soon as it is created and Secure Endpoint was not able to quarantine the file it falls in to compromise category.
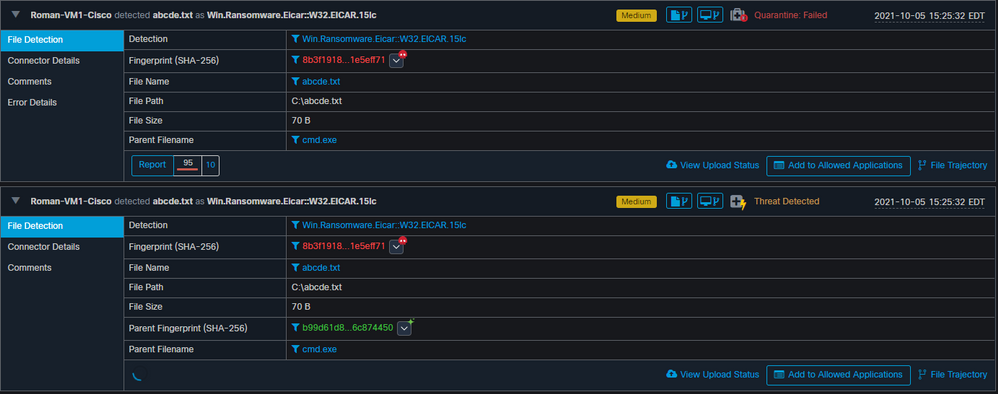
Now in this test, you can look under automated actions and 3 things that happened based on the settings.
- Snapshot was created
- Submission was sent to Threat Grid (TG)
- The endpoint was moved to a separate group that was created and called ISOLATION
You can see all of that in this output, as shown in the image.

Now since this endpoint is compromised, the next test to prove the theory with a similar malicious file but with a different name, as shown in the image.
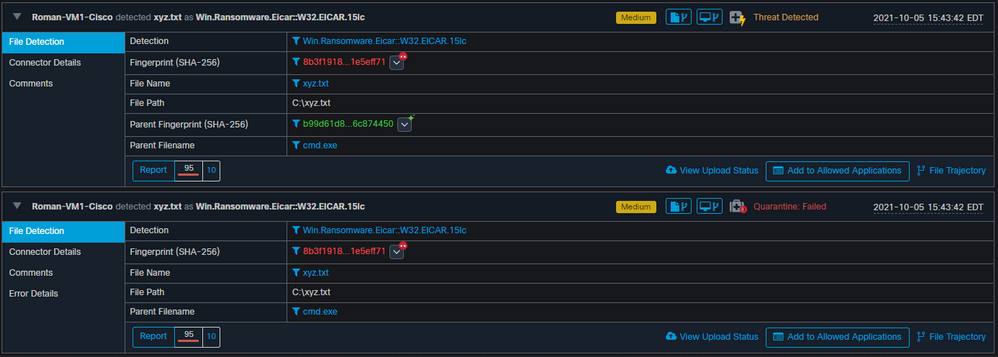
However, since this compromise was not resolved, you can only be able to create a TG submission. No other events were recorded, also turn off the Isolation prior to this 2nd test.

Note: Please notice the time when the threat was detected and automated action triggers.
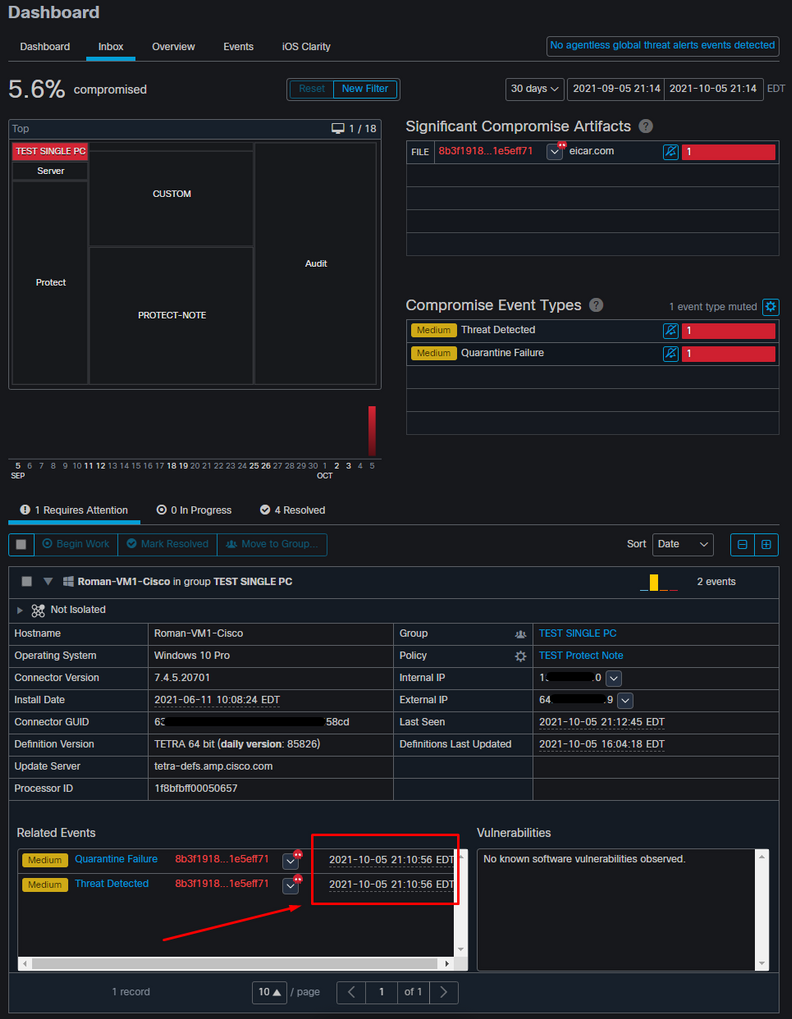
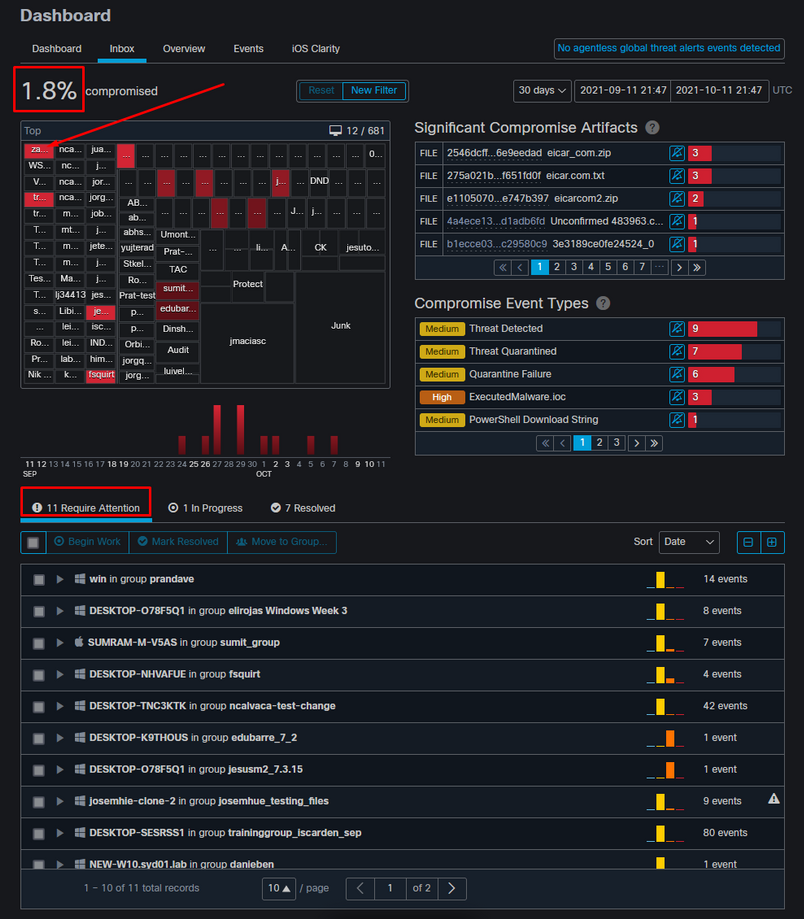
The event is not able to retrigger unless the compromised endpoint is resolved. In this case, the dashboard looks like this. Please notice the percentage and the button Mark Resolved along with the compromised events. No matter how many events are triggered you are only able to create one snapshot and the big percentage number never changed. That number represents compromise inside of your organization and it is based on the total amount of endpoints in your organization. It changes only with another compromised machine. In this example, the number is high due to only 16 devices in the lab. Also, note that compromise events are auto cleared once they reach 31 days of age.
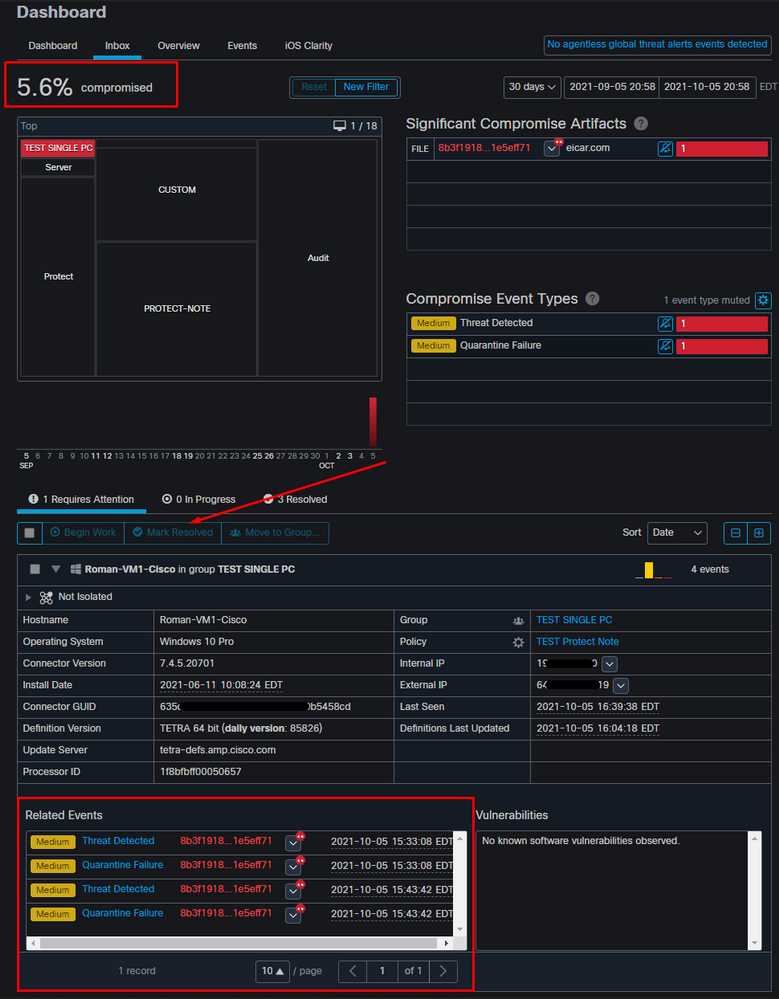
The next step is to create another event and generate a forensic snapshot. The first step is to resolve this compromise, click on the Mark Resolved button. You can do that per endpoint or you can select all in your organization.
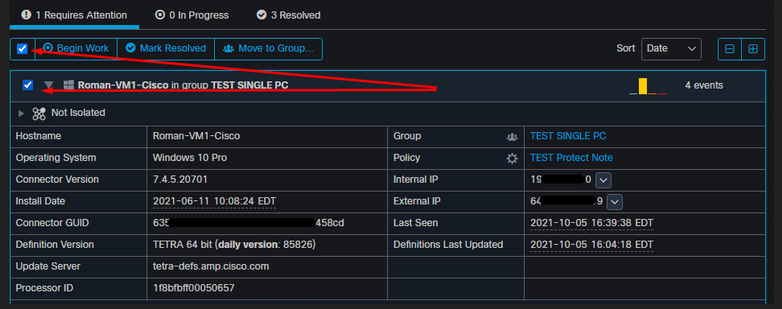
Note: If you select all the compromises are reset to 0%.
Once the Mark Resolved button is selected and since only one endpoint was compromised on the Secure Endpoint dashboard looks like this. And at this point, a new compromised event on the test machine was triggered.
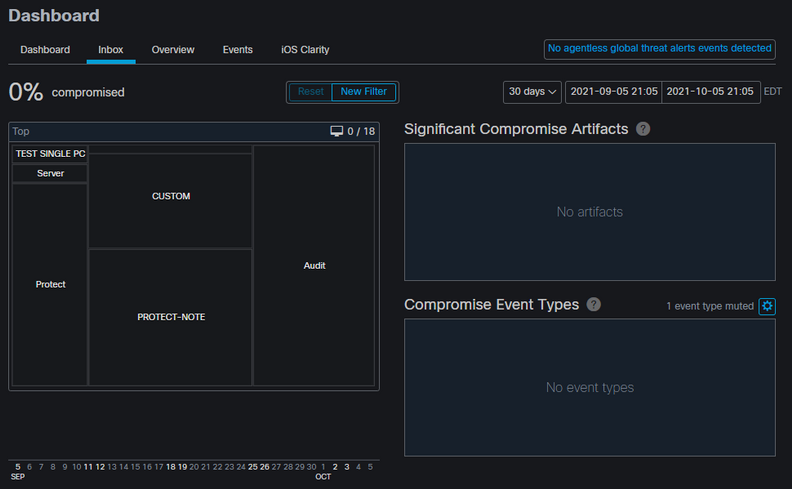
The next example triggers an event with a custom script that creates and deletes a malicious file.
Secure Endpoint console once again compromised, as shown in the image
Here are new events under Automated Actions, as shown in the image.

When the hostname under Automated Actions is selected, it redirects to Device Trajectory where you can observe the snapshot being created once you expand the computer tab, as shown in the image.
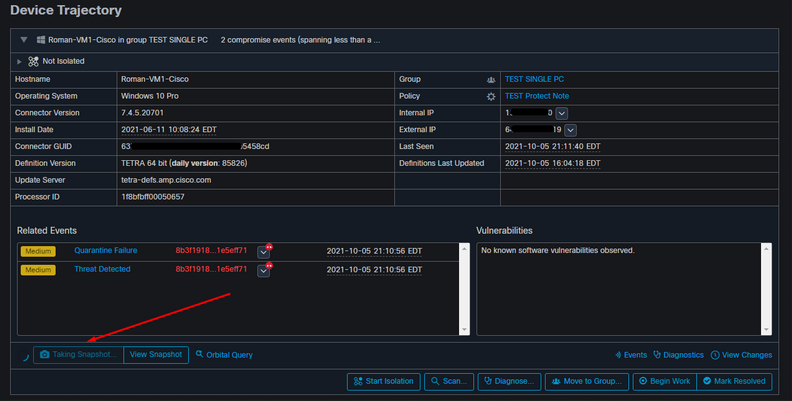
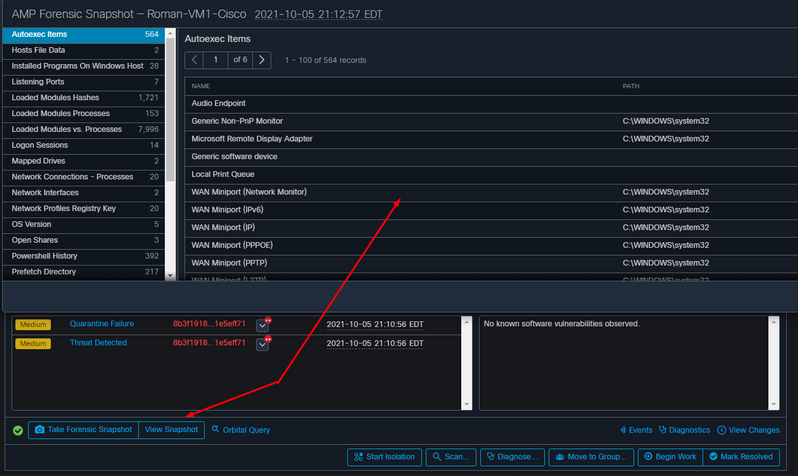
And minute later snapshot is created, as shown in the image.
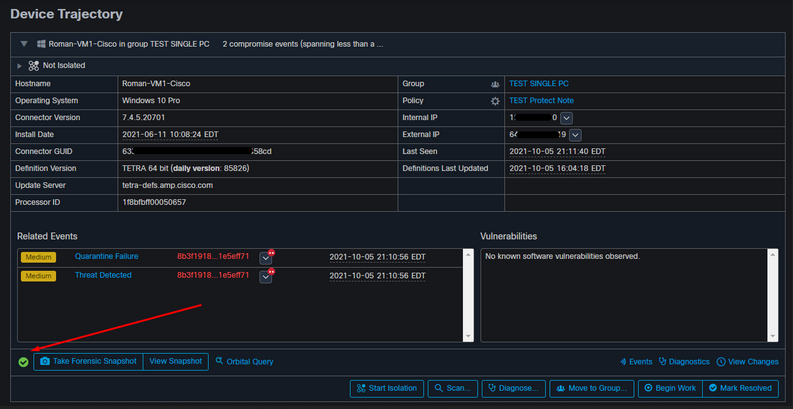
And now you can view the data displayed.
Tip
In very large environments with thousands of endpoints and hundreds of compromises, you can run into situations where the navigation to the individual endpoint might be a challenge. Currently, the only available solution is to use the heat map and then drill down to a specific group where your compromise endpoint is as in this example below.


 Feedback