Introduction
This document describes how to export the Host Access Table (HAT) from your ESA, manipulate the entries, and then import it back to your ESA.
Prerequisites
Cisco Email Security Appliance (ESA) product knowledge, along with the basics of the Sender Group that are listed within the HAT and a user role that allows the action to export and import a HAT configuration.
Requirements
- A sender group in which the intention is to add multiple entries.
- A list of senders or IP addresses that be added to a specific sender group.
- On-prem and vESAs need to have FTP enabled.
- A local FTP client installed.
Why to Export/Import a HAT Configuration
Sometimes you have a big list of senders or IPs for a specific purpose. It can be to use them as relay, senders, or IPs that you trust; or a list of malicious IPs from a vendor that you want to add in a blocklist. And to add them all manually could seem to be a complicated and time intensive task.
On-prem, Virtual ESA and CES Appliances Considerations
It is important to mention and emphasize the actions listed apply to all three types of devices. However, in the case of CES devices, once the HAT has been exported, you are advised to open a case with TAC so an engineer can download the exported HAT file and share it with you, so you can add the desired entries and then import it to your cloud device.
Current Sender Group Entries
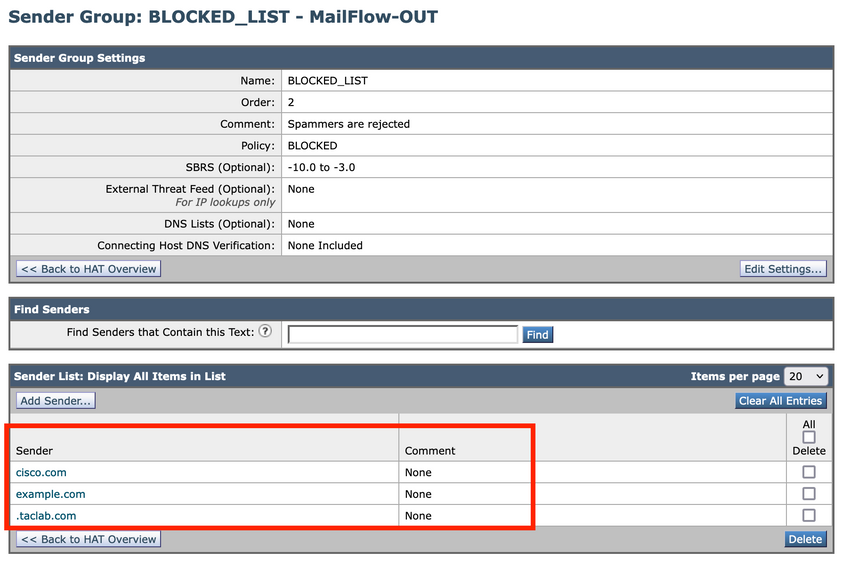
In this case, the modify Sender Group is the BLOCKED_LIST, to which you can add multiple entries to this sender group. These are the current entries of this sender group.
Configuration
Export Host Access Table (HAT)
- From the ESA GUI, navigate to
Mail Policies > HAT Overview.
- Click
Export HAT at the bottom of the HAT box.
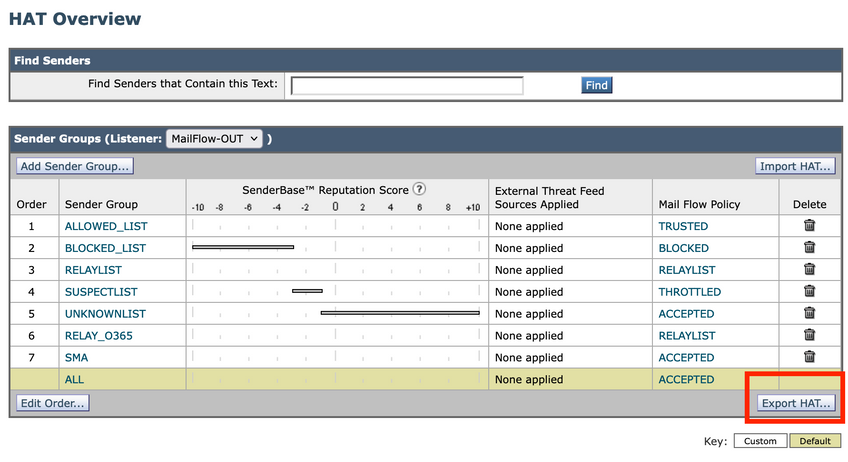
- A new window opens and you type a name to identify the exported file. In this example, put MyNewExportedHAT, for the exported file. After you type the name, click
Submit.
- The HAT overview redisplays, and a message appears at the top of the window with this text
Success - HAT was exported.
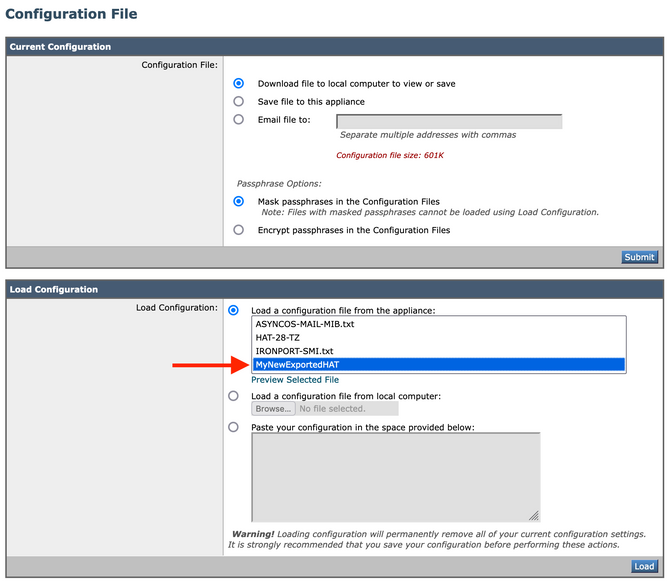
- To check your exported file, go to
System Administration > Configuration File and in the Load Configuration section, you see the file name from step 1.
Preview the Exported File and Edit the Entries
- To modify the file, click
Preview Selected File. After that, a new window is opened. All the information displayed in that format is what is contained in your HAT.
- To modify a specific sender group (
BLOCKED_LIST), you can select all the text from the Preview of Configuration File window as it is and export it to a text editor to manipulate it.
- Confirm the
BLOCKED_LIST section appears like this:
BLOCKED_LIST: cisco.com example.com .taclab.com sbrs[-10.0:-3.0] $BLOCKED (Spammers are rejected)
- To add entries, you can add them after the last entry. In this example, it is.
example.com, as shown here:
BLOCKED_LIST:
 cisco.com
 example.com
 .taclab.com
1.2.3.4 (Add IP via export method)
5.6.7.8 (Add IP via export method)
9.10.11.12 (Add IP via export method)
13.14.15.16 (Add IP via export method)
17.18.19.20 (Add IP via export method)
21.22.23.24 (Add IP via export method)
25.26.27.28 (Add IP via export method)
29.30.31.32 (Add IP via export method)
33.34.35.36 (Add IP via export method)
37.38.39.40 (Add IP via export method)
41.42.43.44 (Add IP via export method)
45.46.47.48 (Add IP via export method)
49.50.51.52 (Add IP via export method)
53.54.55.0/24 (Add subnet via export method)
anotherexample.com (Add host via export method)
ciscodummy.com (Add host via export method)
taclab2.com(Add host via export method)
sbrs[-10.0:-3.0]
$BLOCKED (Spammers are rejected)
- You have the option to add a comment between parenthesis.

Note: To copy the exported HAT file to your local machine, you can also do it with an FTP client. If you check it from the Preview file part, it can be it easier for you to manipulate it.
Upload Modified File to Your ESA
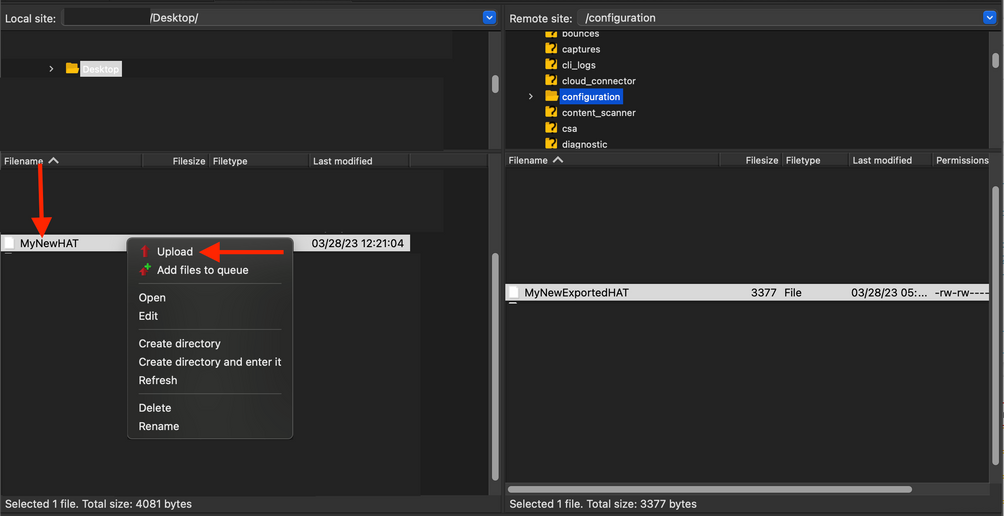
In this example, use an FTP client to upload the new HAT file to your ESA. This example uses Filezilla as the FTP client to connect to the ESA.
- Once connected to the ESA by FTP, search for the location
/configuration within the appliance.
- When in that folder, several files are displayed, which includes the HAT file you exported earlier.
- With the new modified file on your local computer, copy it to your device. In this example, the name of the new file is MyNewHAT and it was upload to the device. Select the file and click
Upload.
- Once the new file is upload to the device, you can proceed to import it to the HAT overview section in your ESA appliance.
Import a New Host Access Table (HAT)
- From the ESA GUI, navigate to
Mail Policies > HAT Overview.
- From there, click
Import HAT and select the name that contains the new entries and click Submit.
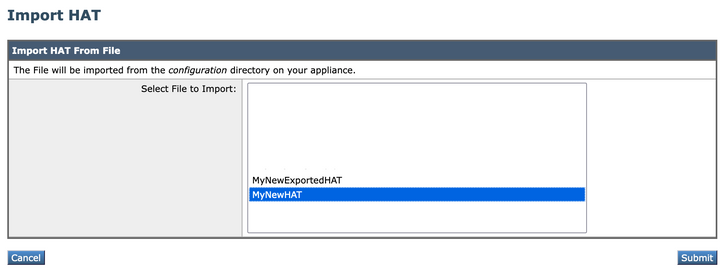
- A prompt window shows
Importing will replace all existing HAT entries. Click Import to confirm the upload.
- At the top, you see a message that indicates the number of entries imported.
- To view the new changes, access the sender group, which in this example is:
BLOCKED_LIST.
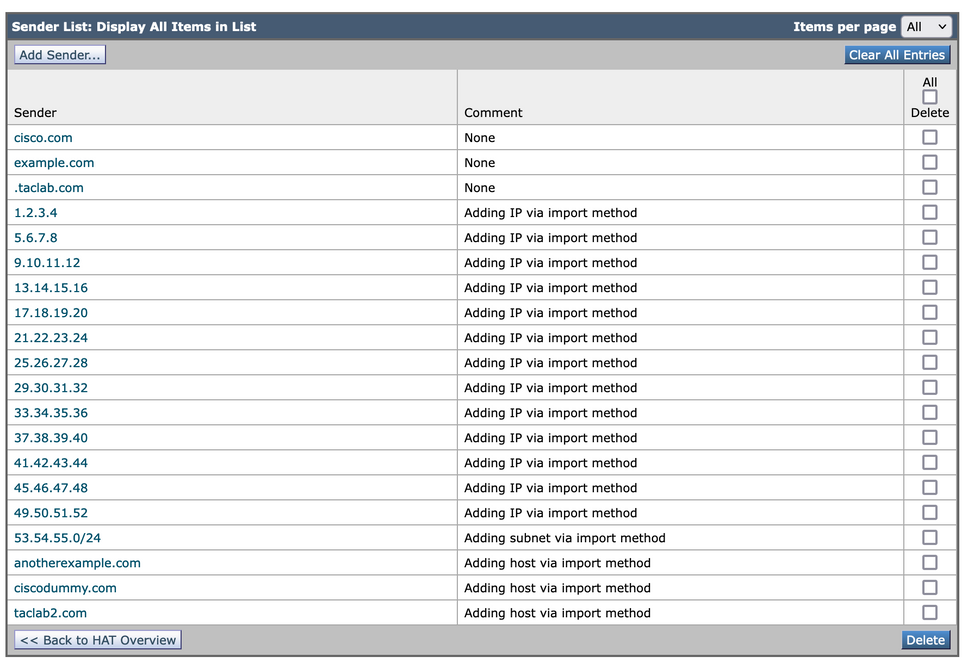
- As you can see, new entries have been added.


 Feedback