Introduction
This document describes the integration of Data Loss Prevention for Office 365 with Secure Access.
Prerequisites
Office 365 E3 Subscription is present for your Microsoft tenant- Compliance auditing is configured as
ON in the compliance portal before you start your integration
Requirements
Cisco recommends that you have knowledge of these topics:
- Cisco Secure Access
- Microsoft Azure Enterprise Applications and App Registrations
Components Used
The information in this document is based on these software and hardware versions:
- Cisco Secure Access
- Microsoft Azure
- Microsoft 365 Compliance portal
The information in this document was created from the devices in a specific lab environment. All of the devices used in this document started with a cleared (default) configuration. If your network is live, ensure that you understand the potential impact of any command.
Configure
Configuration on Azure
To enable the application on Azure, configure according to the next steps:
1. Navigate to the Azure Portal > Enterprise Applications > New Application.

2. Click on Create your own Application.

3. Give a name you desire to identify the app and choose. Integrate any other application you don't find in the gallery (Non-Gallery).
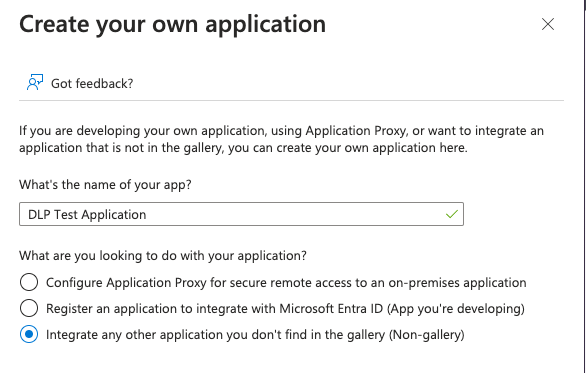
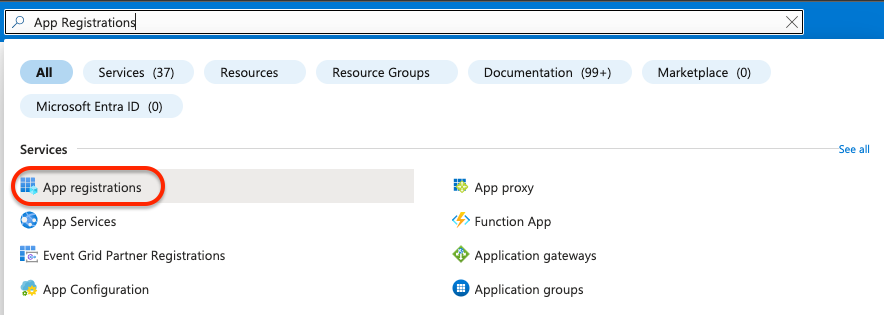
4. Once done, use the Azure Search Bar to look for App Registrations.
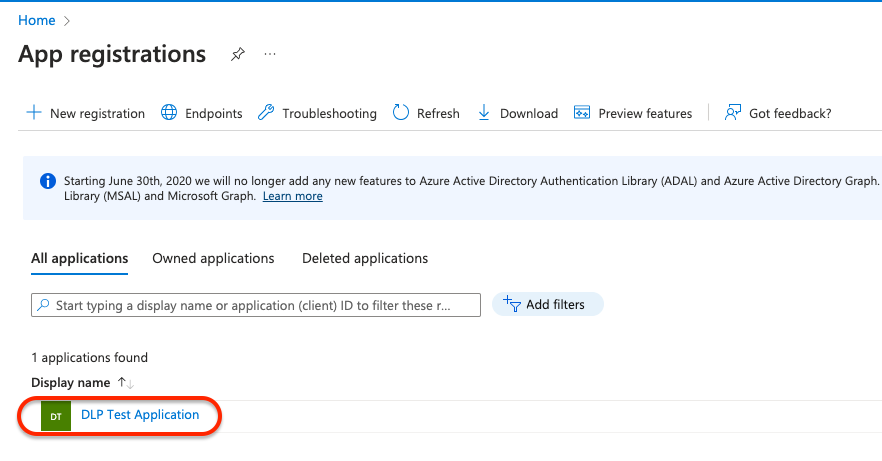
5. Click on All Applications and choose the application created in step Three.
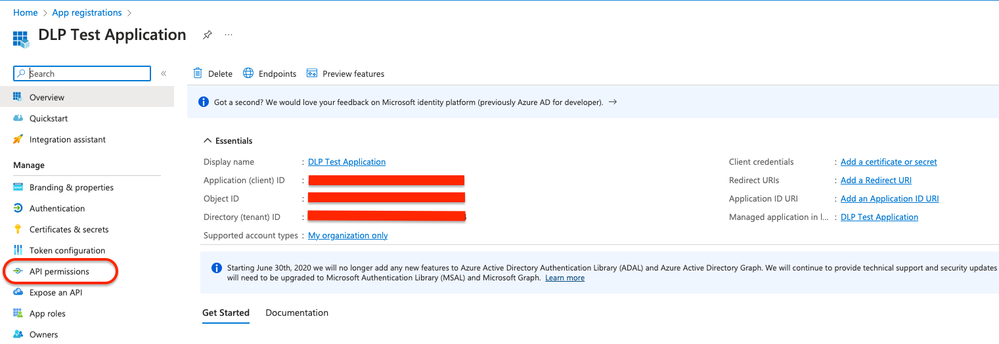
6. Choose API Permissions.
7. Click on Add a permission and choose the required permissions based on the Table.

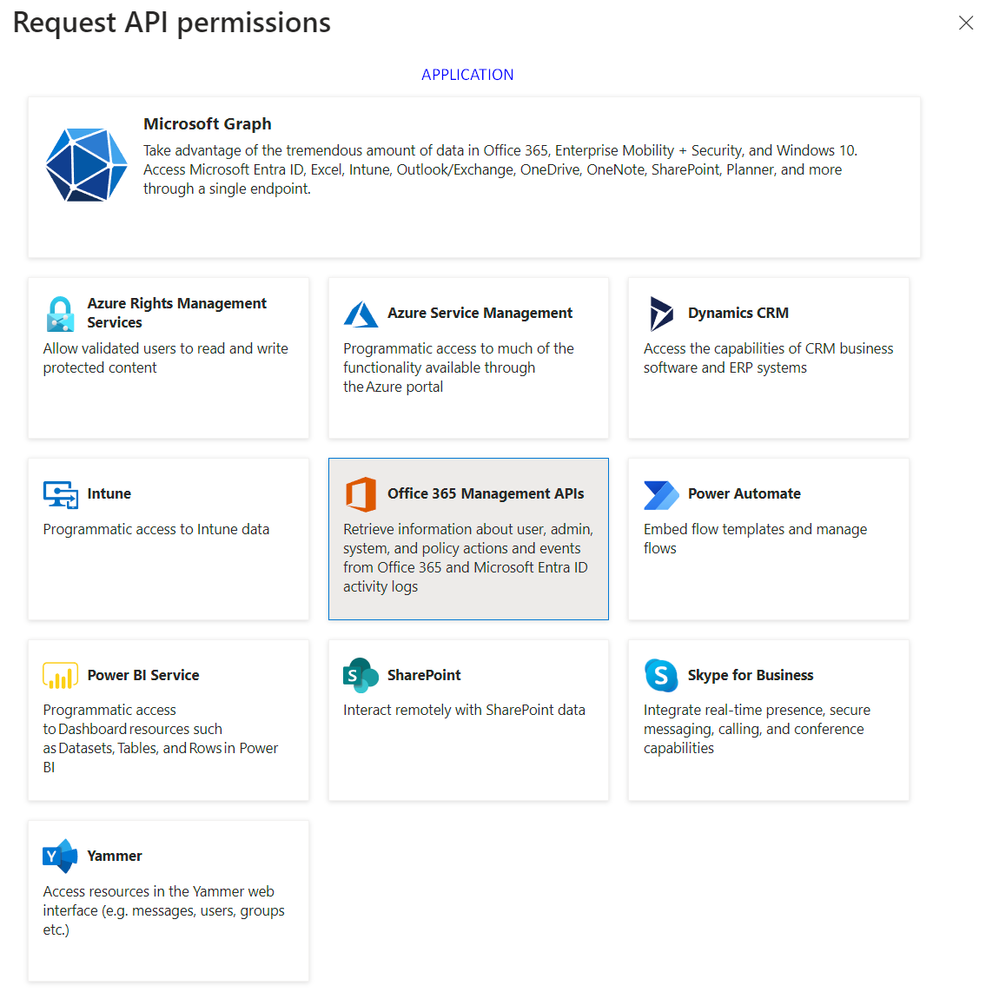
Note: For that, you must configure the API of Microsoft Graph, Office 365 Management APIs, and SharePoint.

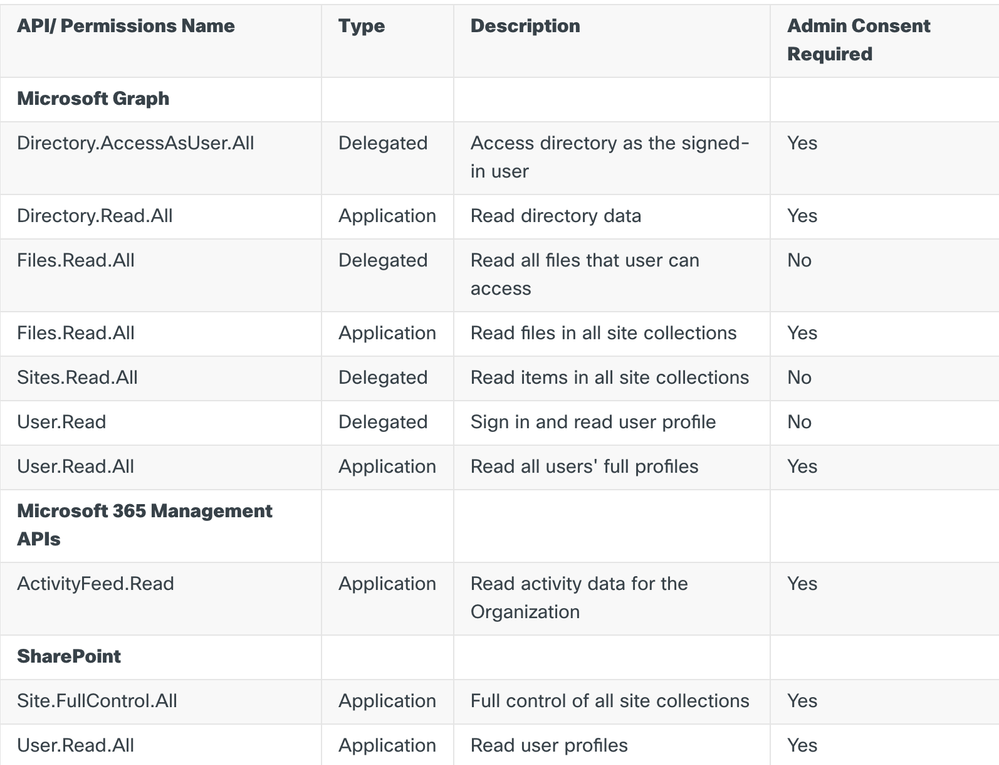

Note: Instead of Site.FullControl.All permission choose Sites.FullControl.All.
- For that, you need to choose the permission based on the application and type:

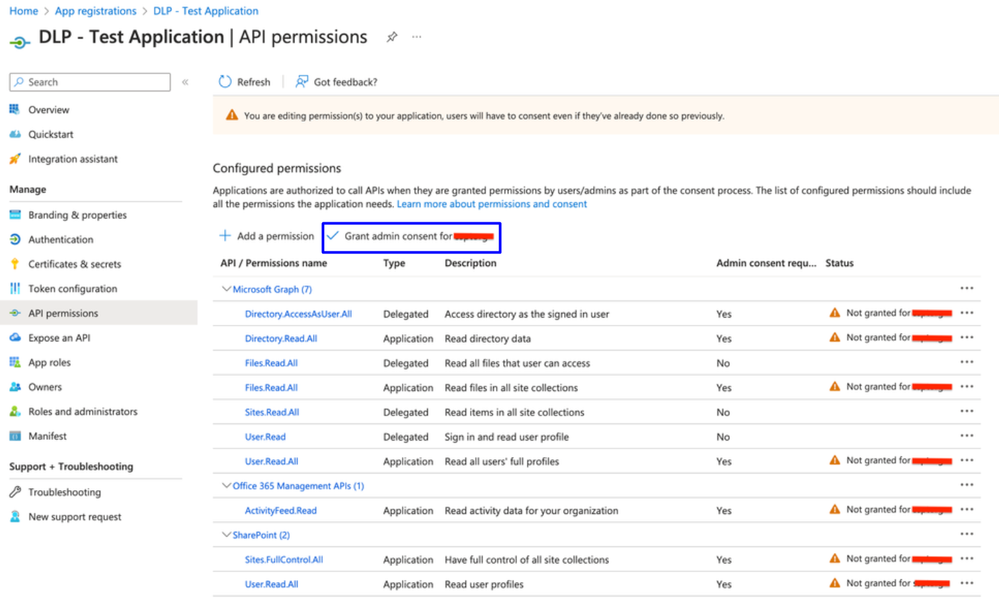
8. Once all the required permissions are added, click on Grant Admin Consent for the tenant.

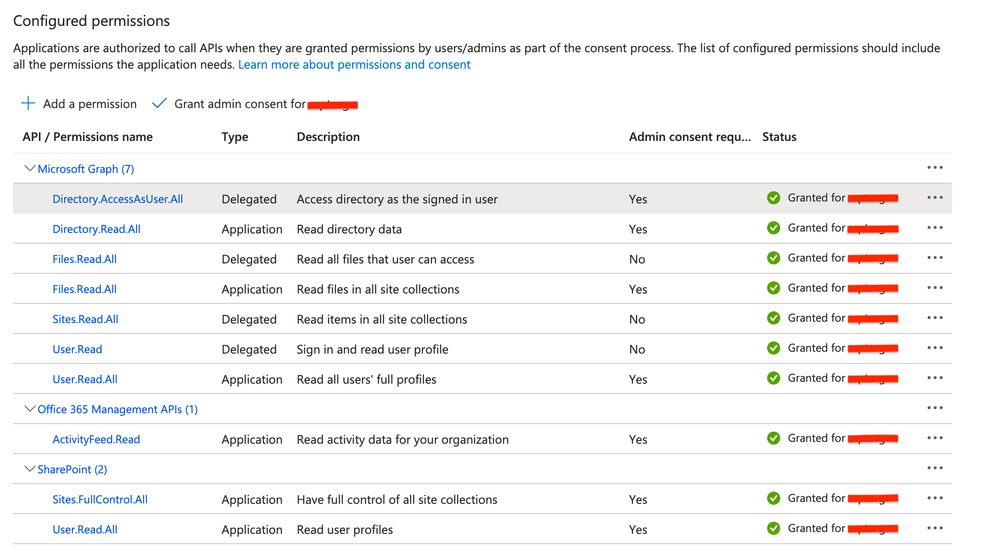
- Once you grant the permissions, the status is visible as
Granted
Now that the configuration on Azure is completed, you can continue the configuration on Secure Access.
Configuration in Secure Access
To enable the integration, configure according the next steps:
- Navigate to
Admin > Authentication.
- Under
Platforms, clickMicrosoft 365.
- Click
Authorize New Tenant in the DLP subsection and add Microsoft 365.
- In the
Microsoft 365 Authorization dialog, check the checkboxes to verify you meet the prerequisites, then click Next.
- Provide a name for your tenant, then click
Next.
- Click
Next to be redirected to the Microsoft 365 login page.
- Log in to Microsoft 365 with admin credentials to grant access. Then, when you get redirected to Secure Access, you must have a message that indicates your integration was successful.
- Click
Done to complete.
Verify
To verify if the integration was successful, navigate to your Secure Access Dashboard:
- Click on
Admin > Authentication > Microsoft 365
And if everything is correctly configured, your status must be Authorized.

Related Information


 Feedback