Configure Secure Access with Sophos XG Firewall
Available Languages
Download Options
Bias-Free Language
The documentation set for this product strives to use bias-free language. For the purposes of this documentation set, bias-free is defined as language that does not imply discrimination based on age, disability, gender, racial identity, ethnic identity, sexual orientation, socioeconomic status, and intersectionality. Exceptions may be present in the documentation due to language that is hardcoded in the user interfaces of the product software, language used based on RFP documentation, or language that is used by a referenced third-party product. Learn more about how Cisco is using Inclusive Language.
Contents
Introduction
This document describes how to configure Secure Access with Sophos XG Firewall.
Prerequisites
- Configure User Provisioning
- ZTNA SSO Authentication Configuration
- Configure Remote Access VPN Secure Access
Requirements
Cisco recommends that you have knowledge of these topics:
- Sophos XG Firewall
- Secure Access
- Cisco Secure Client - VPN
- Cisco Secure Client - ZTNA
- Clientless ZTNA
Components Used
The information in this document is based on:
- Sophos XG Firewall
- Secure Access
- Cisco Secure Client - VPN
- Cisco Secure Client - ZTNA
The information in this document was created from the devices in a specific lab environment. All of the devices used in this document started with a cleared (default) configuration. If your network is live, ensure that you understand the potential impact of any command.
Background Information
 Secure Access - Sophos
Cisco has designed Secure Access to ensure the protection and provision of access to private applications, both on-premise and cloud-based. It also safeguards the connection from the network to the internet. This is achieved through the implementation of multiple security methods and layers, all aimed at preserving the information as they access it via the cloud.
Configure
Configure the Tunnel on Secure Access
Navigate to the admin panel of Secure Access.
 Secure Access - Main Page
- Click on
Connect > Network Connections.
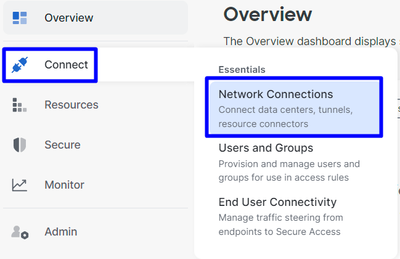 Secure Access - Network Connections
- Under
Network Tunnel Groupsclick on+ Add.
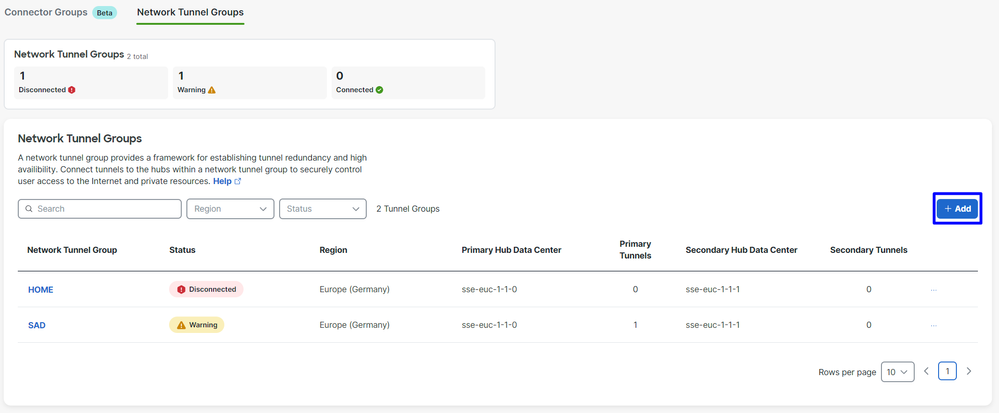 Secure Access - Network Tunnel Groups
- Configure
Tunnel Group Name,RegionandDevice Type. - Click
Next.
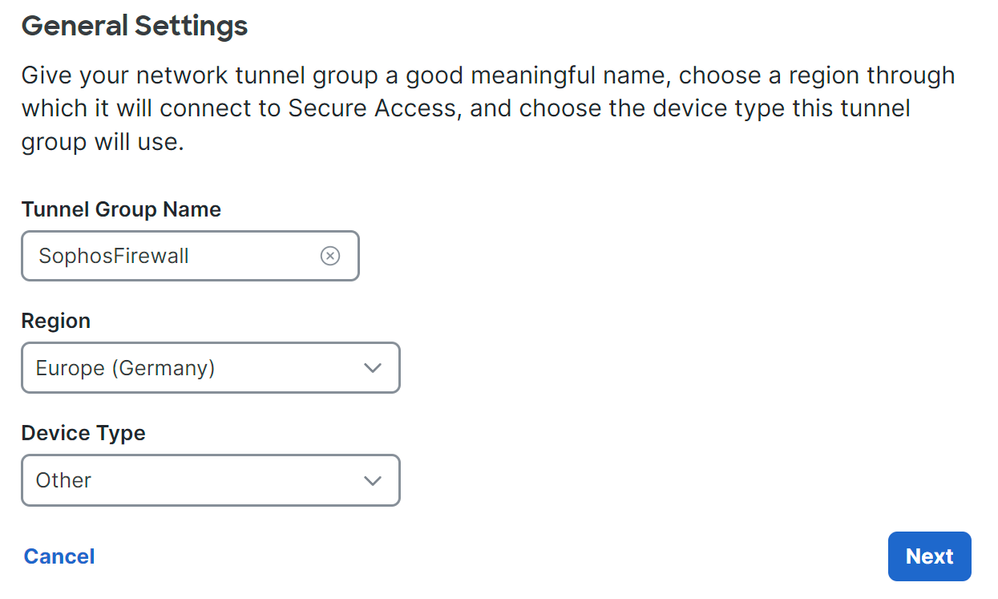 Secure Access - Tunnel Groups - General Settings

Note: Choose the region nearest to the location of your firewall.
- Configure the
Tunnel ID FormatandPassphrase. - Click
Next.
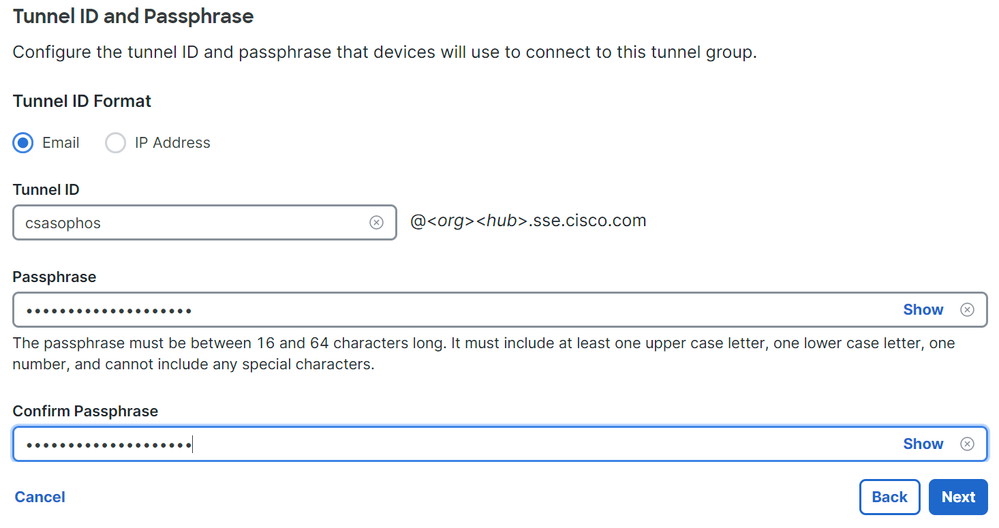 Secure Access - Tunnel Groups - Tunnel ID and Passphrase
- Configure the IP address ranges or hosts that you have configured on your network and want to pass the traffic through Secure Access.
- Click
Save.
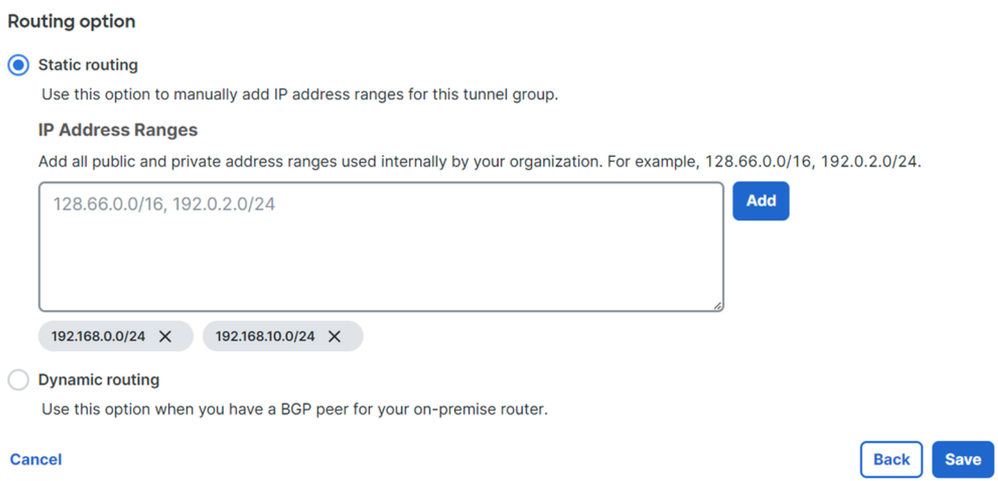 Secure Access - Tunnel Groups - Routing Options
After you click on Save the information about the tunnel gets displayed, please save that information for the next step, Configure the tunnel on Sophos.
Tunnel Data
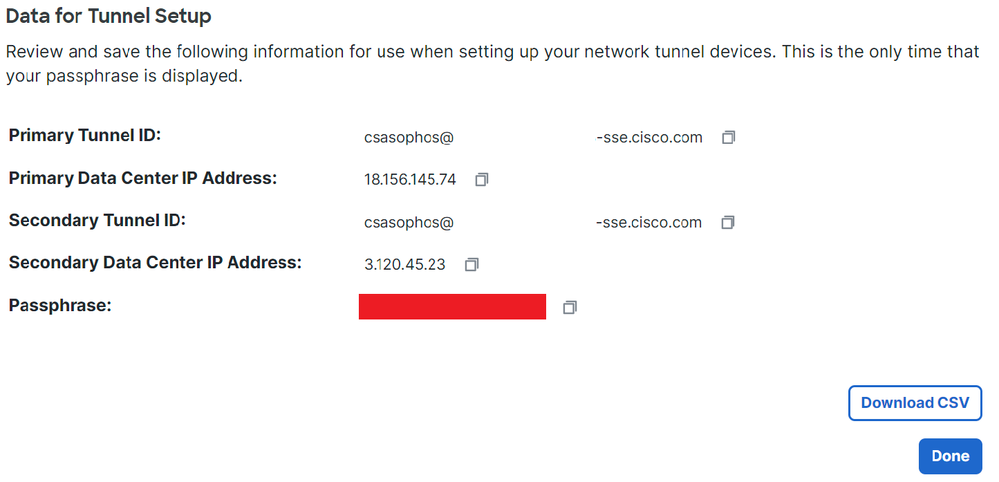 Secure Access - Tunnel Groups - Resume of configuration
Configure the Tunnel on Sophos
Configure IPsec Profile
In order to configure the IPsec Profile, navigate to your Sophos XG Firewall.
You obtain something similar to this:
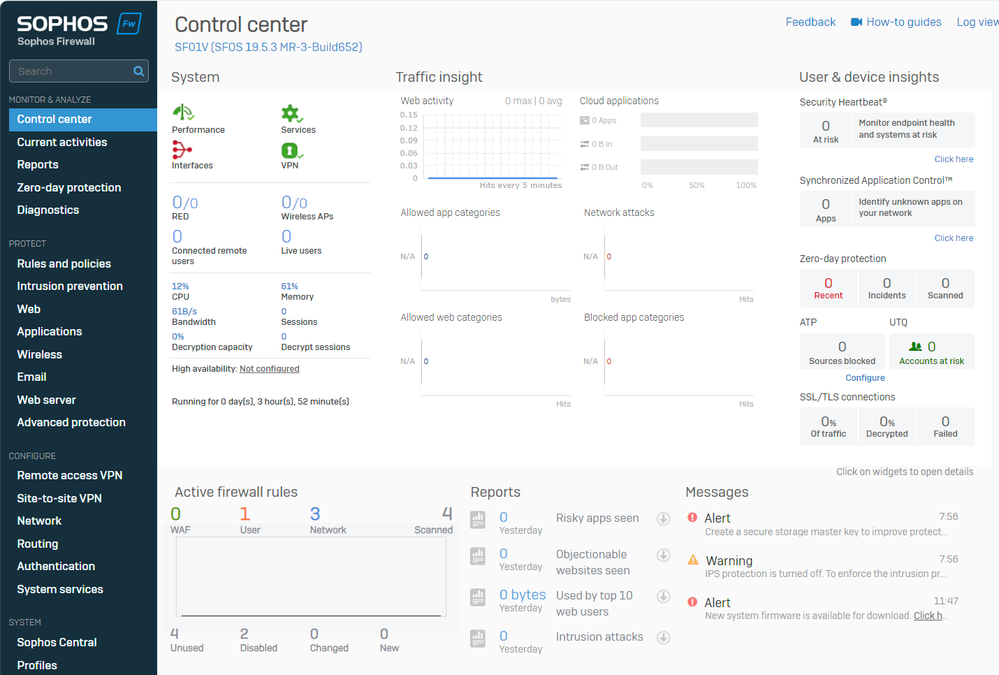 Sophos - Admin Panel
- Navigate to
Profiles - Click on
IPsec Profilesand after that click onAdd
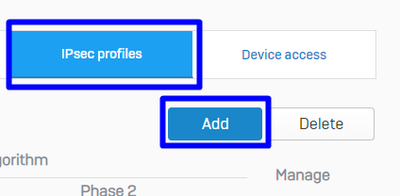 Sophos - IPsec Profiles
Under General Settings configure:
Name: A reference name to the Cisco Secure Access PolicyKey Exchange: IKEv2Authentication Mode: Main ModeKey Negotiation Tries: 0Re-Key connection: Check the option
 Sophos - IPsec Profiles - General Settings
Under Phase 1 configure:
Key Life: 28800DH group(key group): Select 19 and 20Encryption: AES256Authentication: SHA2 256Re-key margin: 360 (Default)Randomize re-keying margin by: 50 (Default)
 Sophos - IPsec Profiles - Phase 1
Under Phase 2 configure:
PFS group (DH group): Same as phase-IKey life: 3600Encryption: AES 256Authentication: SHA2 256
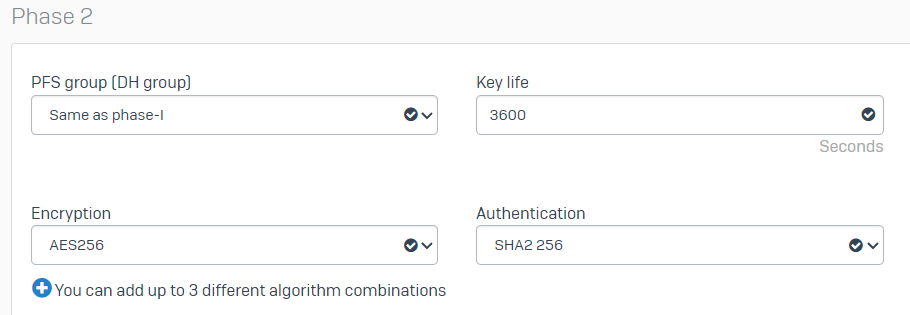 Sophos - IPsec Profiles - Phase 2
Under Dead Peer Detection configure:
Dead Peer Detection: Check the optionCheck peer after every: 10Wait for response up to: 120 (Default)When peer unreachable: Re-initiate (Default)
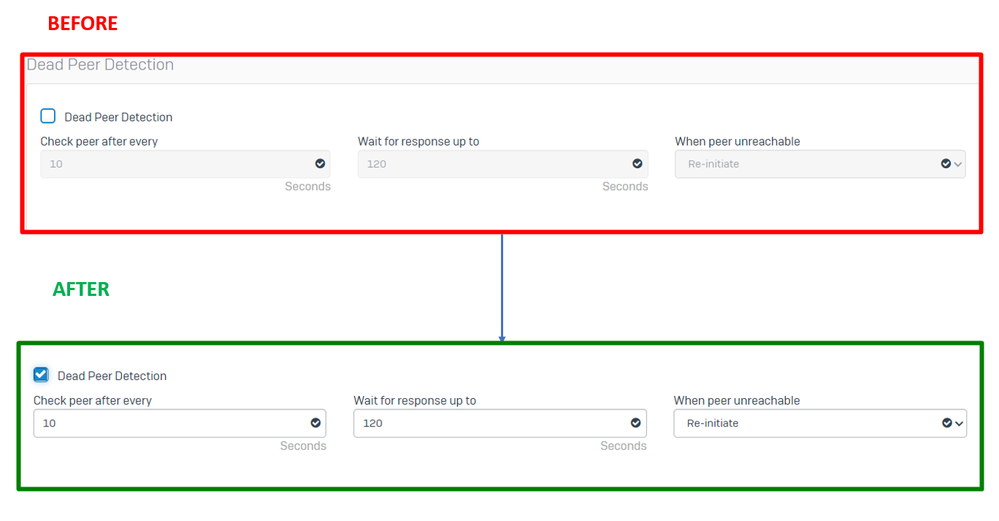 Sophos - IPsec Profiles - Dead Peer Detection
After that click on Save and proceed with the next step, .Configure Site-to-site VPN
Configure Site-to-site VPN
To initiate the configuration of the VPN, click on Site-to-site VPN and click on Add.
 Sophos - Site-to-site VPN
Under General Settings configure:
Name: A reference name to the Cisco Secure Access IPsec PolicyIP version: IPv4Connection type: Tunnel interfaceGateway type: Initiate the connectionActive on save: Check the option

Note: The option Active on save enables the VPN automatically after you end up configuring the site-to-site VPN.
 Sophos - Site-to-site VPN - General Settings

Note: The option Tunnel interface creates a virtual tunnel interface for the Sophos XG Firewall with the name XFRM.
Under Encryption configure:
Profile: The profile that you create on the step,Configure IPsec ProfileAuthentication type: Preshared keyPreshared key: The key that you configure on the step,Configure the Tunnel on Secure AccessRepeat preshared key:Preshared key
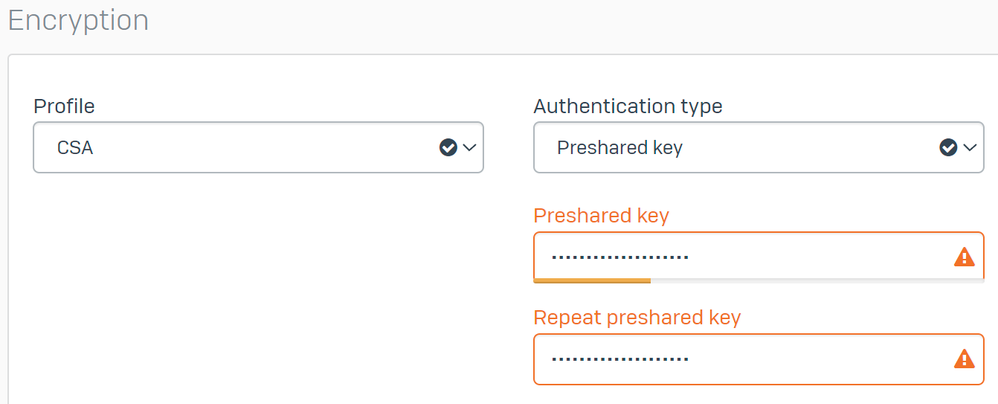 Sophos - Site-to-site VPN - Encryption
Under Gateway Settings configure Local Gateway and Remote Gateway options, use this table as a reference.
|
Local Gateway |
Remote Gateway |
|
Listening interface Your Wan-Internet Interface |
Gateway address The public IP generated under the step, |
|
Local ID type |
Remote ID type IP address |
|
Local ID |
Remote ID The public IP generated under the step, |
|
Local subnet |
Remote Subnet Any |
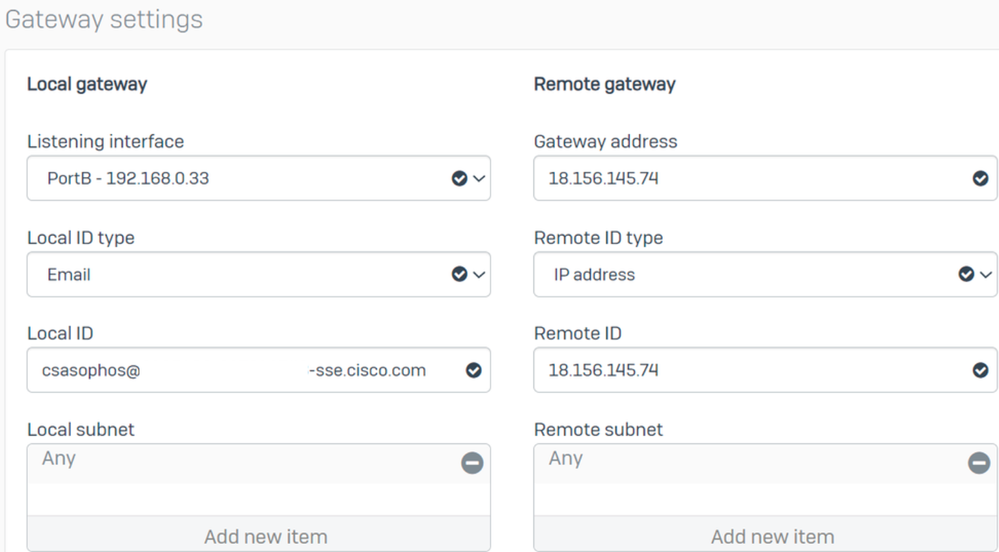 Sophos - Site-to-site VPN - Gateway Settings
After that click on Save, and you can see that the tunnel was created.
 Sophos - Site-to-site VPN - IPsec Connections

Note: To check if the tunnel is correctly enabled on the last image you can check Connection status, if it is green, the tunnel is connected if it is not green the tunnel is not connected.
To check if a tunnel is established navigate to Current Activities > IPsec Connections.
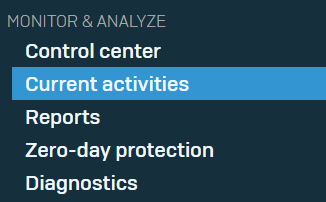 Sophos - Monitor and Analyze - IPsec
 Sophos - Monitor and Analyze - IPsec before and after
After that, we can continue with the step, Configure Tunnel Interface Gateway.
Configure Tunnel Interface
Navigate to Network and check your WAN interface configured on the VPN to edit the virtual tunnel interface with the name xfrm.
- Click on the
xfrminterface.
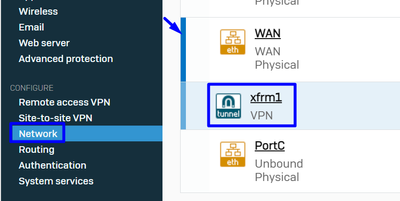 Sophos - Network - Tunnel Interface
- Configure the interface with an IP non-routable in your network, for example, you can use 169.254.x.x/30 which is an IP in a non-routable space usually, in our example we use 169.254.0.1/30
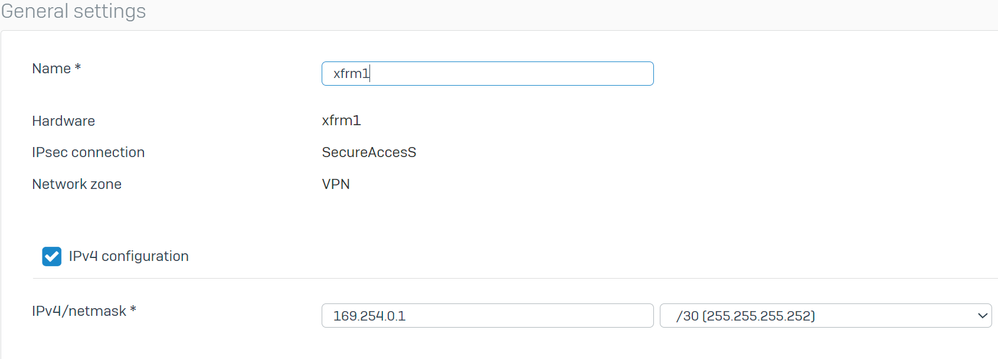 Sophos - Network - Tunnel Interface - Configuration
Configure the Gateways
In order to configure the gateway for the virtual interface (xfrm)
- Navigate to
Routing > Gateways - Click
Add
 Sophos - Routing - Gateways
Under Gateway host configure:
Name: A name that makes reference to the virtual interface created for the VPNGateway IP: In our case 169.254.0.2, that is the IP under the network 169.254.0.1/30 that already we assigned under the step,Configure Tunnel InterfaceInterface: VPN Virtual InterfaceZone: None (Default)
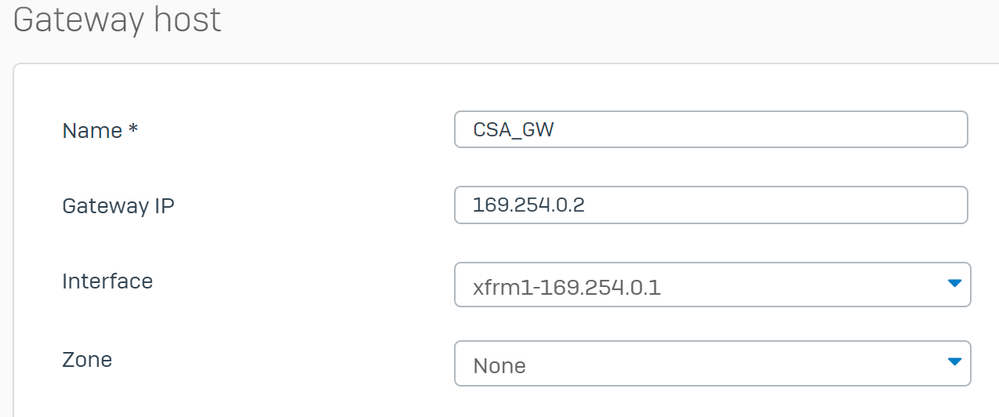 Sophos - Routing - Gateways - Gateway Host
- Under
Health checkdisable the check - Click
Save
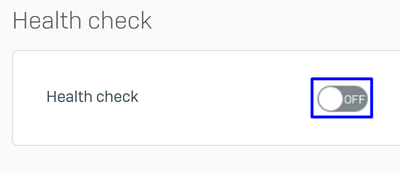 Sophos - Routing - Gateways - Health-check
You can observe the status of the gateway after you save the configuration:
 Sophos - Routing - Gateways - Status
Configure the SD-WAN Route
To finalize the process of configuration, you need to create the route that permits you to forward the traffic to Secure Access.
Navigate to Routing > SD-WAN routes.
- Click on
Add
 Sophos - SD-Wan Routes
Under Traffic Selector configure:
Incoming interface: Select the interface from where you want to send the traffic or the users that access from RA-VPN, ZTNA, or Clientless-ZTNADSCP marking: Nothing for this exampleSource networks: Select the address that you want to route through the tunnelDestination networks: Any or you can specify a destinationServices: Any or you can specify the servicesApplication object: An application if you have the object configuredUser or groups: If you want to add a specific group of users to route the traffic to Secure Access
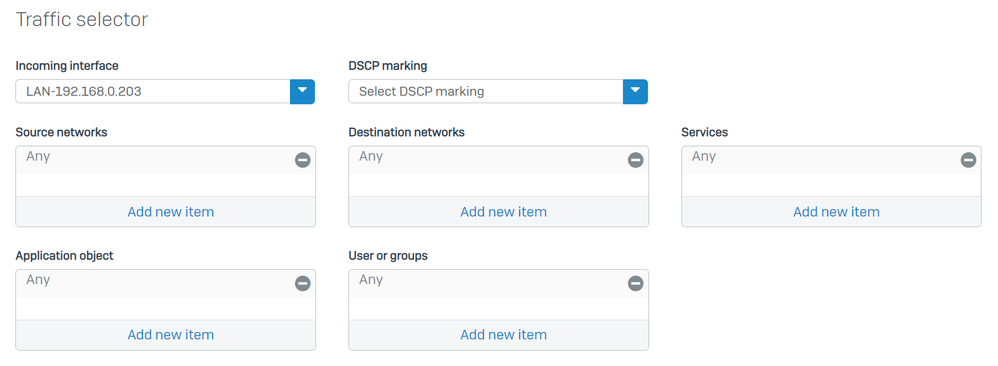 Sophos - SD-Wan Routes - Traffic Selector
Under Link selection settings configure the gateway:
Primary and Backup gateways: Check the optionPrimary gateway: Select the gateway configured under the step,Configure the Gateways- Click on
Save
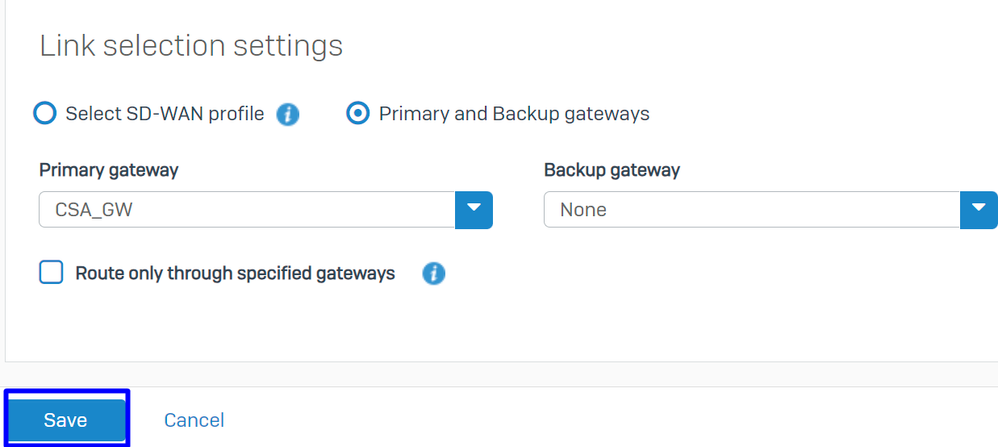 Sophos - SD-Wan Routes - Traffic Selector - Primary and Backup gateways
After you finalize the configuration on the Sophos XG Firewall you can proceed with the step, Configure Private App.
Configure Private App
In order to configure the Private App access, log in to the Admin Portal.
- Navigate to
Resources > Private Resources
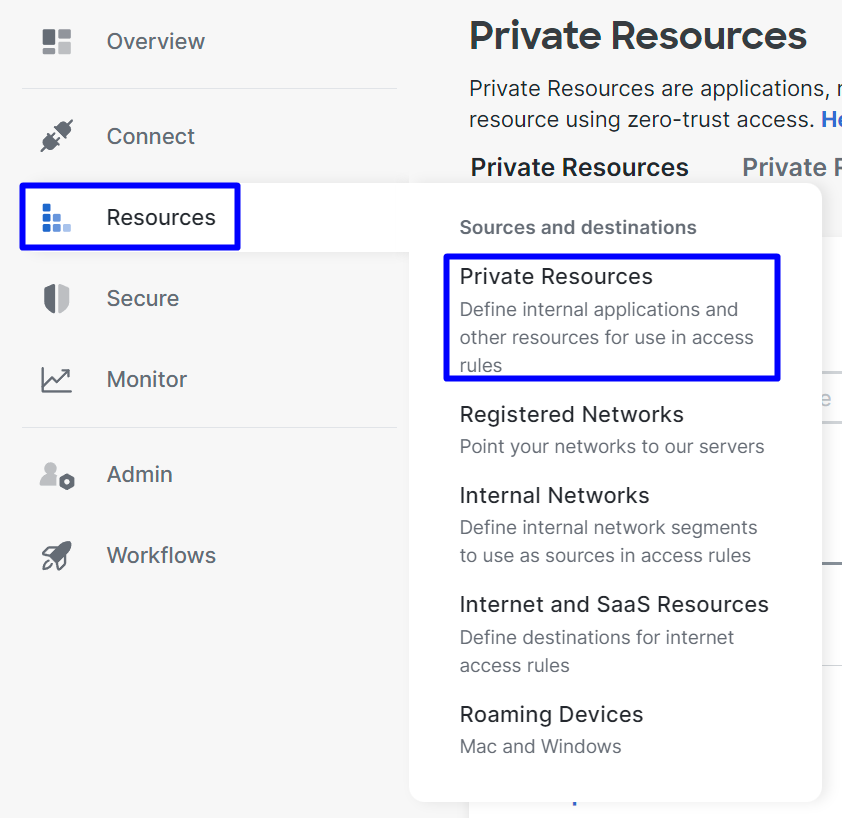 Secure Access - Private Resources
- Click on
+ Add
 Secure Access - Private Resources 2
- Under
GeneralConfigure thePrivate Resource Name
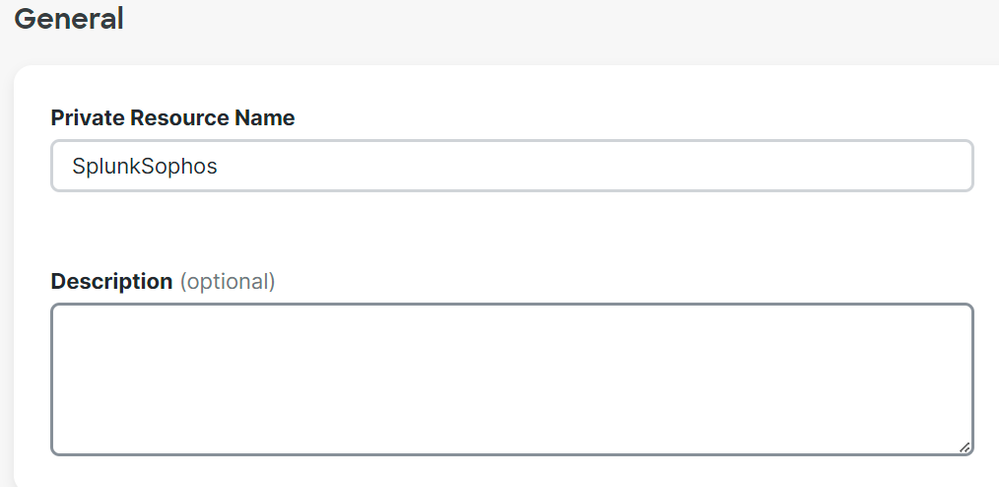 Secure Access - Private Resources - General
Under Communication with Secure Access Cloud configure:
Internally reachable address (FQDN, Wildcard FQDN, IP Address, CIDR): Select the resource that you want to access

Note: Remember the internally reachable address was assigned on the step, Configure the Tunnel on Secure Access.
Protocol: Select the protocol that you use to access that resourcePort / Ranges: Select the ports that you need to enable to access the app
 Secure Access - Private Resources - Communications with Secure Access Cloud
Within Endpoint Connection Methods, you configure all the ways possible to access private resources via Secure Access, and choose the methods that you want to use for your environment:
Zero-trust connections: Check the box to enable ZTNA access.Client-based connection: Enable the button to permit client base ZTNARemotely Reachable Address: Configure the IP of your private App
Browser-based connection: Enable the button to permit browser-based ZTNAPublic URL for this resource: Add a name to use in conjunction with the domain ztna.sse.cisco.comProtocol: Choose HTTP or HTTPS as a protocol to access through the browser
VPN connections: Check the box to enable RA-VPN Access.
- Click
Save
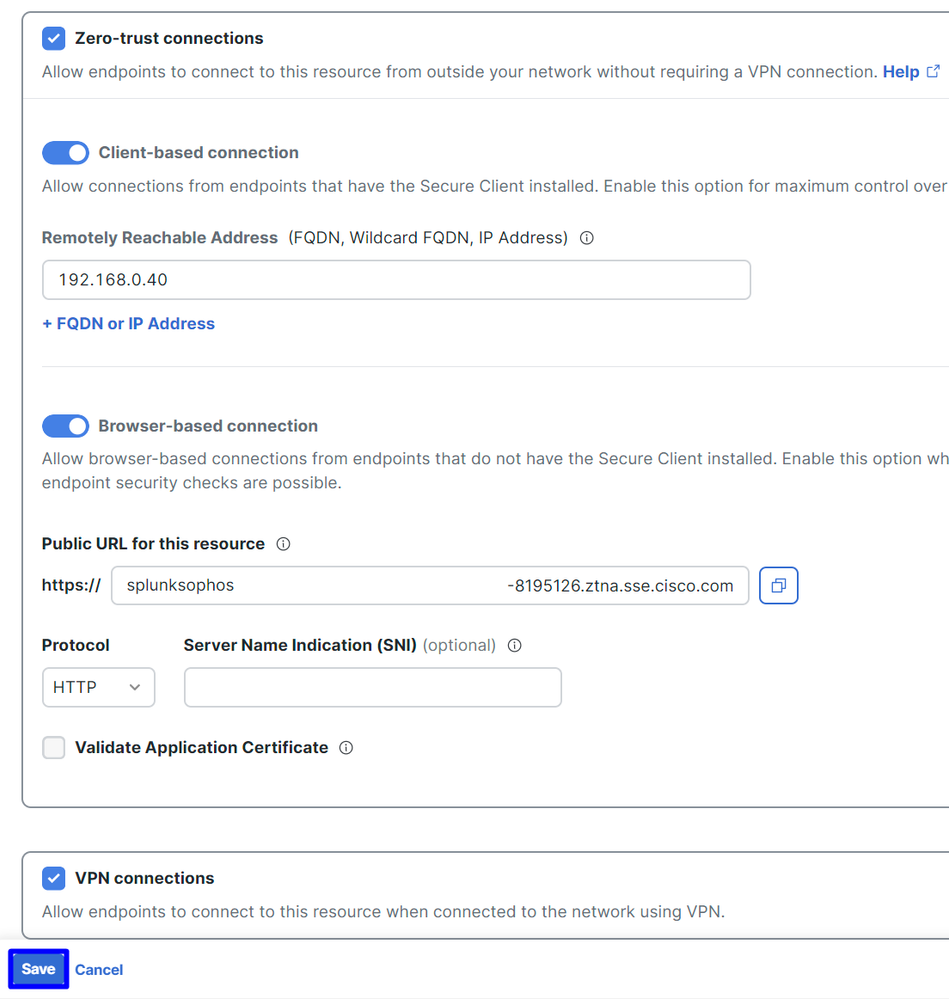 Secure Access - Private Resources - Communications with Secure Access Cloud 2
After the configuration is complete, this is the result:
 Secure Access - Private Resources Configured
Now you can proceed with the step, Configure the Access Policy.
Configure the Access Policy
In order to configure the access policy navigate to Secure > Access Policy.
 Secure Access - Access Policy
- Click
Add Rule > Private Access
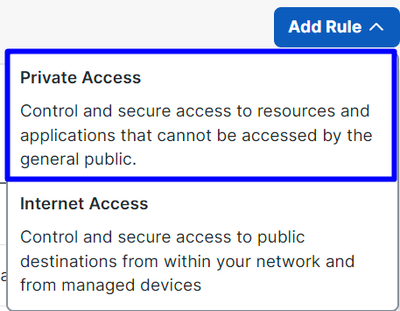 Secure Access - Access Policy - Private Access
Configure the next options to provide access through multiple methods of authentication:
1. Specify Access
Action: AllowRule name: Specify a name for your access ruleFrom: The users that you grant access toTo: The application that you wanted to permit accessEndpoint Requirements: (Default)
- Click
Next
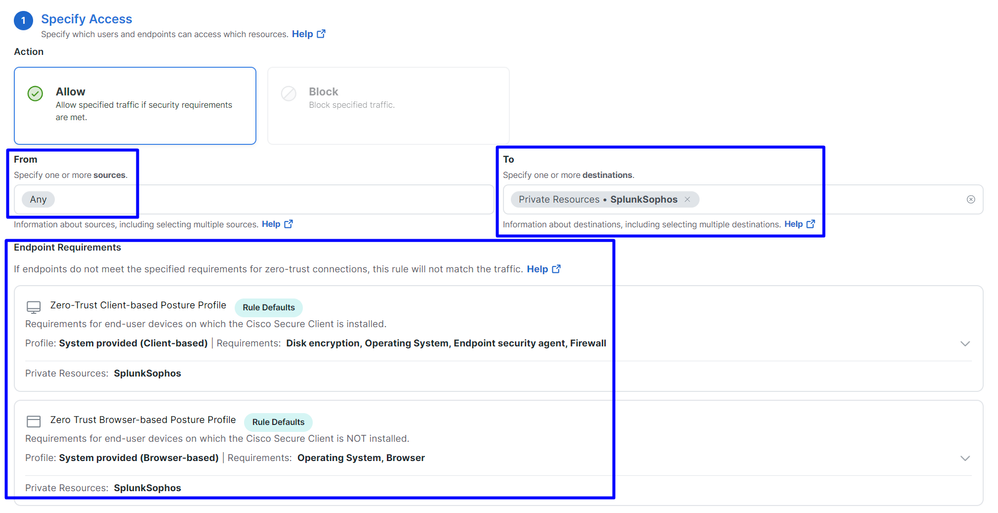 Secure Access - Access Policy - Specify Access

Note: For step 2. Configure Security as needed, but in this case, you did not enable the Intrusion Prevention (IPS), or Tenant Control Profile.
- Click
Save, and you have:
 Secure Access - Access Policy Configured
After that, you can proceed with the step Verify.
Verify
In order to verify the access you must have installed the agent of Cisco Secure Client that you can download from Software Download - Cisco Secure Client.
RA-VPN
Login through Cisco Secure Client Agent-VPN.
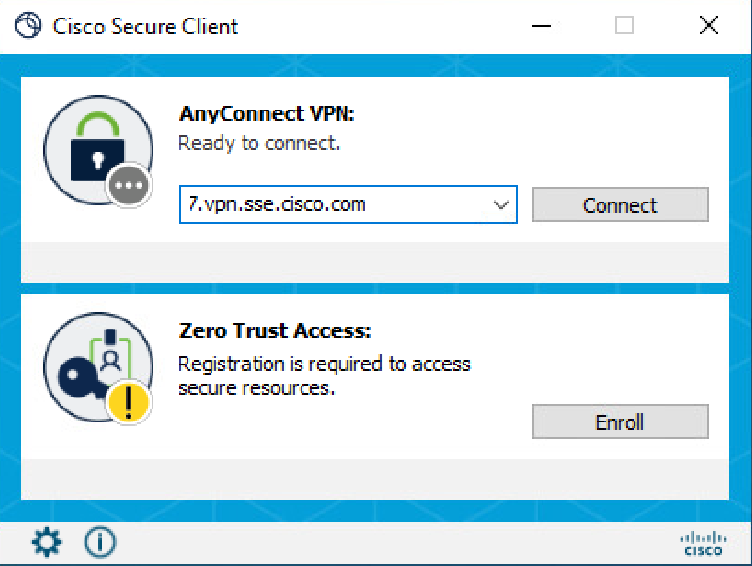 Secure Client - VPN
- Authenticate through your SSO provider
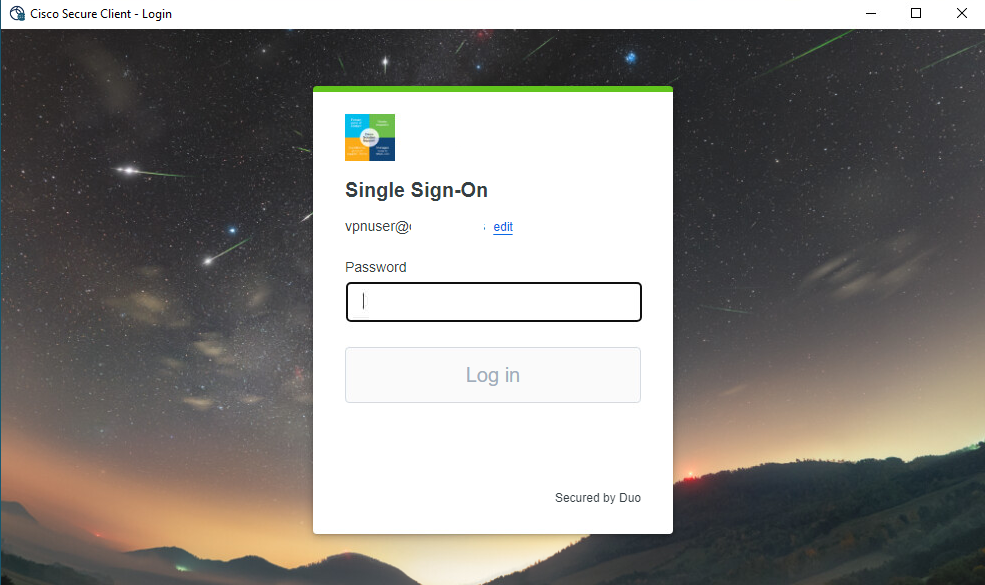 Secure Access - VPN - SSO
- After you get authenticated, access to the resource:
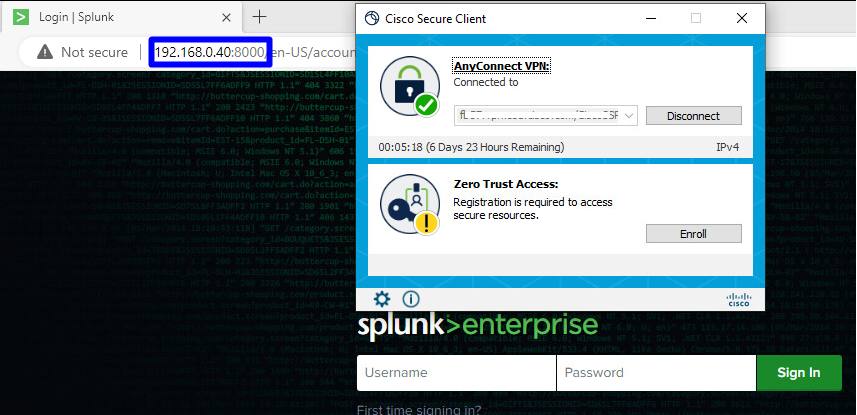 Secure Access - VPN - Authenticated
Navigate to Monitor > Activity Search:
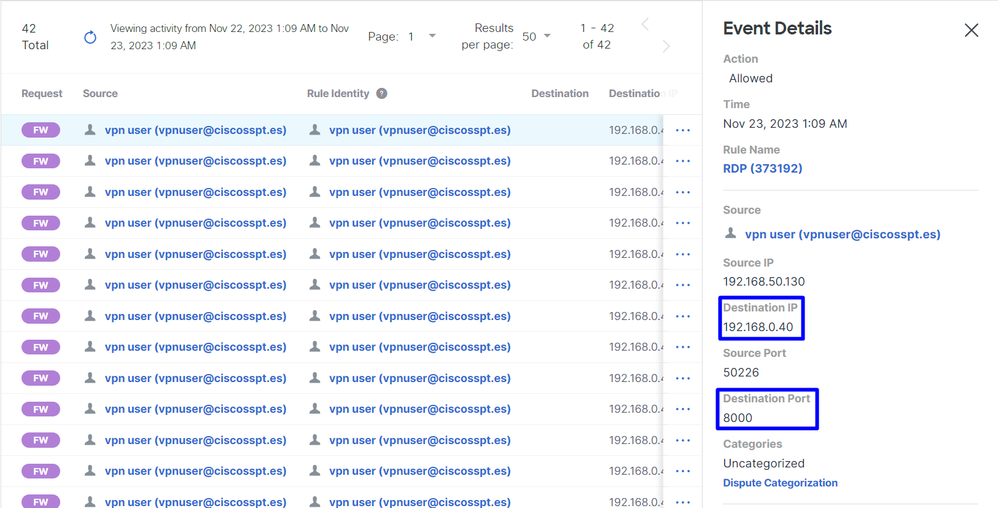 Secure Access - Activity Search - RA-VPN
You are able to see the user was allowed to authenticate through RA-VPN.
Client-Base ZTNA
Login through Cisco Secure Client Agent - ZTNA.
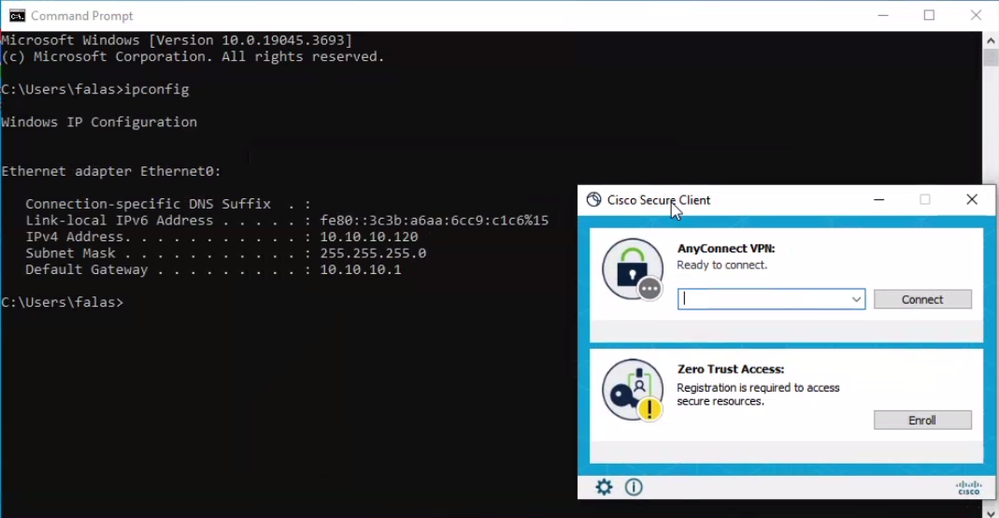 Secure Client - ZTNA
- Enroll with your username.
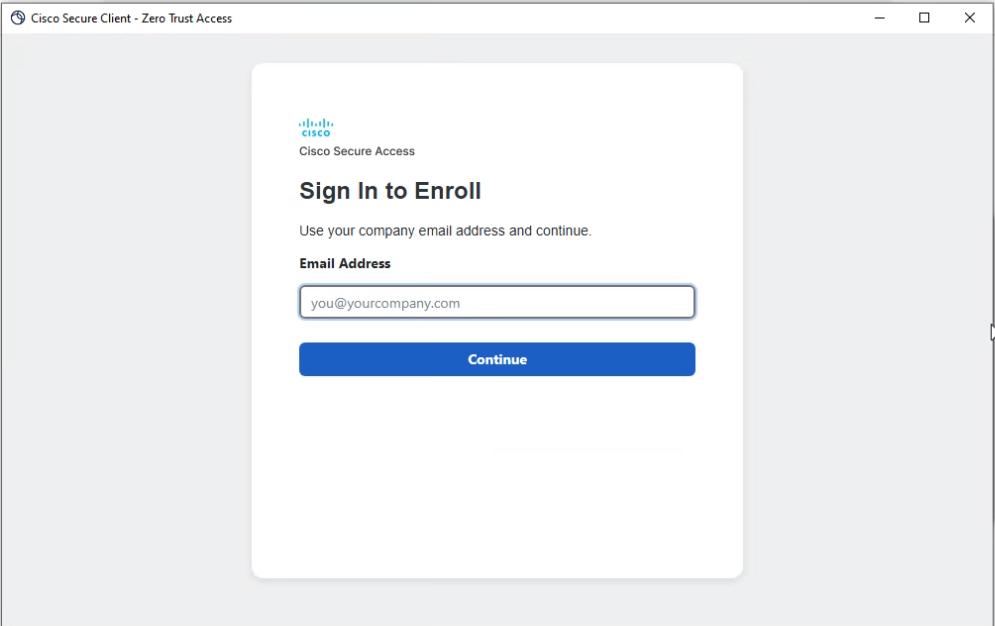 Secure Client - ZTNA - Enroll
- Authenticate in your SSO Provider
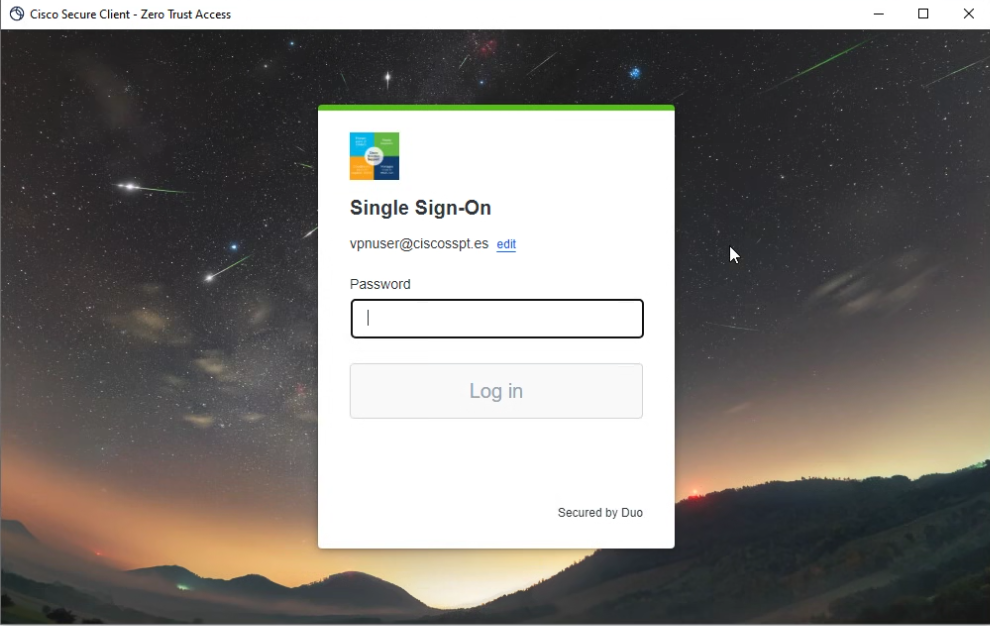 Secure Client - ZTNA - SSO Login
- After you get authenticated, access to the resource:
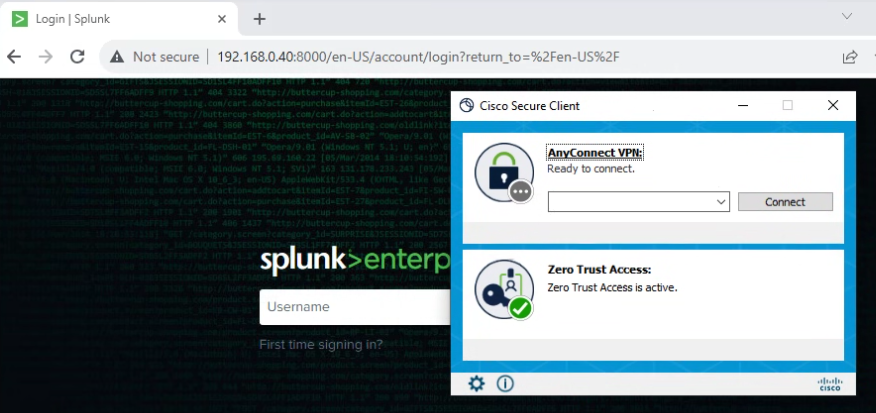 Secure Access - ZTNA - Logged
Navigate to Monitor > Activity Search:
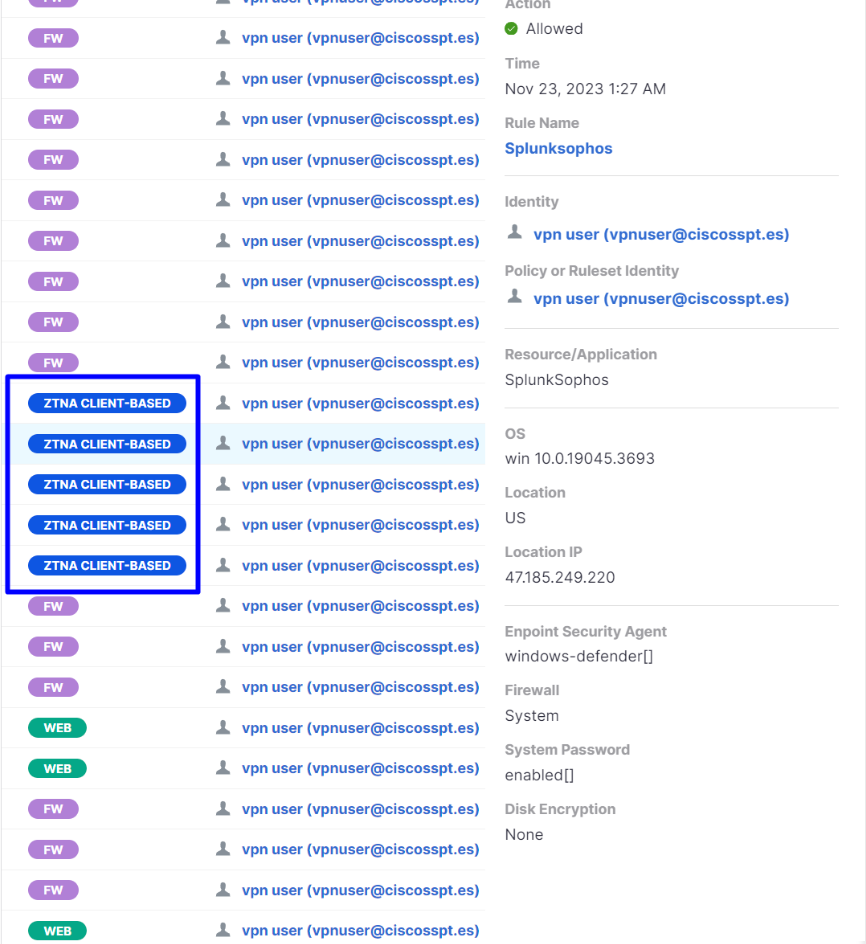 Secure Access - Activity Search - ZTNA Client-Based
You are able to see the user was allowed to authenticate through client-based ZTNA.
Browser-based ZTNA
In order to get the URL, you need to go to Resources > Private Resources.
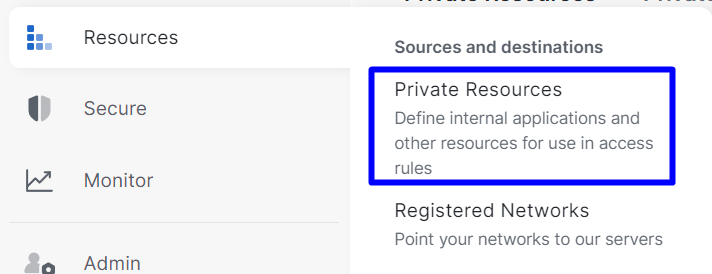 Secure Access - Private Resource
- Click on your Policy
 Secure Access - Private Resource - SplunkSophos
- Scroll down
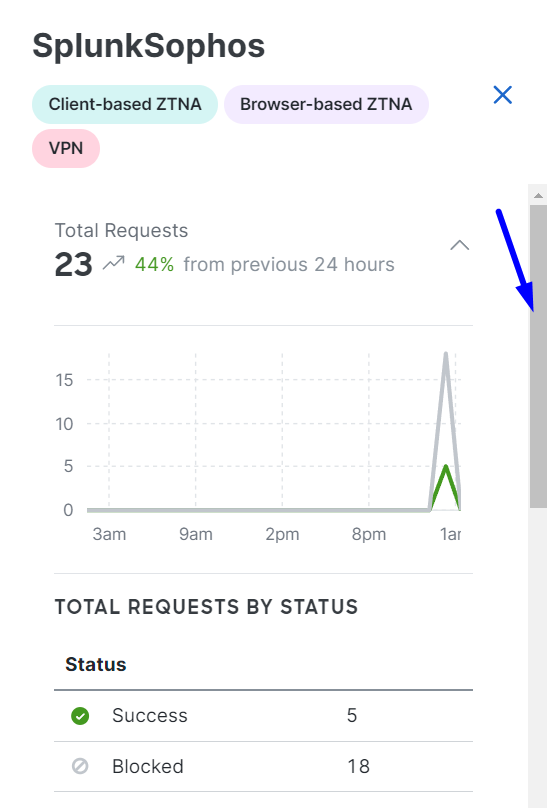 Secure Access - Private Resource - Scroll Down
- You find Browser-based ZTNA
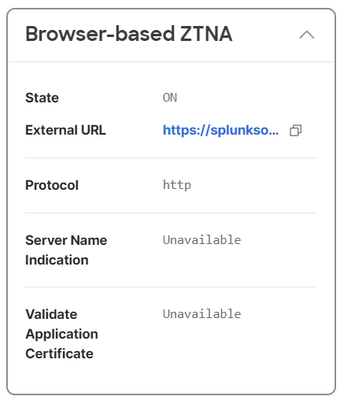 Secure Access - Private Resource - Browser-Based ZTNA URL
- Copy the URL put it on the browser and press enter, it redirects you to the SSO
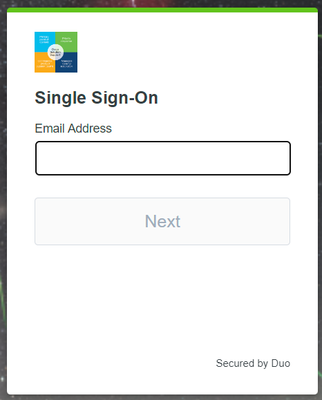 Browser-Based ZTNA
- After you log in, you gain access to your device through browser-based ZTNA
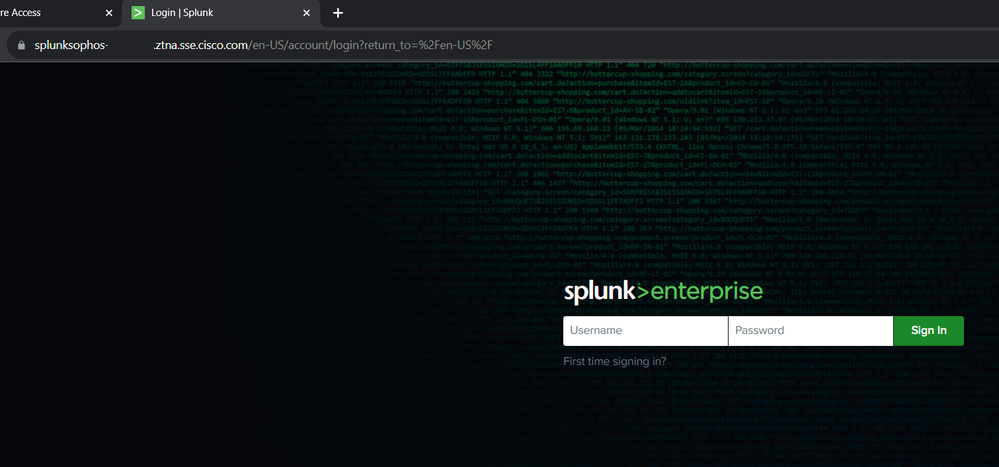 Browser-Based - ZTNA - Logged
- Navigate to
Monitor > Activity Search:
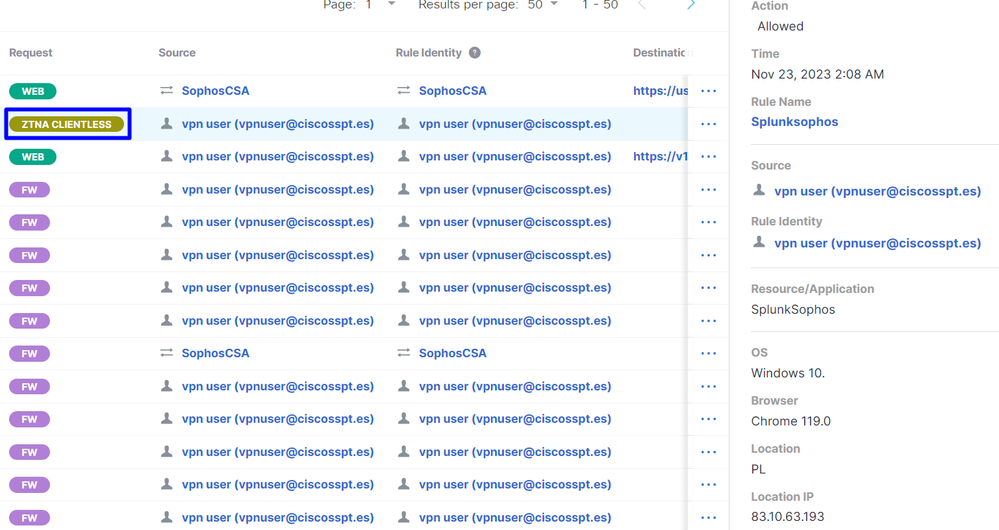 Secure Access - Activity Search - ZTNA Browser-Based
You are able to see the user was allowed to authenticate through browser-based ZTNA.
Related Information
Revision History
| Revision | Publish Date | Comments |
|---|---|---|
1.0 |
28-Nov-2023 |
Initial Release |
Contributed by Cisco Engineers
- Jairo MorenoTAC
Contact Cisco
- Open a Support Case

- (Requires a Cisco Service Contract)
 Feedback