Initial Configuration Steps of FireSIGHT Systems
Available Languages
Contents
Introduction
After you reimage a FireSIGHT Management Center or a FirePOWER Device, you need to complete several steps to make the system fully functional and to generate alerts for intrusion events; such as, installing license, registering the appliances, applying health policy, system policy, access control policy, intrusion policy etc. This document is a supplement to the FireSIGHT System Installation Guide.
Prerequisite
This guide assumes that you have carefully read the FireSIGHT System Installation Guide.
Configuration
Step 1: Initial Setup
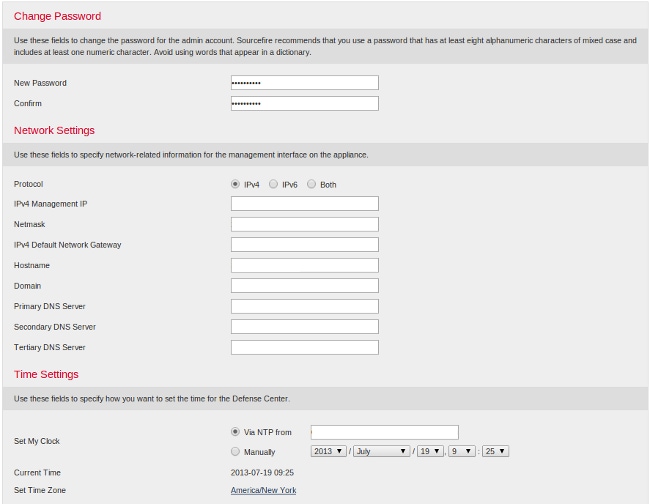
On your FireSIGHT Management Center, you must complete the setup process by logging into the web interface and specifying initial configuration options on the setup page, depicted below. On this page, you must change the admin password, and can also specify network settings such as Domain and DNS servers, and the time configuration.
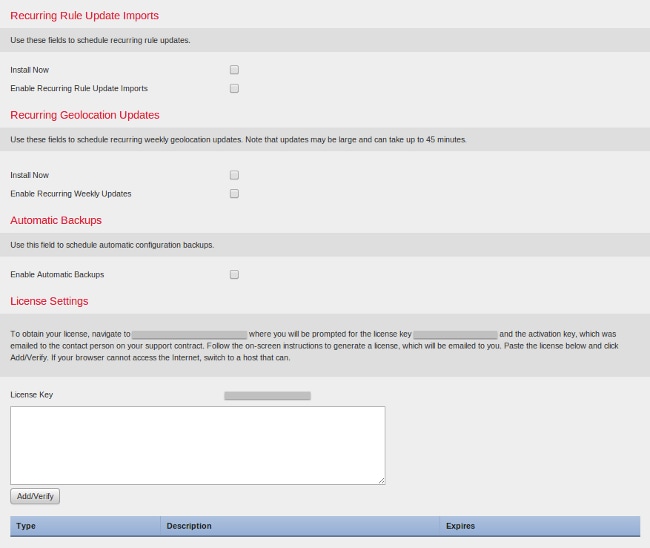
You can optionally configure recurring rule and geolocation updates as well as automatic backups. Any feature licenses can also be installed at this point.
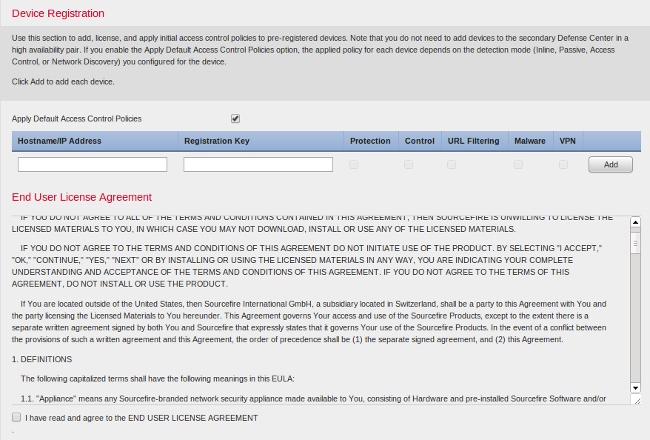
On this page, you can also register a device to the FireSIGHT Management Center and specify a detection mode. The detection mode and other options you choose during registration determine the default interfaces, inline sets, and zones that the system creates, as well as the policies that it initially applies to managed devices.
Step 2: Install Licenses
If you did not install licenses during the initial setup page, you can complete the task by following these steps:
- Navigate to the following page: System > Licenses.
- Click on Add New License.
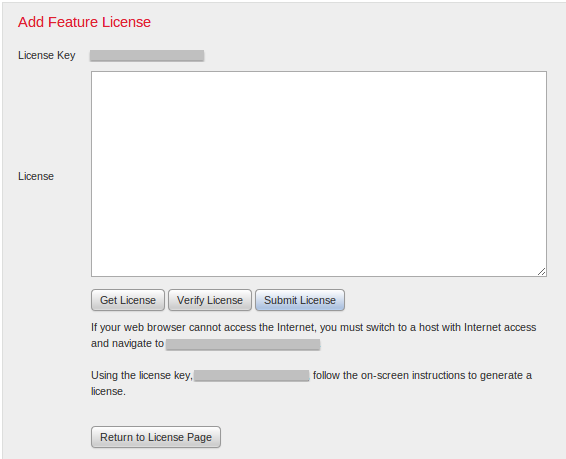
If you did not receive a license, contact the Sales Representative of your account.
Step 3: Apply the System Policy
The System Policy specifies the configuration for Authentication Profiles and Time Synchronization between the FireSIGHT Management Center and managed Devices. To configure or Apply the System Policy navigate to System > Local > System Policy. A default System Policy is provided but needs to be applied to any managed devices.
Step 4: Apply the Health Policy
The Health Policy is used to configure how managed devices report their health status to the FireSIGHT Management Center. To configure or Apply the Health Policy navigate to Health > Health Policy. A default Health Policy is provided but needs to be applied to any managed devices.
Step 5: Register Managed Devices
If you did not register devices during the initial setup page, read this document for instructions on how to register a device to a FireSIGHT Management Center.
Step 6: Enable Installed Licenses
Before you can use any feature license on your appliance, you need to enable it for each managed device.
- Navigate to the following page: Devices > Device Management.
- Click on the device for which you want to enable the licenses and enter the Device tab.
- Click the Edit (pencil icon) next to License.

Enable the required licenses for this device and click Save.
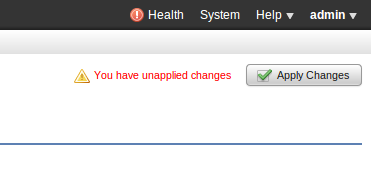
Notice the message "You have unapplied changes" on the top right corner. This warning remains active even if you navigate away from the device management page until you click the Apply Changes button.
Step 7: Configure Sensing Interfaces
- Navigate to the following page Devices > Device Management.
- Click the Edit (pencil) icon for the sensor of your choice.
- Under the Interfaces tab, click the Edit icon for the interface of your choice.
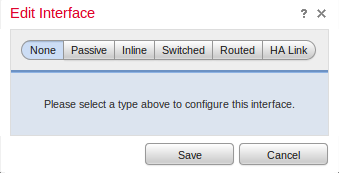
Select either a Passive or Inline interface configuration. Switched and Routed interfaces are beyond the scope of this article.
Step 8: Configure the Intrusion Policy
- Navigate to the following page: Policies > Intrusion > Intrusion Policy.
- Click on Create Policy and the following dialog box is displayed:

You must assign a name and define the base policy to be used. Depending on your deployment you can chose to have the option Drop when Inline enabled. Define the networks you want to protect to reduce false positives and improve the performance of the system.
Clicking on Create Policy will save your settings and create the IPS policy. If you want to make any modification to the intrusion policy, you can choose Create and Edit Policy instead.
Step 9: Configure and Apply an Access Control Policy
1. Navigate to Policies > Access Control.
2. Click on New Policy.
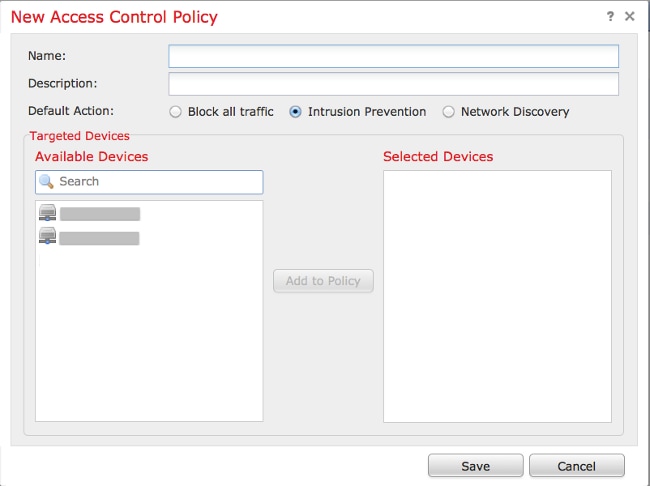
3. Provide a Name for the policy and a Description.
4. Select Intrusion Prevention as the Default Action of the Access Control policy.
5. Finally select the Targeted Devices to which you want to apply the access control policy, and click Save.
6. Select your Intrusion policy for the default action.

7. Connection logging must be enabled to generate connection events. Click the drop down menu which is right of the Default Action.
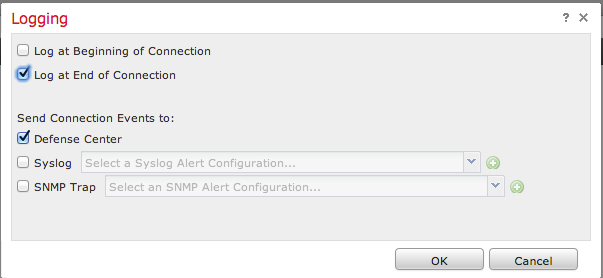
8. Choose to log connections at either the beginning or the end of the connection. The events can be logged on the FireSIGHT Management Center, a syslog location, or through SNMP.
9. Click OK. Note that the color of the logging icon has changed.
10. You may add an Access Control Rule at this time. The options you can use depend on the type of licenses you have installed.
11. When you are finished making changes. click the Save and Apply button. You will notice a message indicating you have unsaved changes on your policy on the upper right corner until the button is clicked.
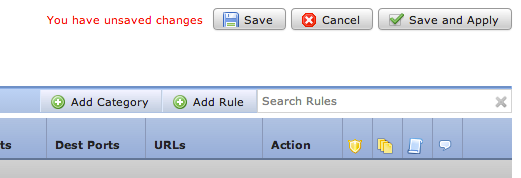
You can choose to only Save the changes or click on Save and Apply. The following window will appear if you choose the latter.
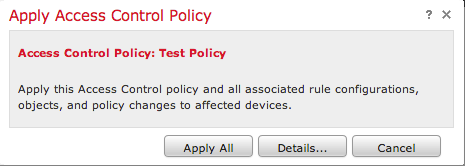
12. Apply All will apply the Access Control policy and any associated Intrusion policy(s) to the targeted devices.
13. You can monitor the status of the task clicking on the Task Status link on the notification shown at the top of the page, or by navigating to: System > Monitoring > Task Status

14. Click the Task Status link to monitor the progress of the Access Control policy apply.

Step 10: Verify If the FireSIGHT Management Center Receives Events
After the Access Control policy apply has completed, you should start seeing connections events and depending on traffic intrusion events.
Additional Recommendation
You can also configure the following additional features on your system. Please refer to the User Guide for implementation details.
- Scheduled backups
- Automatic Software update, SRU, VDB, and GeoLocation downloads/installations.
- External Authentication through LDAP or RADIUS
Revision History
| Revision | Publish Date | Comments |
|---|---|---|
1.0 |
09-Oct-2014 |
Initial Release |
Contact Cisco
- Open a Support Case

- (Requires a Cisco Service Contract)
 Feedback