Introduction
This document describes how to configure OKTA SSO for log in to the End User Spam Quarantine of the Security Management Appliance.
Prerequisites
- Administrator access to the Cisco Security Management Appliance.
- Administrator access to OKTA.
- Self-Signed or CA Signed (optional) X.509 SSL certificates in PKCS #12 or PEM format (provided by OKTA).
Background Information
Cisco Security Management Appliance enables SSO login for end users who use the End User Spam Quarantine and integrates with OKTA, which is an identity manager that provides authentication and authorization services to your applications. The Cisco End User Spam Quarantine can be set as an application which is connected to OKTA for authentication and authorization, and uses SAML, an XML-based open standard data format that enables administrators to access a defined set of applications seamlessly after the sign into one of those applications.
To learn more about SAML, refer to: SAML General Information
Components
- Cisco Security Management Appliance cloud administrator account.
- OKTA administrator account.
The information in this document was created from the devices in a specific lab environment. All of the devices used in this document started with a cleared (default) configuration. if the network is live, ensure that you understand the potential impact of any command.
Configure
Under Okta.
1. Navigate to Applications portal and choose Create App Integration , as shown in the image:

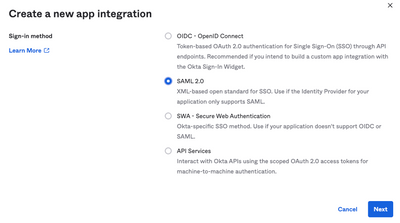
2. Choose SAML 2.0 as the application type, as shown in the image:
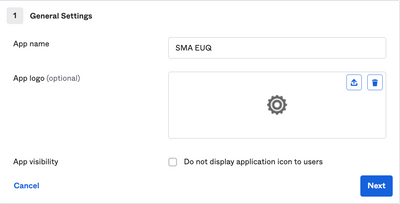
3. Enter the App name SMA EUQ and choose Next, as shown in the image:
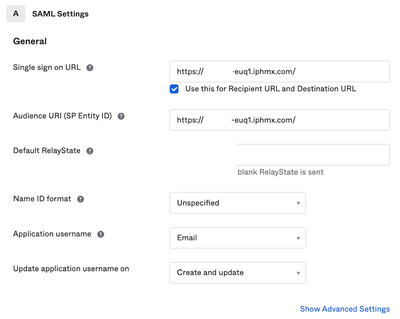
4. Under the SAML settings, fill in the gaps, as shown in the image:
- Single sign on URL: This is the Assertion Consumer Service obtained from the SMA EUQ interface.
- Audience URI (SP Entity ID): This is the Entity ID obtained from the SMA EUQ Entity ID.
- Name ID format: keep it as Unspecified.
- Application username: Email that prompts user to enter their Email address in the authentication process.
- Update application username on: Create and Update.
Scroll down to Group Attibute Statements (optional) , as shown in the image:
Enter the next attribute statement:
- Name: group
- Name format: Unspecified
- Filter: Equals and OKTA

Select Next .
5. When asked to Help Okta to understand how you configured this application, please enter the applicable reason to the current environment, as shown in the image:
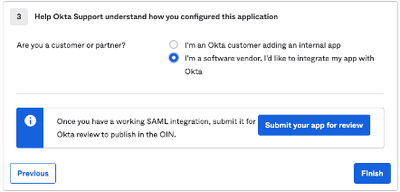
Choose Finish to proceed to the next step.
6. Choose Assignments tab and then select Assign > Assign to Groups, as shown in the image:
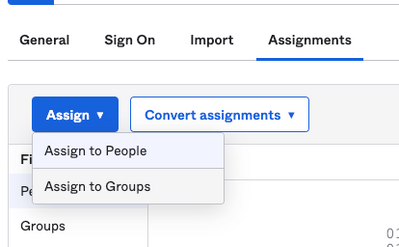
7. Choose the OKTA group, which is the group with the authorized users to access the environment
8. Choose Sign On , as shown in the image:

9. Scroll down and to the right corner, choose the View SAML setup instructions option, as shown in the image:
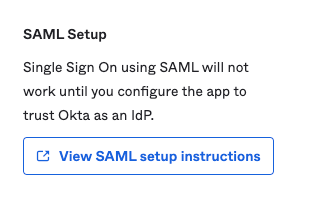
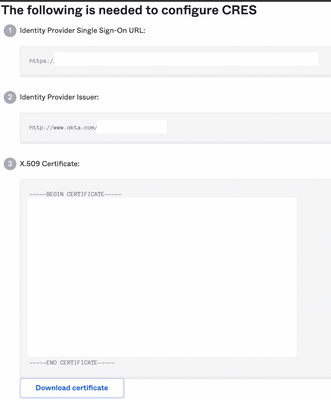
10. Save this information to a notepad, it is necessary to put into the Cisco Security Management Appliance SAML Configuration, as shown in the image:
- Identity Provider Single Sign-On URL
- Identity Provider Issuer
- X.509 Certificate
11. Once you complete the OKTA configuration, you can go back to the Cisco Security Management Appliance.
Under Cisco Security Management Appliance:
1. Log in to the Cisco Security Management Appliance as a Cloud administrator, as shown in the image:
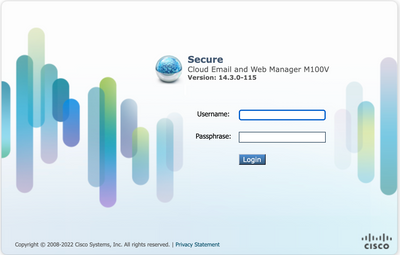
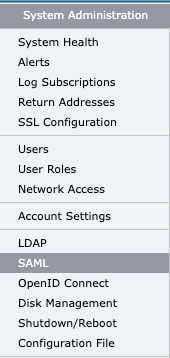
2. On the System Administrationtab, choose the SAML option, as shown in the image:
3. A new window opens to configure SAML. Under SAML for End-User Quarantine, click Add Service Provider , as shown in the image:

4. Under Profile Name , enter a Profile Name for the service provider profile, as shown in the image:

5. For Entity ID , enter a globally unique name for the service provider (in this case, your appliance). The format of the service provider Entity ID is typically a URI, as shown in the image:

6. For Name ID Format , this field is not configurable. You need this value while configuring the identity provider, as shown in the image:

7. For Assertion Consumer URL, enter the URL to which the identity provider sends the SAML assertion after authentication has successfully completed. In this case, this is the URL to your spam quarantine.

8. For SP Certificate , upload the certificate and key, or upload the PKCS #12 file. After it is uploaded, the Uploaded Certificate Details displays, as shown in the image:

9. For Sign Requests and Sign Assertions , check both checkboxes if you want to sign the SAML requests and Assertions. If you select check these options, make sure that you configure the same settings on OKTA, as shown in the image:

10. For Organization Details, enter the details of your organization, as show in the image:

11. Submit and Commit changes before proceeding to configure Identity Provider Settings .
12. Under SAML , click Add Identity Provider, as shown in the image:

13. Under Profile Name: enter a name for the Identity provider profile, as shown in the image:

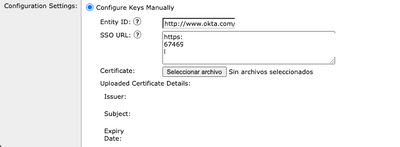
14. Select Configure Keys Manually and Enter the this information, as shown in the image:
- Entity ID: The Identity Provider Entity ID is used to uniquely identify Identity Provider. It is obtained from the OKTA settings in the previous steps.
- SSO URL: The URL to which SP should send SAML Auth requests. It is obtained from the OKTA settings in the previous steps.
- Certificate: The certificate which is provided by OKTA.
15. Submit and Commit the changes to proceed to the SAML login activation.
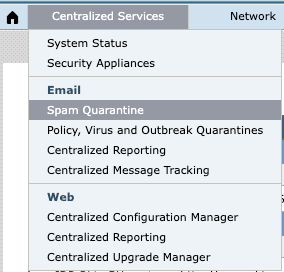
16. Under Centralized Services > Email , click on Spam Quarantine, as shown in the image:
17. Under Spam Quarantine -> Spam Quarantine Settings , click Edit Settings , as shown in the image:

18. Scroll down to End-User Quarantine Access > End-User Authentication , select SAML 2.0 , as shown in the image:

19. Submit and Commit changes to enable SAML Authentication for End User Spam Quarantine .
Verify
1. In any web browser, enter the URL of the End User Spam Quarantine of your company, as shown in the image:

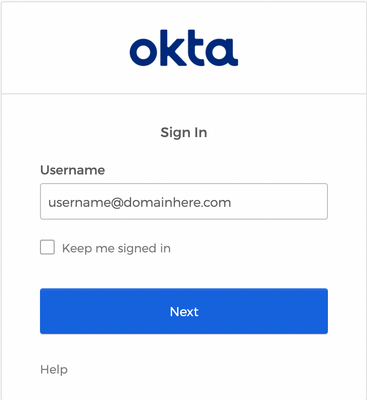
2. A new window opens to proceed with the OKTA authentication. Sign in with the OKTA credentials, as shown in the image:
3. If the Authentication is successful, the End User Spam Quarantine opens the contents of the Spam Quarantine for the user who signs in, as shown in the image:

Now the end user can access the End User Spam Quarantine with OKTA credentials. .
Related Information
Cisco Secure Email and Web Manager End User Guides
OKTA Support


 Feedback