Cisco ASA 8.x Import VNC Plug-in for use with WebVPN
Available Languages
Contents
Introduction
This document describes how to import the Virtual Network Computing (VNC) plug-in for use with WebVPN.
Prerequisites
Requirements
Ensure that you configure basic WebVPN before you attempt this configuration.
Components Used
The information in this document is based on these software and hardware versions:
-
ASA 5510 that runs software version 8.0(2) and ASDM version 6.0(2)
-
Windows 2003 server (used to connect to the VNC plug-in through WebVPN)
-
Client desktop with JRE 1.4.2_05-b04 installed
-
TFTP server (used to import the plug-in through the command line)
Conventions
Refer to Cisco Technical Tips Conventions for more information on document conventions.
Configure
In order to import the VNC plug-in for use with WebVPN, complete these steps:
Step 1. Obtain the VNC Java Plug-in
You can download the VNC plug-in, along with other plug-ins, from the Cisco Software Center. For more information about the VNC plug-in, refer to this URL: http://www.tightvnc.com/ ![]()
Note: The VNC website at http://www.tightvnc.com/ ![]() is managed by a 3rd party provider. Cisco is not responsible for its content.
is managed by a 3rd party provider. Cisco is not responsible for its content.
Step 2. Import the VNC Plug-in
ASDM Example
-
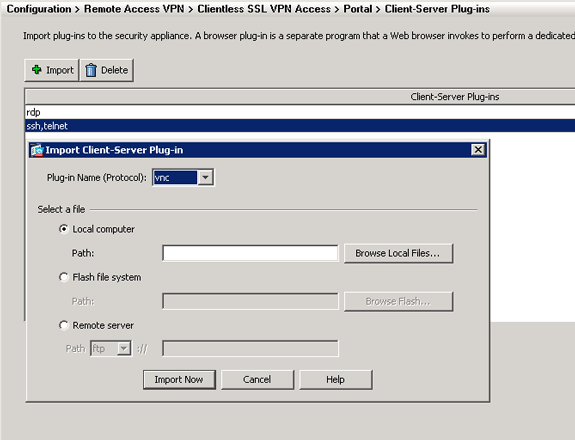
In the ASDM application, click Configuration, and then click Remote Access VPN.
-
Expand Clientless SSL VPN Access, expand Portal, and then choose Client-Server Plug-ins.
-
Click Import.
-
Select vnc from the Plug-in Name (Protocol) drop-down list.
-
Click the Local computer radio button, and click Browse Local Files.
-
Browse to the location in which you saved the VNC plug-in, and select the file.
-
Click Import Now.
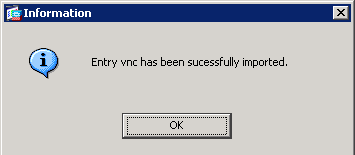
This Information dialog box appears.
-
Click OK.
Command Line Example
TFTP is used in this example to import the WebVPN plug-in.
| ciscoasa |
|---|
ciscoasa#import webvpn plug-in protocol vnc tftp://192.168.50.5/vnc-plugin.jar !--- Use the import webvpn plug-in protocol command in order to import WebVPN !--- plug-ins. This example uses tftp in order to import the VNC plug-in. !!!!!!!!!!!!!!!!!!!!!!!!!!!!!!!!!!!!!!!!!!!!!!!!!!!!!!!!!!!!!!!!!!!!!!!!!!!!! !!!!!!!!!!!!!!!!!!!!!!!!!!!!!!!!!!!!!!!!!!!!!!!!!!!!!!!!!!!!!!!!!!!!!!!!!!!!! !!!!!!!!!!!!!!!!!!!!!!!!!!!!!!!!!!!!!!!!!!!!!!!!!!!!!!!!!!!!!!!!!!!!!!!!!!!!! !!!!!!!!!!!!!!!!!!!!!!!!!!!!!!!!!!!!!!!!!!!!!!!!!!!!!!!!!!!!!!!!!!!!!!!!!!!!! !!!!!!!!!!!!!!!!!!!!!!!!!!!!!!! ciscoasa# |
Step 3. Define VNC Connection Parameters (Optional)
When you connect with the VNC plugin, you can define connection parameters within the URL.
In order to define VNC connection parameters within the URL, complete these steps:
-
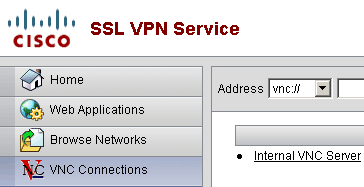
Within the VPN Service browser, select vnc:// from the Address drop-down list within your browser.
-
Insert a forward slash (/) and question mark (?) after the host name or IP address, and separate individual parameters with the ampersand symbol (&) as shown in this image:

-
Define the port parameter if using a port other than the default directly after the host name or IP address. This example uses port 5601.

For a full list of connection parameters, click VNC Connections located on the left side of the VPN Service browser. This table lists some of the more common parameters:
| WebVPN VNC Plug-in Variables | ||
| Parameter | Argument | Definition |
| PASSWORD | string | Password for the session (in plain text). Note: Because the password displays in the Address field as you type it, you should use this parameter with care. Alternately, you can enter the password at the command prompt. |
| View only | Yes/No | Send the keyboard and mouse events to the remote computer. One of these values:
|
| Share desktop | Yes/No | Shares the connection with other clients on the same VNC server. The exact behavior in each case depends on the server configuration. Acceptable values are Yes (default value) and No. |
| port | number | If you use a port number other than the default, this parameter defines the port number. The port number is defined directly after the IP address in the URL (for example, 192.168.0.8:5600). The default VNC port is 5900. |
Note: You can use VNC connection parameters in bookmark entries for VNC servers as well. This image shows an example of an VNC bookmark entry:

Step 4. Connect to a VNC Server
In order to connect to a VNC server, complete these steps:
-
Establish a WebVPN session, and choose vnc:// from the Address drop-down list.

-
Enter the IP address of the VNC server, and click Browse.
-
Enter the password required for the VNC server.
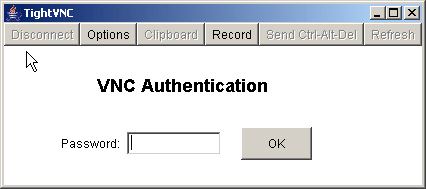
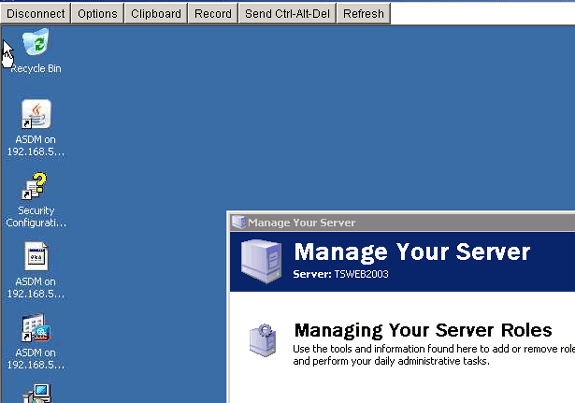
The VNC session appears in a new window.
Verify
Use this section in order to confirm that your configuration works properly.
-
The show import webvpn plug-in command displays the current WebVPN plug-ins. Verify vnc is listed in the ouput of the command.
-
When connected to WebVPN, vnc:// should be available as a URI option in the Address drop-down list.
The Output Interpreter Tool (registered customers only) (OIT) supports certain show commands. Use the OIT in order to view an analysis of show command output.
Troubleshoot
This section provides information you can use to troubleshoot your configuration.
-
Clear Browser Cache
This procedure deletes all files that are currently stored in the cache of your browser.
-
In Internet Explorer, choose Tools > Internet Options.
-
In the Temporary Internet Files section, click the General tab, and then click Delete Files.
-
-
Clear JRE Cache
This procedure deletes all files that are currently stored in the Java cache.
-
In Windows, click Start, and choose Settings > Control Panel.
-
In the Control Panel, double-click Java Plug-in.
-
Click the Cache tab, and click Clear.
-
-
Uninstall/Reinstall JRE
-
In Windows, click Start, and choose Settings > Control Panel > Add or Remove Programs.
-
Choose the Java Runtime Environment program, and click Remove.
-
Download the new JRE from the Java website (http://www.java.com/en/download/
 ), and install the new JRE.
-
-
Uninstall the VNC Plug-in
If the VNC option is not listed as a URI in the address field when you are logged into WebVPN, uninstall and reinstall the VNC plug-in. In order to remove the VNC plug-in from WebVPN, complete one of these procedures:
-
WebVPN—Choose Configuration > Remote Access VPN > Clientless SSL VPN Access > Portal > Client-Server Plug-ins, select the VNC plug-in, and click Delete.
-
CLI—Use the revert webvpn plug-in vnc command in order to remove the plug-in.
-
Related Information
Revision History
| Revision | Publish Date | Comments |
|---|---|---|
1.0 |
17-Sep-2007 |
Initial Release |
Contact Cisco
- Open a Support Case

- (Requires a Cisco Service Contract)


 Feedback