Introduction
This document describes how to configure Cisco Secure Client (includes Anyconnect) with local authentication on Cisco FTD managed by Cisco FMC.
Prerequisites
Requirements
Cisco recommends that you have knowledge of these topics:
- SSL Secure Client configuration through Firepower Management Center (FMC)
- Firepower objects configuration through FMC
- SSL certificates on Firepower
Components Used
The information in this document is based on these software and hardware versions:
- Cisco Firepower Threat Defense (FTD) version 7.0.0 (Build 94)
- Cisco FMC version 7.0.0 (Build 94)
- Cisco Secure Mobility Client 4.10.01075
The information in this document was created from the devices in a specific lab environment. All of the devices used in this document started with a cleared (default) configuration. If your network is live, ensure that you understand the potential impact of any command.
Background Information
In this example, Secure Sockets Layer (SSL) is used to create Virtual Private Network (VPN) between FTD and a Windows 10 client.
From release 7.0.0, FTD managed by FMC supports local authentication for Cisco Secure Clients. This can be defined as either the primary authentication method, or as fallback in case the primary method fails. In this example, local authentication is configured as the primary authentication.
Before this software version Cisco Secure Client local authentication on FTD was only available on Cisco Firepower Device Manager (FDM).
Configure
Configurations
Step 1. Verify Licensing
Before you configure Cisco Secure Client, FMC must be registered and be compliant with Smart Licensing Portal. You cannot deploy Cisco Secure Client if FTD does not have a valid Plus, Apex, or VPN Only license.
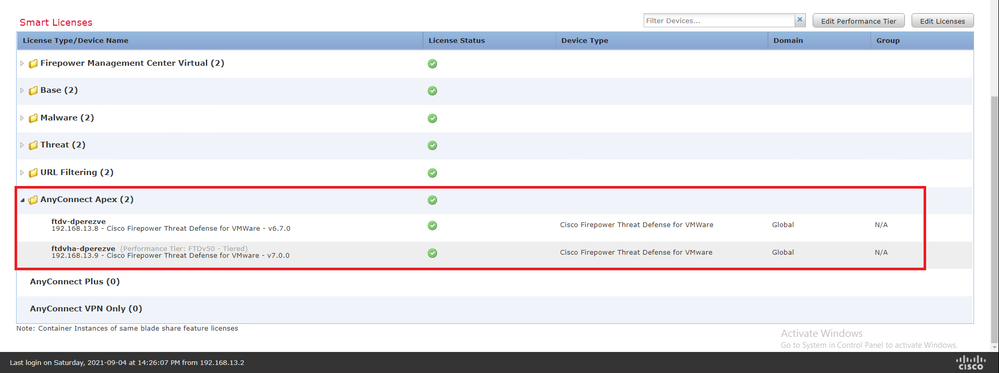
Navigate to System > Licenses > Smart Licenses in order to ensure that the FMC is registered and compliant to Smart Licensing Portal:

Scroll-down on the same page. On the bottom of the Smart Licenses chart, you can see the different types of Cisco Secure Client (AnyConnect) licenses available and the devices subscribed to each one. Ensure that the FTD at hand is registered under any of these categories:
Step 2. Upload Cisco Secure Client Package to FMC
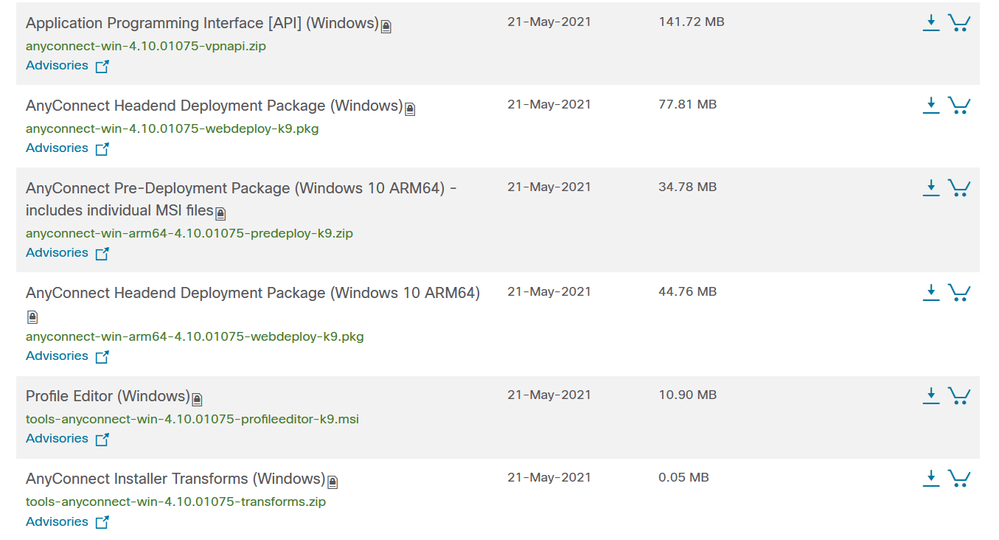
Download the Cisco Secure Client (AnyConnect) Headend Deployment Package for Windows from cisco.com:
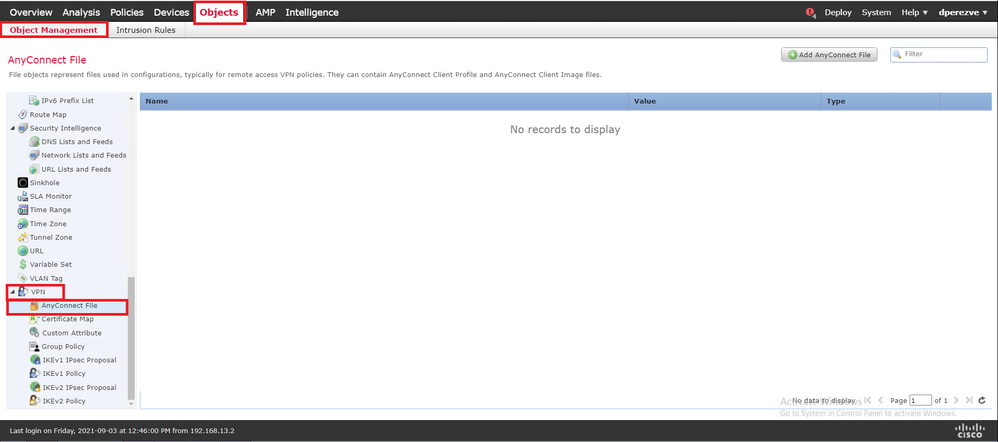
To upload the Cisco Secure Client image, navigate to Objects > Object Management and choose Cisco Secure Client File under the VPN category in the table of contents:
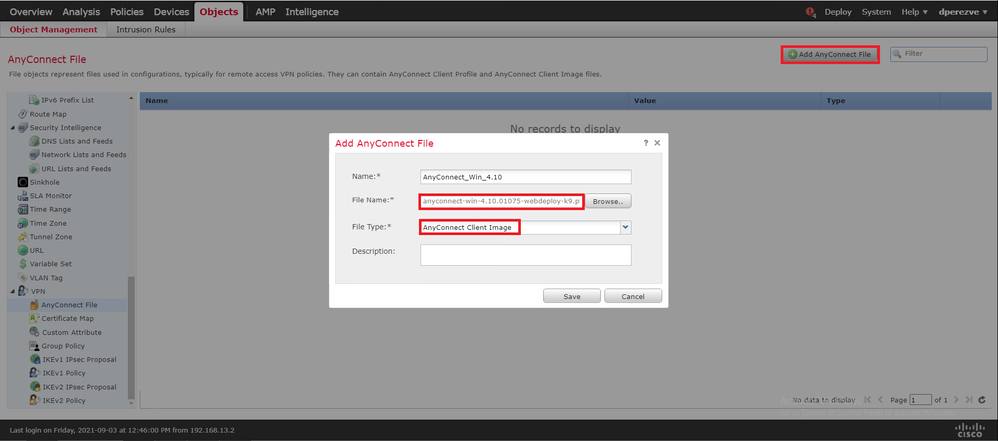
Click Add AnyConnect File. In the Add AnyConnect Secure Client File window, assign a name for the object, then choose Browse.. to pick the Cisco Secure Client package. Finally, select AnyConnect Client Image as the file type in the drop-down menu:
Click Save. The object must be added to objects list:
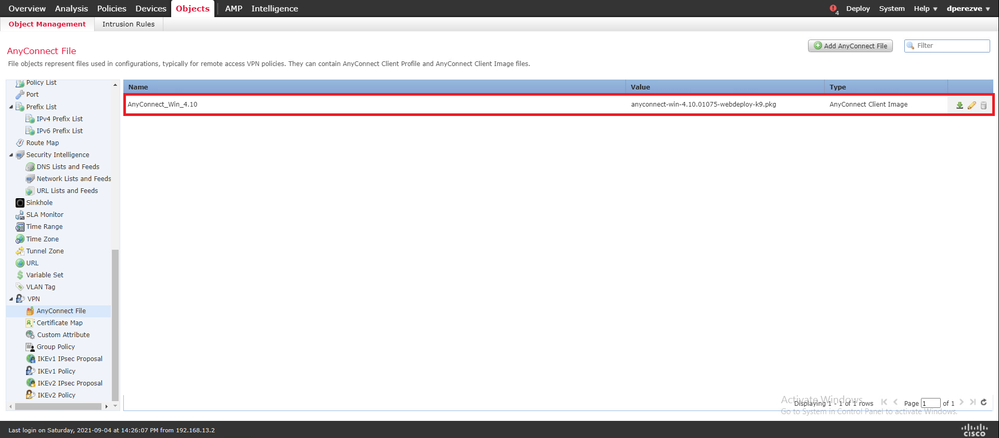
Step 3. Generate a Self-Signed Certificate
SSL Cisco Secure Client (AnyConnect) requires one valid certificate to be used in the SSL handshake between VPN headend and client.
Note: In this example, a self-signed certificate is generated for this purpose. In addition, aside from self-signed certificates, it is possible to upload a certificate signed by either an internal Certificate Authority (CA) or a well-known CA too.
To create the self-signed certificate, navigate to Devices > Certificates.

Click Add. Then choose the FTD listed in the Device drop-down menu in the Add New Certificate window.
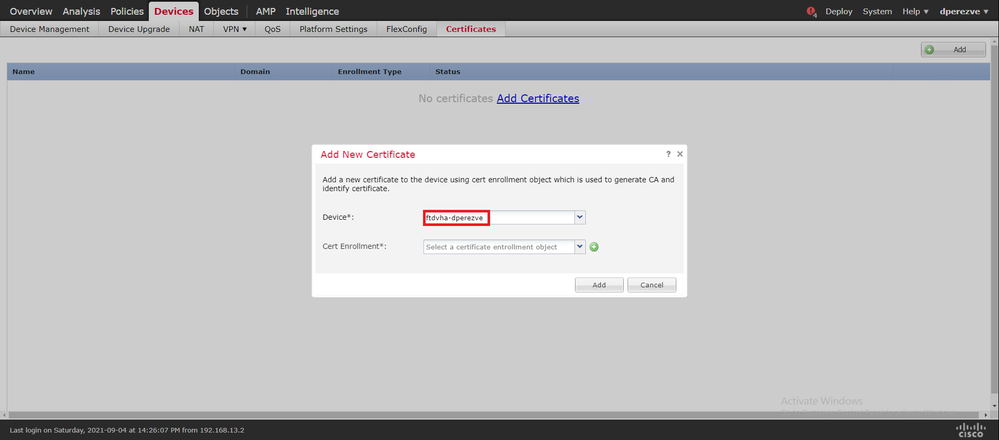
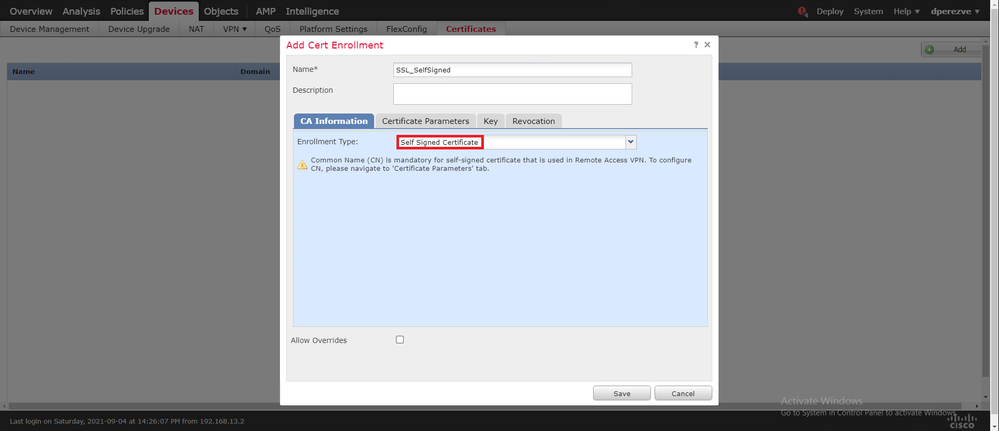
Click the Add Cert Enrollment button (green + symbol) to create a new enrollment object. Now, in the Add Cert Enrollment window, assign a name for the object and select Self Signed Certificate from the Enrollment Type drop-down menu.
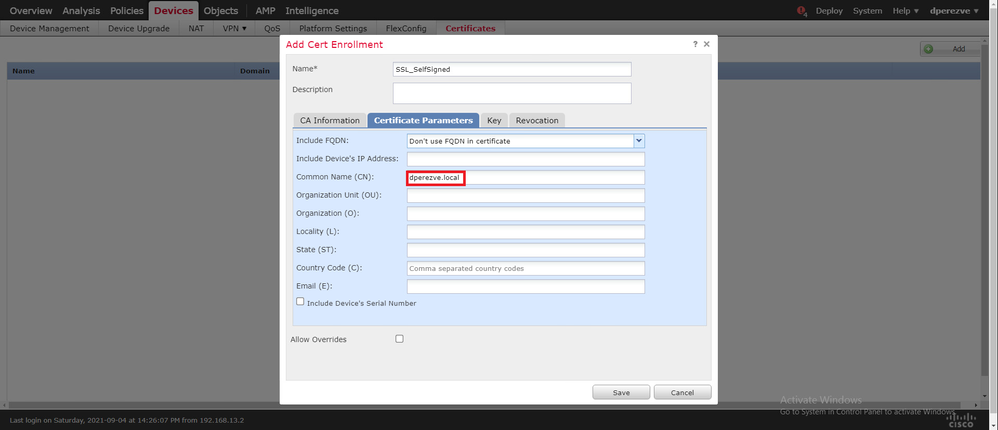
Finally, for self-signed certificates, it is mandatory to have a Common Name (CN). Navigate to the Certificate Parameters tab to define a CN:
Click the Save and Add buttons. After a couple of seconds, the new certificate must be added to the certificate list:

Step 4. Create Local Realm on FMC
The local user database and the respective passwords are stored in a local realm. To create the local realm, navigate to System > Integration > Realms:

Choose the Add Realm button. In the Add New Realm window, assign a name and choose LOCAL option in the Type drop-down menu:
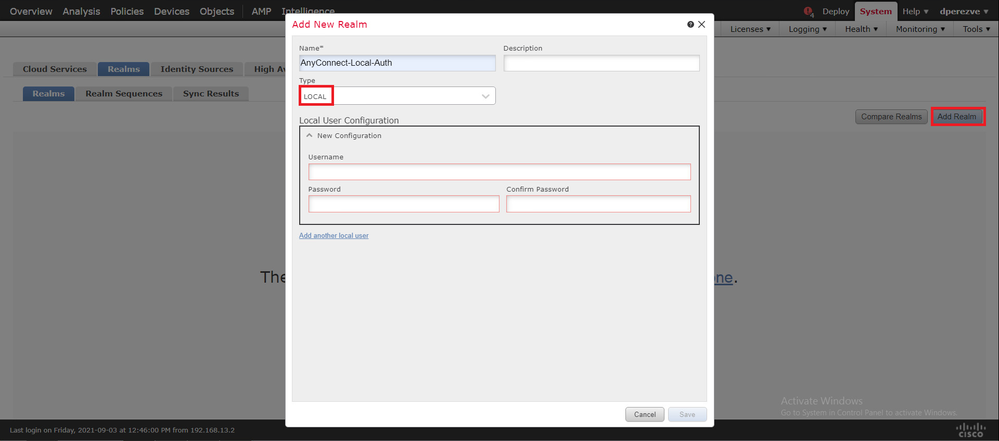
User accounts and passwords are created in the Local User Configuration section.
Note: Passwords must have at least one upper case letter, one lower case letter, one number and one special character.
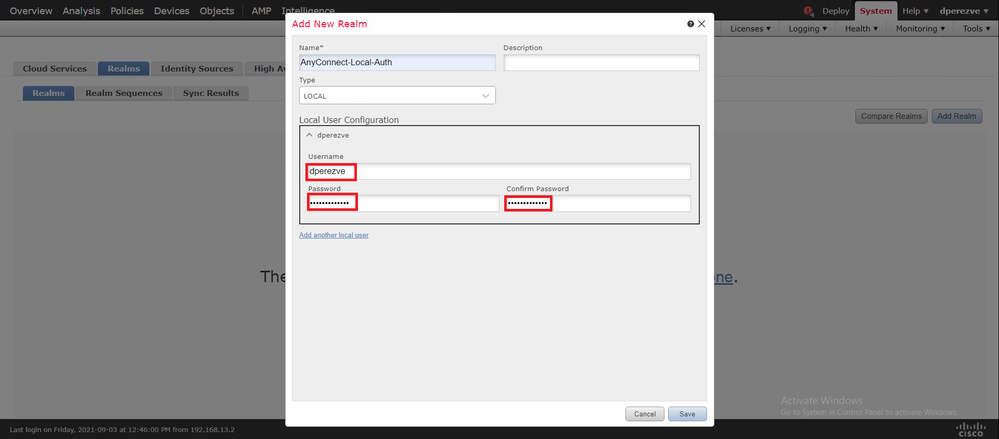
Save changes, then click Add Realm to add a new realm to the existing realms list.

Step 5. Configure SSL Cisco Secure Client
To configure SSL Cisco Secure Client, navigate to Devices > VPN > Remote Access:

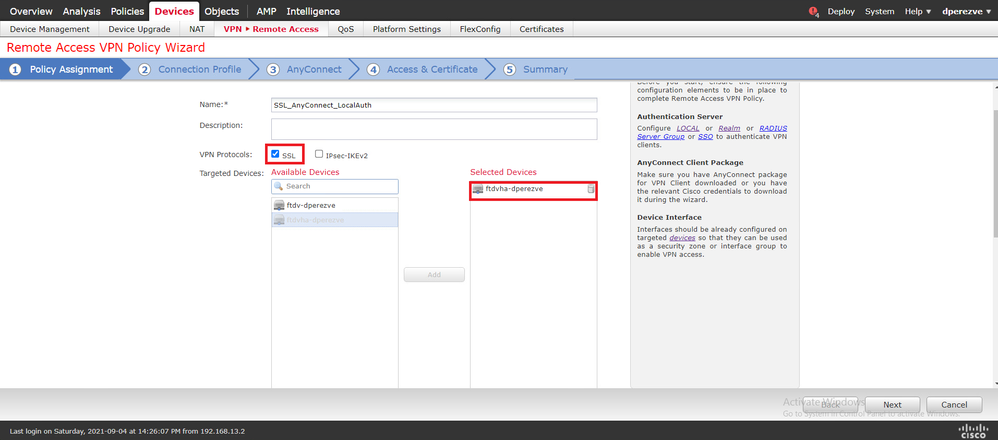
Click Add in order to create a new VPN policy. Define a name for the connection profile, select SSL checkbox, and choose the FTD listed as the targeted device. Everything must be configured in the Policy Assigment section in the Remote Access VPN Policy Wizard:
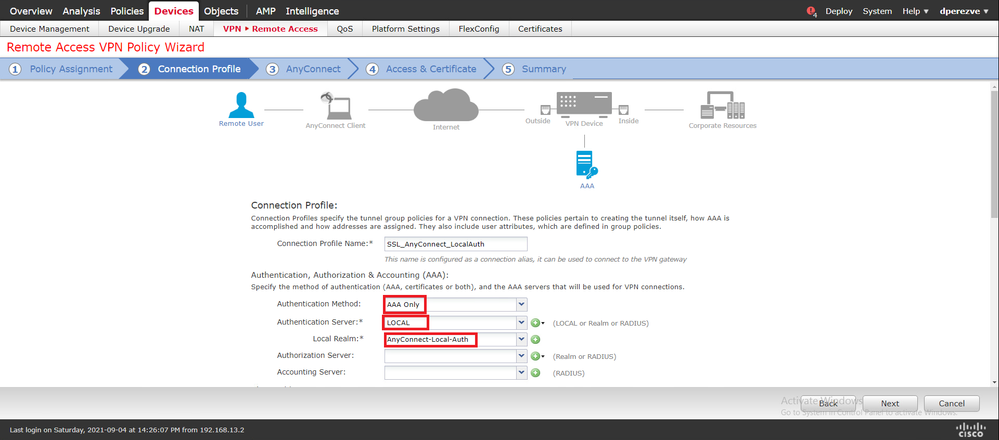
Click Next in order to move to the Connection Profile configuration. Define a name for the connection profile and choose AAA Only as the authentication method. Then, in the Authentication Server drop-down menu, choose LOCAL, and finally, choose the local realm created in Step 4 in the Local Realm drop-down menu:
Scroll down on the same page, then click the pencil icon in the IPv4 Address Pool section in order to define the IP pool used by Cisco Secure Clients:
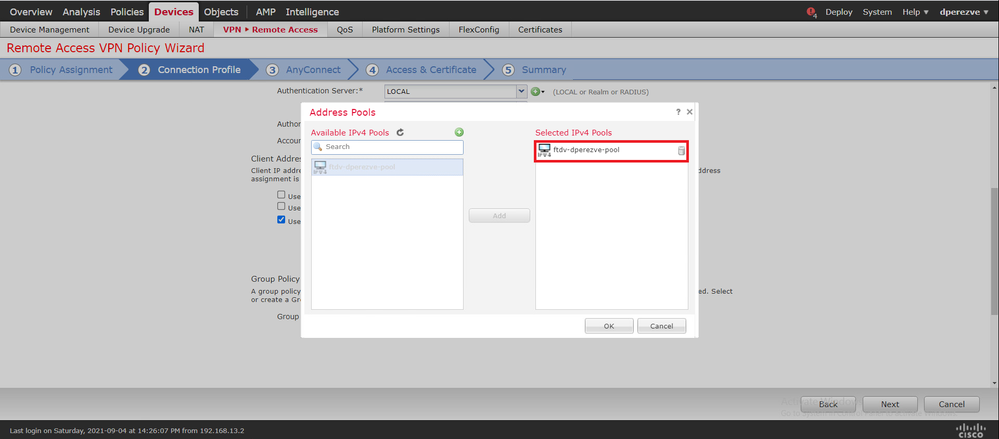
Click Next in order to move to the AnyConnect section. Now, select the Cisco Secure Client image uploaded in Step 2:

Click Next in order to move to the Access & Certificate section. In the Interface group/Security Zone drop-down menu, choose the interface where Cisco Secure Client (AnyConnect) needs to be enabled. Then, in the Certificate Enrollment drop-down menu, choose the certificate created in Step 3:
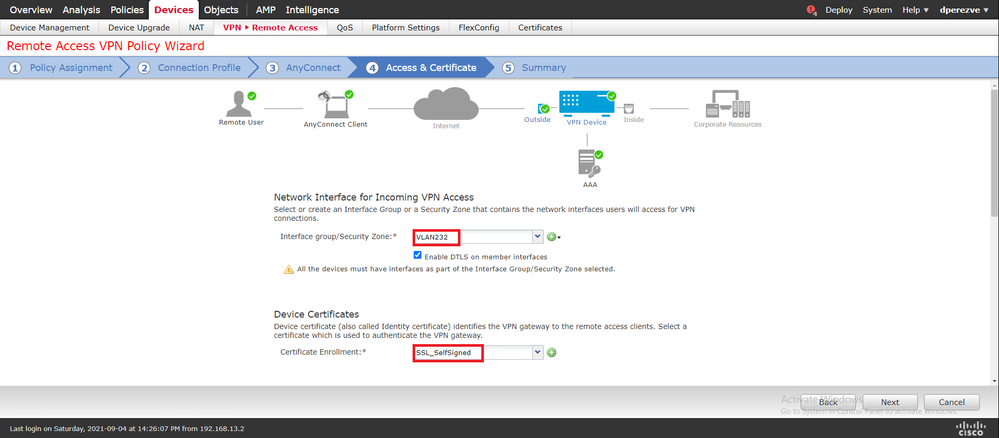
Finally, click Next to see a summary of the Cisco Secure Client configuration:
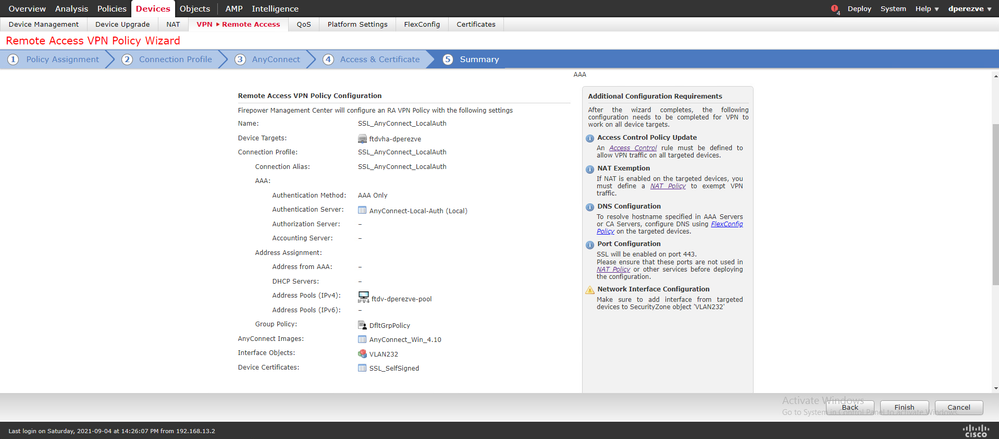
If all the settings are correct, click Finish and deploy the changes to FTD.
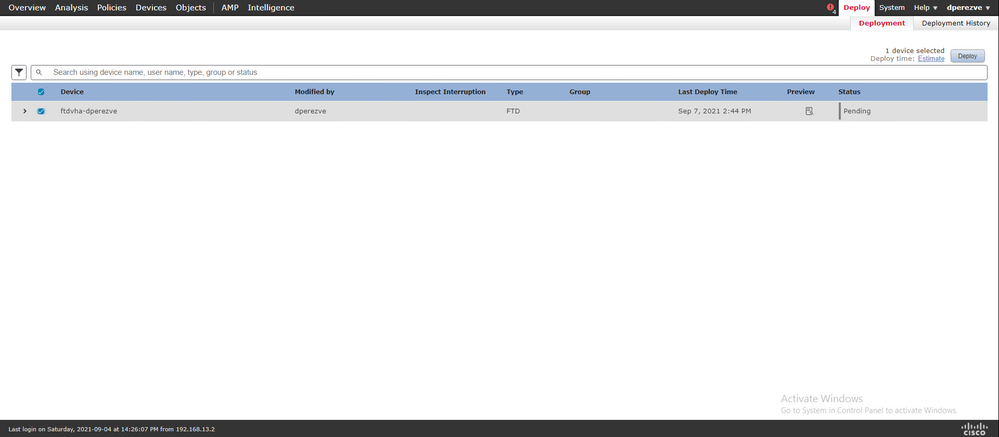
Verify
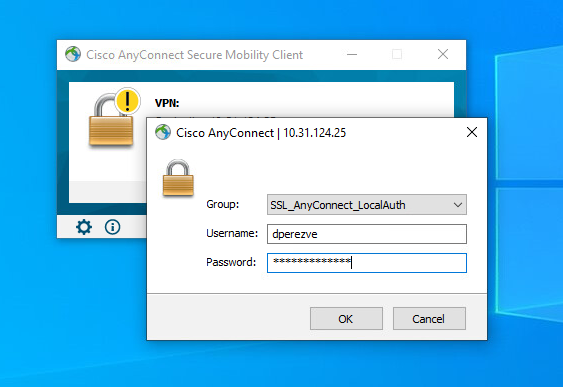
After deployment has been successful, initiate a Cisco AnyConnect Secure Mobility Client connection from Windows client to FTD. The username and password used in the authentication prompt must be the same as created in Step 4:
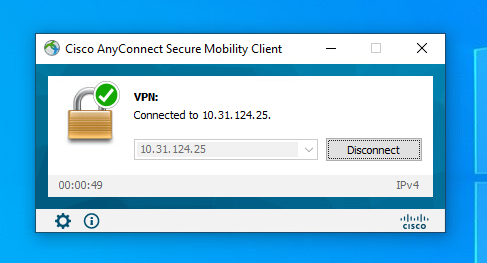
After credentials are approved by FTD, Cisco AnyConnect Secure Mobility Client app must display connected state:
From FTD, you can run show vpn-sessiondb anyconnect command in order to display the Cisco Secure Client sessions currently active on the Firewall:
firepower# show vpn-sessiondb anyconnect

Session Type: AnyConnect

Username     : dperezve               Index        : 8
Assigned IP  : 172.16.13.1            Public IP    : 10.31.124.34
Protocol     : AnyConnect-Parent SSL-Tunnel DTLS-Tunnel
License      : AnyConnect Premium
Encryption   : AnyConnect-Parent: (1)none  SSL-Tunnel: (1)AES-GCM-256  DTLS-Tunnel: (1)AES-GCM-256
Hashing      : AnyConnect-Parent: (1)none  SSL-Tunnel: (1)SHA384  DTLS-Tunnel: (1)SHA384
Bytes Tx     : 15756                  Bytes Rx     : 14606
Group Policy : DfltGrpPolicy
Tunnel Group : SSL_AnyConnect_LocalAuth
Login Time   : 21:42:33 UTC Tue Sep 7 2021
Duration     : 0h:00m:30s
Inactivity   : 0h:00m:00s
VLAN Mapping : N/A                    VLAN         : none
Audt Sess ID : 00000000000080006137dcc9
Security Grp : none                   Tunnel Zone  : 0
Troubleshoot
Run debug webvpn anyconnect 255 command on FTD in order to see SSL connection flow on FTD:
firepower# debug webvpn anyconnect 255
Besides Cisco Secure Client debugs, connection flow can observed with TCP packet captures as well. This is an example of a successful connection, a regular three handshake between Windows client and FTD is completed, followed by a SSL handshake used to agree ciphers.
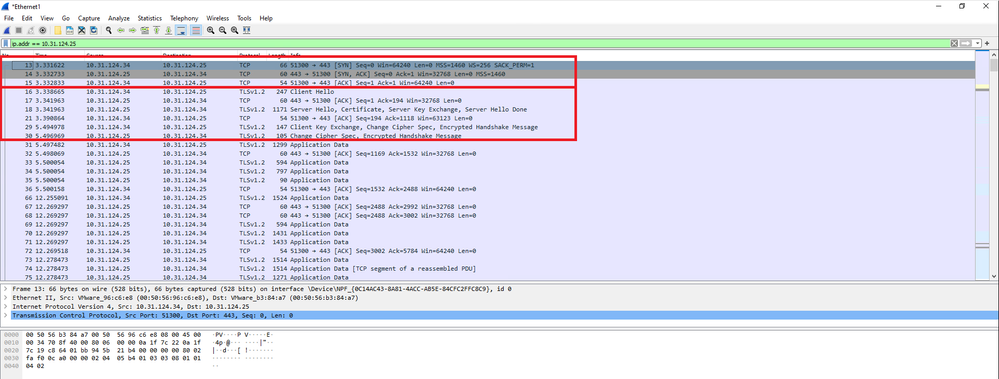
After protocol handshakes, FTD must validate the credentials with the information stored in local realm.
Collect the DART bundle and contact Cisco TAC for further research.


 Feedback