Introduction
This document describes the procedure to generate an SSH key pair using PuTTY and using a Linux shell, add it to AMP, and then access the CLI. AMP Private Cloud appliance uses certificate-based authentication to SSH into the appliance. The procedure to generate a key pair quickly, in order to access the CLI and to interact with the file system via SCP (WinSCP) is detailed here.
Prerequisites
Requirements
Cisco recommends that you have knowledge of these topics:
- PuTTY
- WinSCP
- Linux / Mac shell
Components Used
This document is not restricted to specific software and hardware versions.
The information in this document was created from the devices in a specific lab environment. All of the devices used in this document started with a cleared (default) configuration. If your network is live, ensure that you understand the potential impact of any command.
Configure
The first step involves generating an RSA key pair either using PuTTY or Linux shell. After this, the public key needs to be added and trusted by the AMP Private Cloud Appliance.
Generate an RSA key pair using PuTTY
Step 1. Ensure that you have installed PuTTY completely.
Step 2. Launch PuTTYGen which is installed along with PuTTY to generate the RSA key pair.

Step 3. Click Generate to and move the cursor randomly to complete the key pair generation.
Step 4. Choose to "Save public key" and "Save private key" which is to be used in the later sections, as shown in the image here.
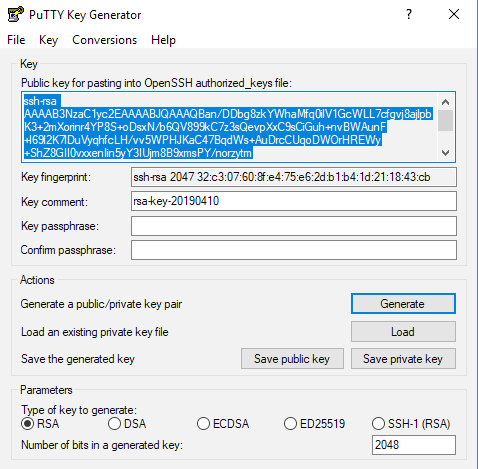
Step 5. Open the public key with Notepad as the format needs to be modified in order for it to be accepted in AMP Private Cloud Administration Portal.

Step 6. Remove the first 2 lines that start with "----BEGIN" and the final line that starts with "---- END"
Step 7. Remove all the line breaks to make the public key content as a single continuous line.
Step 8. Enter the word "ssh-rsa" at the beginning of the file. Save the file.

Generate an RSA key pair using Linux/Mac
Step 1. On the Linux/Mac CLI, enter the command "ssh-keygen"
Step 2. Enter the required parameters and this generates the RSA key pair at the folder "~/.ssh"
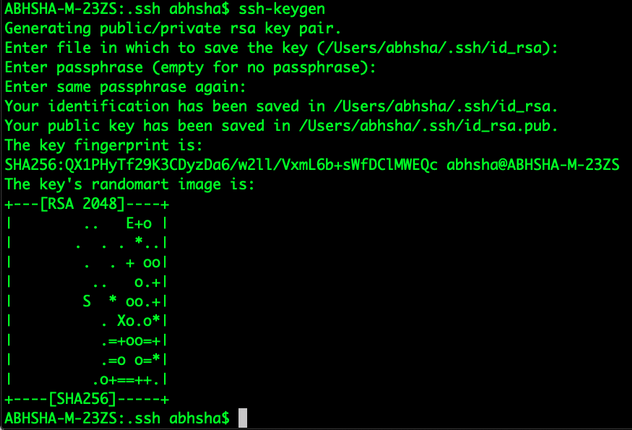
Step 3. If you open the contents of id_rsa.pub which is the public key, you can see that it is already in the required format.

Adding the generated public keys to the AMP Private Cloud Administration Portal
Step 1. Navigate to the AMP Private Cloud Administration Portal > Configuration > SSH
Step 2. Click "Add SSH Key"

Step 3. Add the contents of the public key and save this.
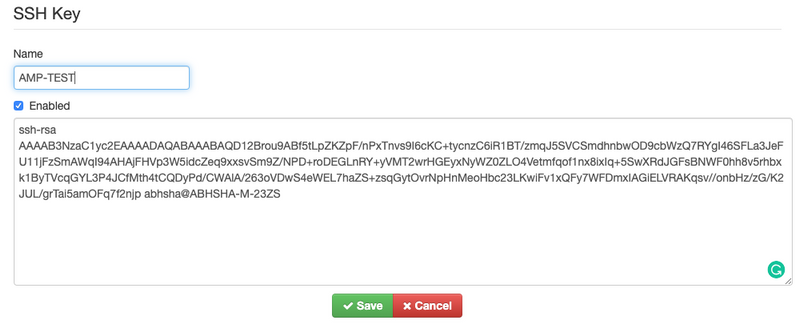
Step 4. After this has been saved, ensure that you're "Reconfiguring" the appliance.
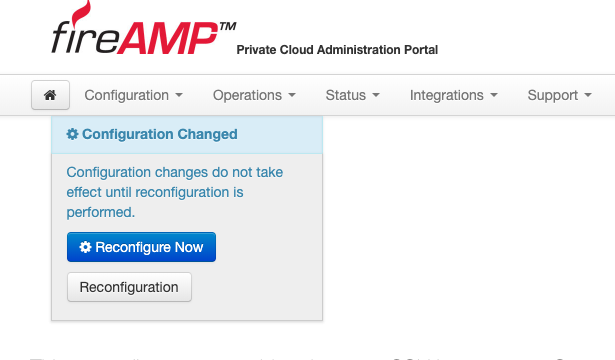
Use the generated key pair to SSH into the appliance using PuTTY
Step 1. Open the PuTTY and enter the IP address of the AMP Private Cloud Administration portal.
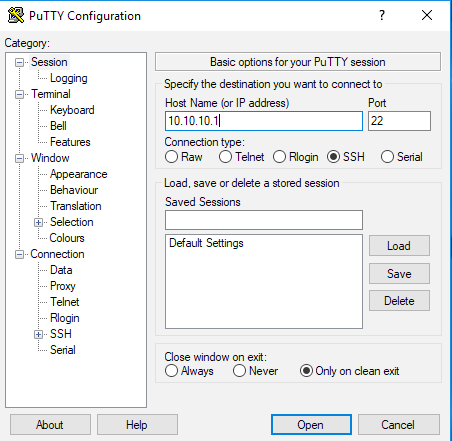
Step 2. On the left pane, select Connection > SSH and click on Auth.
Step 3. Select the Private Key which was generated by PuTTYGen. This is a PPK file.
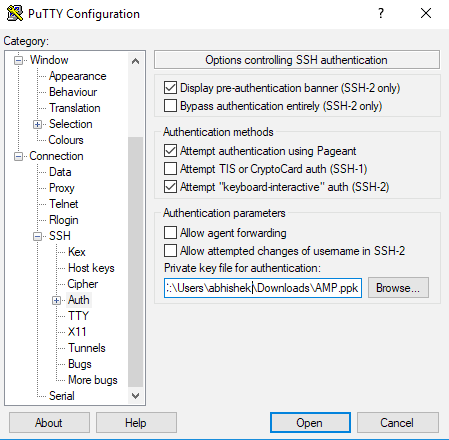
Step 4. Click on Open and when it prompts for a username, enter "root" and you should land at the CLI of the AMP Private Cloud.
Using the configured key pair to SSH into the appliance using Linux
Step 1. If the private and public key pairs are stored correctly at ~/.ssh path, then you should be able to SSH to the AMP Private Cloud appliance by simply issuing the ssh command without prompting you for any password.
ssh root@<AMP-IP-ADDRESS>

Using WinSCP to interact with the file system of AMP Private Cloud
Step 1. Install WinSCP on your machine and launch it.
Step 2. Enter the IP address of the AMP Private Cloud Administration Portal, and select the File Protocol as SCP. Enter the username as root and leave the password field.
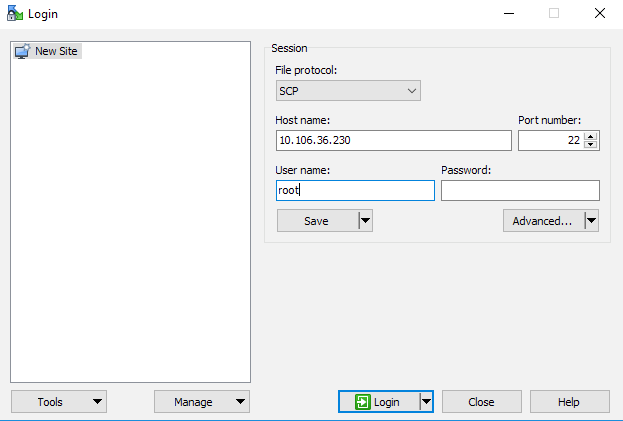
Step 3. Select Advanced > Advanced > SSH > Authentication
Step 4. Select the PPK file which was generated as a private key by PuTTYgen.
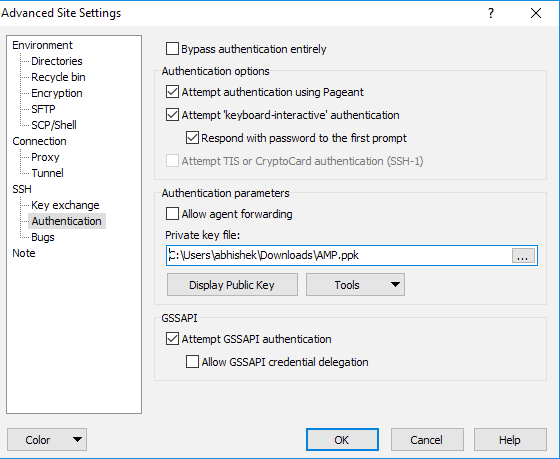
Step 5. Click OK, and then Login. You should be able to log in successfully after accepting the prompt.
