Introduction
This document describes the type of accounts and the steps to configure Two-Factor Authentication in the Cisco Secure Endpoint Console.
Prerequisites
Requirements
Cisco recommends that you have knowledge of these topics:
- Secure Endpoint
- Access to the Secure Endpoint Console
Components Used
The information in this document is based on these software and hardware versions:
- Secure Endpoint Console v5.4.20211013
The information in this document was created from the devices in a specific lab environment. All of the devices used in this document started with a cleared (default) configuration. If your network is live, ensure that you understand the potential impact of any command.
Background Information
Access Control
There are two types of accounts in the Secure Endpoint Console: administrators and unprivileged or regular accounts. When you create a new username you must select their privilege level, but you can change their access level at any time.
Administrators have full control, can view data from any group or computer in the organization and make changes to groups, policies, lists and usernames.
Note: An administrator can demote another administrator to a regular account but cannot demote themselves.
An unprivileged or regular user account can only view information for groups they have been given access to. When you create a new user account, you have the choice of whether to grant them administrator privileges. If you do not grant them those privileges, you can select which groups, policies and lists they have access to.
Two-Factor Authentication
Two-Factor Authentication provides an additional layer of security against unauthorized attempts to access your Secure Endpoint Console account.
Configure
Privileges
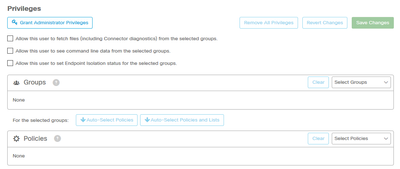
If you are an administrator, in order to change permissions or grant administrator privileges, you can navigate to Accounts > Users select the user account and choice the permissions, see this image.
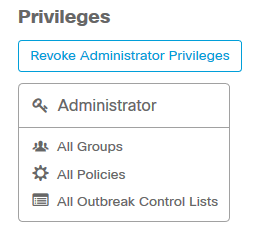
An administrator also can revoke administrator privileges to another administrator, to do this you can navigate to the administrator account to see the option, as shown in the image.
Note: When user permissions change some data is cached in Search results so a user is still able to see it for a period of time even though they no longer have access to a group. In most cases, the cache is refreshed after 5 minutes.
Two-Factor Authentication
This feature allows you to enforce the authentication with an external access request. In order to configure this, follow this procedure:
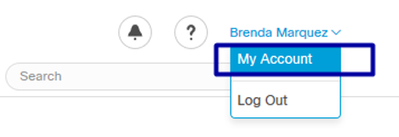
Step 1. Navigate to My Account at the right top of the Secure Endpoint Console as in this image.
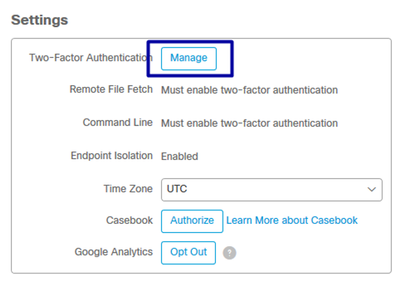
Step 2. In the Settings section select Manage, in order to see a straightforward guide with three steps needed to enable this feature, as shown in the image.
Step 3. There are three quick steps:
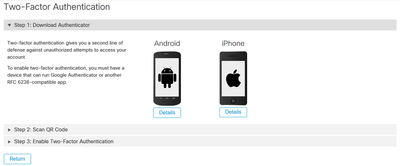
a) Download authenticator, which you can obtain for Android or iPhone that can run Google Authenticator. Select Details on any of the cell phones to generate a QR code that redirects you to the download page. See this image.
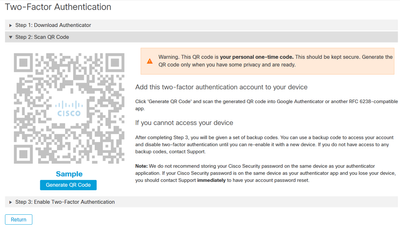
b) Scan QR code, select on Generate QR code, it that has to be scanned by Google Authenticator as shown in this image.
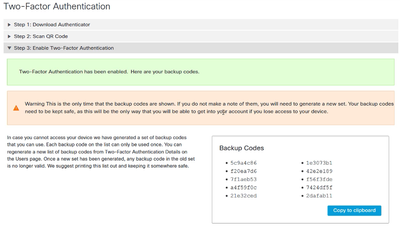
c) Enable Two-Factor authenticator, open your authenticator application in your cellular phone and enter the verification code. Select Enable to finish this process, as shown in the image.

Step 4. Once it is done, it gives you some backup codes. Select Copy to clipboard in order to save them, see the image as an example.
Note: Each backup code can only be used one time. After you have used all your backup codes you must return to this page in order to generate new codes.
For further reference, you can consult the Secure Endpoint User Guide.
Additionally, you can watch the Accounts and Enable Two-Factor Authentication video.


 Feedback