Introduction
This document describes step-by-step instructions on how to configure Terminal Access Controller Access Control System (TACACS+) on ONS15454/NCS2000 devices and Cisco Access Control System (ACS). All topics include examples. The list of attributes provided in this document is not exhaustive or authoritative and might change at any time without an update to this document.
Prerequisites
Requirements
Cisco recommends that you have knowledge of these topics:
- Cisco Transport Controller (CTC) GU
- ACS Server
Components Used
This document is not restricted to specific software and hardware versions.
The information in this document was created from the devices in a specific lab environment. All of the devices used in this document started with a cleared (default) configuration.
Note: If your network is live, ensure that you understand the potential impact of any command.
Configure
Configurations required on ONS15454/NCS2000:
1. You can configure TACACS server configuration from this Tab. Navigate to Provisioning > Security > TACACS Server as shown in the image.
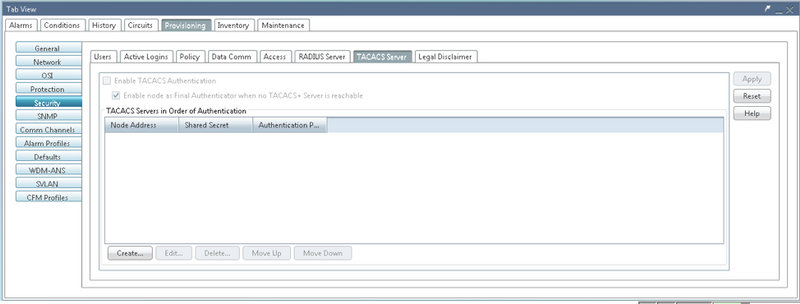
2. In order to add the TACACS+ server details, click on the Create button. It will open the TACACS+ configuration window as shown in this image.

- Enter the Server IP address
- Add the Shared secret between Node and the TACACS+ server
- Add the authentication port number. At this port, TACACS+ server is listening for the client. Default port number is 49
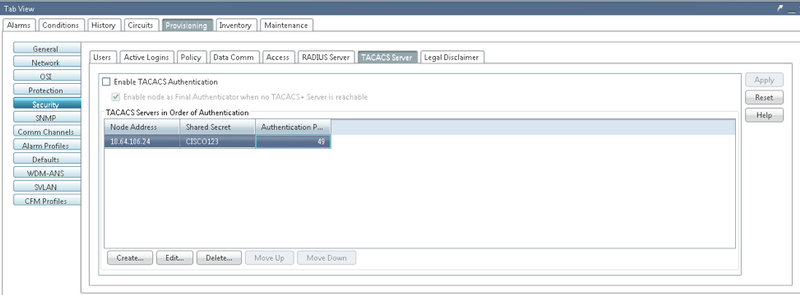
3. In order to activate the TACACS+ server configuration on NODE, check the checkbox Enable TACACS Authentication and click on the Apply button as shown in the image.

4. In order to enable the Node as the final authenticator, when no server is reachable, click on the checkbox as shown in the image.
5. In order to modify the particular server configuration, select the corresponding server configuration row, click on the Edit button in order to modify the configuration.
6. In order to delete the particular server configuration, select the corresponding server configuration row, click on Delete button to delete the configuration.
Configurations required on ACS Server:
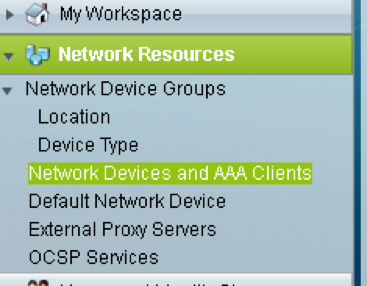
1. Create Network device and AAA client and click on the create button in Network Resources pan as shown in the image.
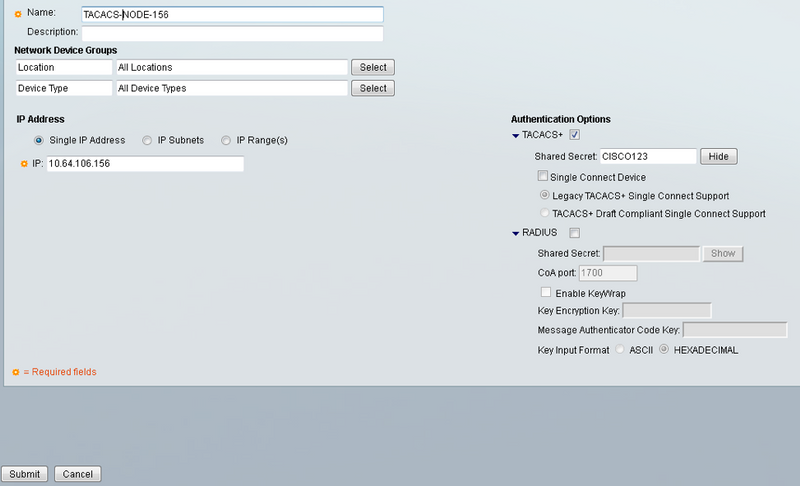
2. Give same Shared Secret as given in ONS node configuration. Otherwise, authentication will be failed.
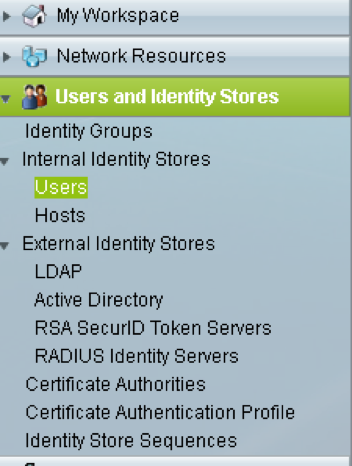
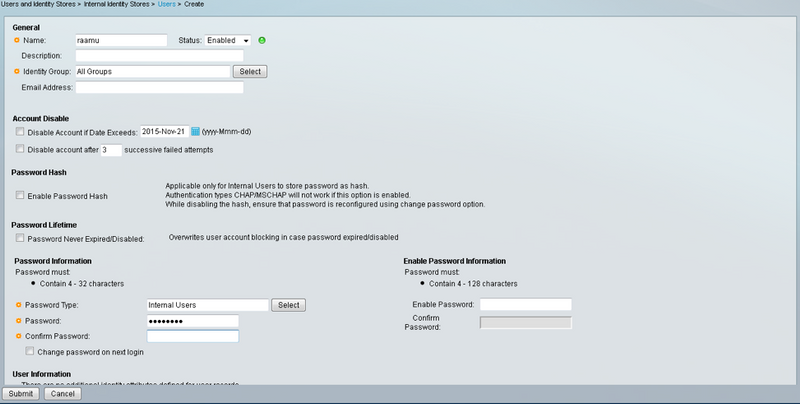
3. Create a username and password for the required user to get authenticated in the Users and Identity Stores Pan as shown in the image.
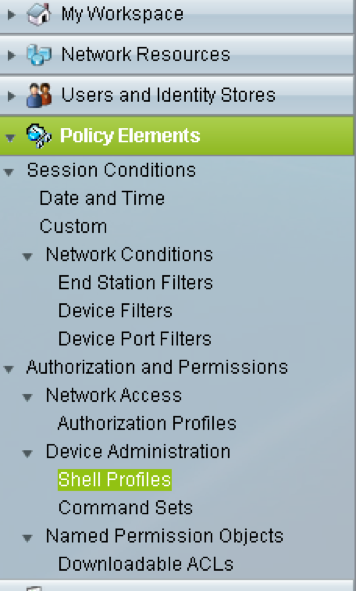
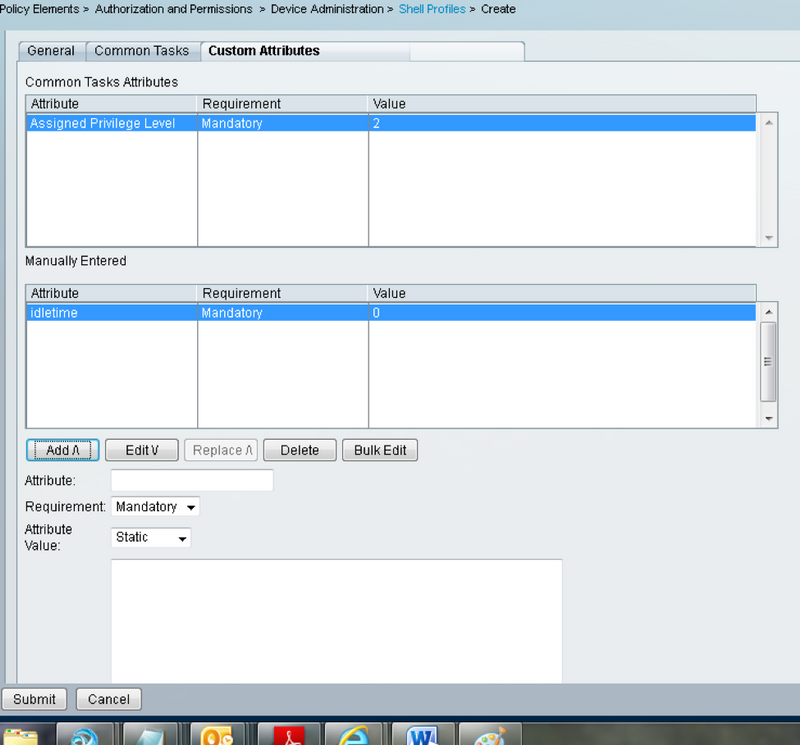
4. Create shell profiles in the Policy Elements pane:
a. Select the privilege level (0 to 3):
0 for Retrieve user.
1 for Maintenance user.
2 for Provisioning user.
3 for Superuser.
b. Create a custom attribute in Customer Attributes panel for Idle Time attribute.
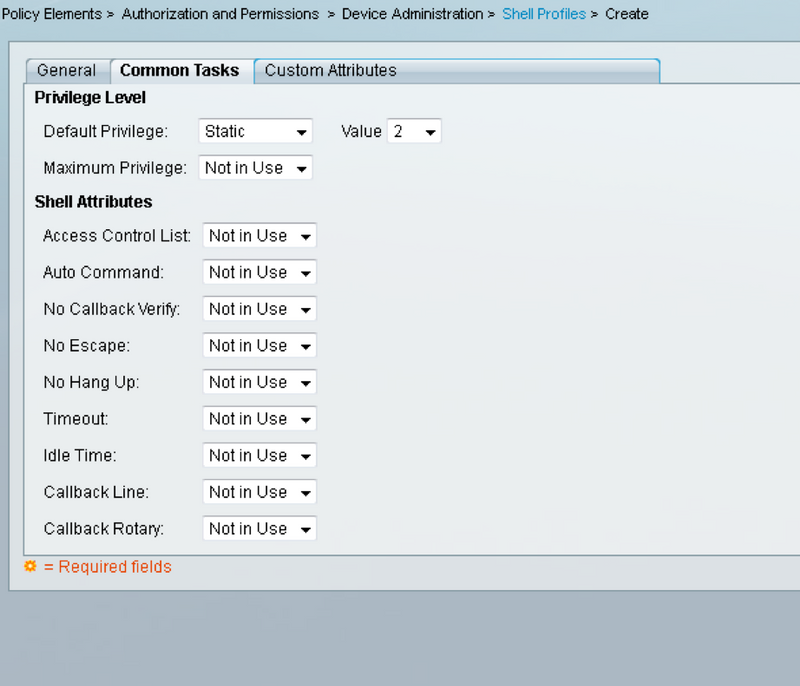
Idletime “0” indicates that connection never times out and it will be forever.the If user specifies any other time, connection will be available for that many seconds.
5. Create Access policies in the Access Polices panel:
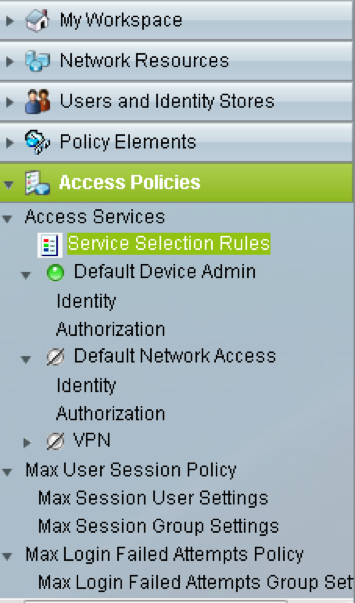
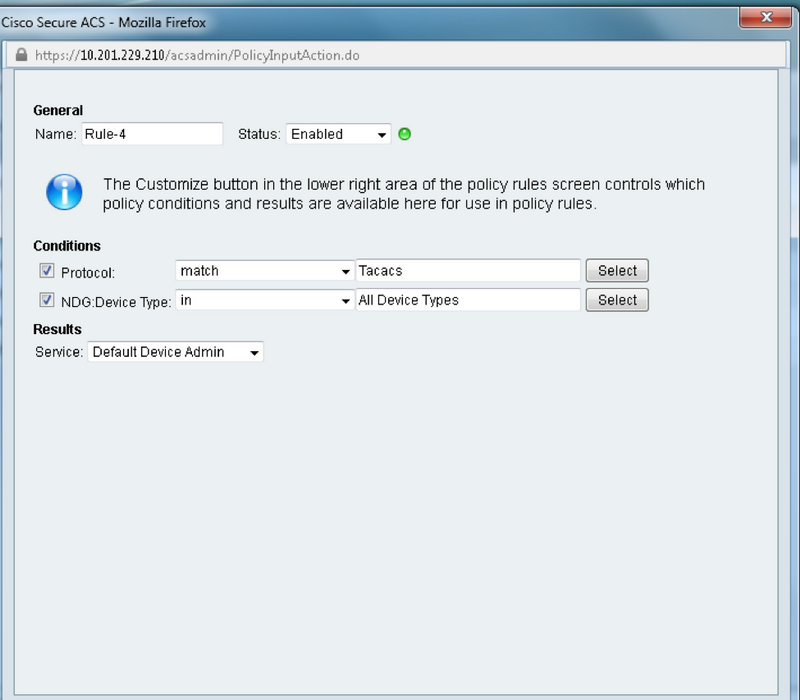
a. Click on Service Selection Rules and create a rule:
- Select TACACS as protocol
- The device as All device or specific similar to which created earlier
- Service type as Default Device Admin.
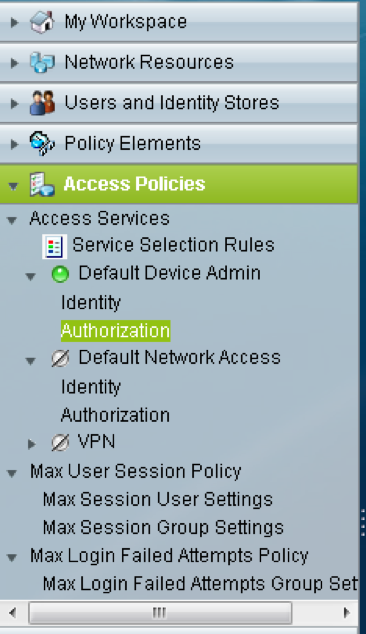
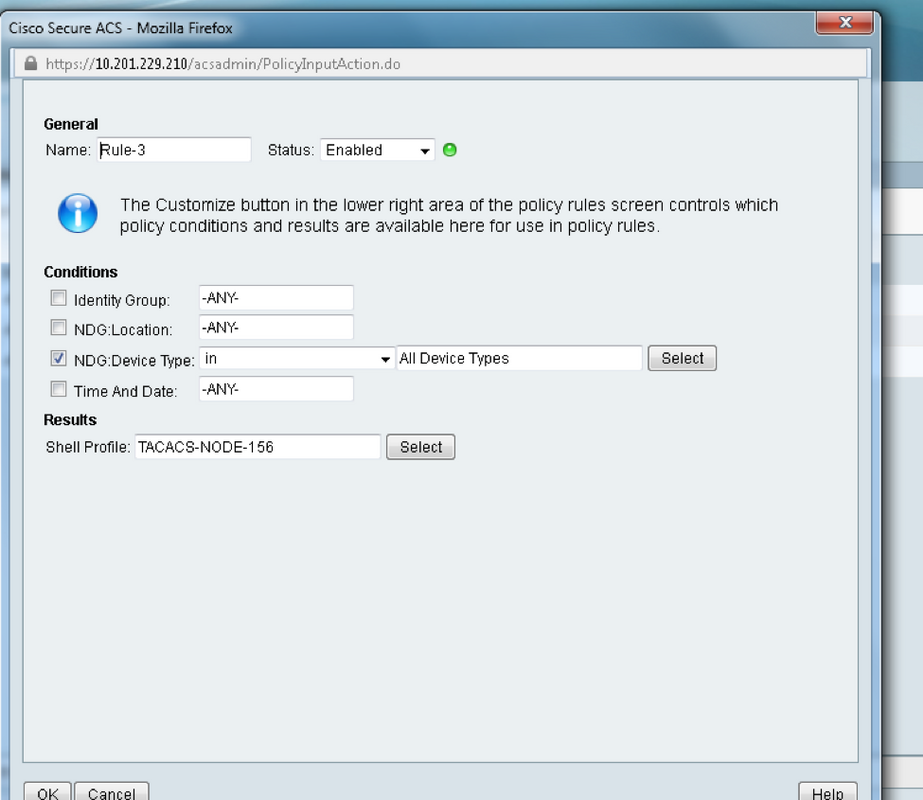
b. Select Authorization and create a rule for authorization in under Default Device Admin radio button:
- Select Already Created shell profile
- Select a specific device or all devices in device type
Verify
There is currently no verification procedure available for this configuration.
Troubleshoot
There is currently no specific troubleshooting information available for this configuration.