Introduction
This document describes how to identify and collect data when traffic has loss across the WAN but no drops are seen on the SD-WAN Edge.
Prerequisites
Requirements
Cisco recommends that you have knowledge of these topics:
- Cisco Software-Defined Wide Area Network (SD-WAN)
- Embedded Packet Capture or vManage Packet Capture
- Wireshark
- Microsoft Excel
Components Used
The information in this document is based on these software and hardware versions:
- C8000V version 17.03.04
- vManage version 20.3.4
- Wireshark version 2.6.3
The information in this document was created from the devices in a specific lab environment. All of the devices used in this document started with a cleared (default) configuration. If your network is live, ensure that you understand the potential impact of any command.
Background
In order to assist with this challenge, the steps described in this doc shows how to mark specific traffic with Differentiated Services Code Point (DSCP) to help to identify the desired packets. DSCP can be used to identify the traffic since this value is copied from the inner packet header to the IPsec header. Once the desired packets are identified, it shows how to match the traffic across two WAN captures to ensure traffic made it from source to destination.
Two single router sites are used to demonstrate this troubleshoot technique. In this case, ICMP traffic from 10.0.0.10 to 10.0.2.10 in the form of 100 pings as shown in the image. There is no loss in this example but this same troubleshoot technique is used in the case where there is a loss to identify it.

Troubleshoot Process
Overview Process
- For the traffic traced across the WAN, an Access List (ACL) (or centralized policy) is needed to mark traffic with some unused DSCP value. In this example, DSCP 27 is used.
- Once the traffic is marked, embedded packet capture is used to capture the packets on the transport interface of the source and destination router.
Note: vManage packet capture can also be used although there is a limitation of 5MB of data or 5 minutes of runtime.
- After the captures are taken, open them in Wireshark to view.
- The filter is applied in Wireshark to show which packets are desired and then they are compared.
- Microsoft Excel is used for large captures to ensure accuracy.
Mark the Desired traffic with DSCP
An access-list such as the example Is configured on the source router (cEdge1 in this example) and applied on the interface in the SD-WAN portion of the router config as shown.
An optional counter is applied to verify that traffic hits the policy as expected. This can be checked with the command show sdwan policy access-list-counters.
policy
 access-list mark_dscp_27
  sequence 10
   match
    source-ip 10.0.0.10/32
    destination-ip 10.0.2.10/32
   !
   action accept
    count MARK_DSCP_27_COUNT   (optional counter to verify packets that hit the policy)
    set
     dscp 27
    !
   !
  !
  default-action accept

sdwan
 interface GigabitEthernet3
  access-list mark_dscp_27 in
Capture the Traffic with the Embedded Capture
Note: How to configure an embedded packet capture in Cisco IOS XE to capture the encrypted packets which traverse the WAN, navigate to Embedded Packet Capture for Cisco IOS and Cisco IOS XE Configuration Example
Note: An ACL must be used to limit the EPC on the WAN as there could be more than the 1000 PPS rate-limit for the EPC.
Example
An ACL is configured on cEdge1 and cEdge3 since traffic is only checked in the direction of source to destination in this example.
Note: The WAN IP addresses are used to filter the capture. There are multiple outputs which can be used to identify the path the traffic takes so that the correct WAN IPs can be identified for the ACL filter. The commands which can be used to generate this output are the show sdwan app-fwd cflowd flows and show sdwan policy service path. Please, navigate to Conditional Packet Trace for debug condition.
ip access-list extended CAP-Filter
    10 permit ip host 192.168.23.149 host 192.168.28.240
At this point, the captures are started on both routers and 100 pings are sent across the overlay.
#ping vrf 10 10.0.2.10 rep 100
Type escape sequence to abort.
Sending 100, 100-byte ICMP Echos to 10.0.2.10, timeout is 2 seconds:
!!!!!!!!!!!!!!!!!!!!!!!!!!!!!!!!!!!!!!!!!!!!!!!!!!!!!!!!!!!!!!!!!!!!!!
!!!!!!!!!!!!!!!!!!!!!!!!!!!!!!

Success rate is 100 percent (100/100), round-trip min/avg/max = 1/1/4 ms
After the captures are stopped and collected from both routers, they need to be opened in Wireshark to view them.
Analysis through Wireshark
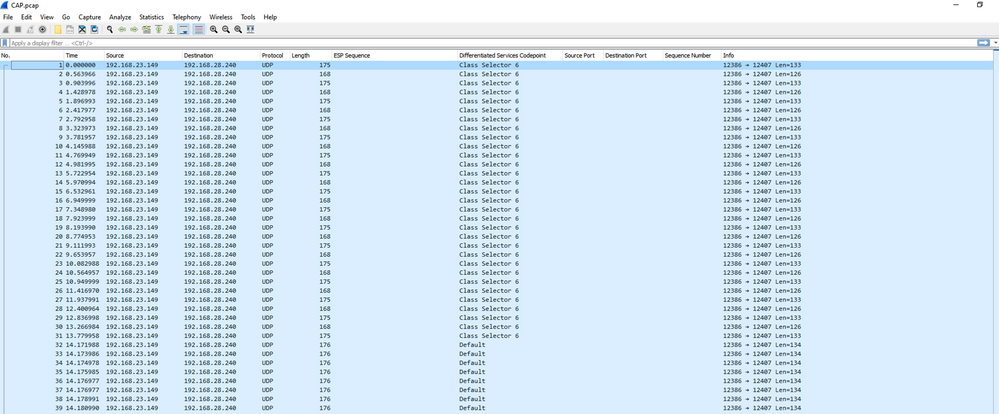
Once the cEdge1 capture is opened in Wireshark it is seen that all the traffic is encrypted and it is not easy to decipher which packets are the pings which were sent.
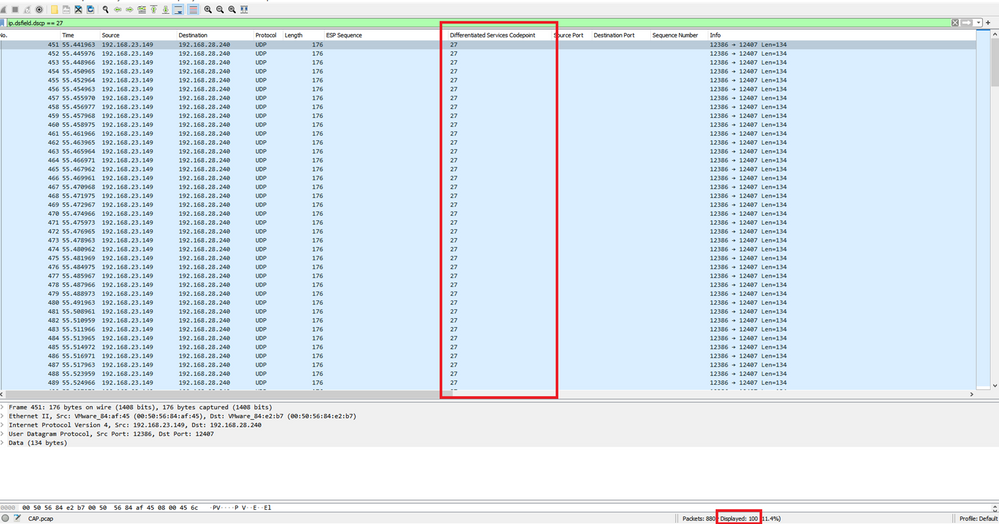
Filter this capture with a display filter ip.dsfield.dscp == 27, it is seen that only 100 packets are displayed at the bottom of the screen and it is seen that the DSCP column value all shows 27.
In some cases where DSCP value is maintained across the WAN, the same filter can be used on the destination capture.
In other cases, this is not possible such as a situation where DSCP value is cleared across a public-internet connection.
Filter the Desired Traffic by ESP Sequence
In either case, the traffic can be identified with the ESP sequence numbers.
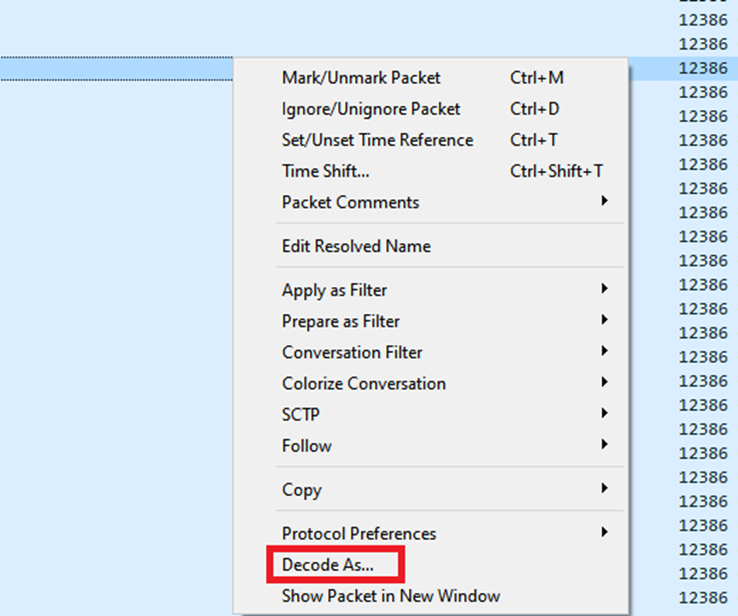
To see the ESP sequence numbers in the packet, right click on the capture and choose Decode as as shown.
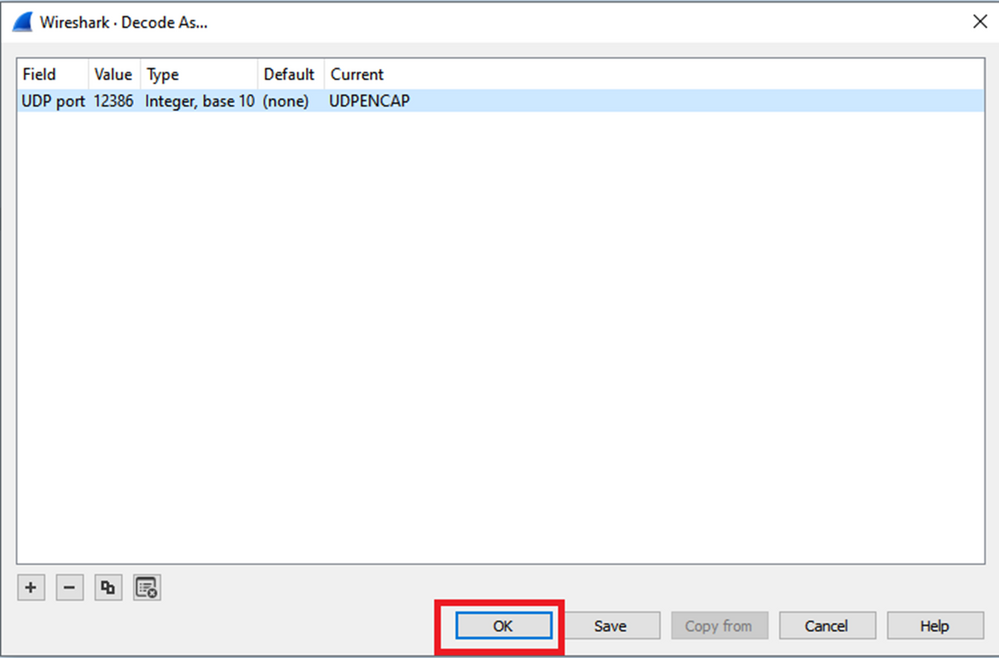
Select the Current field dropdown menu and in that field type UDPENCAP or select it from the dropdown.
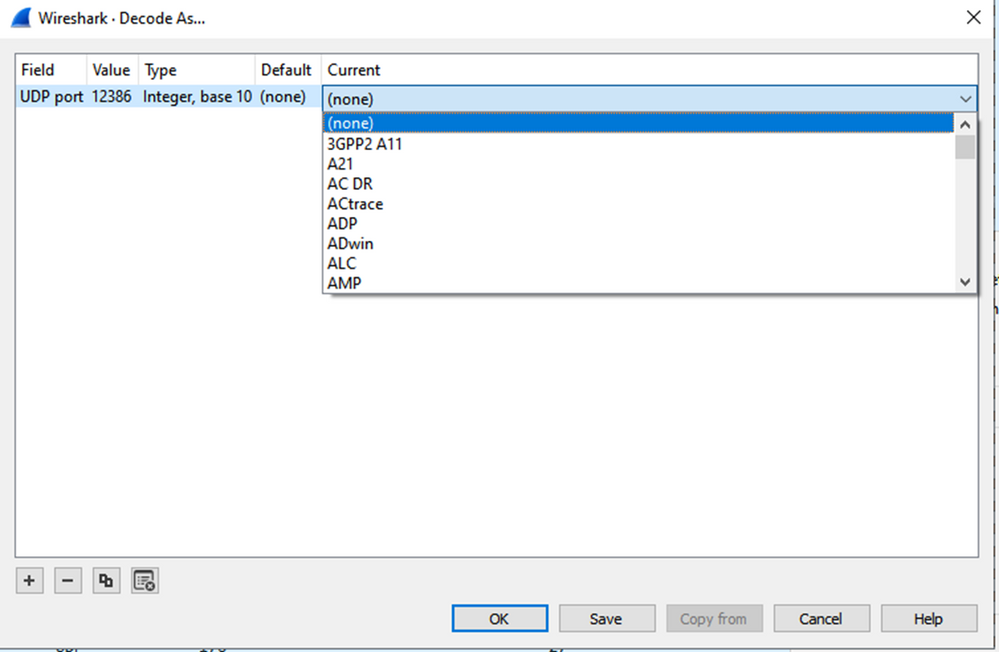
Select the OK once this is completed.
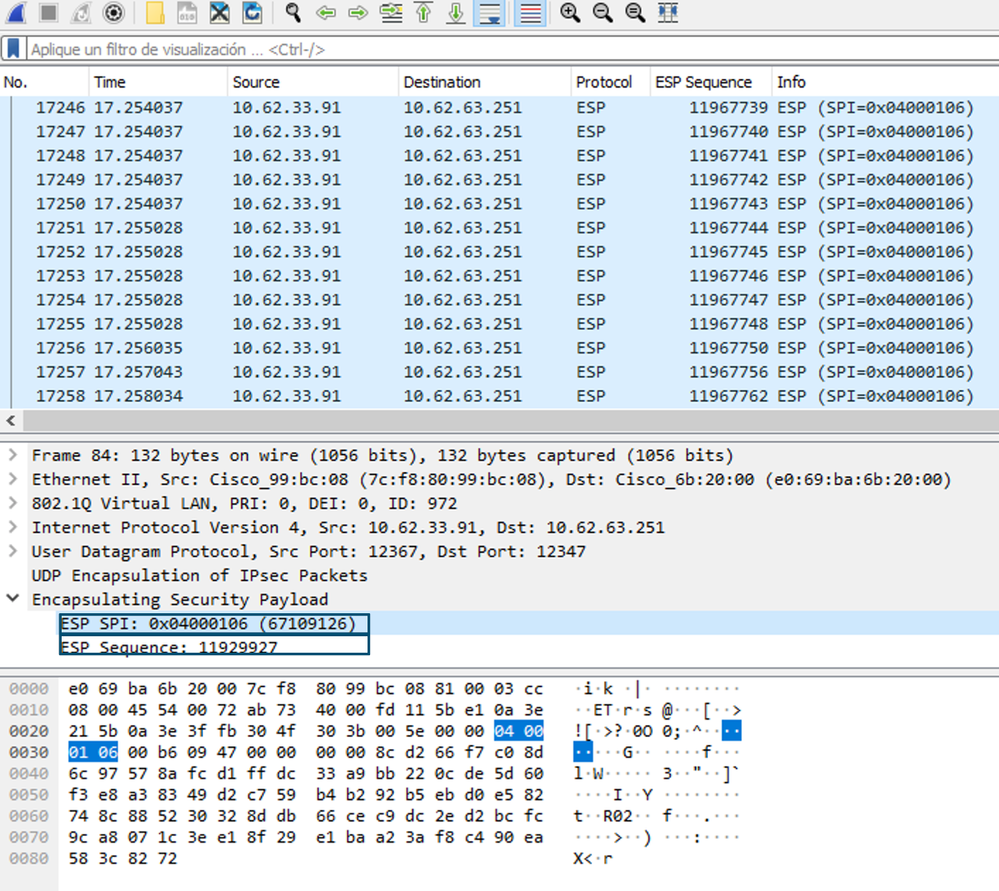
Within the Wireshark Packet Details section, expand the Encapsulating Security Payload portion of the packet to see ESP Sequence.

Right click on ESP Sequence and choose apply as column so the ESP Sequence can be seen as a column in the Packet List section at the top portion of the Wireshark screen.
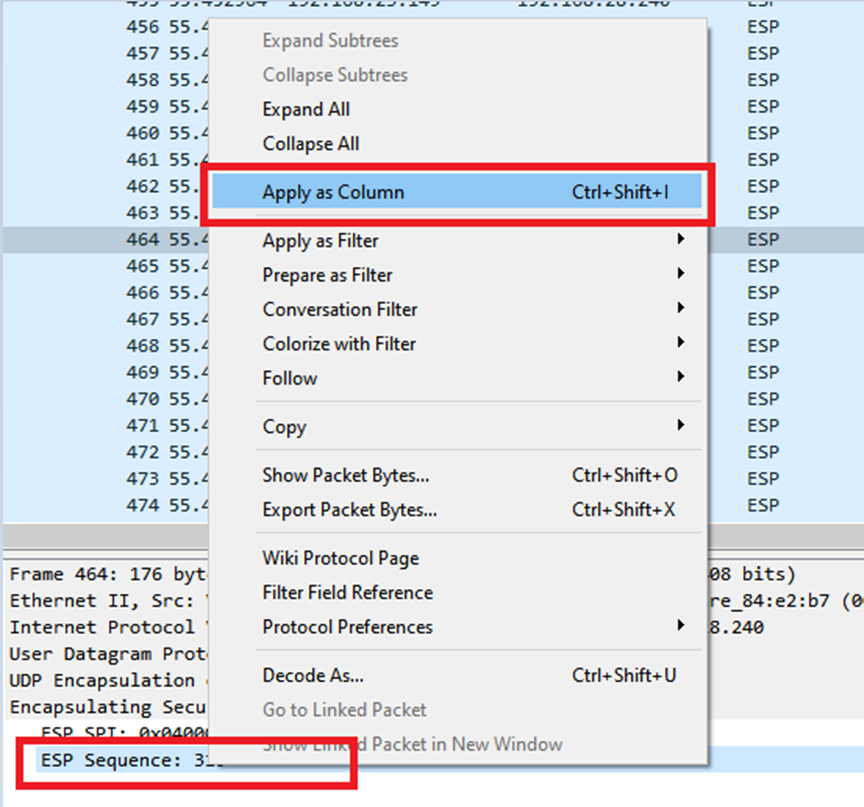
Note: The ESP SPI for the packets on cEdge1is 0x040001dc. This is used for a filter on the destination capture.

Open the destination capture, repeat the steps to decode as UDPENCAP, and display the ESP Sequence numbers in the packets.
Once the packets display the ESP Sequence number, the ESP SPI from the first capture can be used as a filter on the second capture to display only the traffic within that SPI that matches the desired traffic.
Notice that the packet sequence numbers that match both have DSCP 27 marked.
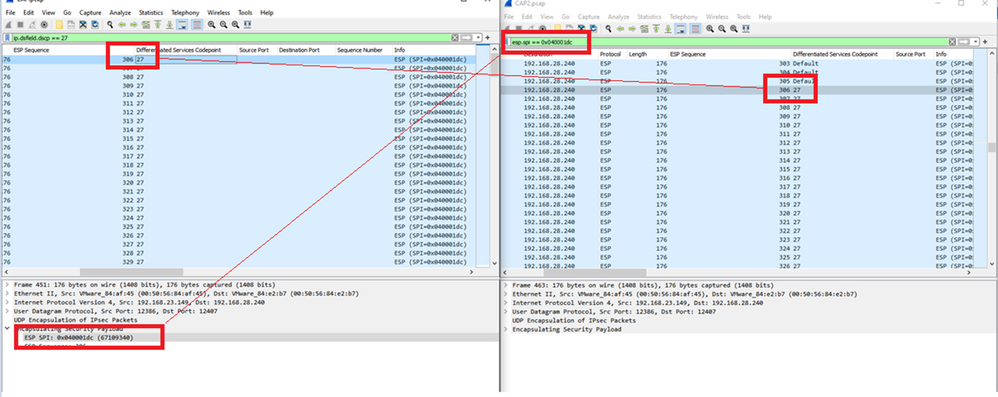
This comparison can be done in Wireshark manually or Microsoft Excel can be used to do this comparison.
In order to use Microsoft Excel to compare, it is necessary to slice both captures to contain only packets which are in both captures.
In the source capture, the first relevant packet has ESP sequence 306 and that corresponds to packet number 451.

The last relevant packet in the source capture has ESP sequence 405 and is packet number 550.

In the destination capture, the first relevant packet corresponds to the source capture with ESP Sequence 306 but in this capture is packet 463.

The last relevant packet is also present with ESP Sequence 405 and it is packet 564.

The first capture must now be sliced to include only relevant packets.
Navigate to File > Export Packet Dissections > As CSV…
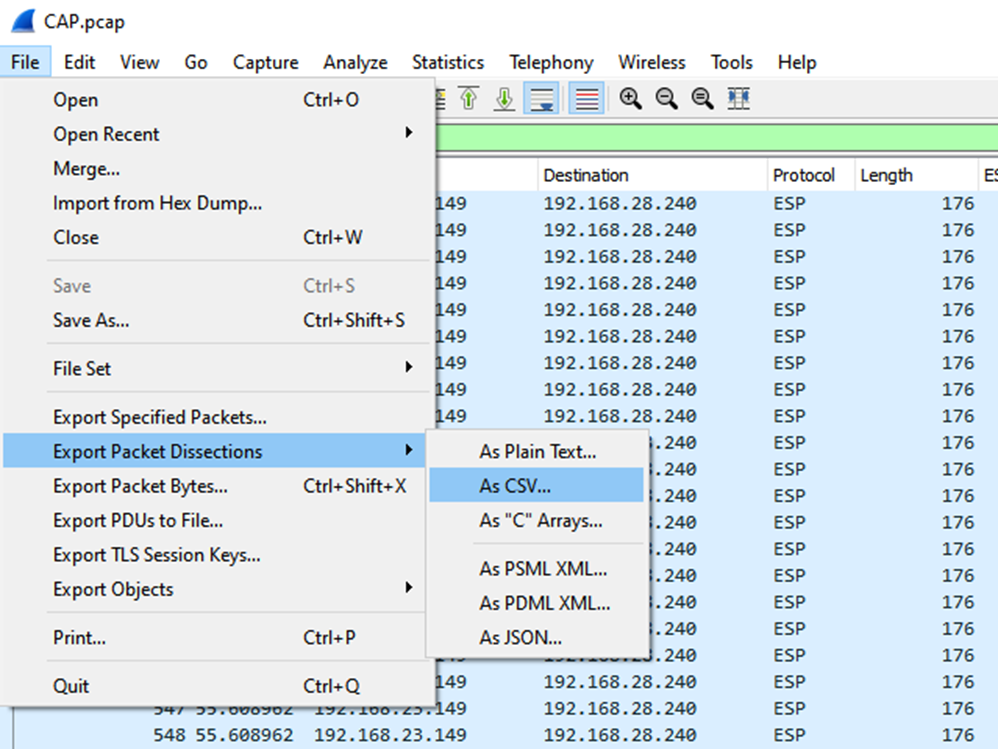
Select Captured and Range and in the Range field type the range from the first relevant packet to the last relevant packet.
Enter a file name in the File Name field and click Save.
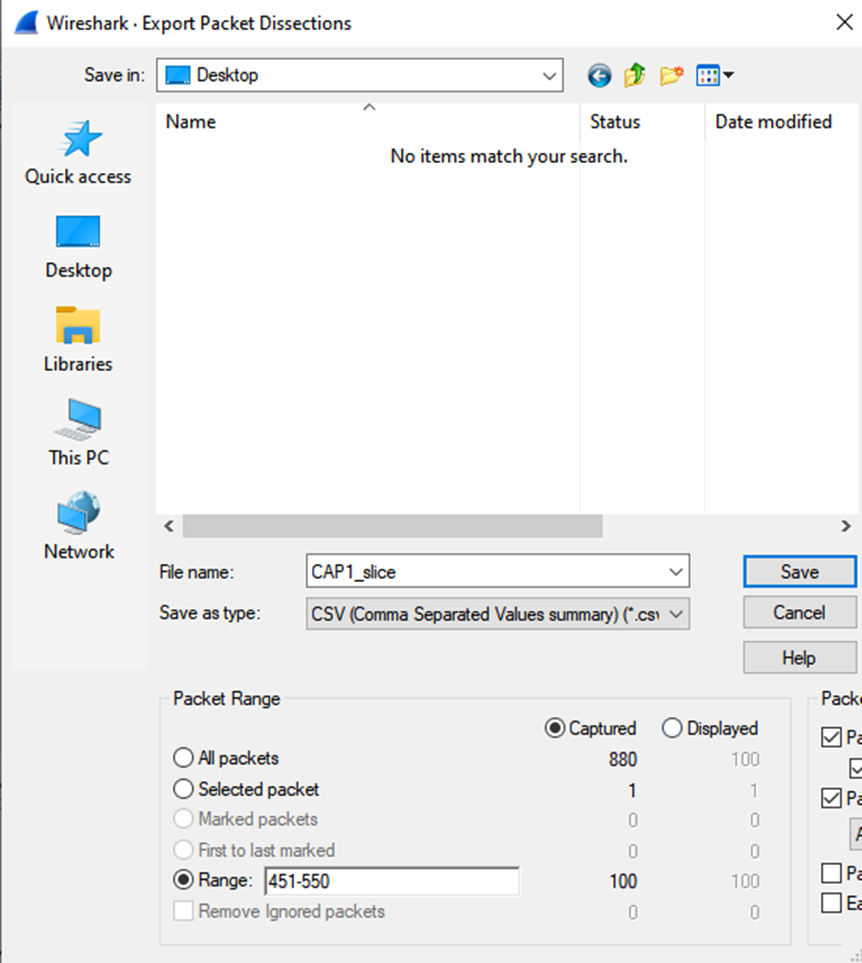
Repeat the same process on capture 2 for the relevant packets.
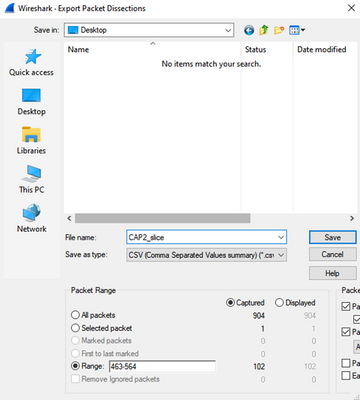
Open both CSV files in Microsoft Excel.
On the source capture CSV, save as an XLSX format.

At the bottom of the screen, select the + symbol to add another sheet. Name it CAP2_slice.

Open the CAP2 CSV file and press CTRL + a to select all and CTRL + c to copy it.
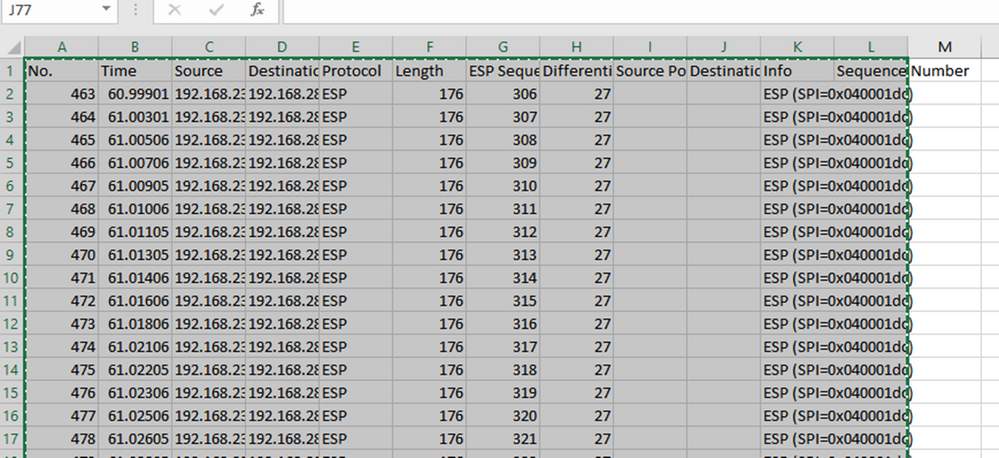
Navigate to the CAP1_slice.xlsx file and on the second tab for CAP2_slice, paste (CTRL + v) the copied information into the cell A1.
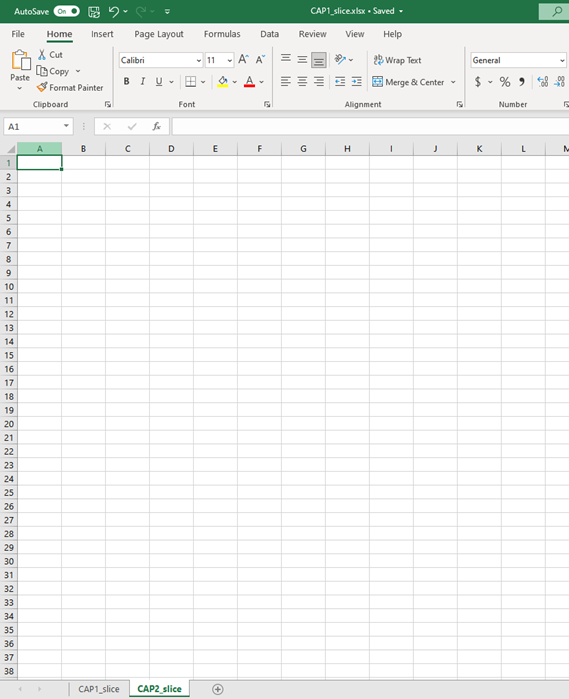
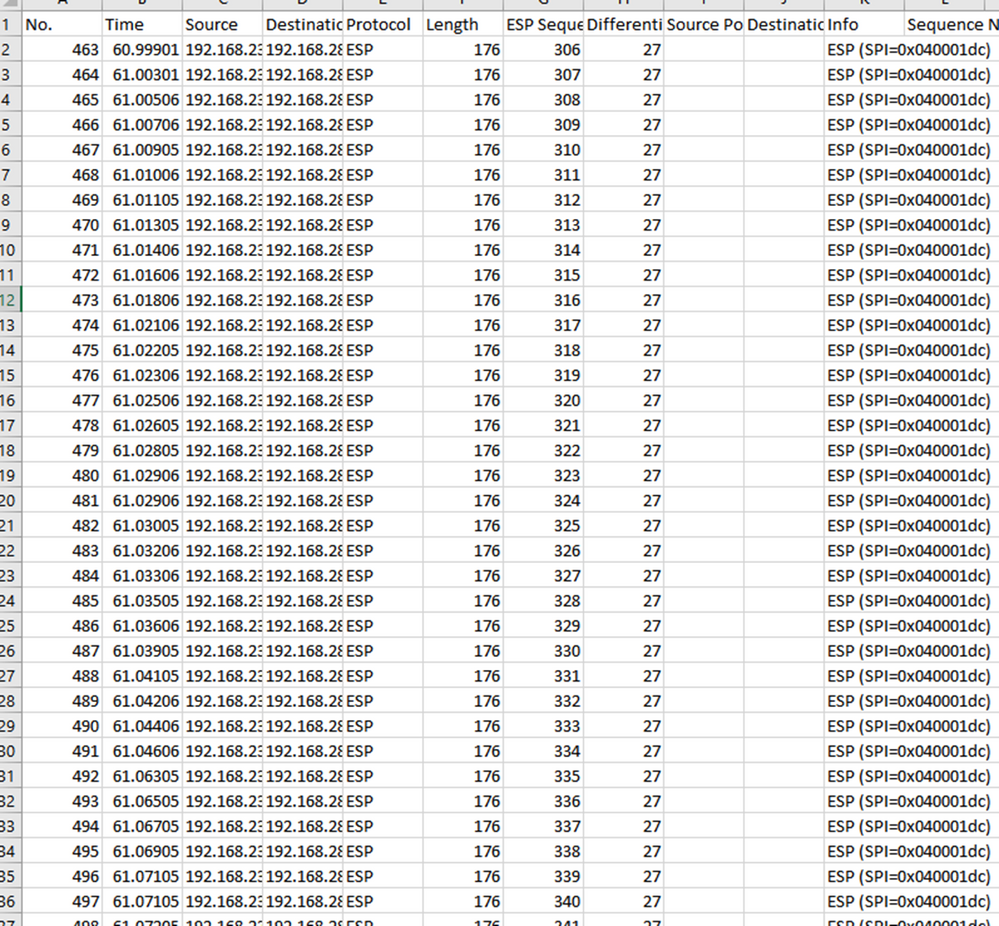
Navigate back to CAP1_slice sheet and make a new column called COMPARE_ESP_SEQUENCE.

As the ESP Sequence number is in Column G, compose a VLOOKUP command as shown to compare the two sheets to ensure that everything in Column G on the source is in Column G on the destination.
=IF(ISNA(VLOOKUP(G2,CAP2_slice!G:G,1,FALSE)),"MISSING","PRESENT")

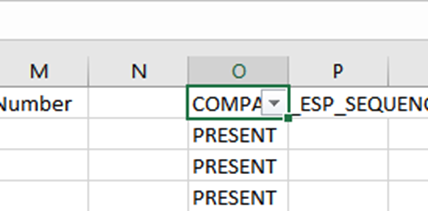
After Enter is selected the word PRESENT is displayed. This means that the packet with ESP Sequence 306 is present in the second sheet. This is significant because it means that the packet made it from the source to the destination.

Select Column O Row 2 and hover over the bottom right corner of the green box around that cell.

Select and hold, and drag the mouse down to copy this formula to the bottom of the cells which have values.


Scroll back to the top of the sheet and click the COMPARE_ESP_SEQUENCE. Then select Sort & Filter.

Choose Filter from the dropdown menu.
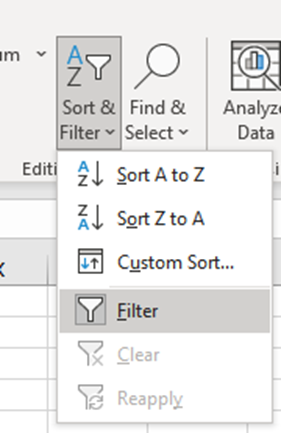
A dropdown menu appears on the COMPARE_ESP_SEQUENCE column.
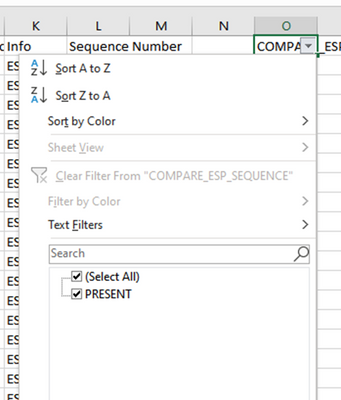
Click the dropdown menu on the COMPARE_ESP_SEQUENCE heading. Notice that in this example, the only value shown is PRESENT. This means all the packets are present in both captures.
To create a problematic example, delete 10 packets from the CAP2_slice, to demonstrate how this would work in a test where some missed packets are missing.
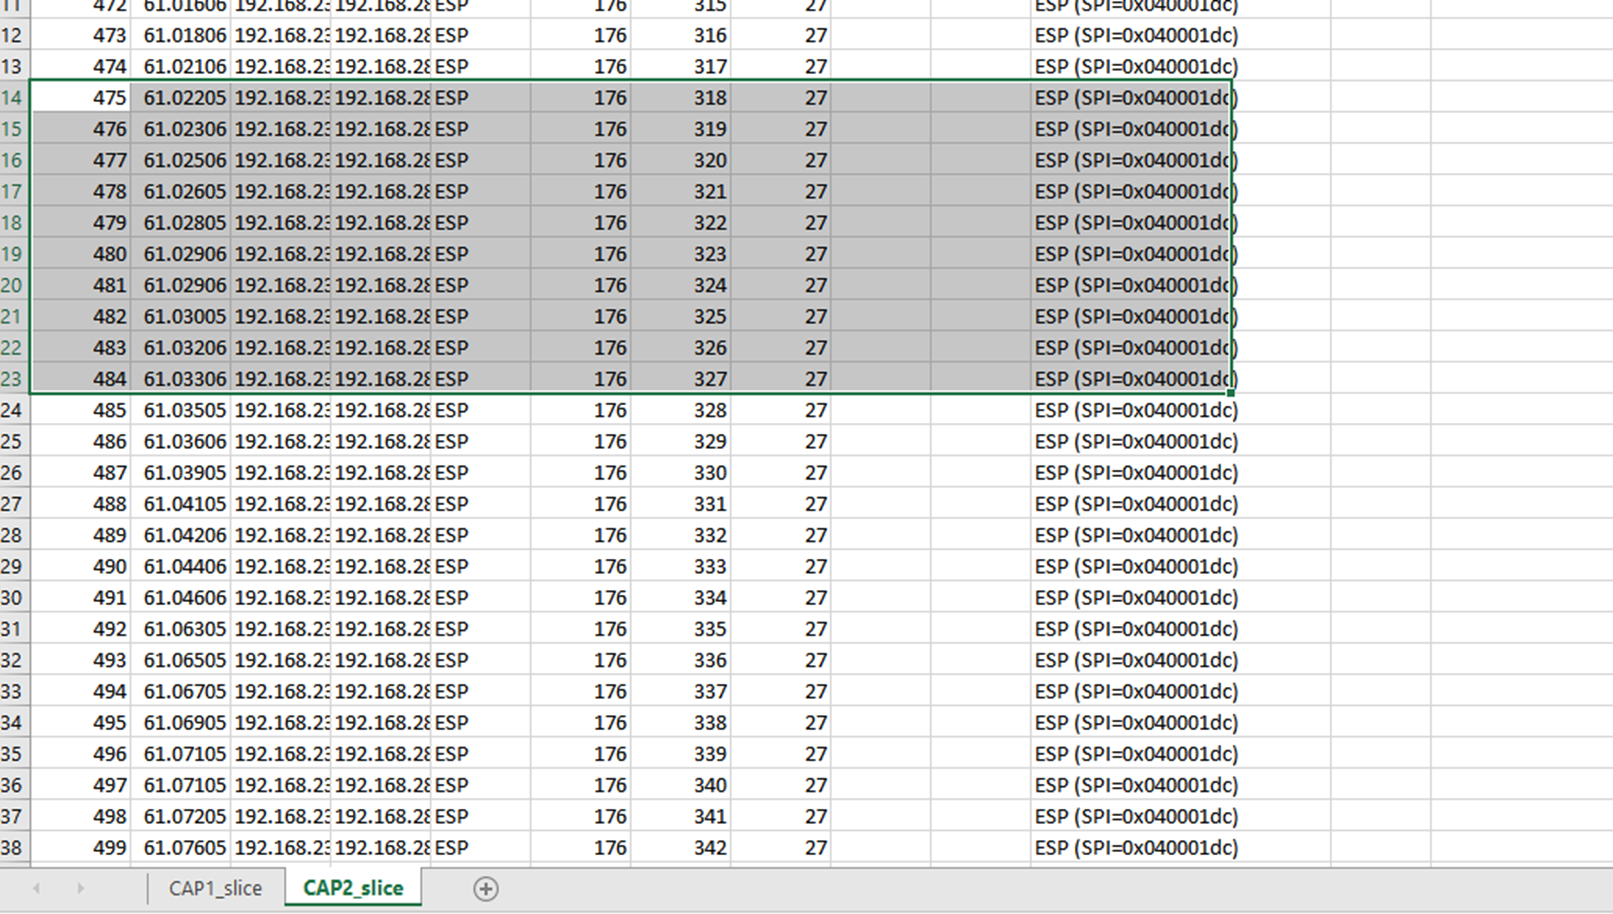
Navigate back to CAP1_slice sheet and now it is seen that there are 10 packets missing.

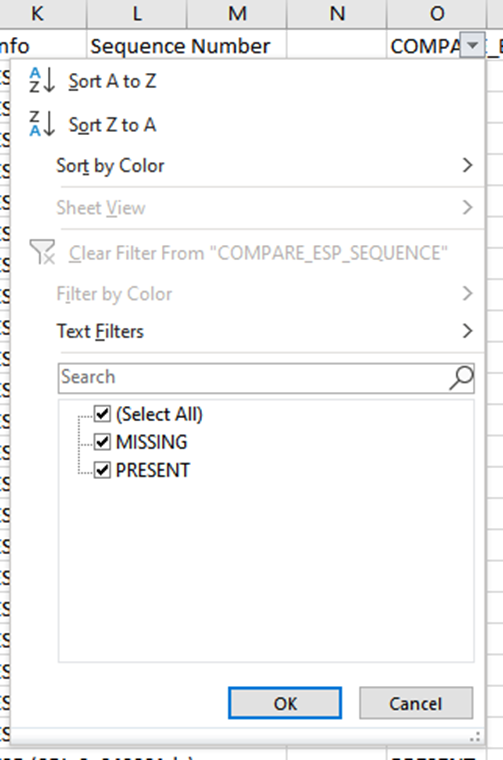
When the dropdown menu is selected on the COMPARE_ESP_SEQUENCE column, now it is seen that there are MISSING packets also. This can be toggled to view only the MISSING packets.
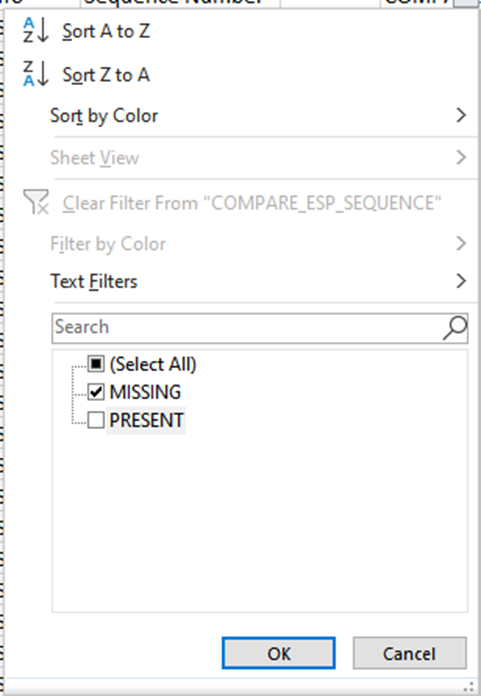
Now only the missing packets are shown in the Excel sheet.

DSCP is Different on Receiver
In some scenarios, the DSCP value set is cleared by the ISP, so it does not match on the receiver side with the DSCP set on the sender. Another useful tool to complement this scenario and track the packets is the ESP SPI and the ESP Sequence number.
The DSCP should be used to identify interesting packets from the sender. Then the ESP Sequence number from those specific packets can then be compared to the receiver capture. Unlike the DSCP marking, the ESP Sequence Number cannot be modified as it is embedded in the SD-WAN IPSEC functionality. This makes the ESP Sequence Number helpful in tracking the interesting packets (matched by DSCP on the sender) across the underlay.
To compare the ESP Sequence numbers, the ESP Sequence Number can be added as a column in Wireshark and compared between the outbound and inbound captures.
When pcap caoture is opened in Wireshark, to be able to see the ESP SPI and sequence number, expand one packet, right-click and select protocol preferences, search for UDPENCAP and change the default port to the SD-WAN port (Source port) as shown in the picture.
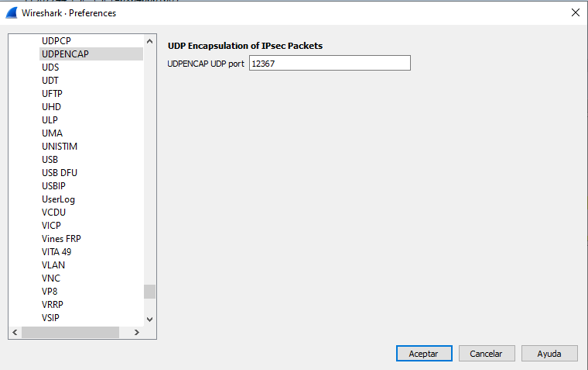
After UDPENCAP is in place with the right port, the ESP information is now displayed as shown in the image.
Note: To learn more about ESP on SD-WAN, please refer toTroubleshoot SD-WAN cEdge IPsec Anti Replay Failures
Related Information


 Feedback