Introduction
This document describes how to configure replication in Hyperflex.
Prerequisites
Requirements
Cisco recommends that you have knowledge of these topics:
- Unified Computing System Manager (UCSM)
- HyperFlex
- vCenter
- Networking
- DNS
Components Used
The information in this document is based on these software and hardware versions:
- HyperFlex Connect 5.0.2d
- Hyperflex Stretch Cluster
- Hyperflex Standard Cluster
- UCSM 4.2(1l)
- vCenter 7.0 U3

Note: For the Data protection is required to have the same Hyperflex Data Platform version in both clusters, cluster can be different in size and type.
The information in this document was created from the devices in a specific lab environment. All of the devices used in this document started with a cleared (default) configuration. If your network is live, ensure that you understand the potential impact of any command.
Background Information
Hyperflex Data Protection provides you with a disaster recovery plan. It allows you to have automatic snapshots that are replicated to remote cluster. Snapshots for the protected virtual machines are sent to the remote cluster depending on the frequency configured in the cluster. Nevertheless, only most recently taken snapshot remains on the destination cluster.
Additional Background Information
- It is a best practice when configuring IP range, to allocate more IPs than nodes present in the cluster in case that an expansion is planned for the future.
- MTU must be the same in both ends.
- Replication network must use the same IP subnet in both clusters along the same VLAN.
Procedure
Step 1. Log into the Hyperflex system and go to the Replication option in the left action pane:
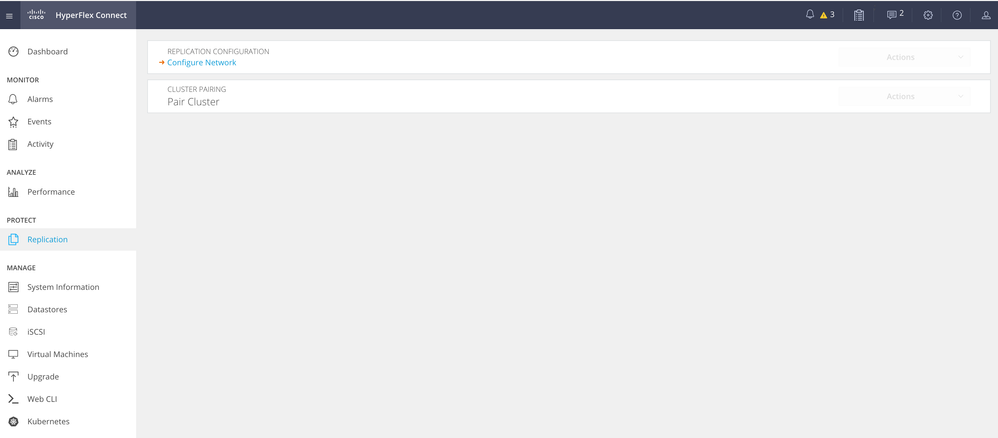 Replication Option
Step 2. Click on the Configure Network option, and fill the information for each of the fields and click Next:
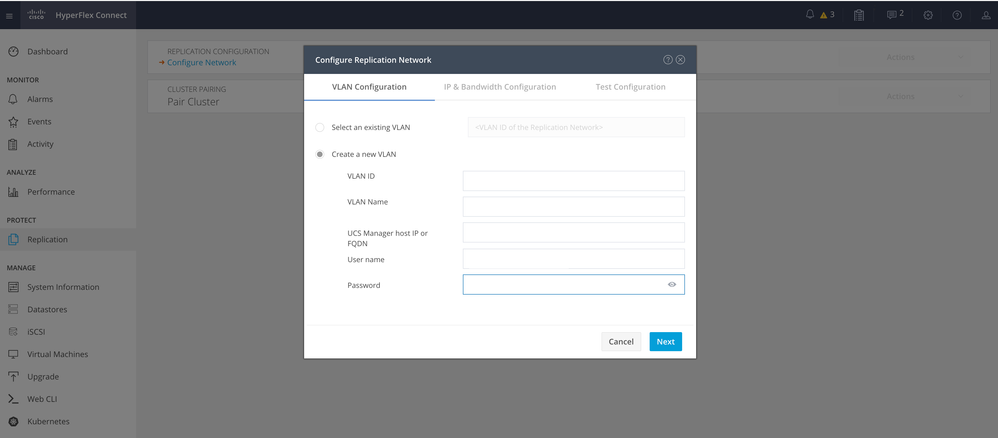 Configure Replication Network
Step 3. Set the IP information for the replication network, adding the subnet, gateway and IP range. Once the IP range is assigned, click on Add IP Range, then click Configure.
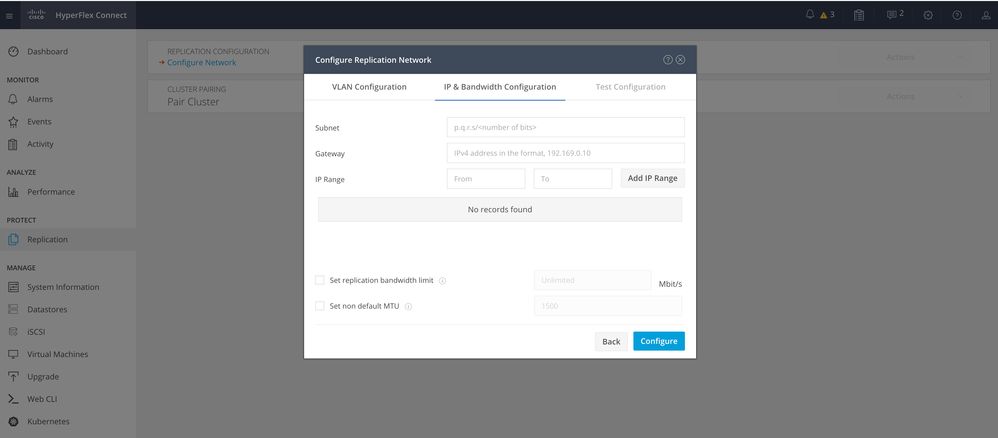 Configure Replication Network
Step 4. The configuration is validated and applied, once completed, click Close:
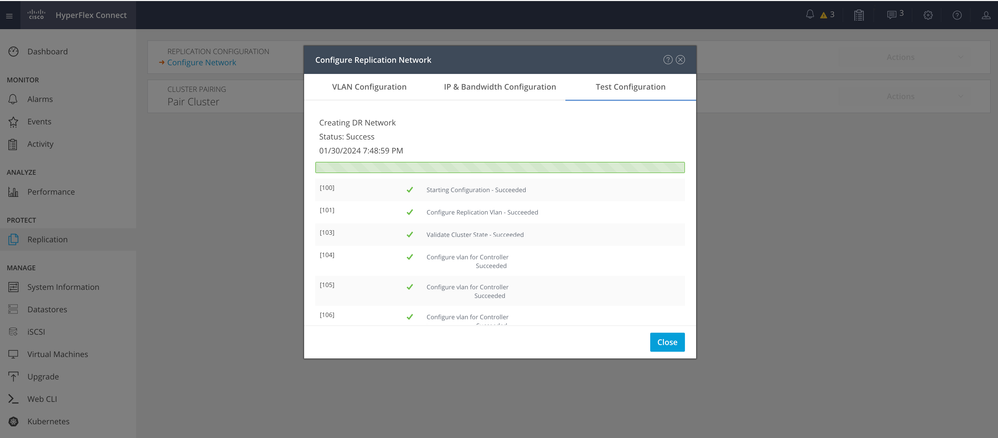 DR Network Configuration
Step 5. Configure the network in the other cluster. For this example the second cluster is stretch, hence both UCSM credentials are required. Fill the information as applicable and click Next:
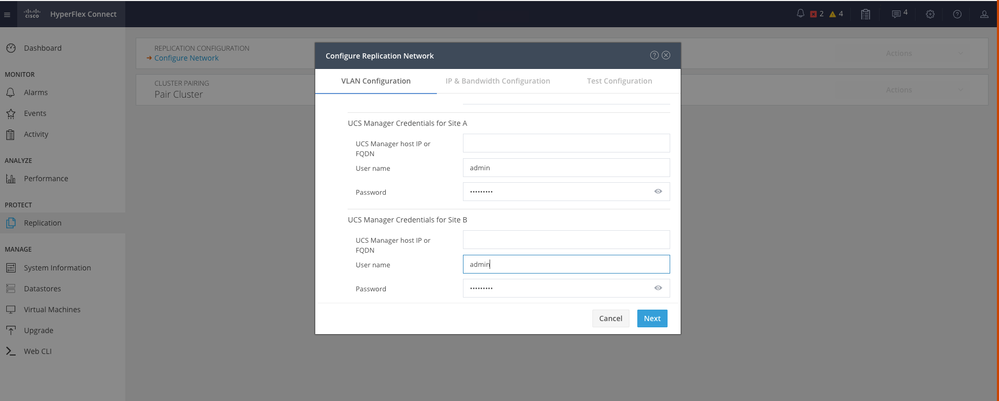 Second Cluster Network Configuration
Step 6. Set the IP information for the replication network on the second cluster, adding the same subnet, gateway and IP range. Once the IP range is assign, click on Add IP Range, then click Configure:
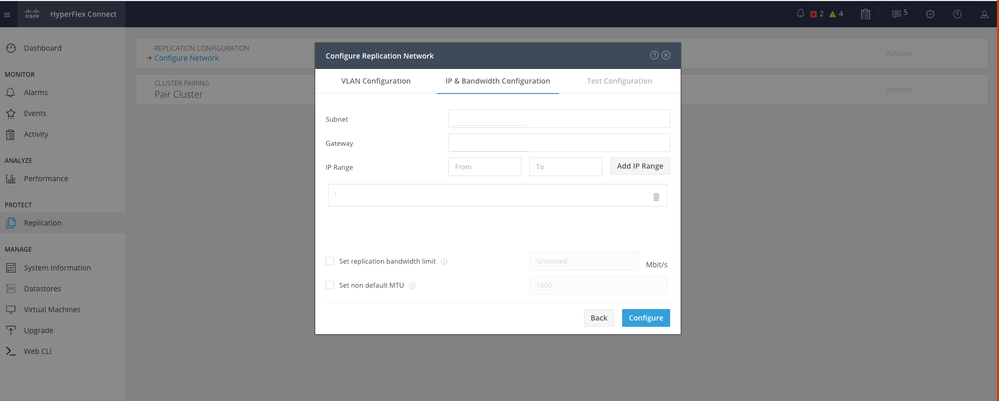 Configuring Network Second Cluster
Step 7. Once the configuration is completed a success status appears, then click Close:
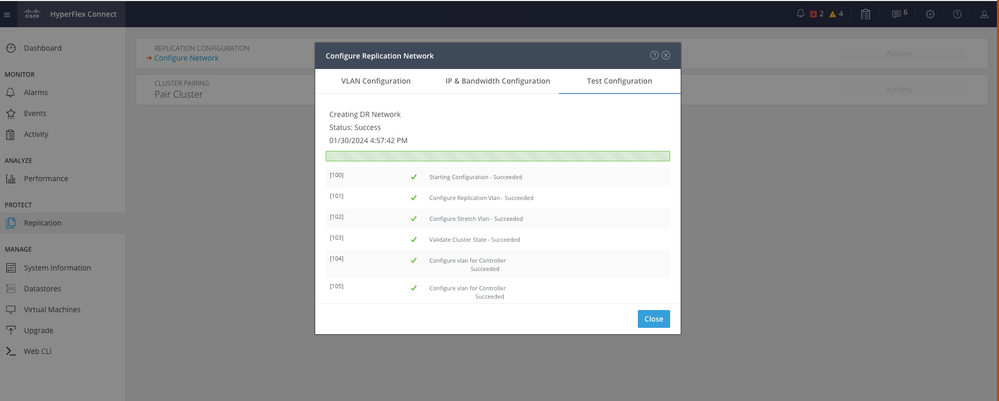 DR Network Configuration Second Cluster

Note: Once the network is configured, it is a best practice to do a network test between the two clusters to confirm they are able to reach each other. Use ping to test the IPs reachability between the eth2 interfaces.
Step 7. Creating the replication pair, click Replication and the click on Pair Cluster in the Cluster Pairing option. Assign a name for the Replication Pair Name and click Next:
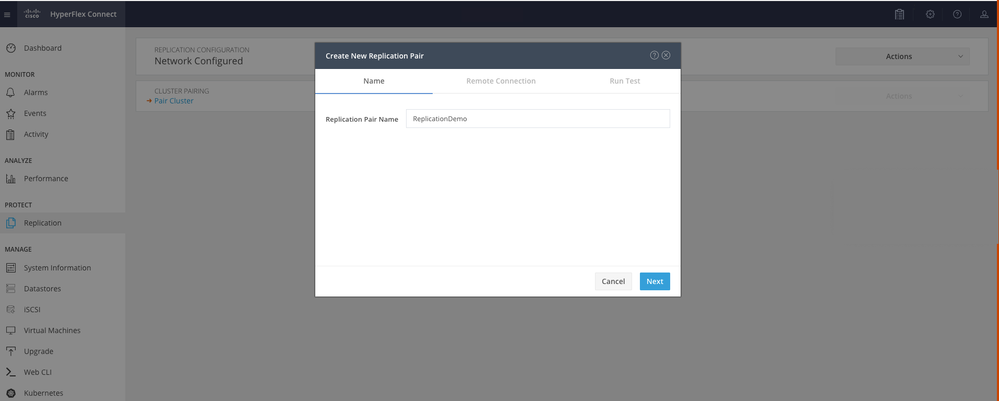 Replication Pair
Step 8. Provide the cluster Management IP or FQDN for the cluster to be the replication pair and then click Pair:
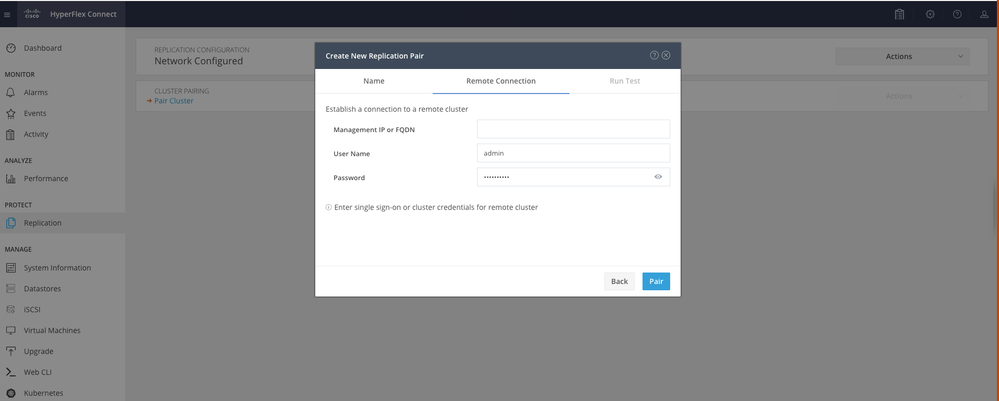 Pairing Cluster
m
Step 8. Once the clusters are paired, everything is set to start the datastore mapping between the two clusters, within the same replication page. The Map Datastore option appears, click on it:
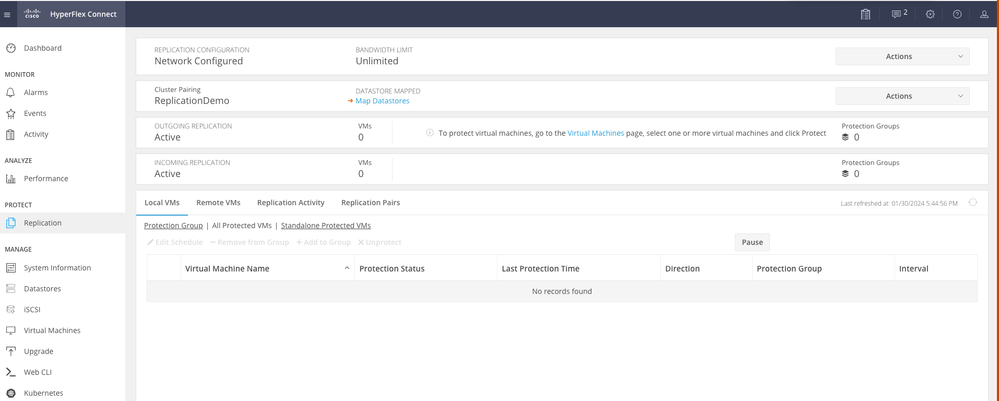 Mapping Datastore
Step 9. In the pop up window the Datastore Mapping appears, showing the available datastores in the cluster in the left, and a drop down menu with the available datastores in the paired cluster where the VMs are attempted to be protected:
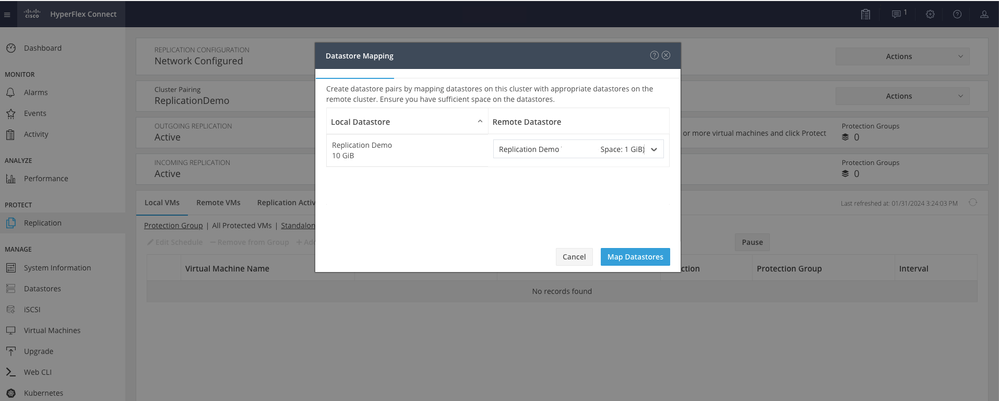 Mapping Datastores

Note: Mapping datastores can be done from both sites to each other, for example, Cluster1 can Map datastores to cluster2 and Cluster2 can map datastores to cluster1 without any additional configuration.
Step 10. Once the datastores are mapped, define the protection group, specify a name and select a time period to protect the virtual machines to be associated to it. Finally, specify the time when the protection group starts, then click Create Protection Group.
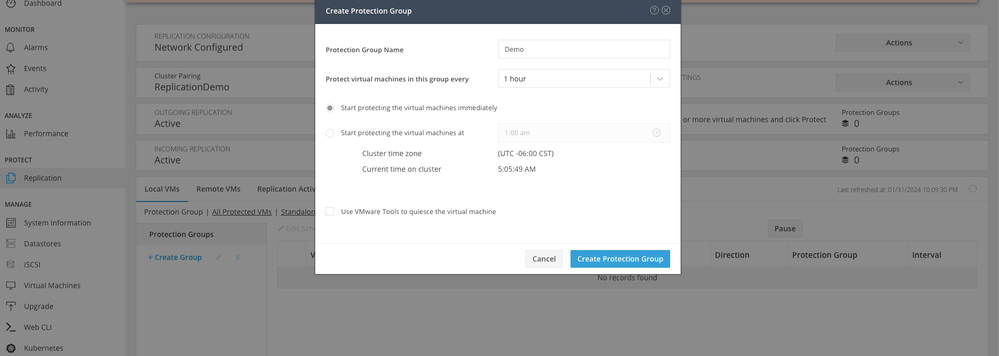 Protection Group Creation
Protection Group Considerations
- The protection group defines how the data protection behaves.
- It allows you to specify the frequency to protect the virtual machine.
- It can go from 5 minutes to 24 hours, also the time when the protection starts.
- It can have an immediate or specific time.
- VMware tools can be enabled to quiet the virtual machine.
A success message appears indicating that the Protection Group was created and it appears listed in the protection group area:
 Protection Group Created
Step 11. With the protection group created, the final step is to assign it to the virtual machines that are to be protected. Navigate to the Virtual Machines tab, select the virtual machine to be protected and then click on Protect:
 Virtual Machine Protection
A pop up window appears to attach the Protection Group created, select it, and click on Protect Virtual Machine:
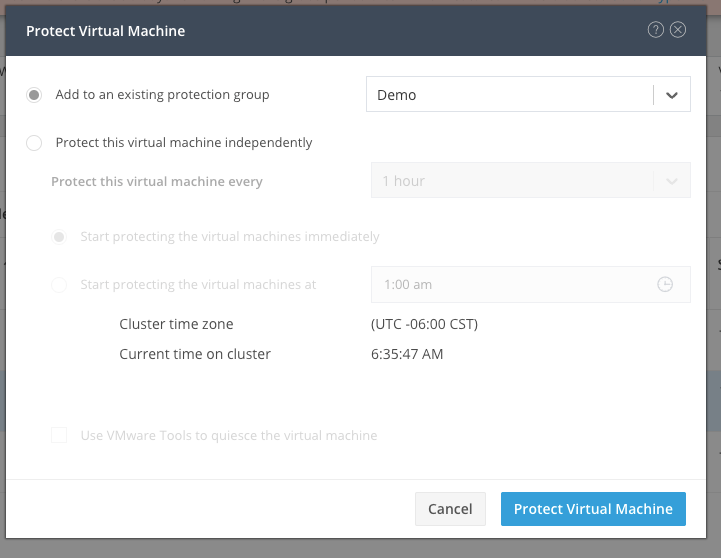 Selecting the Protection Group
Once protected, the VM displays as protected for the Protection Group.
 VM protected

Note: Ensure that the protected VM belongs to a datastore being mapped, otherwise the protection fails.
Troubleshoot
Verify VM Protection Configuration
It is a best practice to monitor the VM protection under the Replication tab:
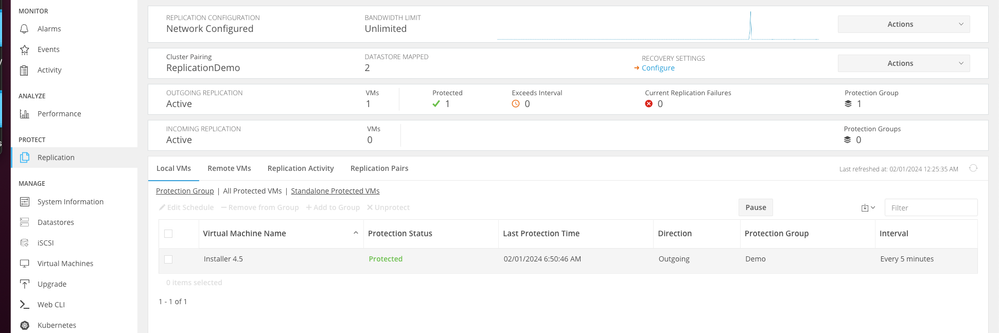 Monitoring Protected VMs
Monitor Replication Activities
Replication activities can be monitored by clicking in the Replication Activity tab:
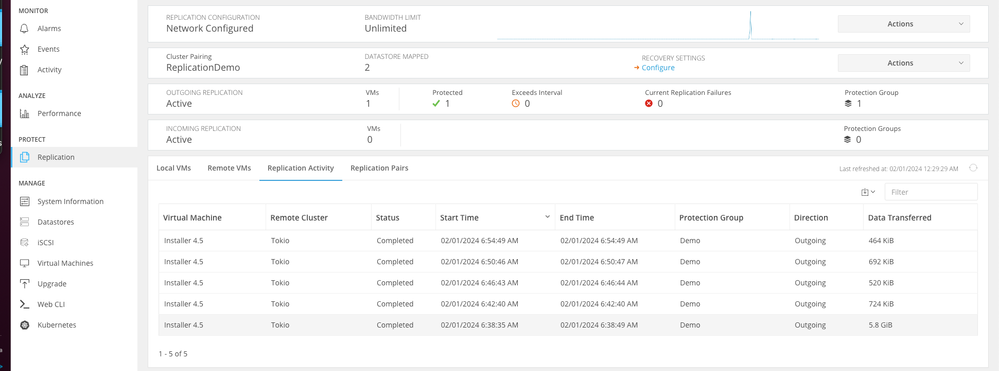 Replication Activities
Common Issues
Pair Issues
Pairing issues can appear:
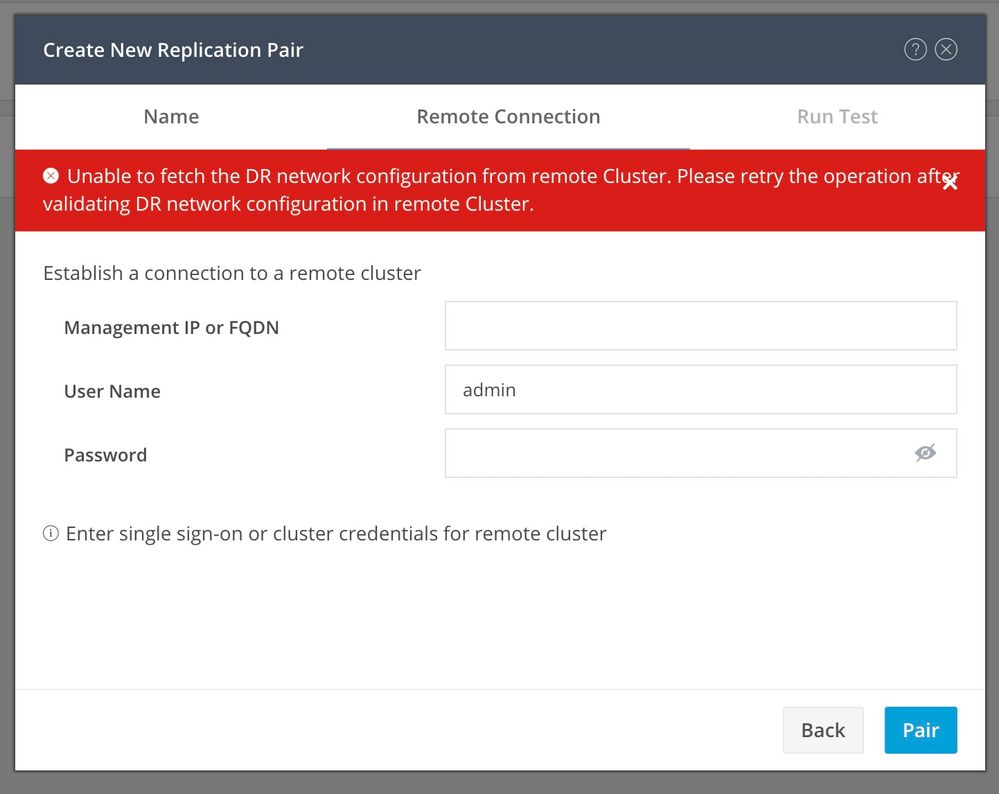 Pairing issues
- Ensure the replication network is configured in both clusters.
- Ensure clusters are reachable from each other.
Connectivity Issues
- Verify the eth2 is present. Use the ifconfig command on each of the storage Controller Virtual Machines to confirm the eth2 is properly configured on them.
- Use ping to test connectivity between the eth2 interfaces.
- Ensure the Replication VLAN in both clusters match.
- Ensure the replication VLAN is properly configured in all the paths between the clusters.
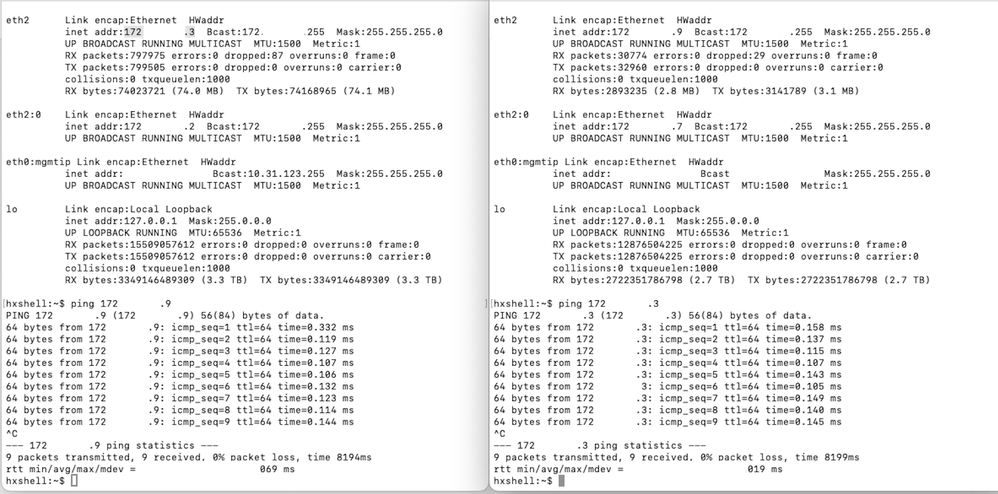 Ping Test
Protection Issues
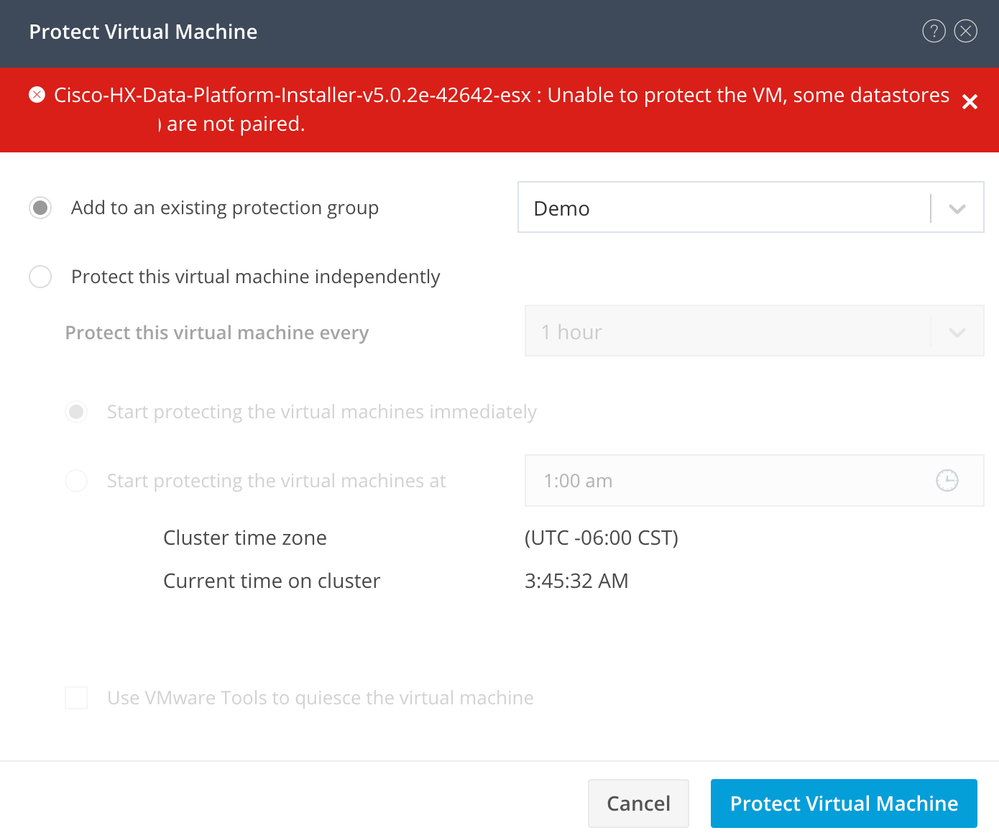 Protection Issues
- Ensure that the VM to be protected belongs to a mapped datastore.
- Ensure datastores are properly mapped.

Note: Some fixes require Technical Assistance Center (TAC ) intervention. Open a case with TAC, if necessary.
Related Information


 Feedback