Introduction
This document describes the steps to integrate Identity Services Engine and SecureX via Orchestration with a workflow from Cisco Secure GitHub.
Prerequisites
Cisco recommends that you have knowledge on these topics:
- Experience with Cisco ISE configuration
- Knowledge on ISE API
- Knowledge on SecureX Orchestration
Requirements
You must have Cisco ISE deployed in your network and have an active SecureX account. The orchestration workflows are triggered via the SecureX browser extension.
In our example the workflow to be used was imported form the Cisco Secure GitHub page, this procedure applies also for a custom workflow.
Components Used
The information in this document was created from the devices in a specific lab environment. All of the devices used in this document started with a cleared (default) configuration. If your network is live, ensure that you understand the potential impact of any command.
- Identity Services Engine ISE version 3.1
- SecureX account
- SXO Remote device version 1.7
Configure
Network Diagram
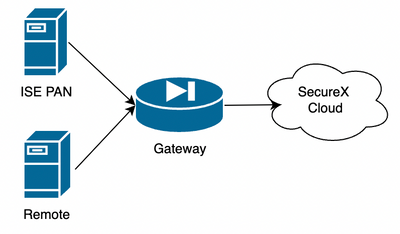
In our example ISE PAN and Remote server are placed in the same subnet to have direct connectivity.
Since ISE is an on-premises devices, the Remote server with be in contact with the Secure-X cloud and forward the information to the ISE PAN
Configurations
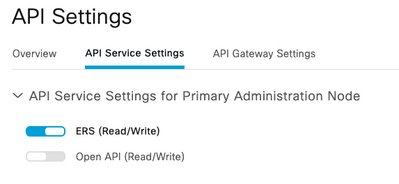
ISE PAN configuration
1. Navigate to Administration > System > Settings > API Settings >API Service Settings and enable ERS (Read/Write)
2. (Optional) Create a new user for the Secure-X connection, navigate to Administration > System > Admin Access > Administrator > Admin Users and create a new user, this new user must have "ERS Admin" permissions or it can be a super admin user.
Configure and deploy remote server
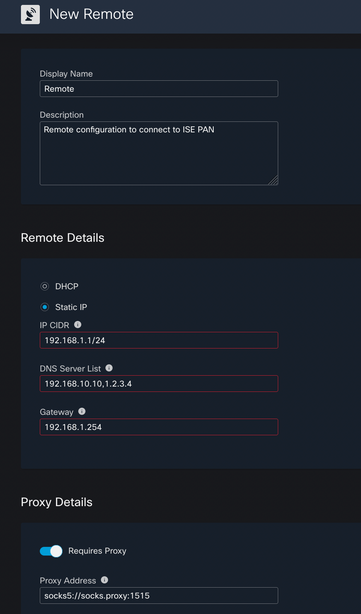
1. Configure the remote Server, on the Secure-X console navigate to Orchestration > Admin > Remote Configuration and select option New Remote, the IP address information is the one to be used when the VM is created, and it must be in the same subnet where the ISE PAN is deployed.
Note: If the connection to the cloud happens through a proxy, currently, only a SOCKS5 proxy is supported for this purpose.

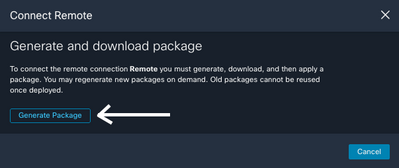
2. Download the configured settings to be used for the VM deployment, once the information is saved, the remote appears as "Not Connected", navigate under actions and select Connect
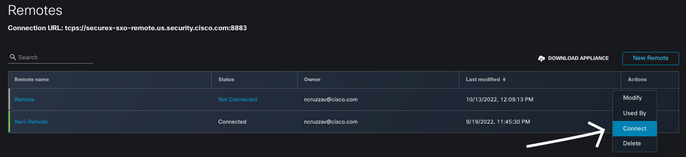
Select Generate Package, this action downloads a .zip file that contains the information just configured to be used when the VM is deployed.
3. Download and install the VM, next to New Remote select DOWNLOAD APPLIANCE this action downloads an OVA image that you need to use to deploy the remote server.
For the remote VM specs please refer to the SecureX Remote Setup guide
The downloaded information inside the ZIP file must be used on the Encoded User Data when the VM is created, this populated the configured remote information into the server once it boots up.
4. Once the VM is up, it connects to the SecureX account automatically, to verify that the connection is up, under the Remote configuration you must see a change of the state to "Connected"

Configure the Target on SecureX
For Orchestration to work with a device is important to configure a Target, Secure X use this Target to send the API calls and interact with the device through Orchestration
1. Navigate to Orchestration > Targets > New Target

2. Fill the target information with the next guidelines
- Display Name: Target Identifier
- Description: A little description to identify the purpose of the target
- Account Keys: Here you need to configure the User/Password to access ISE through API
- No Account Keys: False
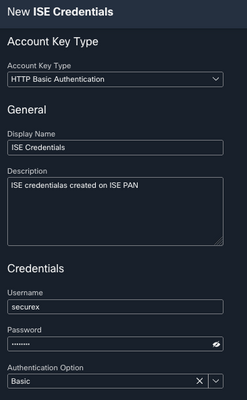
- Default Account Keys: Select Add New
- Account Key Type: HTTP Basic Authentication
- Display Name: Account Key identifier
- Username: User created on ISE PAN as ERS Admin
- Password: Password for the user created on ISE PAN
- Authentication Option: Basic
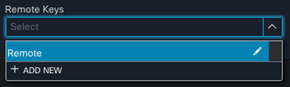
- Remote: Here you need to select the remote connection previously configured
- Remote Keys: select your remote on the drop down menu
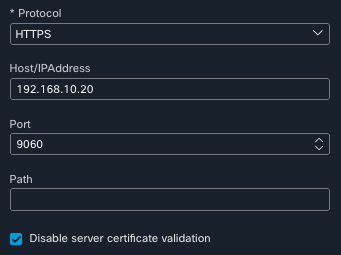
- HTTP: Here you need to configure the API information for the ISE PAN
- Protocol: HTTPS
- Host/IP Address: ISE PAN private IP
- Port: 9060
- Path: Leave it in blank
- Disable server certificate validation: Check this box
- Proxy: Since the proxy configuration was included in the remote configuration, you can leave this section in blank
- Select Submit
Import the workflow from Cisco Secure GitHub
For this example the workflow to use is "Add Endpoint to Identity Group", you can use any of the listed workflows on the Cisco Secure GitHub page, or you can create a custom workflow.
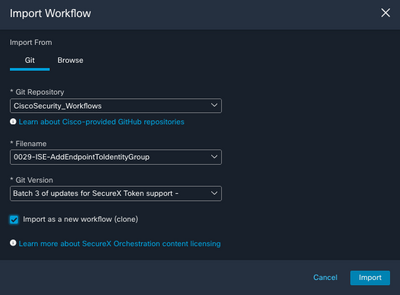
1. Navigate to Orchestration > My Workflows > Import Workflow

2. To import the Workflow fill the information as follows and select Import; to identify the workflow to import, you can search by name or by workflow number
- Git Repository: CiscoSecurity_Workflows (Where the workflow is located)
- Filename: 0029-ISE-AddEndpointToIdentityGroup (Select the number of workflow you want to use)
- Git Version: Batch 3 of updates for SecureX Token Support (Latest version)
- Import as a new workflow (clone): Check (This imports the workflow and creates a clone of it)
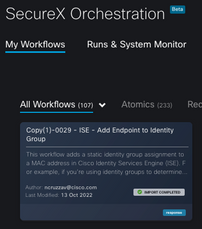
3. Once imported, the new template appears under My Workflows, Select the new created workflow to edit the parameters to make it work with with ISE
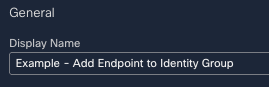
4. Since this is a pre-build workflow you only need to modify 3 sections of the workflow:
- Name: Change the Display name for a better identifier
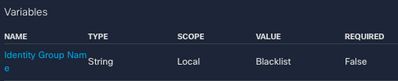
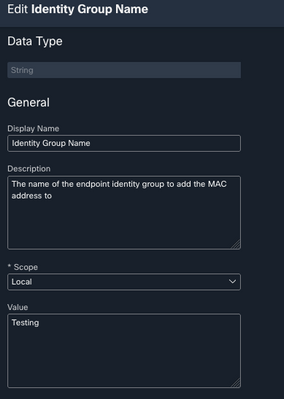
- Identity Group Variable
- Under Variables, edit the Identity Group Variable by default is Balcklist, Select the variable and configure the Identity Group Name you want to modify through Orchestration
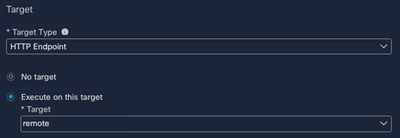
- Target: Configure the Target configured previously
- Target Type: HTTP Endpoint
- Target: Name of the target configured
Verify
Once everything is configured, is time to test the Workflow
The workflow for the test performs this action: if you find a MAC Address in a web page, it could be on ISE itself, or another webpage like Threat Response; through the SecureX browser extension, the workflow looks for that MAC Address inside ISE database through API, if the MAC do not exist the observable is added into the Endpoint Identity Group without need to copy the value and access to ISE.
To demonstrate this, take a look in the next example:
1. The selected workflow works with the observable type "MAC Address"
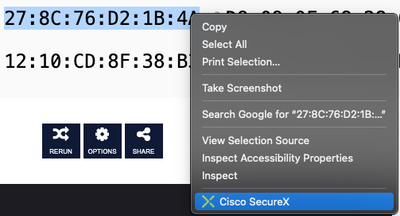
2. Find a MAC Address on a web page and perform a right click.
3. Select the SecureX option
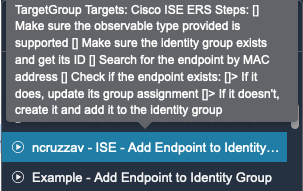
4. Select the Workflow created before
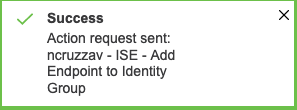
5. Confirm that the task is executed successfully
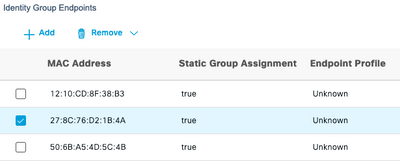
6. On the ISE PAN navigate to Administration > Identity Management > Groups > Endpoint Identity Groups > (The Group configured on the workflow)
7. Open the Endpoint Identity Group configured on the workflow and confirm that the MAC Address select is added into that MAC Address List
 Feedback