Introduction
This document describesthe steps to configure a compatible U-law wav files in Audacity before importing the file to Webex Contact Center.
Prerequisites
Requirements:
- Webex Contact Center Administrator access to the tenant.
- Audacity a recording application software (A free and open-source digital audio editor)
Components Used
The information in this document is based on these software versions:
The information in this document was created from the devices in a specific lab environment. All of the devices used in this document started with a cleared (default) configuration. If your network is live, ensure that you understand the potential impact of any command.

Note: This document is targeted towards customers and partners who have custom audio files to be played when end callers reach IVR prompts.
Problem Statement
The imported audio file in Routing Strategy -> Resources -> Audios Files is added in the flow but when the flow is pulled to play that audio wav file, the file does not play. Although the file is triggered.
Refer: Imported an audio file: OUH_SD_Old_phone_number_removal.wav

Used this Audio File on a PlayMusic node and published the flow and called in to check if the file plays. Could see the file is triggered in Debug but the wav file did not play as the caller did not hear any audio.

Solution
Webex Contact Center supports uploading .wav audio files with the specifications:
- Channels: 2
- Sample Rate: 8000
- Precision: 14-bit
- Bit Rate: 128k
- Sample Encoding: 8-bit u-law
Instructions to convert compatible audio files using Audacity recording application software.
Step 1:
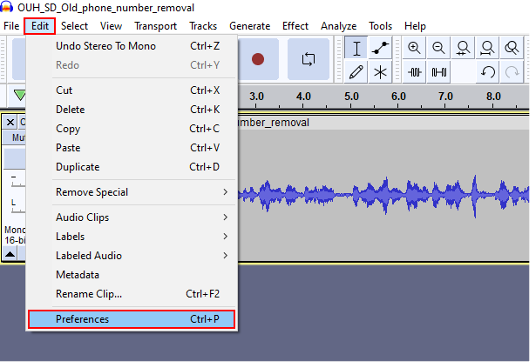
Open Audacity and - before importing the file - open preferences to change the project resolution settings.
Step 2:
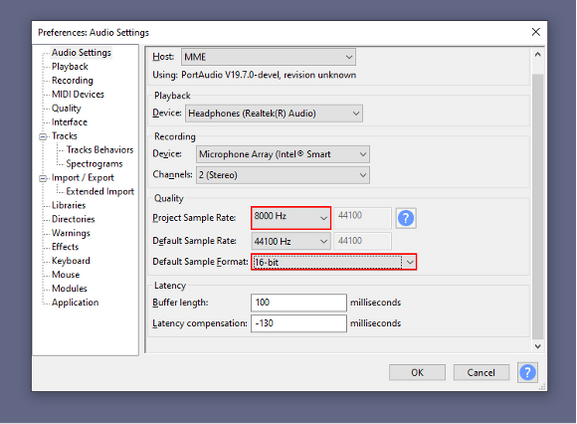
Change the project sample rate from the default 44,100Hz to 8000Hz, and the format from 32-bit float to 16-bit PCM.

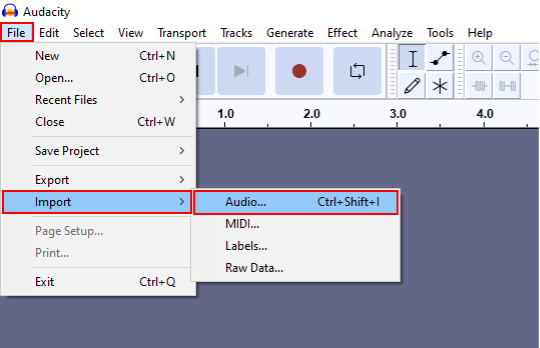
Tip: Now that the project sample rate is set correctly, import the provided audio file. Source format does not matter, Audacity is capable of handling a wide range of input and output formats, which is why it is useful here.
Step 3:
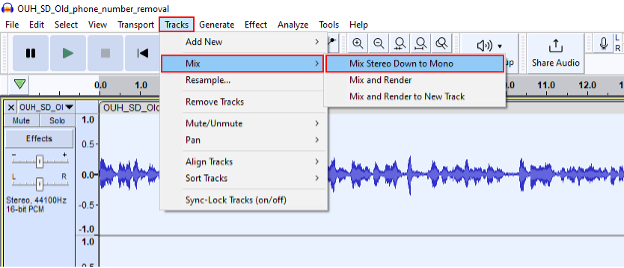
Down mix the audio from stereo (two tracks, for two speakers) to mono (one track, for a handset single speaker).
Click on the imported track and press Ctrl+A to select it. If the source audio is already mono, skip this step.
Step 4:
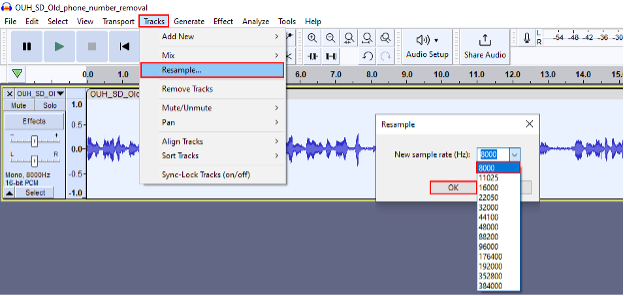
Resample the new mono track down to the appropriate 8kHz. You need to press Ctrl+A again beforehand.
Step 5:
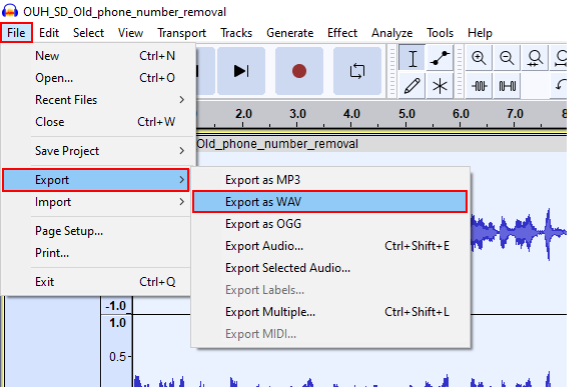
You now have the appropriate number of tracks, and correct sampling rate. Time to export the track.
Step 6:
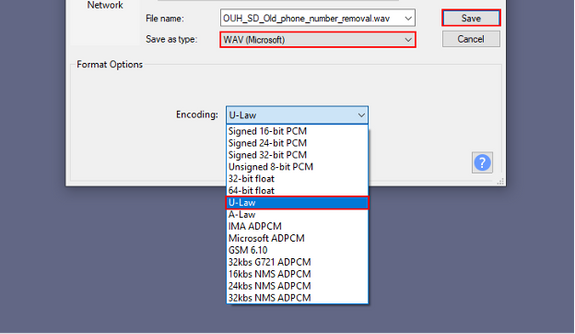
Make sure the export format is WAV (Microsoft) and encoding profile is changed to U-Law.
This is the most critical step as the formatting and encoding must be correct for the device to process it.


 Feedback