Introduction
This document describes the steps to configure Webex Connect with Short Message Service (SMS) digital channel
Contributed by Bhushan Suresh, Cisco TAC Engineer.
Prerequisites
Requirements
Cisco recommends that you have knowledge of these topics:
- Webex Contact Center (WxCC) 2.0
- Webex Connect (Formally IMI)
Components Used
The information in this document is based on these software versions:
The information in this document was created from the devices in a specific lab environment. All of the devices used in this document started with a cleared (default) configuration. If your network is live, ensure that you understand the potential impact of any command.
Configure the SMS Digital Channel
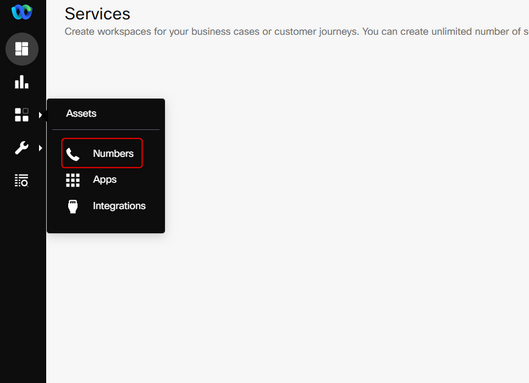
Step 1: Select an available number you want to use the Webex Connect portal under Assets > Numbers.
An available number is a number that does not have a Service associated with it
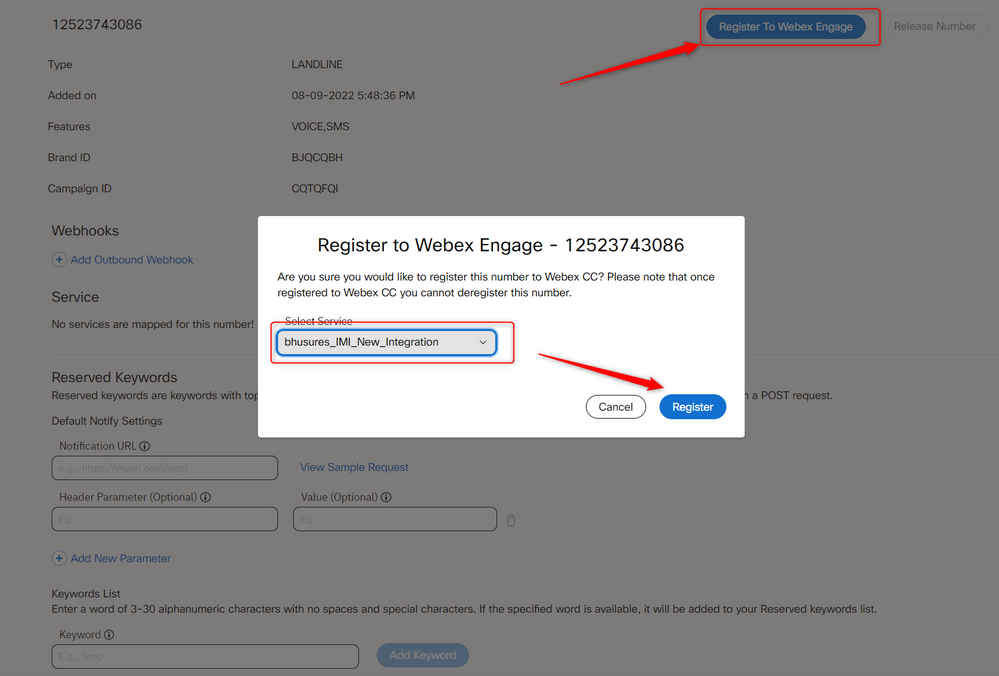
Step 2: Select the number and select Manage.

Step 3: Register to the Webex Contact Center with the Register To Webex Engage option > Select the service > select Register.
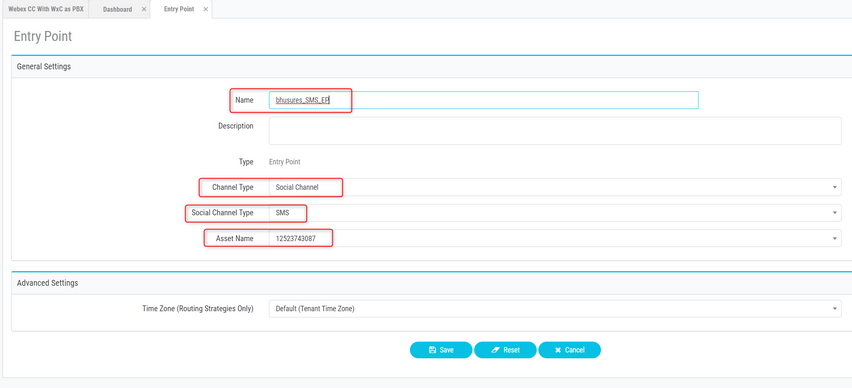
Step 4: Create an Entry point on the Webex Contact Center portal page as shown:

Note: The asset name is the SMS number that you registered with the Webex Contact Center.
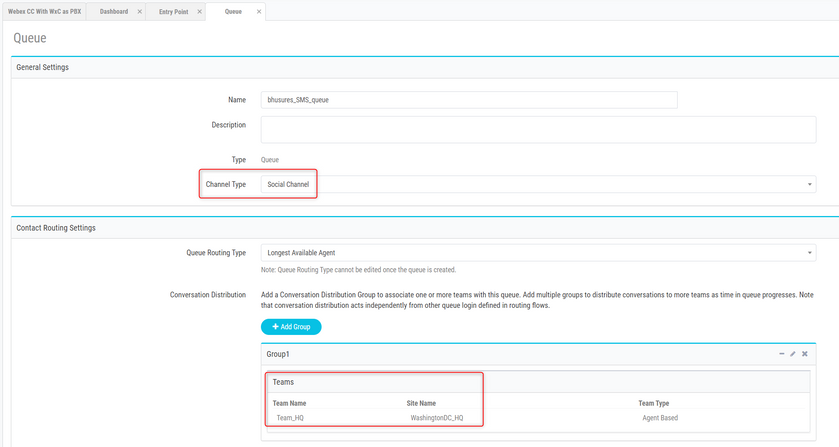
Step 5: Create a queue and assign a team to the call distribution.
Step 6: Create a SMS flow. The SMS flow is available here and can be uploaded to the service.
You do not have to create the flow from the start. There are some pre-configured flows that you can use. Navigate toWebex Connect Flows and download the flow for SMS integration.
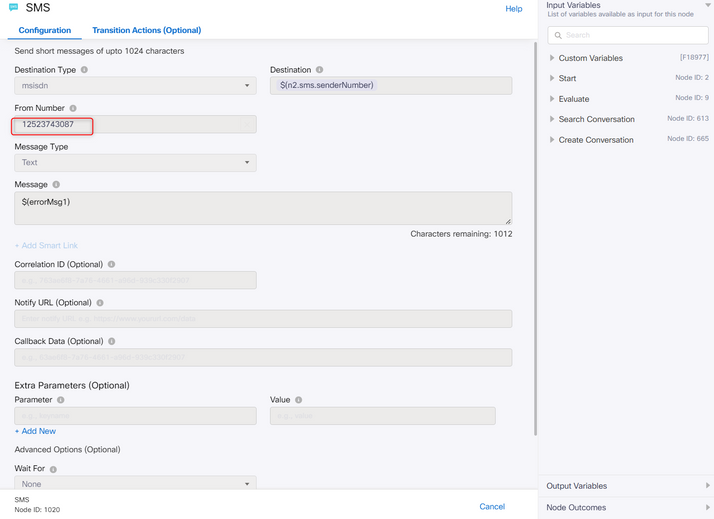
Step 7: Edit the ALL SMS nodes and add the number as the From Number.
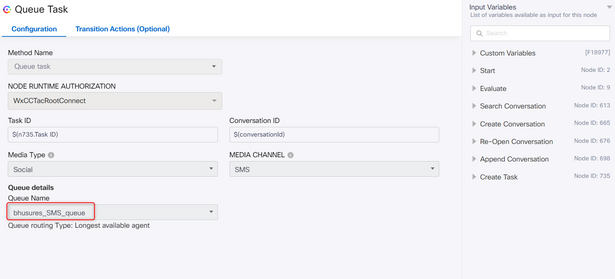
Step 8: Edit the Queue Task node.
Onboard SMS Numbers for the Tenant
The process to add SMS numbers on the tenant is to submit a 10DLC form to the Webex Connect team. Please reach out to your Customer Success Manager or Partner Success Manager for the sample form


 Feedback