Introduction
This document describes how to configure and customize Date Time format in the Cisco Webex Contact Center Analyzer Visualization.
Prerequisites
Requirements
Cisco recommends that you have knowledge of the following topics:
- Cisco Webex Contact Center
- Analyzer
Components Used
Note: This document is targeted towards customers and partners who have deployed Webex Contact Center to their network infrastructure.
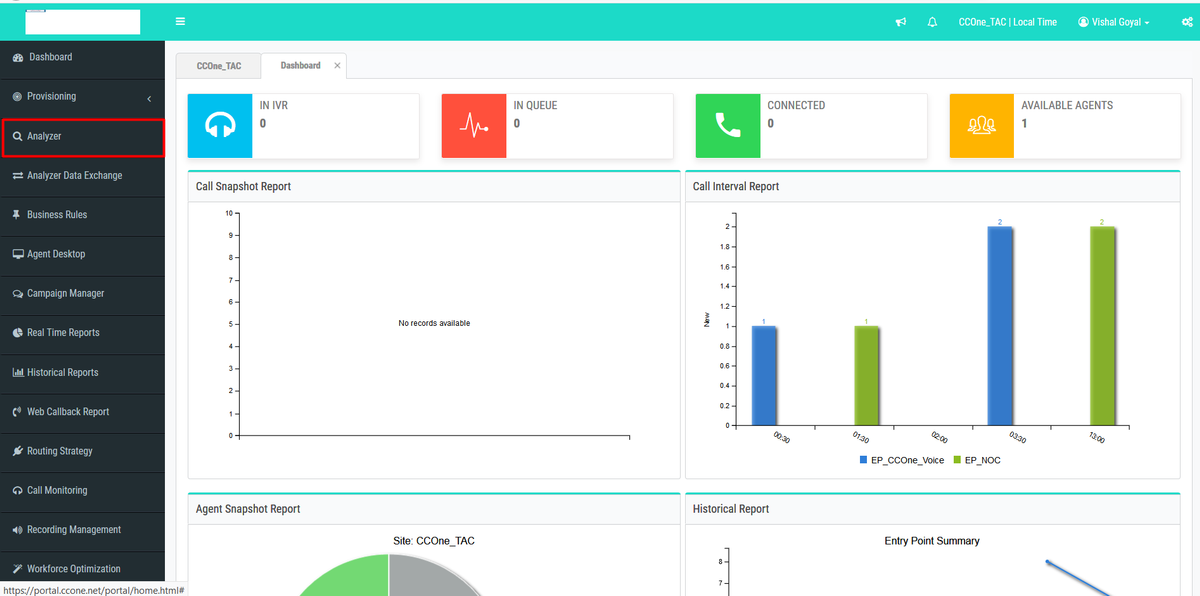
Step 1: Login to Portal via https://portal.ccone.net/ and click on the "Analyzer" tab

Step 2: Click on Visualization >> Standard Reports >> Historical Reports >> Agent Reports >> Agent

Step 3: Run the Agent report (In the above call, the report ID is 102312)
Step 4: Under the columns - " Initial Login Time" and "Final Logout Time", Different entries are reflected ( different from normal date and time )

Step 5: Click on the selected date and time entry >> A microscopic symbol appears >> click on it and few entries would be seen under " Call Start Timestamp "

Step 6: Use any one entry to convert the EPOCH time to human-readable data. In the above example, Let's take 1563467317392


Reason for the discrepancy
Analyzer process the data as the sum of all the logins time for an agent
Solution
Change Visualization
No changes must be made to the Standard Reports (BU Recommendation), therefore create a new report for any modifications.
Create a new report
Step 1: Go to Visualization >> Standard Reports >> Historical Reports >> Agent Reports >> Agent >> Edit >> Save Visualization ( Saving as report name Test11)

Step 2: Right Click on Profile Variables, namely Initial Login Time and Final Login Time
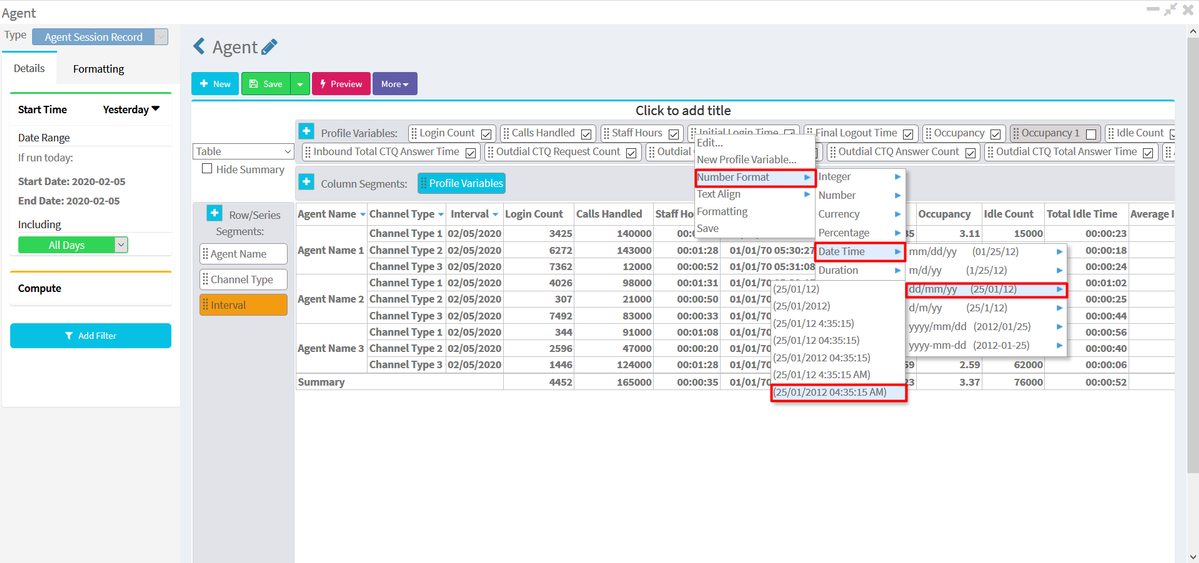
Step 3: By default, the Initial Login Time is represented in the EPOCH format. To change the format, right-click on "Initial Login Time" >> Number Format >> Date Time
Choose "dd//mm//yy" and the data will be presented in this format.

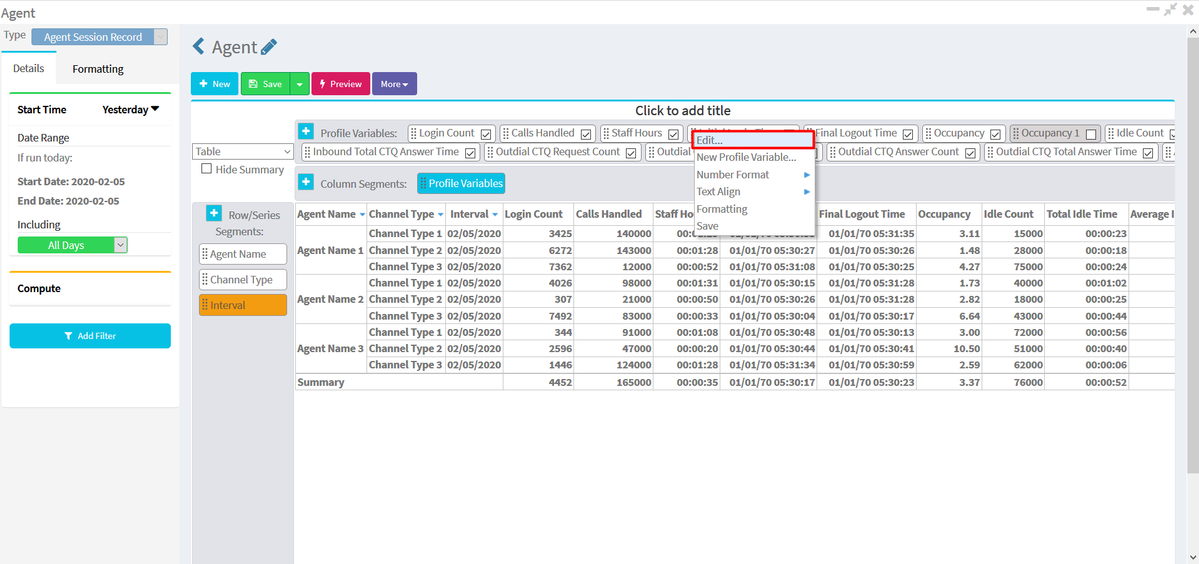
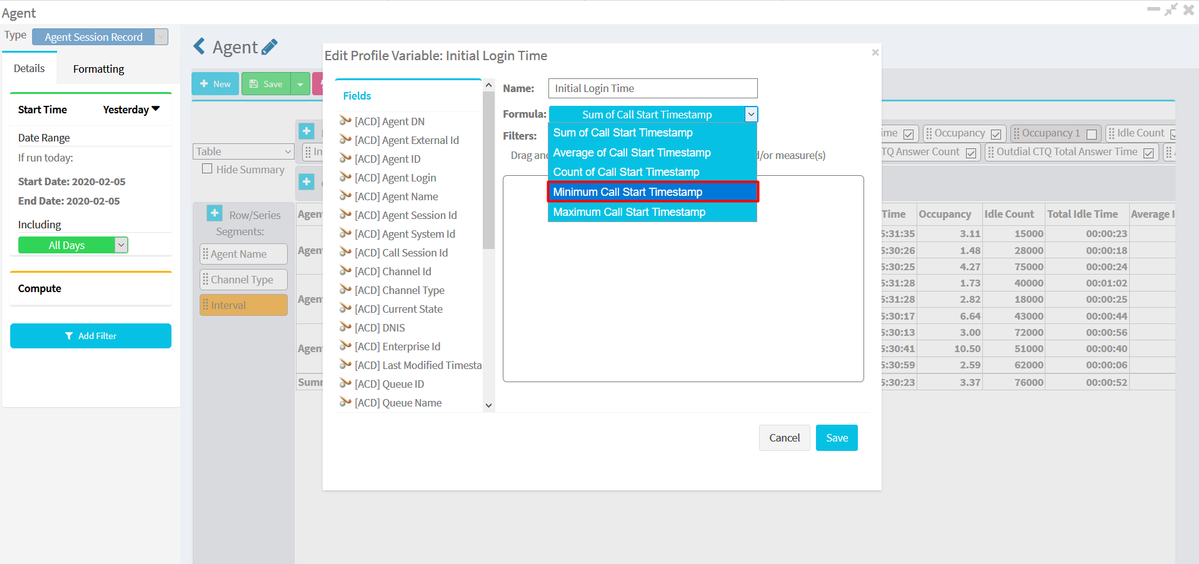
Step 4: Take "Initial Login Time", Right Click on Edit, a new window appears where the Formula is " Sum of Call Start Timestamp", change it to "Minimum Call Start Timestamp" and Save the report
Note: {Minimum Call Start Timestamp will reflect the first instance/time of agent login for the date(s)}


Step 5: Select Final Logout Time under Profile Variable, click on Edit >> Select " Maximum Call End Timestamp" and Save
Note: Maximum Call End Timestamp will reflect the final instance of agent log out for the date(s)

Step 6: Run the report for the desired result

