Introduction
This document describes how to configure Contact Center Enterprise (CCE) Virtual Agent integrated with Google Contact Center Artificial Intelligence (CCAI) Dialogflow Customer Experience version (CX).
Contributed by Ramiro Amaya Cisco TAC Engineer, Anjum Jeelani and Adithya Udupa, Cisco Engineers.
Prerequisites
Requirements
Cisco recommends that you have knowledge of these topics:
- Cisco Unified Contact Center Enterprise (UCCE) Release 12.6
- Cisco Package Contact Center Enterprise (PCCE) Release 12.6
- Customer Voice Portal (CVP)
- Google Dialogflow CX
- Control Hub
- Postman tool
Components Used
The information in this document is based on these software versions:
The information in this document was created from the devices in a specific lab environment. All of the devices used in this document started with a cleared (default) configuration. If your network is live, ensure that you understand the potential impact of any command.
Background
A Dialogflow CX agent is a virtual agent that handles concurrent conversations with your end-users. It is a natural language understanding module that understands the nuances of human language. Dialogflow translates end-user text or audio during a conversation to structured data that your apps and services can understand. You design and build a Dialogflow agent to handle the types of conversations required for your system.
A Dialogflow agent is similar to a human call center agent. You train them both to handle expected conversation scenarios, and your training does not need to be overly explicit.
Dialogflow CX, provides a new way to design agents, which changes from a state machine (static conversations) approach to a more “agent”-design one. This gives you clear and explicit control over a conversation, a better end-user experience, and a better development workflow when you build a conversational AI experience for your environment.
Note: Dialogfow CX agent is supported only for OEM (Cisco billed).
Configure
Create Google Project and Dialogflow CX Agent
A Google Project needs to be created and provision with Cisco, in addition a Virtial Agent (Dialogflow CX) needs ton be created before you can start the integration with CCE. When a project is provisioned to Cisco you are considered a OEM customer (Cisco billed). If you need information on how to create and provision the project, and how to create the Dialogflow CX agent visit: Create Google Project and Dialogflow CX Agent
Create Virtual Agent Profile
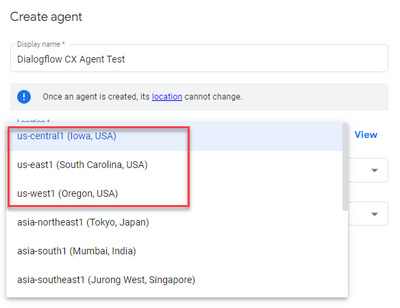
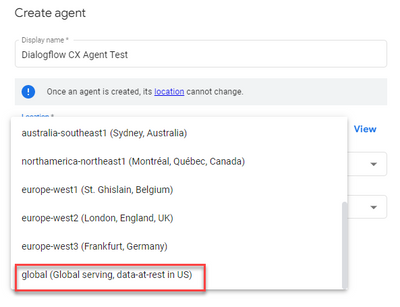
When you create the Dialogflow Virtual agent you select the Google Data Center location. The steps to create the conversation profile depend on the Dialogflow CX location.
Location - US / Global
Step 1. Log in to Google Agent Assist and choose the project which was used when you created the Dialogflow CX agent.

Step 2. Select the Conversation profiles and click Create new as shown in the image.
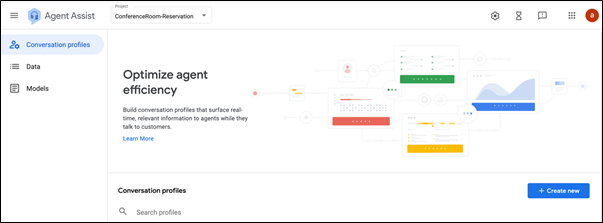
Step 3. Ensure the Agent Assist URL uses the same location as the agent you want to create the conversation profile for. In this example, you see that the URL is in location global.

The agent you previously created was on global location, so you do not have to change the location in the URL.
Step 4. Add the name and the language.
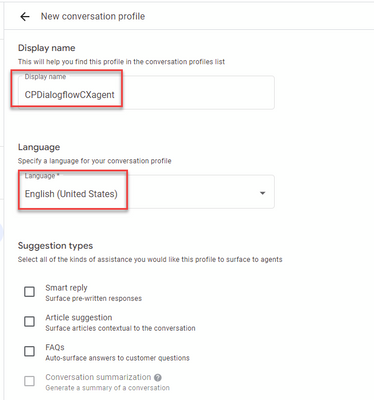
Step 5. Scroll down and select Enable Virtual agent and then select the Dialogflow CX agent.
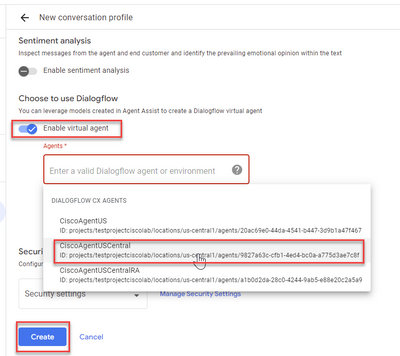
Now the conversation profile is created for the agent.
Webex Control Hub Configuration
Create a CCAI configuration in Cisco Webex Control Hub at Control Hub . A CCAI configuration leverages CCAI Connectors to invoke the CCAI services. For details, visit the Configure Contact Center AI article at Webex Help Center
Step 1. Ensure that the Cloud Connect publisher and subscriber are installed. For more information, visit the Install Cloud Connect section in Cisco Unified Contact Center Enterprise Installation and Upgrade Guide.
Step 2. Log in to Webex Control Hub. Navigate to Contact Center and click Cloud Connect.
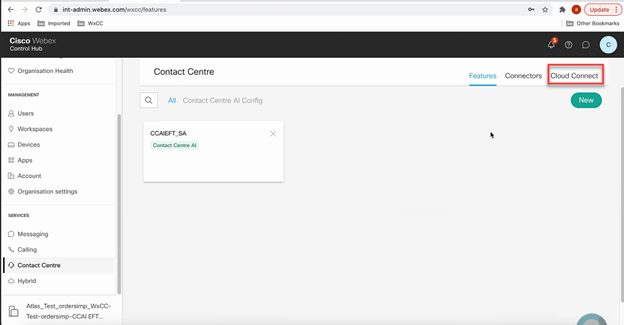
Step 3. On Cloud Connect window enter the name and the Fully Qualified Domain Name (FQDN) of Primary Cloud connect.
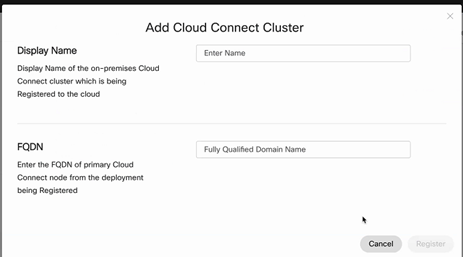
Step 4. On Cloud Connect window enter the name and the FQDN of Primary Cloud connect and click Register.
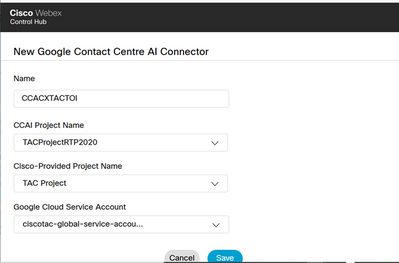
Step 5. Add a Connector. On the Contact Center window select the Connectors tab.
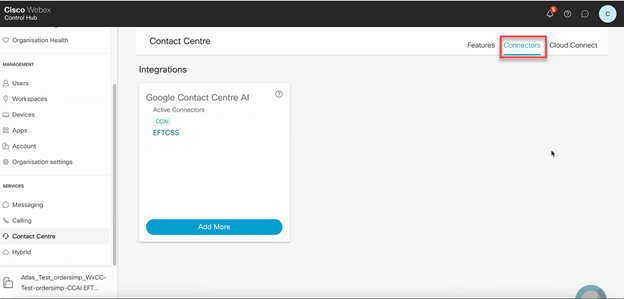
Step 6. If a connector is already added and you need to add one more, click Add More. Sign in with Google and provide the information requested.
Note: The user accout that you sign in with Google must have the owner role of the google project.

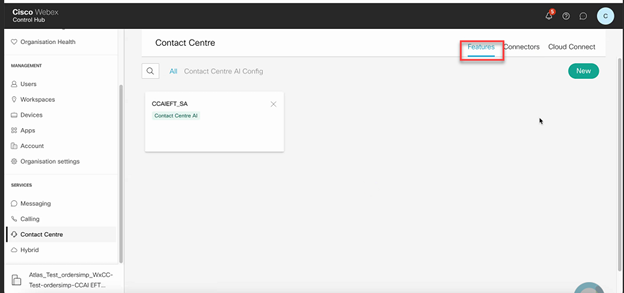
Step 7. Now add the features. On the Contact Center page, click Features and click New.
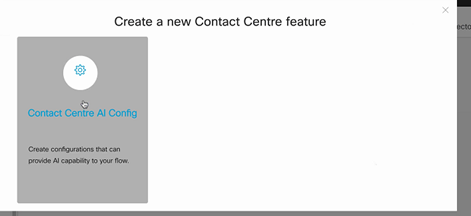
Step 8. You are now in the Create a New Contact Center Feature page. Click Contact Center AI Config.
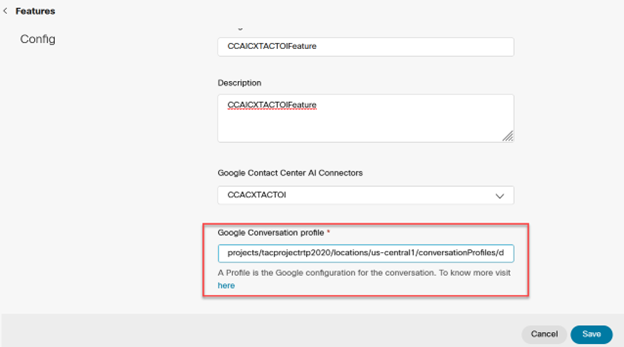
Step 9. Provide the features information, select the connector already added and the Google Profile created.
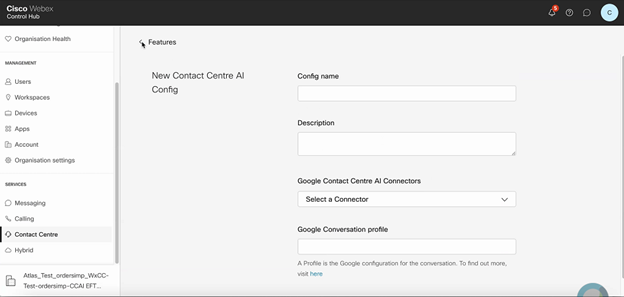
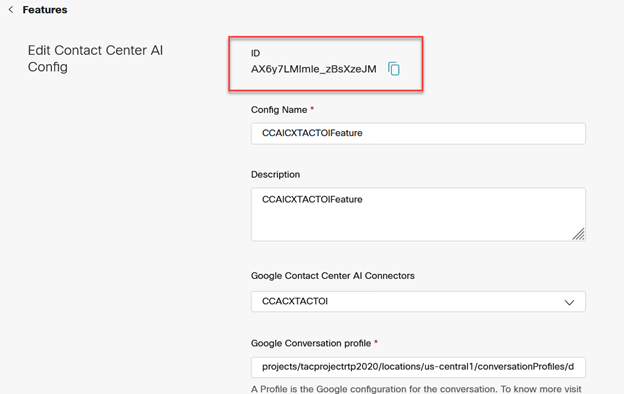
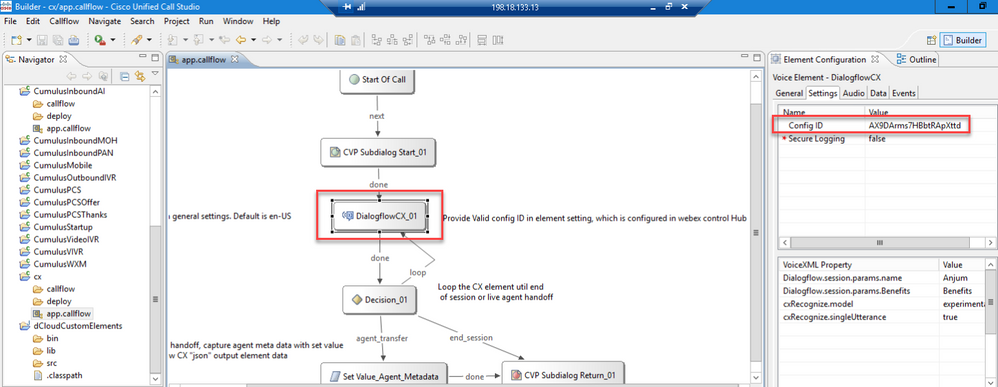
In this example, this is the Config id to be used in the call studio application, if this is not the default virtual agent:
AX6y7LMImIe_zBsXzeJM
CCE Configuration
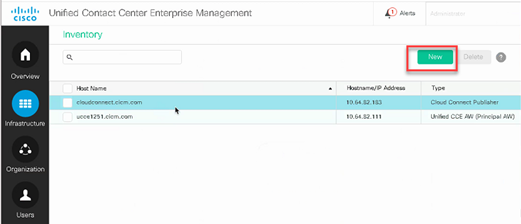
Step 1. On UCCE AW, open Cisco Web Administration tool and navigate to Inventory. Click New.
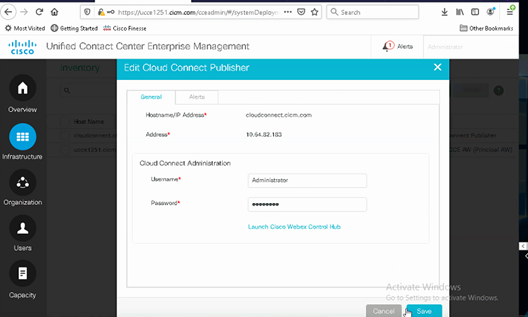
Step 2. Add Cloud Connect and provide the FQDN and credentials.
Note: Refer to these documents for Package CCE certificate exchange: Self-Signed Certificates in a PCCE Solutions and Manage PCCE Components Certificate for SPOG. For Unified CCE refer to Self-Signed Certificate Exchanged on UCCE.
Step 3. For UCCE configure Cloud Connect in the CVP Operations Console (OAMP). For details visit the section Configure CVP Devices for Cloud Connect in the Administration Guide for Cisco Unified Customer Voice Portal.
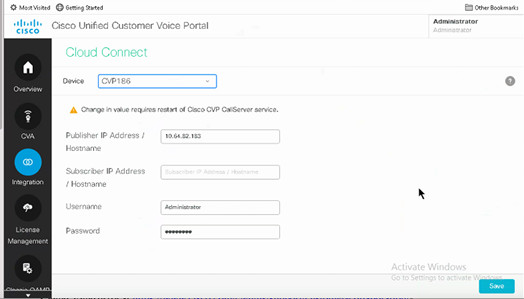
Step 4. Import the Cloud Connect certificate to the CVP server. For details, visit the section Import Cloud Connect Certificate to Unified CVP Keystore in the Configuration Guide for Cisco Unified Customer Voice Portal.
Step 5. Open CVP Call Studio application and create a CVP application usin the CX element as shown in the image.
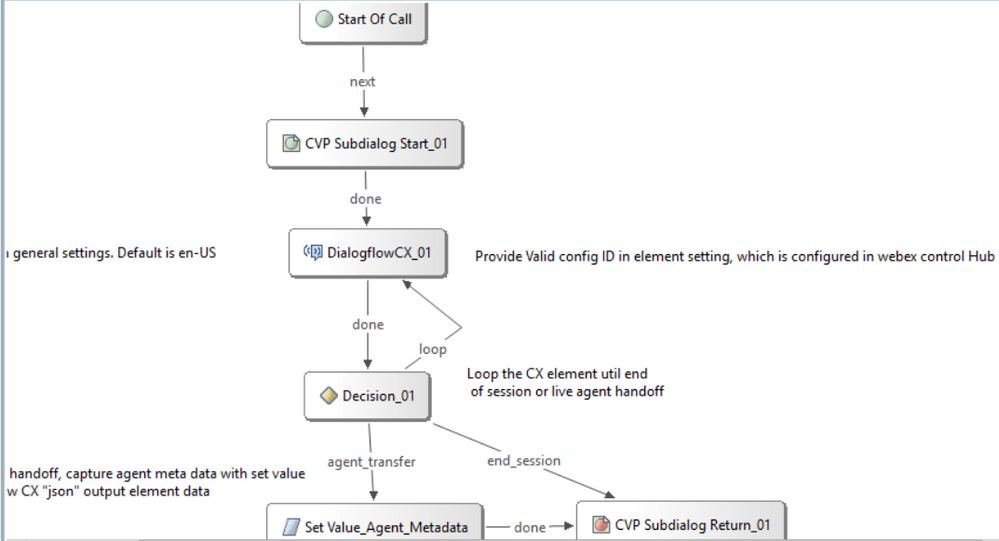
Step 6. Click the CX element and add the Config id originated from the Control Hub features.
Dialogflow CX Agent Welcome Event
Create a welcome event to be played to the caller when a call is initiated.
Step 1. Open https://dialogflow.cloud.google.com/cx/projects.
Step 2. Select the project and agent for which the welcome event is to be configured.
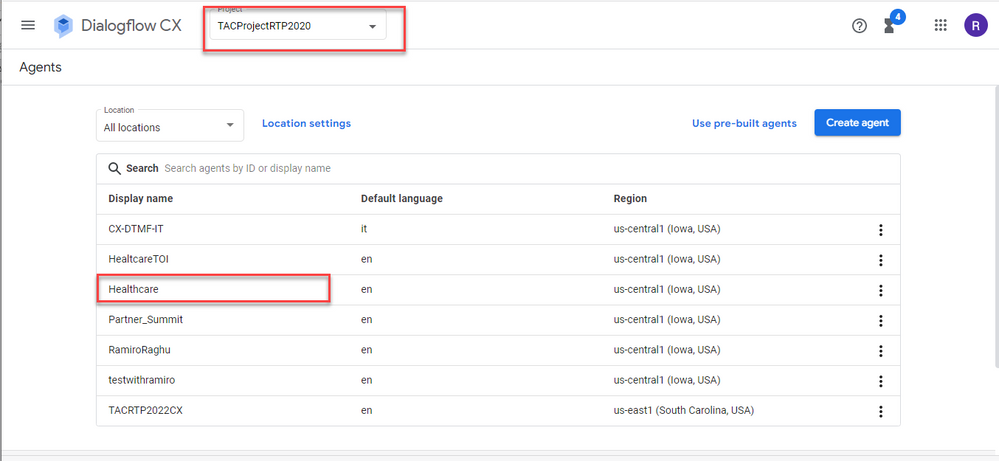
Step 3. In the Google Dialogflow CX Agent screen, click Default Start Flow in the left panel.
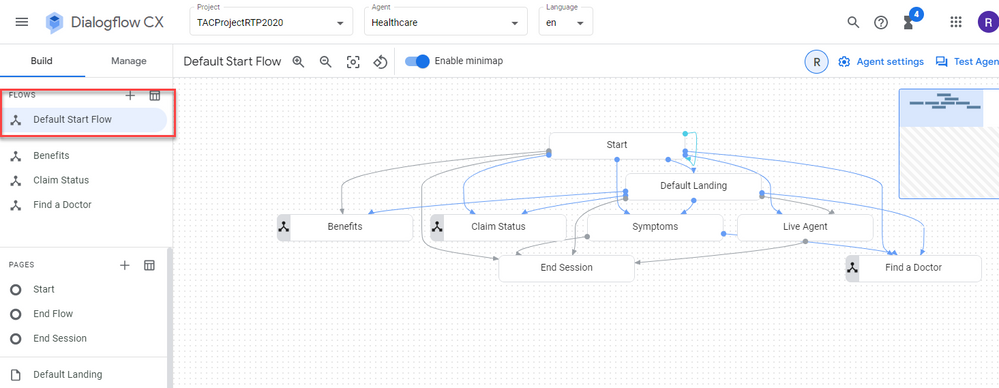
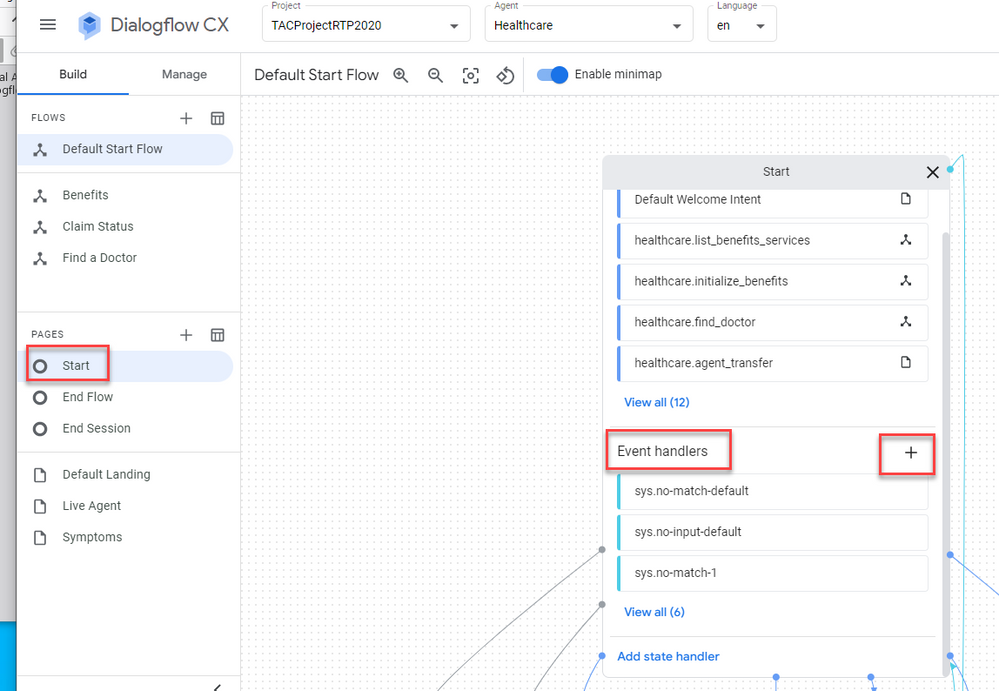
Step 4. Click Start > Event handlers.
Step 5. In the right panel, click Add event handler.
Step 6. Check the Use custom event box.
Step 7. In the Custom Event box, type welcome_event.
Step 8. In the Agent says box, type the welcome message to be played.
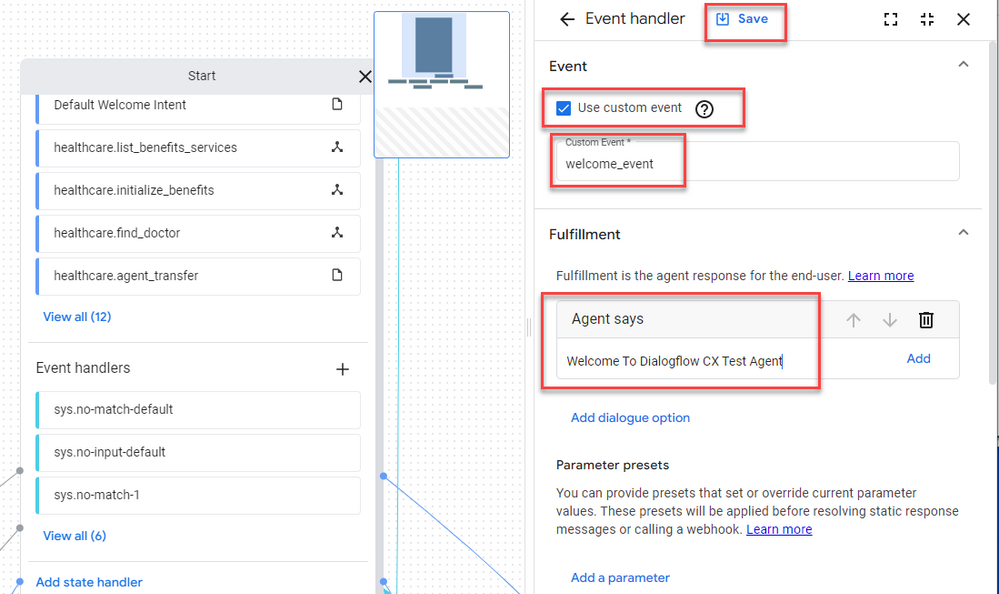
Step 9 Save the changes
Verify
There is currently no verification procedure available for this configuration.
Troubleshoot
There is currently no specific information to troubleshoot available for this configuration.
Related Information


 Feedback