Introduction
This document describes the configuration of Specific License Reservation (SLR) features which are introduced in CVP and UCCE version 12.6.2.
Prerequisites
Requirements
Cisco recommends that you have knowledge of these topics:
- Unified Contact Center Enterprise (UCCE)
- Customer Voice Portal (CVP)
Components Used
The information in this document is based on these software versions:
- CVP Noamp
- UCCE - Single Pane of Glass (SPOG)
- CSSM (Cisco Smart Software Manager)
The information in this document was created from the devices in a specific lab environment. All of the devices used in this document started with a cleared (default) configuration. If your network is live, ensure that you understand the potential impact of any command.
Configure
SLR
- Allows you to reserve the licenses from the virtual account, tie them to the UDI of the device, and then use the device with the reserve licenses in the disconnected mode.
- SLR Feature is for highly secure networks and other devices that cannot or do not connect to Cisco.
- Devices that are registered with smart license share device information at regular intervals with Cisco Smart Software Manager (CSSM).
- Cisco offers license reservation as on-request configuration for these devices.
Network Diagram
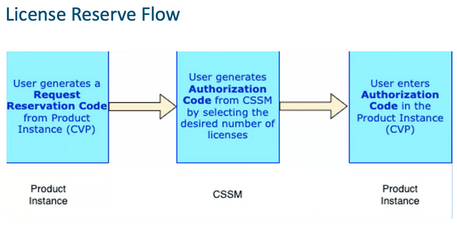
License Reserve Flow
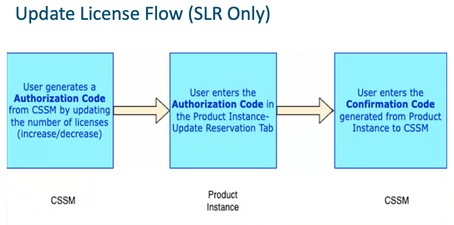
Update License Flow (SLR Only)
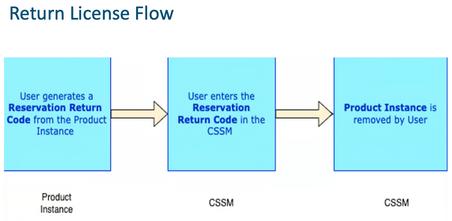
Return License Flow
Procedure
Specific License Reservation (SLR)
Step 1: To configure Specific License Reservation (SLR) on CVP 12.6.2, Log in to CVP Noamp, navigate to License Management> License Settings.
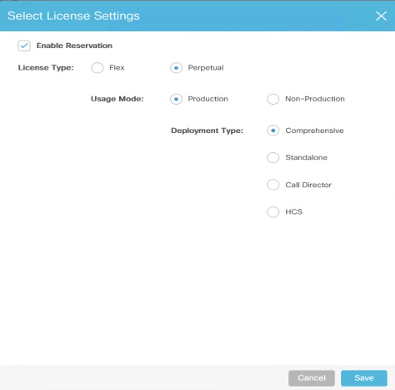
Step 2: Click Enable Reservation check box and then click Save button.
Step 3: Registration Status is Unregistered – Reservation Enabled.
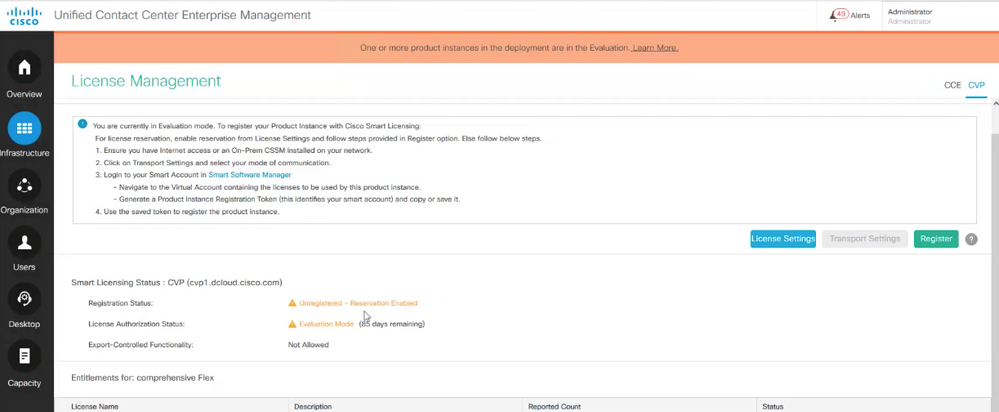
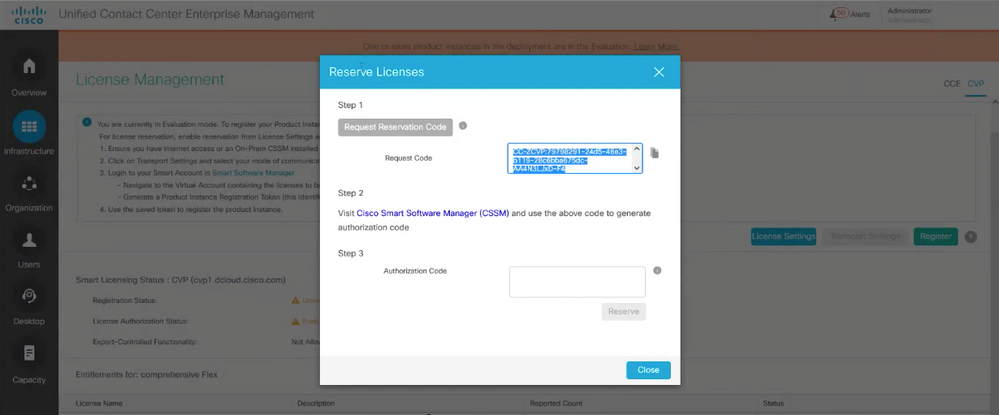
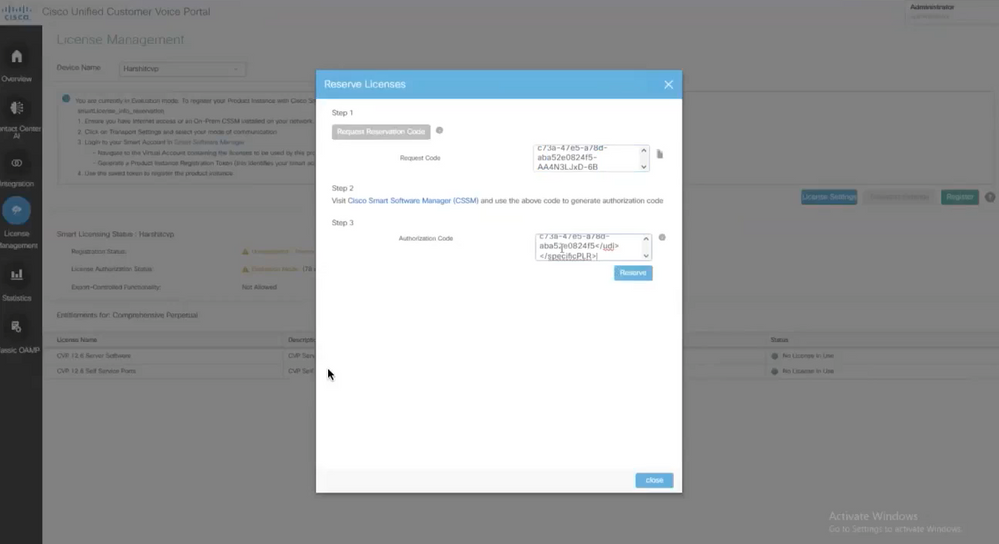
Step 4: Click Register, and under Reserve Licenses window, click Request Reservation Code. It generates a Request Code. Copy this Request code and Log in to Cisco Smart Software Manager (CSSM), and paste this Request code on CSSM portal to generate the Authorization Code for SLR.
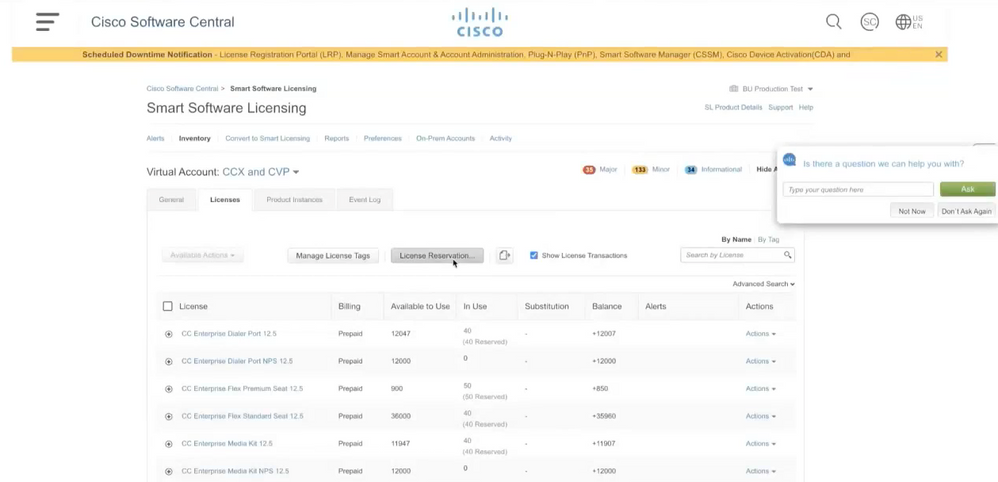
Step 5: Navigate to CSSM portal. Click License Reservation tab.
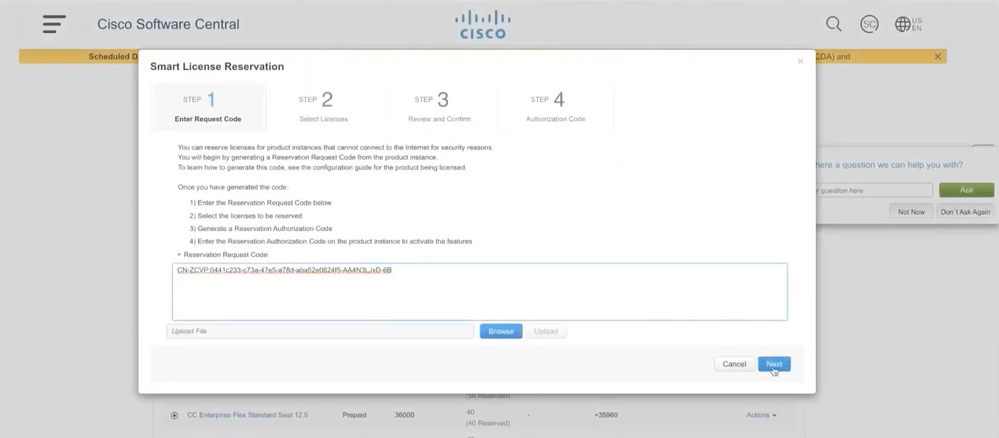
Step 6: Paste the Request code in Reservation Request code window and click Next.
Step 7: Select Reserve a Specific Licenses and enter the number of licenses you want to Reserve.
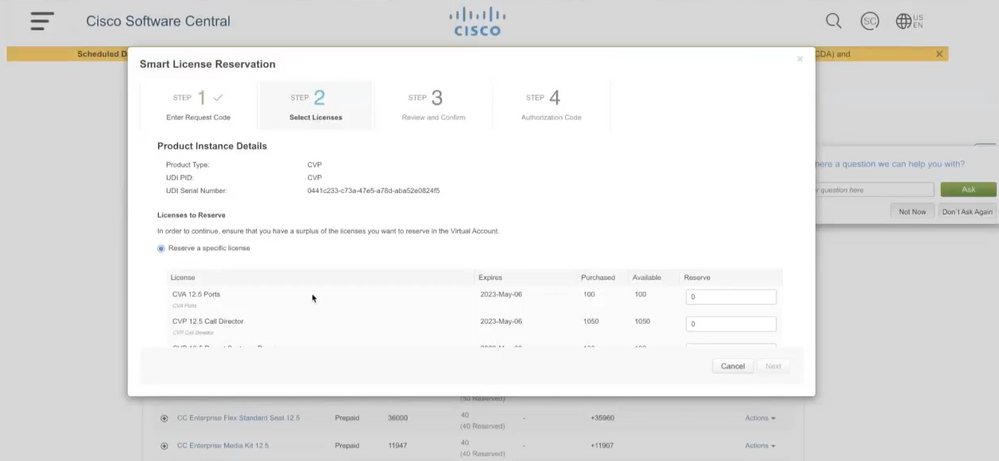
Step 8: Review and Confirm the license reservation on CSSM and click Generate Authorization code.
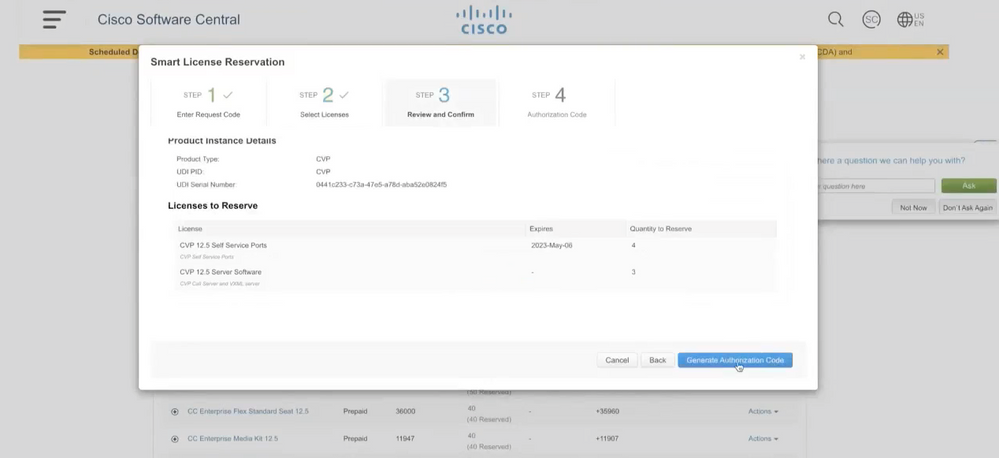
Step 9: Copy and also make sure to Download the Authorization Code. It is advised to download the authorization code so that if you want to update License Reservation or Return Reservation in future, you can use this Authorization Code.
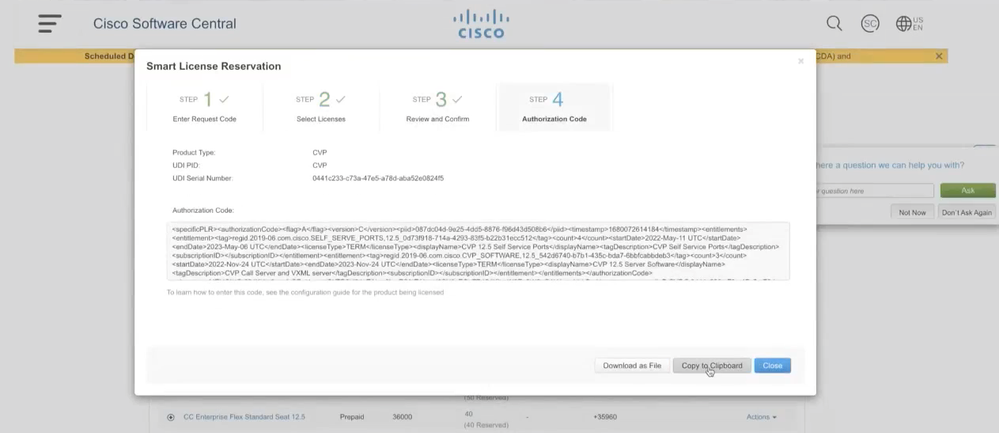
Step 10: Navigate to Reserve Licenses window on CVP and paste the Authorization Code, and click Reserve to complete the reservation.
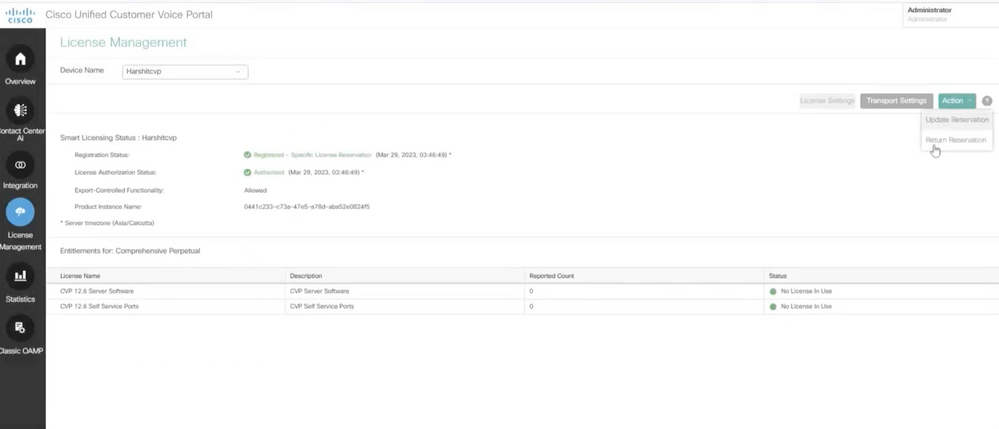
Note: To Update or Return the license reservation, click the Action button and select Update Reservation or Return Reservation (as shown in this screencapture) respectively.
Verify SLR
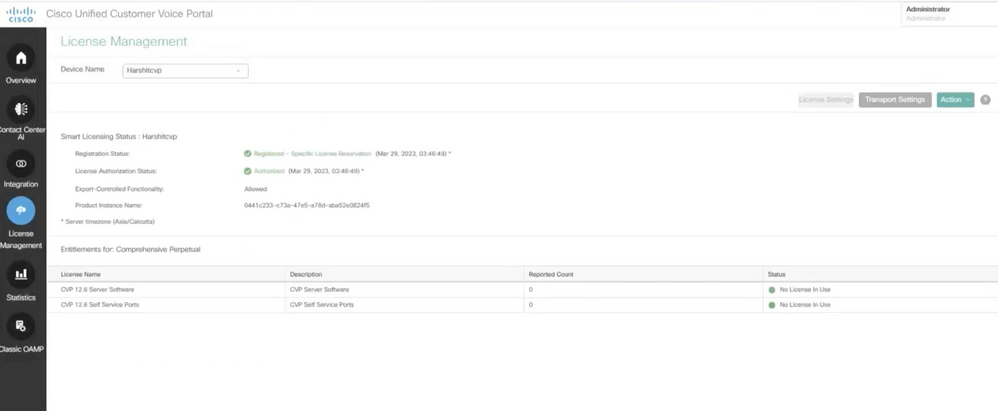
To verify SLR is enabled, navigate to the License Management page and it must show:
Registration Status: Registered - Specific License Reservation
License Authorization Status: Authorized
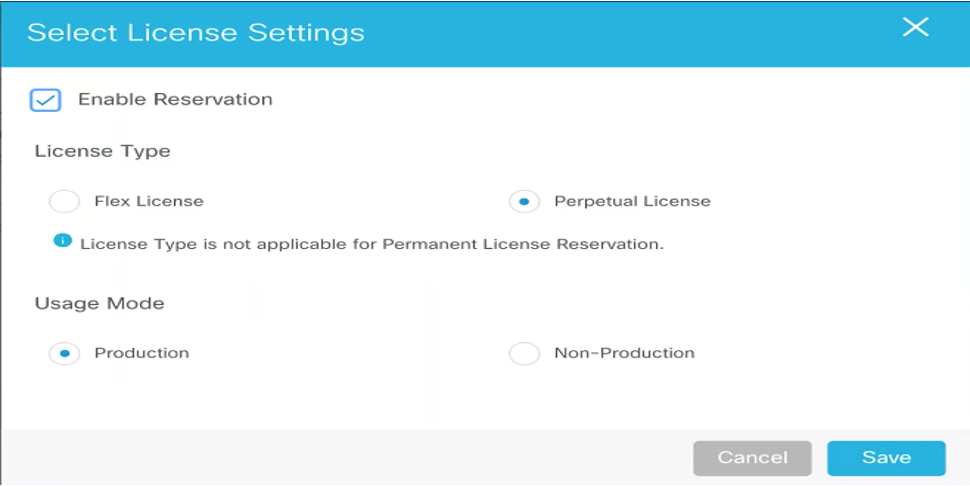
Note: Steps for SLR in CCE are same as CVP, the only difference is the License Settings User Interface. This is the screencapture of License Setting page from CCE.
License Settings User Interface in CCE.
 License Settings in CCE
Related Information


 Feedback