Introduction
This document describes how to set up a Cisco Voice Operating System (CVOS) system cluster with the use of a Certificate Authority (CA)-Signed Multi-Server Subject Alternate Name (SAN) having publisher - subscriber architecture model. The CVOS system covers CUIC, Finesse, Livedata, IdS systems in UCCE environment.
Contributed by Venu Gopal Sane, Ritesh Desai Cisco TAC Engineer.
Prerequisites
Requirements
Cisco recommends that you have knowledge of these topics:
- Cisco Unified Contact Center Enterprise (UCCE) Release v12.5
- Cisco Package Contact Center Enterprise (PCCE) Release v12.5
- Cisco Finesse v12.5
- Cisco Unified Intelligence Center v12.5
Components Used
The information in this document is based on CVOS Operating System administration - Certificate Management.
The information in this document was created from the devices in a specific lab environment. All of the devices used in this document started with a cleared (default) configuration. If your network is live, make sure that you understand the potential impact of any command.
Background Information
With Multi-Server SAN certificates, only one CSR is required to be signed by CA for one cluster of nodes, rather than the requirement to obtain a CSR from each server node of the cluster and then obtain a CA-signed certificate for each CSR and manage them individually.
Before you attempt this configuration, ensure these services are up and functional:
Configure
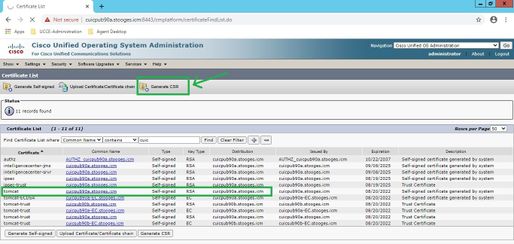
Step1. Log into Operating System (OS) Administration and navigate to Security > Certificate Management > Generate CSR as shown in the image.
Step 2. Select Multi-Server SAN in Distribution. It auto-populates the SAN domains and the parent domain.
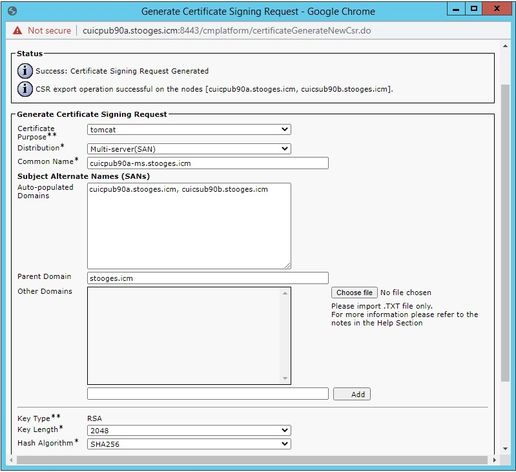
Step 3. Successful generation of CSR shows this message:

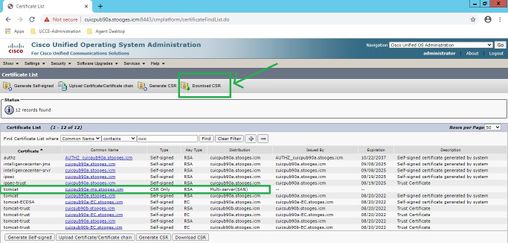
Step 4. Upon successful generation of CSR, generated CSR can be seen here, which can be downloaded to sent to CA for signing.
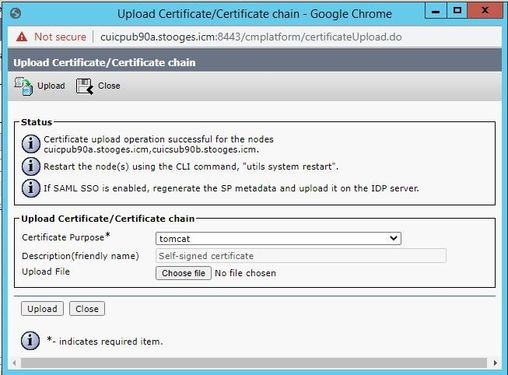
Step 5. Upload the CA-signed certificate as type tomcat into the Publisher node of the cluster in certificate management page and follow the instructions displayed upon successful upload.
Step 6. After successful file uploaded, verify the certificate list that shows new CA-signed certificate as type multi-SAN.
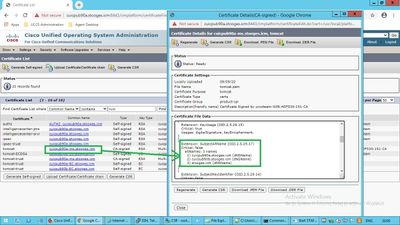
Click on the new multi-SAN certificate, verify SubjectAltNames shows Domain Name and FQDNs of all cluster node(s).
Verify
Use this section in order to confirm that your configuration works properly.
Login to cmplatform page of Subscriber nodes and verify that the same multi-SAN certificate is populated with the use of http://<any-node-fqdn>:8443/cmplatform.
Troubleshoot
This section provides information you can use in order to troubleshoot your configuration.
Collect these certificate management logs from CLI access and open the case with Cisco TAC: file get activelog platform/log/cert*


 Feedback