Introduction
This document describes the migration process from non-integrated to integrated CCP Public Switched Telephone Network (PSTN) for carrier IntelePeer.
Prerequisites
Requirements
Cisco recommends that you have knowledge of these topics:
- Cloud Connected Provider (CCP) Intelepeer Non-Integrated
- Control Hub administration for Webex Calling Organization Calling Features
- HTTP Archive (HAR) for a log of web browser interactions
Components Used
The information in this document was created from the devices in a specific lab environment. All of the devices used in this document started with a cleared (default) configuration. If your network is live, ensure that you understand the potential impact of any command.
Configure
Configurations
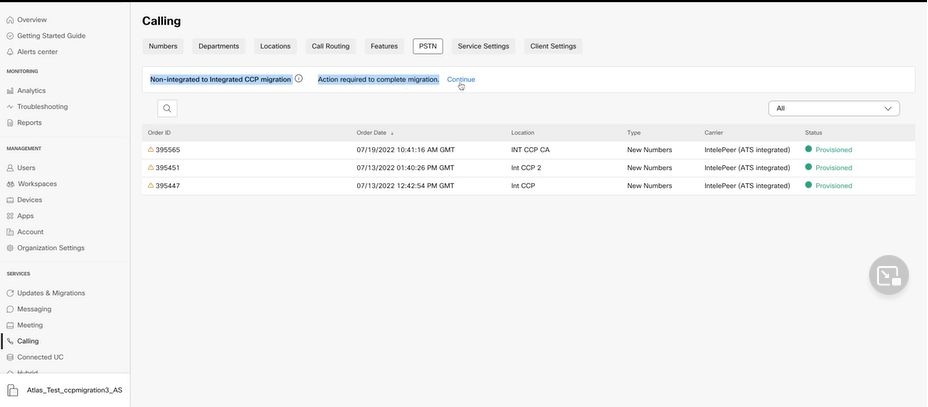
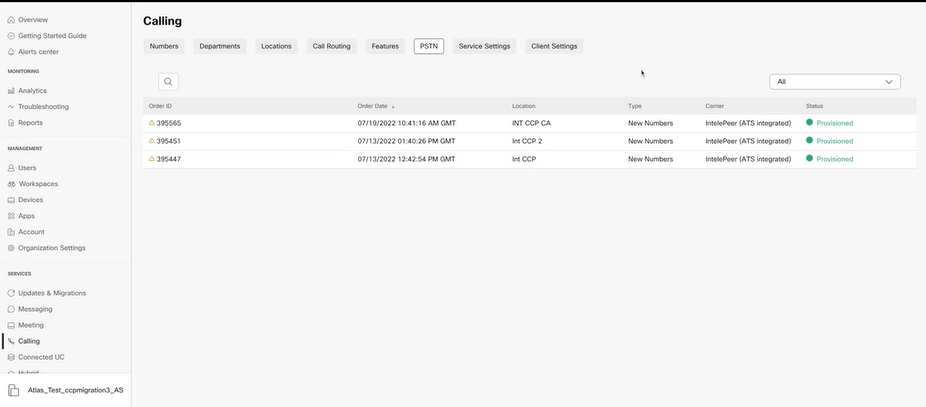
Step 1. If you have any Non-Integrated Intelepeer locations configured, the Calling > PSTN menu is visible. At Calling > PSTN a migration banner displays as: Non-Integrated to Integrated CPP migration, Action required to complete migration, Continue.
- Click Continue, then Action required to complete the migration.
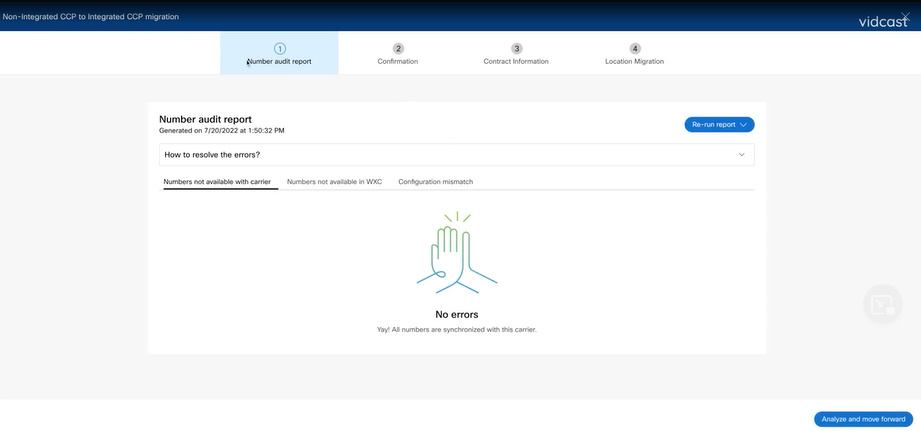
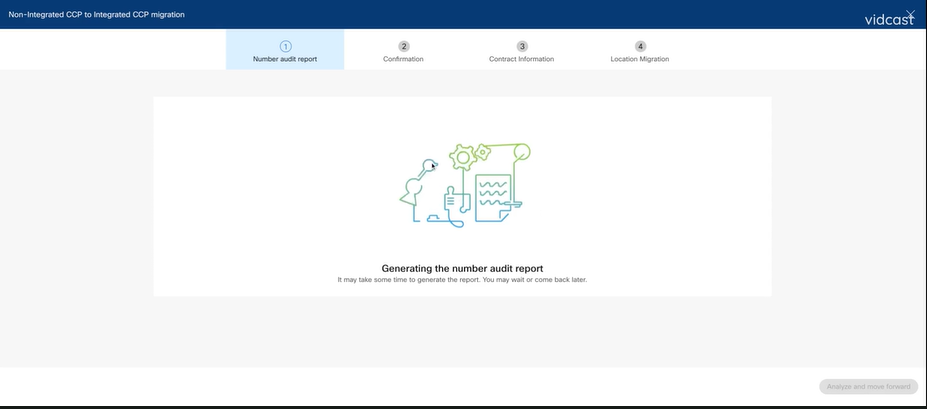
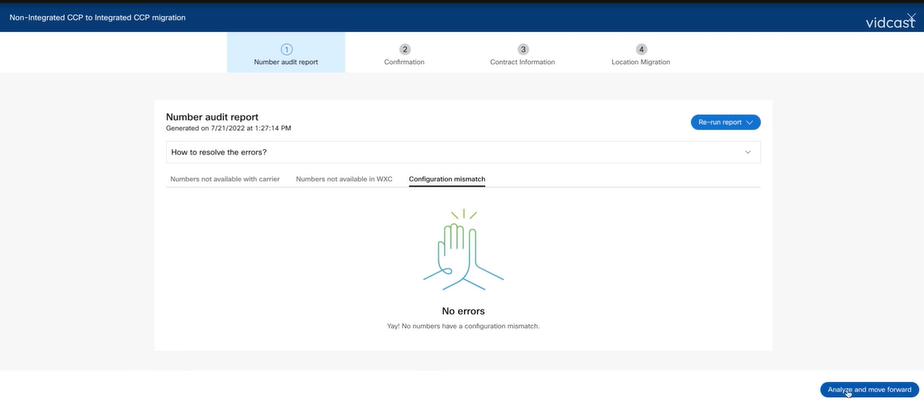
Step 2. The Number audit report contains 3 tabs: 1. Numbers not available with carrier, 2. Numbers not available in WXC and 3. Configuration mismatch.
- Click Analyze and move forward button if no errors display on any of these tabs.
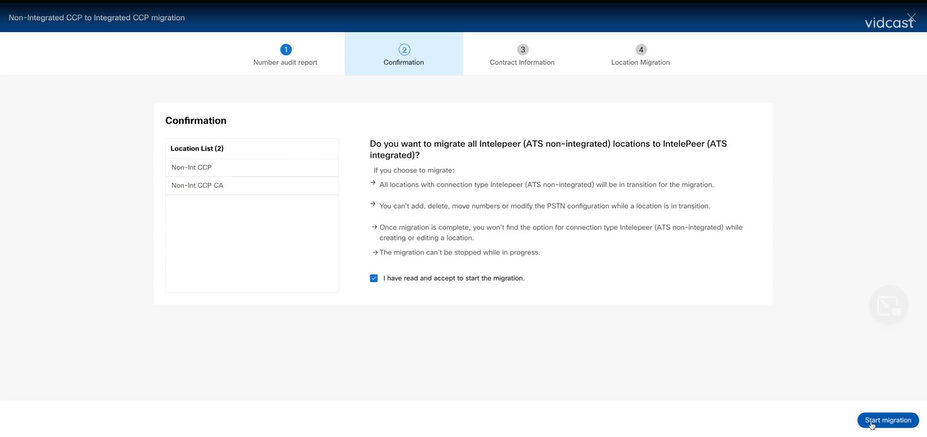
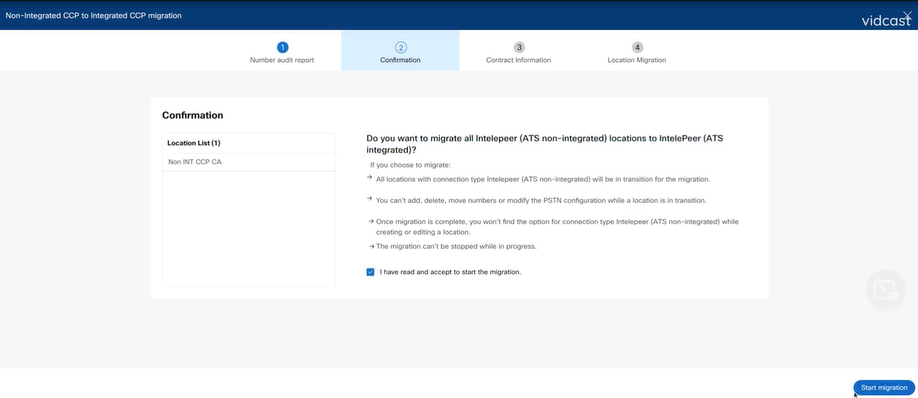
Step 3. At the Confirmation page, you can start migration of the Locations that are Non-Integrated Intelepeer.
- Click I have read and accept to start the migration.
- Click Start migration button.
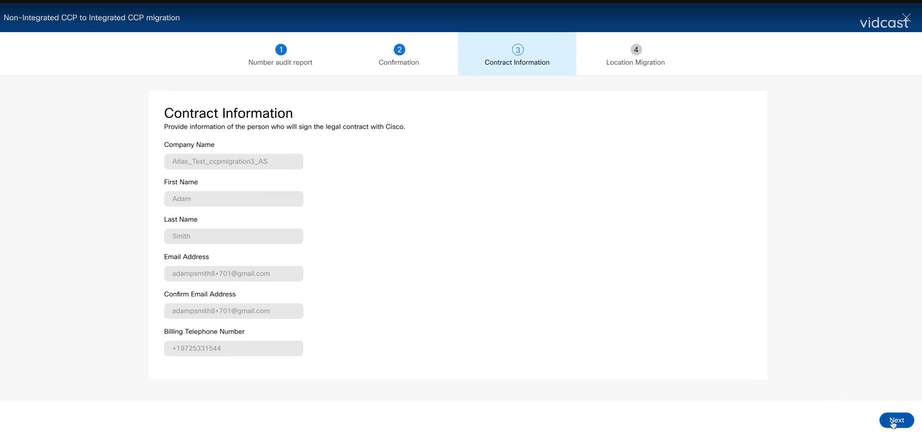
Step 4. The Contact Information page would be prepopulated.
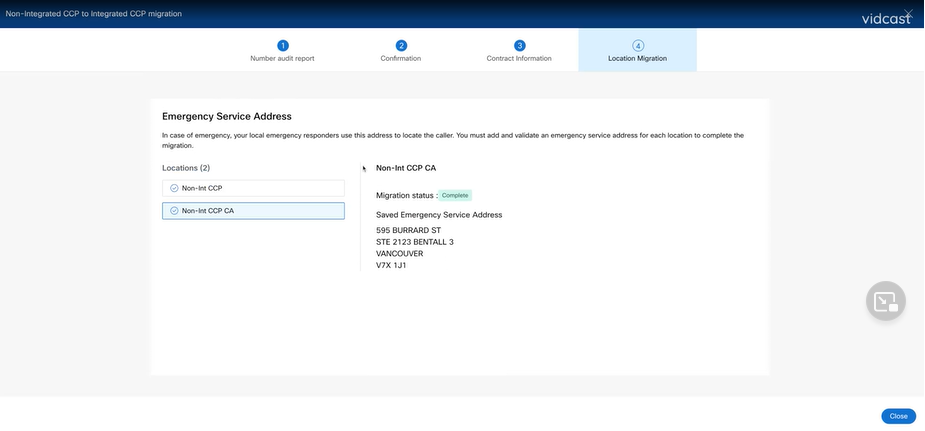
Step 5. The Location Migration page lists the Non-Integrated Intelepeer locations.
a. Select the first location, if more than 1.
b. Click Validate Address.
c. Apply Suggested address, if needed.
d. Click Migrate Now.
e. Migration Status shows as Complete.
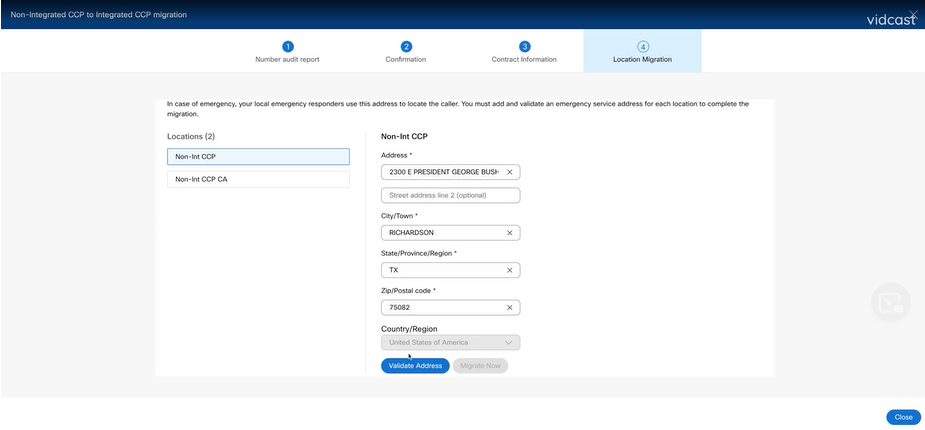
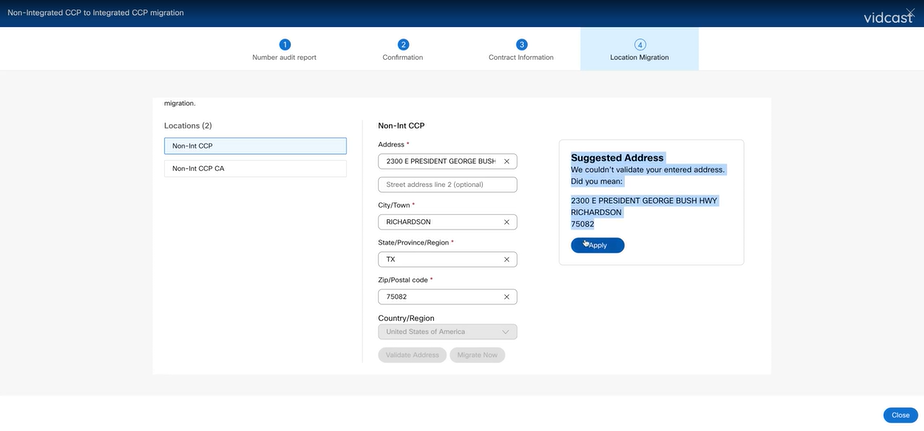
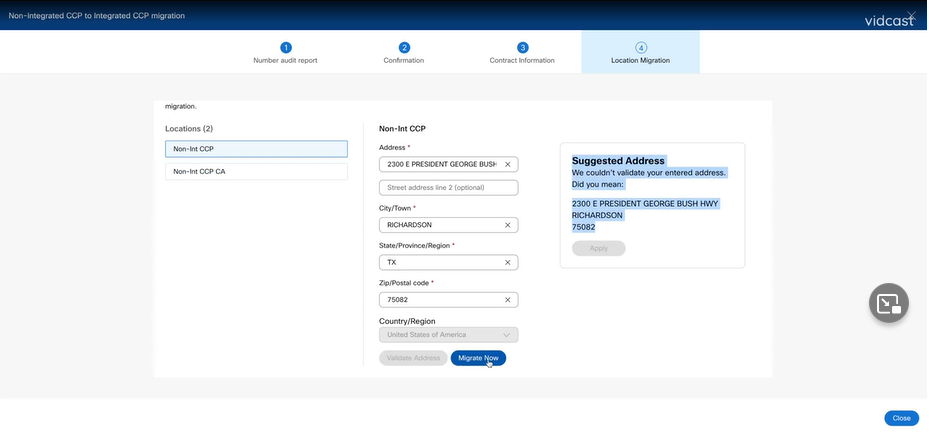
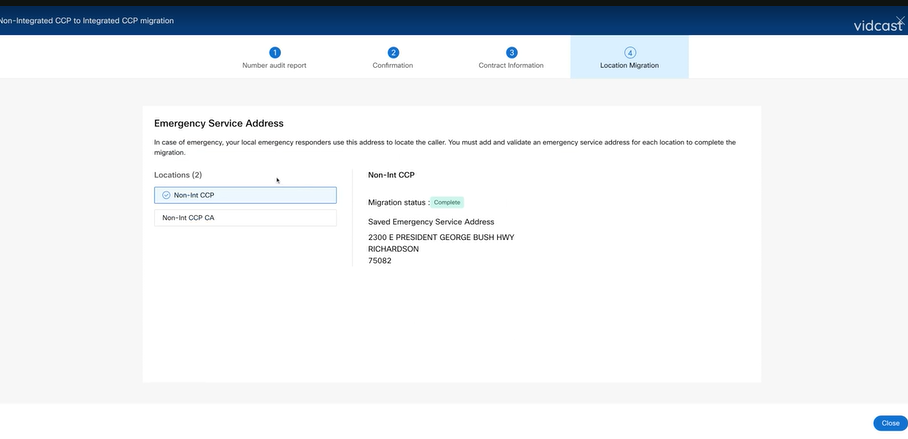
Step 6. Repeat Step 5 a-e for any Non-integrated Intelepeer location that remains.
Step 7. Click Close after all locations are migrated to Integrated IntelePeer.
Verify
If there are no longer any Non-Integrated Intelepeer locations, the migration banner is no longer visible at Calling > PSTN menu after Step 7 of Configurations.
Troubleshoot
Scenario 1: Number Audit Report has Errors
- For example, errors at Numbers not available with carrier.
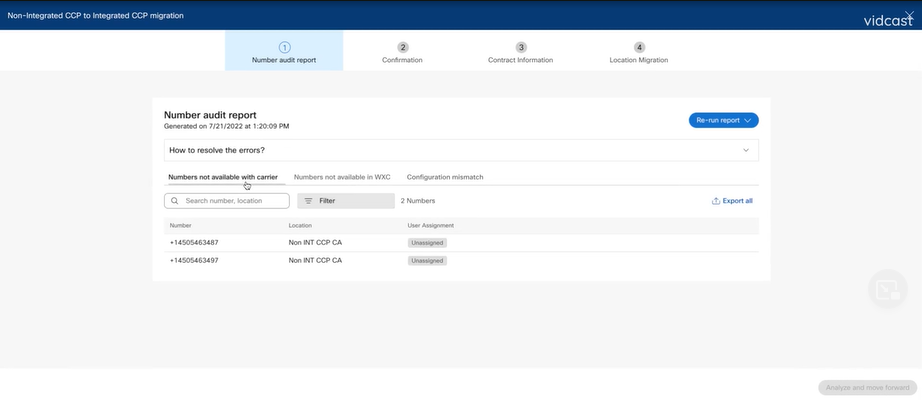
- The errors have to be resolved with the instructions provided on the expandable How to resolve the errors? dropdown in the Number Audit Report Page.
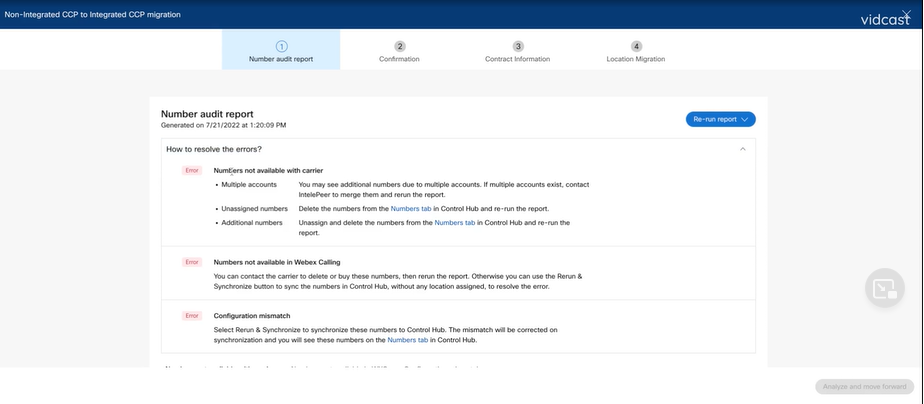
- Once the errors are resolved, run the rerun and sync button.
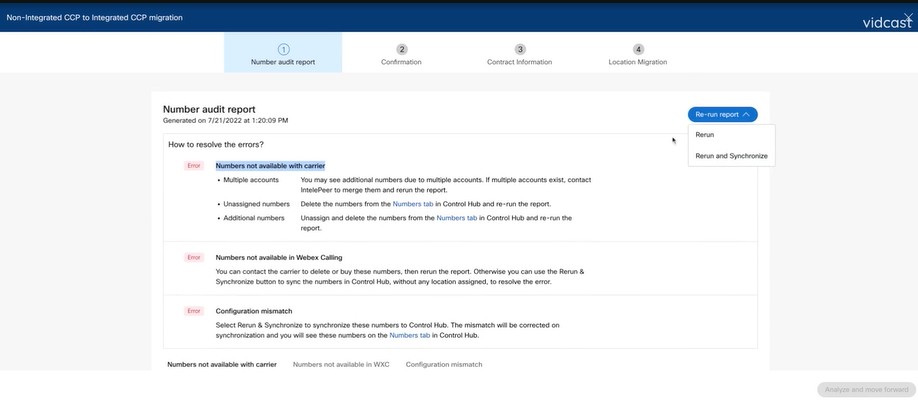
- This enables the analyze and move forward button to proceed with the migration process.
If errors still exist in the Number Audit Report, recreate the issue and produce a HAR file.
Contact Cisco TAC and provide the HAR file for review.
Scenario 2: All the Locations are not Completely Migrated
- In this case, the migration process is considered to be in a pending state, and all the non-integrated locations are marked as in transition.
- You cannot edit the PSTN configurations for these locations; no add/move/delete numbers associated with these locations.
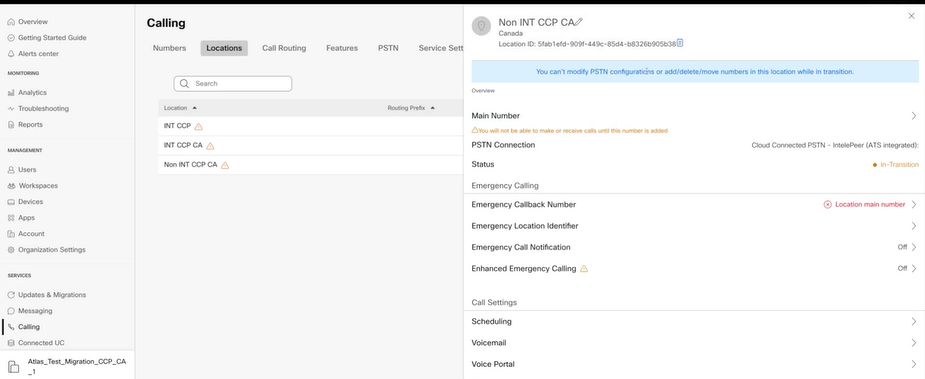
- The migration has to be continued per configuration steps 1 - 7 for all non-integrated locations in transition for the migration banner to no longer be visible at Calling > PSTN menu after Step 7 of Configurations.
Scenario 3: Number Audit Report Failure
- After the Migration Number audit report starts, an Error while generating the report, message is reported.
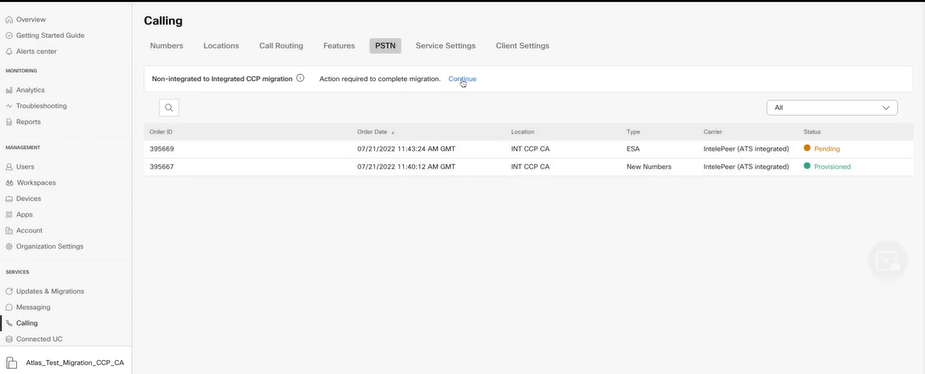
- Select the Try Again button to start the Number and audit report process. But this also fails with Error while generating the report.
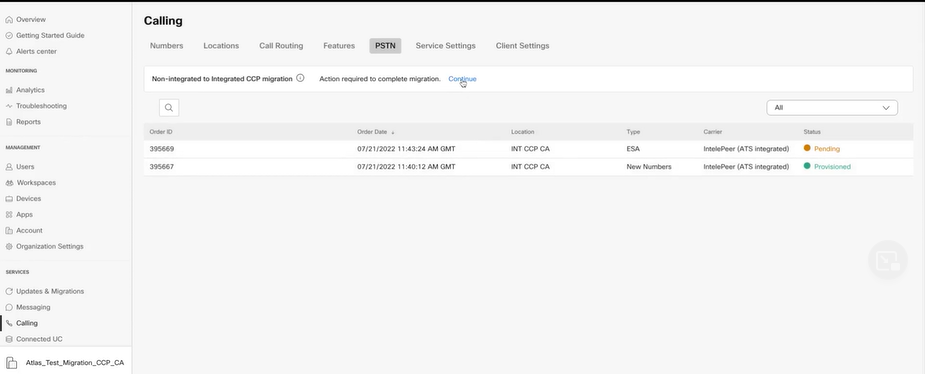
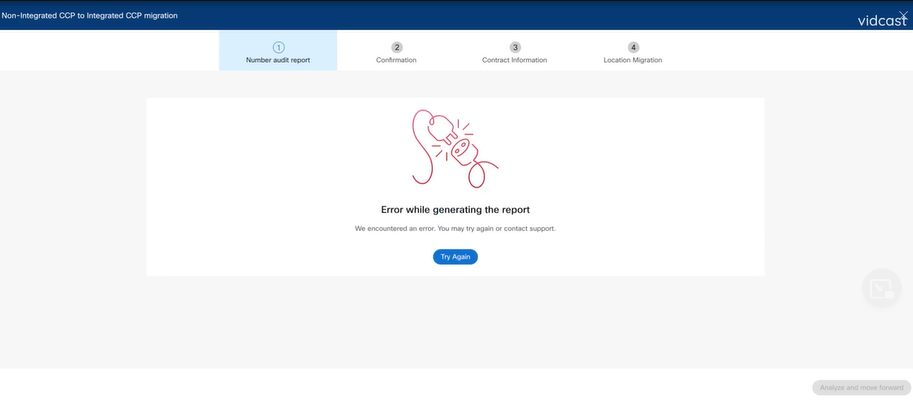
In this case, recreate the issue and produce a HAR file.
Contact Cisco TAC and provide the HAR file for review.
Here is the link with information to obtain a HAR file for a reproduced issue:
https://help.webex.com/en-us/WBX9000028670/How-Do-I-Generate-a-HAR-File-for-Troubleshooting-Browser-Issues
Enable the HAR trace per instructions in link, recreate issue, after issue recreated, save HAR file.


 Feedback