Introduction
This document describes how to configure the Remember Me API for integrations with Persistent Session Tokens (PST) when Single Sign On (SSO) is enabled for CI Webex Sites (managed via Webex Control Hub). When SSO is enabled, you can set up PST from your Identity Provider (IdP) so that sessions take longer to expire. For CI Sites, the Webex idbroker does not honor PST by default.
Prerequisites
Requirements
Cisco recommends that you have knowledge of these topics:
- Know your Org ID and get a Bearer Token
- Have Postman installed. You can download the desktop version or the Add-on for Chrome
Note: Navigate to Background Information in order to know how to get a Bearer Token.
Components Used
This document is not restricted to specific software and hardware versions.
The information in this document was created from the devices in a specific lab environment. All of the devices used in this document started with a cleared (default) configuration. If your network is live, make sure that you understand the potential impact of any command.
Background Information
You can find the Org ID in the Webex Control Hub. Access to Control Hub and click on My Company.
In order to get a Bearer Token, follow these steps:
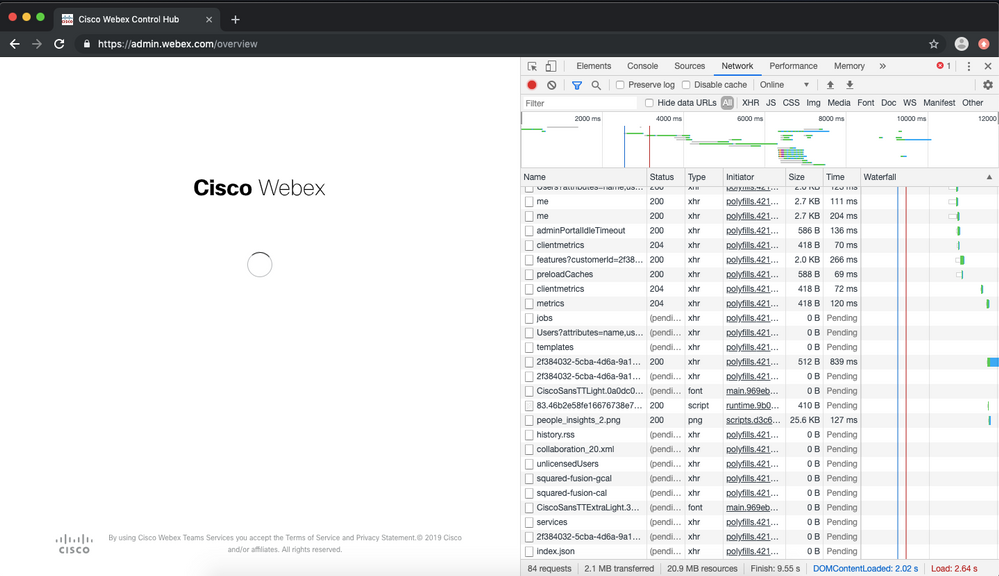
Step 1. From Google Chrome, navigate to admin.webex.com.
Step 2. At the top-right of your browser window, click the Chrome menu (⋮).
Step 3. Select Tools > Developer Tools. The Developer Tools window opens as a docked panel at the side or bottom of Chrome.
Step 4. Select the Network tab.
Step 5. Log in with your Full Admin account.
This image illustrates Steps 1. to 5.:
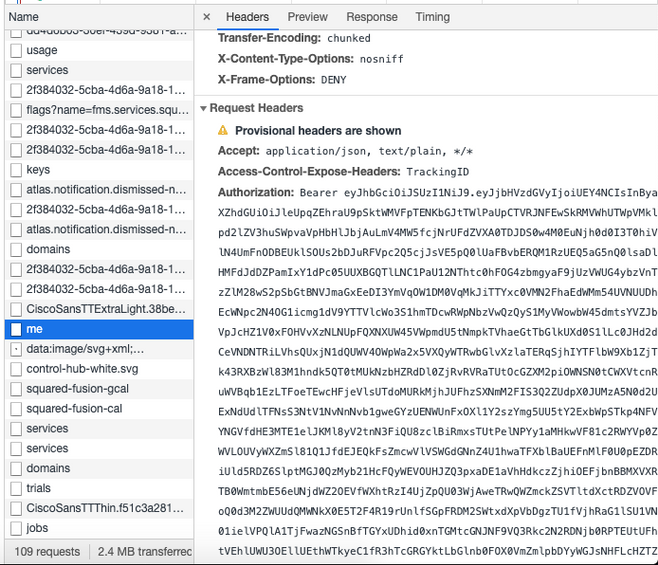
Step 6. After you pass the SSO login window, look for an entry called Me.
Step 7. Click on the Me entry. Navigate to the Headers tab and then scroll down until Request Headers. Next to Authorization is the Bearer token.
Configure
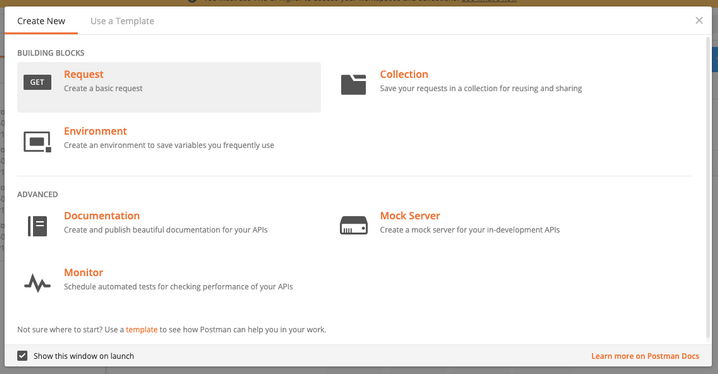
Step 1. Open Postman and create a new Request.
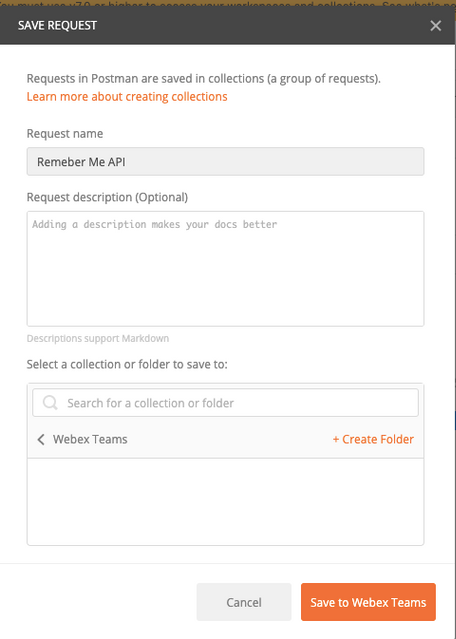
Enter a name and click Save to Webex.
Step 2. Navigate to the Headers tab and enter the Keys and Values below:
| Authorization |
Bearer Token |
| Content-Type |
application/json |
| Accept |
application/json |
Step 3. Replace {OrgID} in the URL with the orgid that you found in Control Hub.
https://idbroker.webex.com/idb/idbconfig/{orgid}/v1/authentication
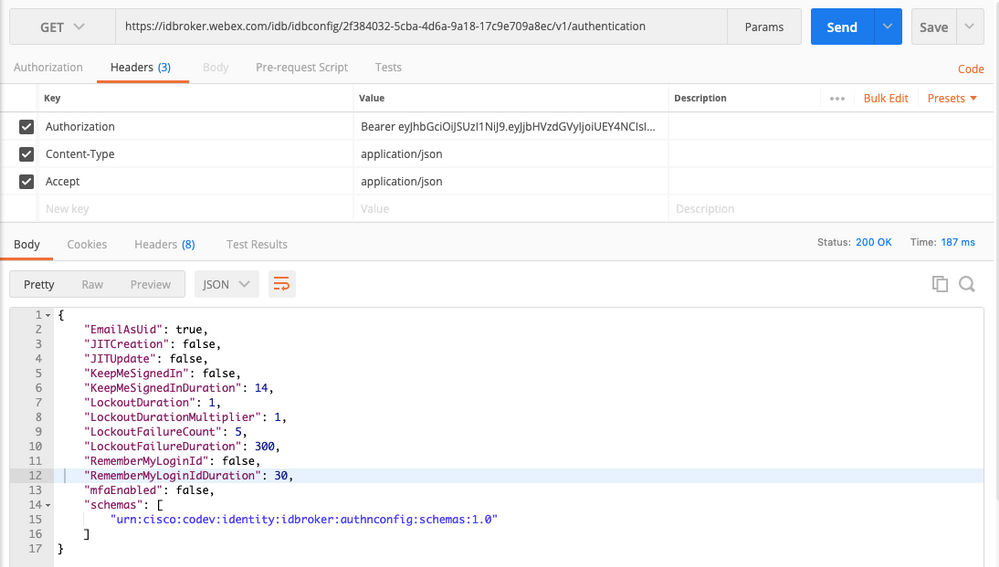
Step 4. Do a GET from Postman in order to see the contents of the authentication policy:
{

    "EmailAsUid": true,

    "JITCreation": false,

    "JITUpdate": false,

    "KeepMeSignedIn": false,

    "KeepMeSignedInDuration": 14,

    "LockoutDuration": 1,

    "LockoutDurationMultiplier": 1,

    "LockoutFailureCount": 5,

    "LockoutFailureDuration": 300,

    "RememberMyLoginId": false,

    "RememberMyLoginIdDuration": 30,

    "mfaEnabled": false,

    "schemas": [

        "urn:cisco:codev:identity:idbroker:authnconfig:schemas:1.0"

    ]

}
This image illustrates Step 1. and Step 2.
Step 5. Copy the above from your GET response and paste it in the Body tab with the use of the Raw format as shown in the image:
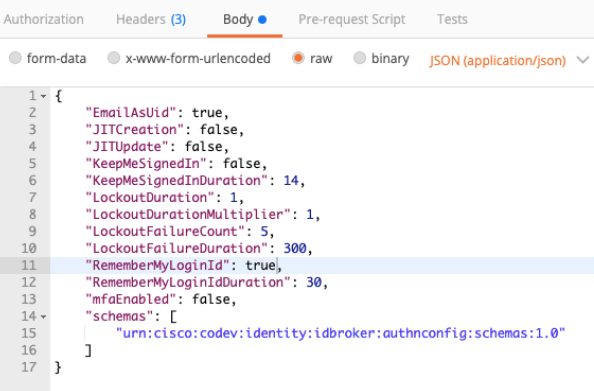
Change RememberMyLoginId: false to RememberMyLoginId: true.
Choose a value for the RememberMyLoginIdDuration appropriate for your users. This value determines how long (days) the Remember Me token is valid in the browser. If a user tries to log in to a Webex site in that browser and on that machine with a different email address for testing purposes or as a different employee identity for any reason, they will not be recognized with that identity.
Note: The Remember Me token is an encrypted hash of the email address only for the purpose of identification in the Discovery Screen.
Step 6. Do a PATCH from Postman in order to overwrite your changes.
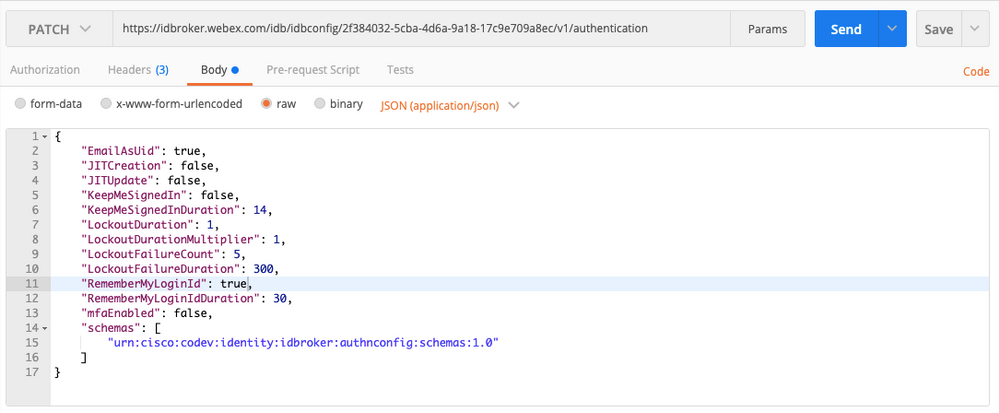
Caution: Do not change any of the other values as they will affect the ability of your site for all users to handle authentication. If you change any of these values, you will not be able to receive support from Cisco TAC.
Verify
There is currently no verification procedure available for this configuration.
Troubleshoot
There is currently no specific troubleshooting information available for this configuration.
