Introduction
This document describes the procedure to configure and enable a customized content security policy for webbridge on Cisco Meeting Server (CMS) version 3.2.
Contributed by Octavio Miralrio, Cisco TAC Engineer.
Prerequisites
Requirements
Cisco recomends that you have knowledge on these topics:
- CMS general configuration
- Hypertext Transfer Protocol Secure (HTTPS)
- Hypertext Markup Language (HTML)
- Web server
Components Used
The information in this document is based on these software and hardware versions:
- CMS version 3.2
- Windows web server 2016
The information in this document was created from the devices in a specific lab environment. All of the devices used in this document started with a cleared (default) configuration. If your network is live, ensure that you understand the potential impact of any command.
Configure
Configurations
Fron CMS version 3.2 and newer, the CMS administrators can embed the web app withing another website. That means the web app is embedded within another web page.
Note: Web app can run media when embedded in the browsers that require HTTPS and not on browsers with HTTP.
Step 1. Open the Command Line Interface (CLI) of the CMS and run the next command:
webbridge3 https frame-ancestors <frame-ancestors space-separated string>
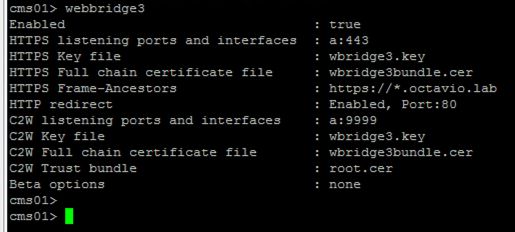
The <frame-ancestors space-separated string> parameter must be replaced with the frame Uniform Resource Locator (URL) where the web app is embedded, wildcards are supported, for example https://*.octavio.lab as shown in the image:
The web app does not check the header contents besides that the characters are valid. The administrators must ensure that the content security policy header contains valid strings. The string size is limited to 1000 characters and allowed characters are a-z A-Z 0-9_ . / : ? # [ ] @ ! $ & ' ( ) * + - = ~ %.
Step 2. Configure the embed iFrame within a web page.
The next step is to embed iframe element within a web page. The iframe element is recognized by the <iframe> tag in an HTML document. In order to support media, the next attributes are required:
<iframe src="https://<address>:<port>/" allowusermedia allow="microphone; camera; encrypted-media; displaycapture;"></iframe>
Note: HTTPS is required to run webapp media. Other attributes that are supported by iframe such as height and width can also be included.
The creation of the iFrame content is up to the web page administrator, it can be customized as needed, the next is an example of an iFrame created for demostration purposes:
<!DOCTYPE html>
<html lang="en">
<meta http-equiv="Content-Type" content="text/html; charset=utf-8"/>
<html>
<head>
<title>Customized Content Security Policy</title>
</head>
<body>
<h1>This is the title of the Content Securiity Policy</h1>
<p>Welcome to the CMS Content Security Policy Demostration.</p>
<p>All this text is not part of the webbridge itself.</p>
<p>Below you will see the enbedded webapp page, https://join.octavio.lab.</p>
<iframe src="https://join.octavio.lab" width="1024" height="768" title="CMS 3.2 Customizable CSP" allowusermedia allow="microphone; camera; display-capture"></iframe>
</body>
</html>
Step 3. Deploy on web server.
Once the HTML document has an embedded iframe, the page must be loaded onto a web server. For the purpose of this document the HTML file is called index.html and stored on a Windows web server, as shown in the image:

Note: The aditional configurations of the web server and options available for the web page are out of the scope for this document. The web server admin must complete the deployment of the web page.
Verify
In order to validate the configuration is working correctly, open a web browser and navigate to the web page where the iFrame was configured, for this document it is https://ad-ocmiralr.octavio.lab/cmsframe/index.html.
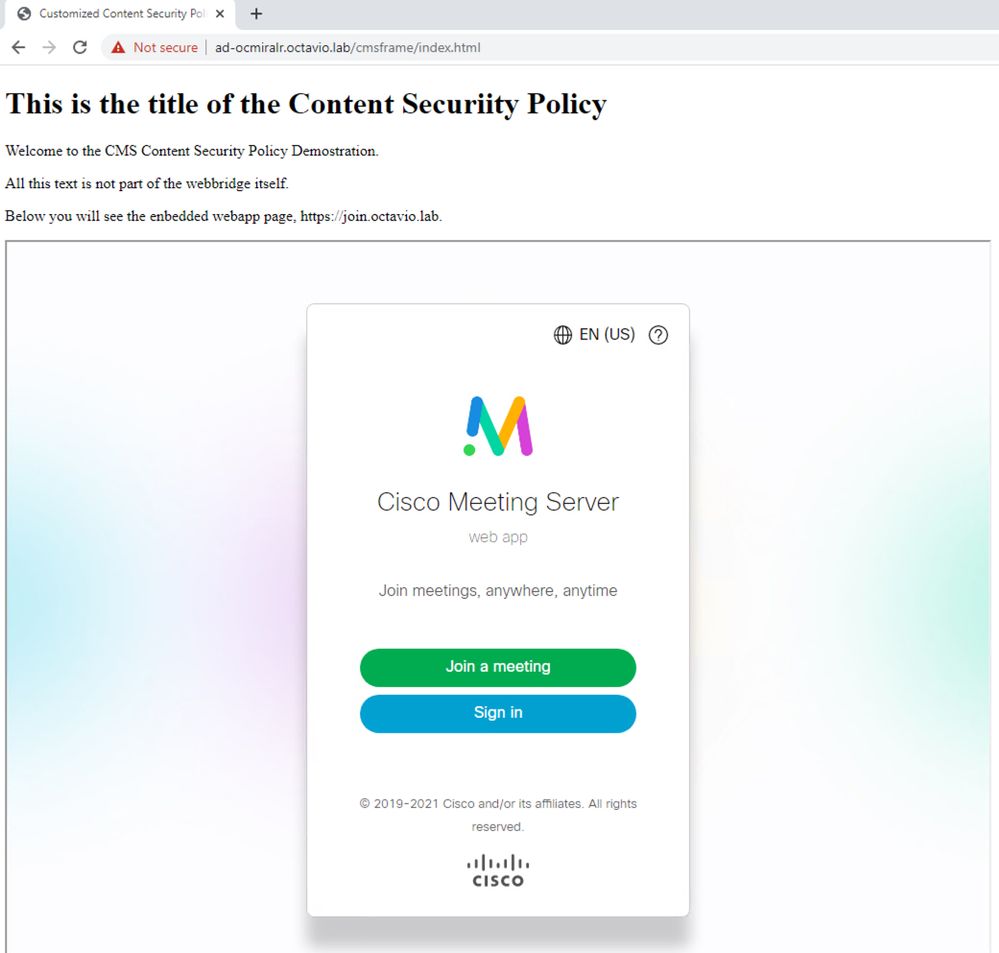
Access any available meeting on the CMS and validate audio and video are working fine.
Troubleshoot
- The web page is shown but the web app is not loaded.
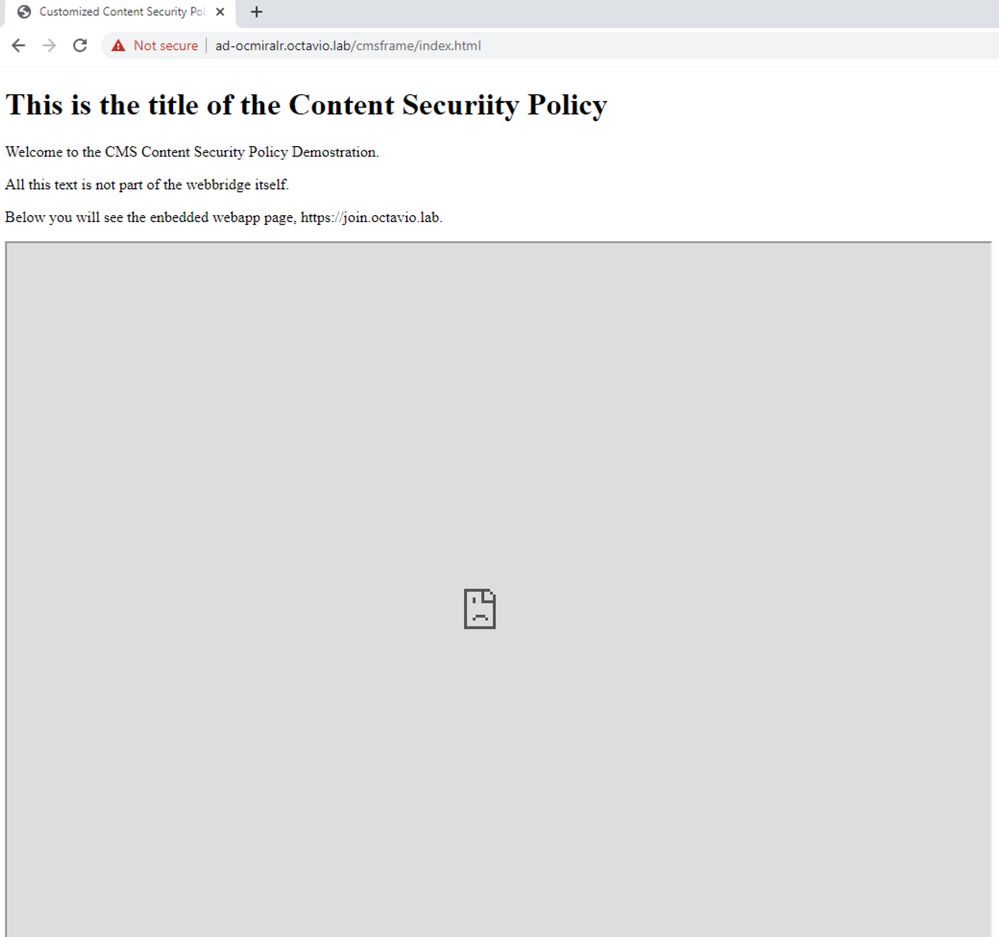
In order to solve this kind of issue, follow the next steps:
Step 1. Open the CLI of the CMS.
Step 2. Run the next command: webbridge.
Step 3. From the webbridge configuration ensure the Frame-Ancestors are correct it must be the iframe src configured on the web page created.
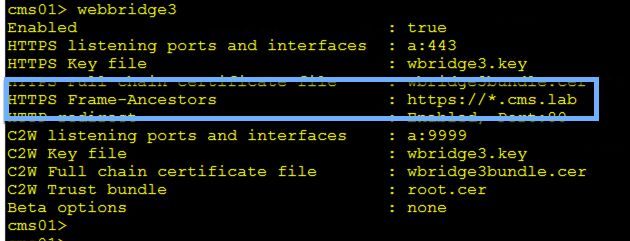
In this case the configured Frame-Ancestors on webbridge is different from the one configured on web page, as shown in the image:

Step 4. Correct the Frame-Ancestor value either on the webbridge configuration or in the web page code as required.
- The web app is loaded but cannot access camera or microphone.
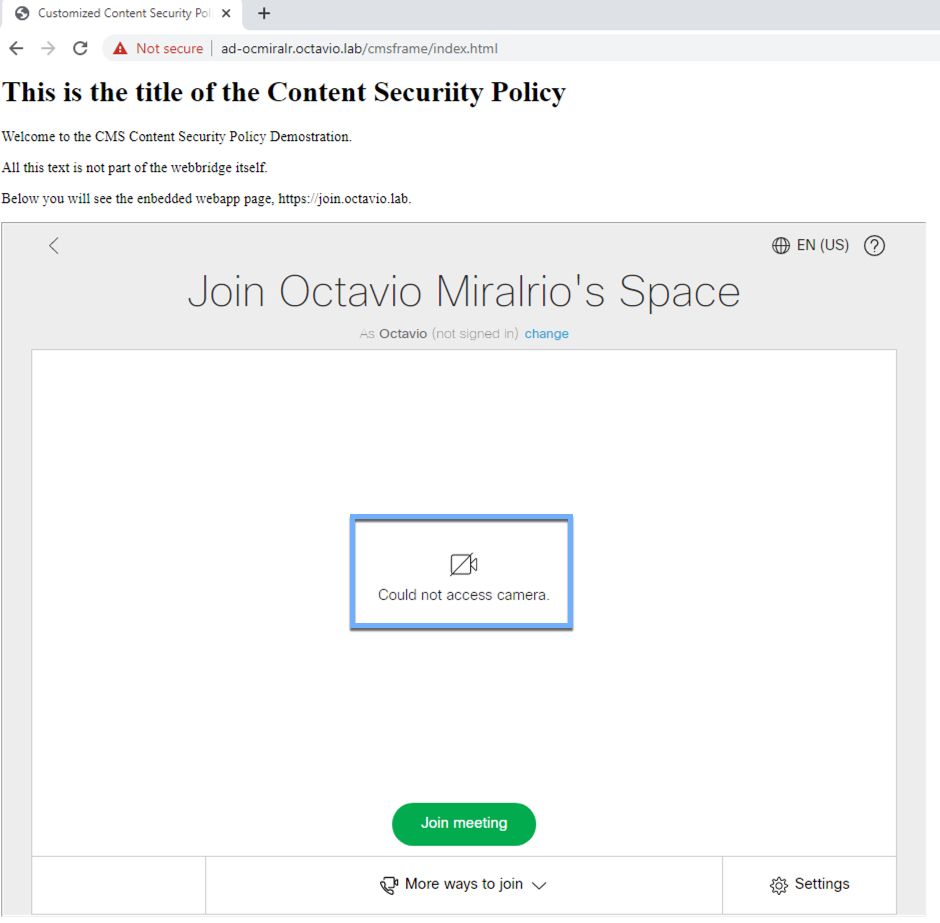
This issue is caused because the iframe is not configured correctly, To support audio and video, the iframe must include the attributes allowusermedia allow="microphone; camera; display-capture".
In order to solve this problem follow the next steps:
Step 1. Open the web server and locate the main page HTML file.
Step 2. Use a text editor to edit the HTML file.
Step 3. Add the media attributes to the iframe, as shown in the next code:
<iframe src="https://join.octavio.lab" width="1024" height="768" title="CMS 3.2 Customizable CSP" allowusermedia allow="microphone; camera; display-capture"></iframe>