Introduction
This document describes endpoint account recovery when local accounts are disabled after cloud registration and endpoint is offline in Control Hub.
Prerequisites
Requirements
It is recommended that you have some familiarity with these topics:
- Control Hub platform
- Endpoint Registration and Administration via the Graphical User Interface (GUI) of the endpoint.
Components Used
This equipment has been used to make the tests and produce the results described in this document:
- Room Kit endpoint
- Desk Pro endpoint
The information in this document was created from the devices in a specific lab environment. All of the devices used in this document started with a cleared (default) configuration. If your network is live, ensure that you understand the potential impact of any command.
Description of the scenario in detail
When registering a device to the cloud, you are prompted to decide if want to keep your local user accounts on the device itself active. By default, the local user accounts are deleted.
This document describes how to recover your endpoint's admin account when you have disabled the local accounts on the device after cloud registration and your endpoint is offline in Control Hub.
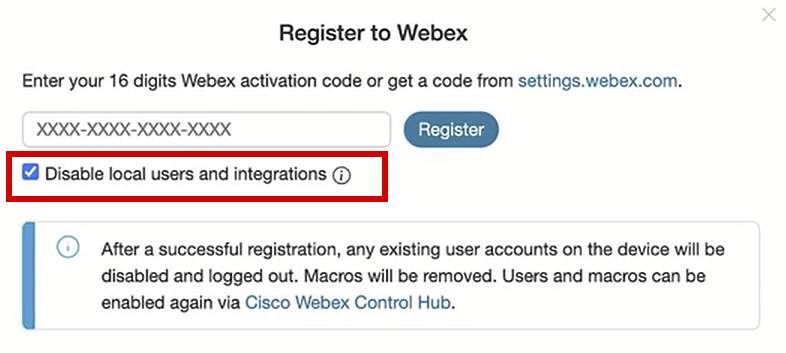 Register to Webex pop-up from endpoint GUI
This means that you are not able to access the device's Graphical User Interface or GUI via your browser by using the device's IP address. You have access to the device's GUI only via the Control Hub platform by navigating to Devices under the Management section in your Control Hub. Then choose one of the online devices to log in to its GUI and click Local Device Control under the Support section:
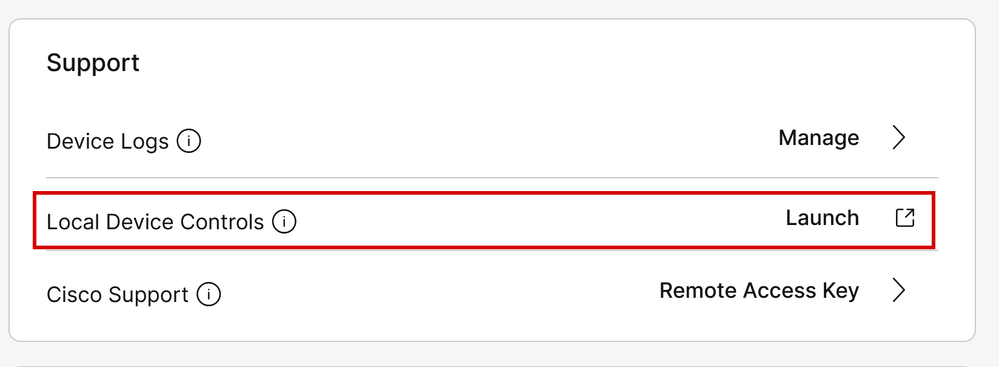 Local Device Control in Contorl Hub
A new window opens. Select Proceed to open the device GUI:
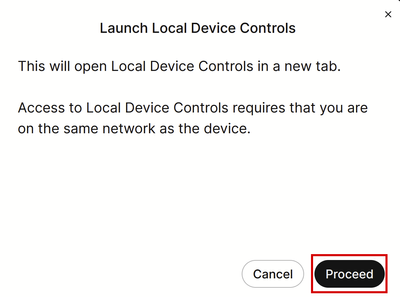 Local Device Controls pop-up in Control Hub
Then the endpoint GUI opens in your browser. From there, you can create a new user and use this user to login to your device GUI by using the device's own IP address in your browser. The whole procedure in detail is described in this video: Activating User Accounts on Cloud Registered Devices .

Note: You need to be in the same network as the endpoint, otherwise, you are not able to access the GUI. If you are not, you then see this page in your browser after clicking Proceed :
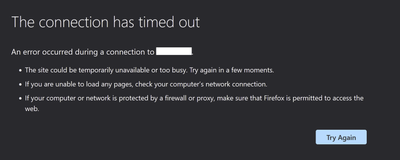 Browser Time-Out Connection Message
An issue arises when your endpoint is displayed as offline in Control Hub (shown here):
 Endpoint Offline Status in Control Hub
In this scenario, you are not able to access the endpoint's GUI from Control Hub. The Local Device Control described previously in this article is not going to work as it is practically accessing the device GUI via HTTP and requires the device to be online. If you have chosen to disable local user accounts during device registration, either deliberately or accidentally, then you are also not able to access the device's GUI by using its IP address on your browser. At this stage, you have lost access to your device's GUI. Unless you can bring the device back online with some basic troubleshooting by physically accessing the device, you are locked out of it.
There are two suggested action plans to choose in order to get out of this situation:
- Factory Reset the device.
- Contact TAC after obtaining a Remote Access Key.
Factory Reset the device
Factory resetting the device in this specific scenario can be done by physically accessing the device. There are two possible options:
- From the touch panel connected to the endpoint (Navigator or Touch 10 peripheral device), navigate to settings and select the Factory Reset option. For Board devices that have no touch panel connected to them, the touch screen of the endpoint has the Settings Button at the top right corner of the screen.
- Endpoints have a pinhole on the back or bottom of the device. The pinhole, depending on the device, might be covered with a plastic cap. You can use a safety pin or paper clip and insert it into the pinhole and press for 10-15 seconds. Then, a factory reset is going to initiate.

Note: When the factory reset is used, all device configurations and files (like log files or whiteboards) saved on the device are going to be deleted. There is no option to keep a backup for the device configuration and files and re-use it once the device is registered to the cloud again.
Some additional details on the Factory reset are provided in the article: Factory-Reset-|-Secure-Data-Wipe .

Warning: You must set up and register the device to the cloud again from the beginning if you decide to perform a factory reset. Before registering the device to the cloud, delete its previous Workspace from the list of workspaces in your Control Hub Organization and recreate it if you plan to use the same Workspace as before. You cannot re-add the same endpoint to the already existing Workspace. The Workspace is seeing the endpoint as offline, but it still considers it is registered to it. Adding a second endpoint to a Workspace is not supported at the time of writing this article.
Once the device boots up after factory reset, and you verify that you have connectivity to the network, you can use the device IP to login to the device GUI using the default credentials: username is admin and password is blank. Then create additional users on this endpoint and proceed with registering the device to the newly created workspace in your Control Hub Organization. Make sure to uncheck this option once the registration window appears:
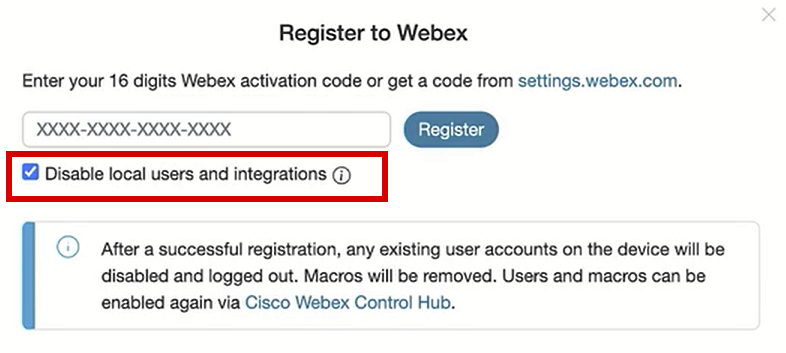 Register to Webex pop-up from endpoint GUI

Note: For you to access the endpoint's GUI, you need to enter the endpoint's IP address in a web browser and use an admin's credentials to log in. The default username is admin and the default password is blank, but only for an endpoint that you have just received or you have factory reset. You need to be on the same network\VLAN as the endpoint you are trying to access, or else you are not able to use the device's GUI.
Once the device is registered to the cloud, you can access the GUI both through Control Hub and by using the IP address of the endpoint on your browser and logging in with one of your created user accounts or the default user account.
Contact TAC to manually configure an admin account on your endpoint
If you do not want to lose the configuration that already exists on your endpoint, instead of performing a factory reset, open a ticket with TAC and describe your issue. The TAC engineer is going to then ask you to login to your Control Hub Organization, navigate to the Devices tab under the Management section, and then select the endpoint you have lost access to:
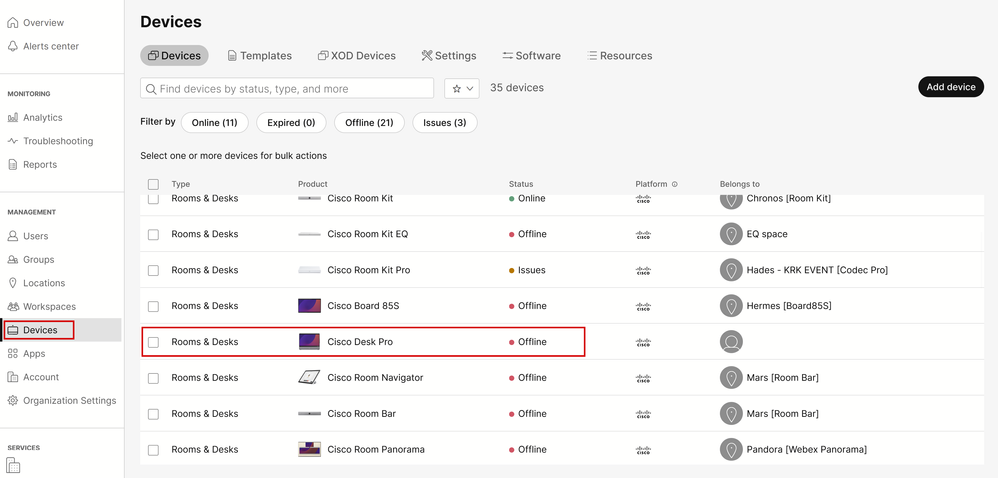 Devices section in Control Hub
Then navigate to the Support section and click on Remote Access Key. A window appears that contains a long key that looks like the one seen in the picture (this key has been reset on the test device and is not valid anymore) below:
 Remote Access Key pop-up in Control Hub
Copy this key and share it with the TAC engineer that is assigned to your case. The engineer is going to use this key to generate a unique password that can be used along with the remote support user account (which already exists on the device by default) to help you create a new admin account.

Caution: Do not request the TAC engineer to give you the password generated by the remote access key. Sharing the password is not allowed.
At this stage, contact the TAC engineer to create the account together in a meeting. Verify that the endpoint has network connectivity and you can SSH to it. In the SSH application you are using, the TAC engineer then takes control of your screen remotely and inputs the username remotesupport and the password generated by the remote access key you provided. Then the engineer creates the new admin account on the device using a special command shell on the endpoint.

Warning: Do not intervene with the SSH App while the engineer is creating the user account and do not revoke screen control from the TAC engineer. This shell is strictly used by TAC. You risk eligibility for an RMA if you run any commands yourself that possibly damage the device during this procedure.
After the creation of the new admin account, use it to login to the device's GUI in your browser using the endpoint's IP address. You are be able to create more user accounts from the GUI if needed.
Remote support user password not accepted
There is a chance that when the TAC engineers try to type the password on the SSH App to login to the endpoint console, you see an Invalid Password error. The password was probably typed correctly by the engineer but it was not accepted. This is usually happening because, on your local machine, you have not changed the language to English. You have been using a different language and thus the password typed by the engineer who has control of your PC is not in English. Because of this, you are not able to login to the console. Make sure the local language on your PC is set in English before troubleshooting initiates.
In addition, Characters like the backslash (\) or forward slash (/) can possibly be mapped differently on your keyboard. For example, this means that the engineer types a backslash (\) but in reality, a forward slash (/) is typed. If the local language is set to English and the password seems to still not work, then generate a fresh remote access key from Control Hub and share it with the engineer. The engineer generates a new password and checks if any special characters exist. A new login can then be tried with the new password.
 Access Denied SSH Prompt

Warning: There are cases where the character y is mapped to the character z and vice versa on some keyboards. In order to have no doubts about the password typed, the engineer can try typing this string in your browser search bar or a note application:
abcdefghijklmnopqrstuvwxyz1234567890!@#$%^&*()-_=+:;"'<,>.?/
This is not to be copy-pasted but rather typed. If characters appear in a different order than the one they were typed, then there is a character mismatch on the keyboard.
In addition, machines with non-QWERTY keyboards can have similar results. Make sure to inform the engineer about your setup in such scenarios.
Related Information
Factory Reset / Secure Data Wipe
Activating User Accounts on Cloud Registered Devices


 Feedback