Introduction
This document describes how to create and collect the Problem Report Tool (PRT) file from Cisco 78XX/88XX Series endpoints.
Prerequisites
Requirements
Cisco recommends that you have knowledge of these topics:
- How to enable web access on the endpoint configuration
- Internet Protocol (IP) connectivity to the phone for access to the phone web interface
Components Used
The information in this document is based on these software and hardware versions:
- Cisco IP Phone firmware version 10.3(1) and later
- In this article, the Cisco 8845 Phone is used; however, the PRT feature is available on these phones.
At the bottom of this page, you are able to also gather a PRT from the 8821 firmware 11.0(4) and later.
78XX Series Phones with PRT Support
- Cisco IP Phone 7811
- Cisco IP Phone 7821
- Cisco IP Phone 7841
- Cisco IP Phone 7861
88XX Series Phones with PRT Support
- Cisco IP Phone 8811
- Cisco IP Phone 8821
- Cisco IP Phone 8841
- Cisco IP Phone 8845
- Cisco IP Phone 8851
- Cisco IP Phone 8851NR
- Cisco IP Phone 8861
- Cisco IP Phone 8865
The information in this document was created from the devices in a specific lab environment. All of the devices used in this document started with a cleared (default) configuration. If your network is live, ensure that you understand the potential impact of any command.
Background Information
The Cisco Collaboration endpoint user interface displays basic information. In order to troubleshoot complex issues collect the PRT file. Please see the Related Information section to review the process depicted in this VIDEO - Unified Communications Manager - 7800 and 8800 Problem Report Tool Collection.
With firmware 10.3(1) and later some 78XX & 88XX Series Collaboration Endpoints support the PRT feature.
Note: The Cisco DX650 also supports the PRT feature as seen in DX650 FAQ: How do you create a problem report?. However, the focus of this document is 78XX/88XX Series Collaboration Endpoints.
Note: The collaborations endpoint default level of console logging can be sufficient for basic analysis. If additional debugs are needed, refer to the How to Log into a Cisco IP Phone to Set Debug Level for more information.
Warning: A packet capture (pcap) from the endpoint is required for conclusive analysis. The pcap procedure is covered in Collecting a packet capture from a Cisco IP Phone.
PRT Creation and Collection
Summary Steps
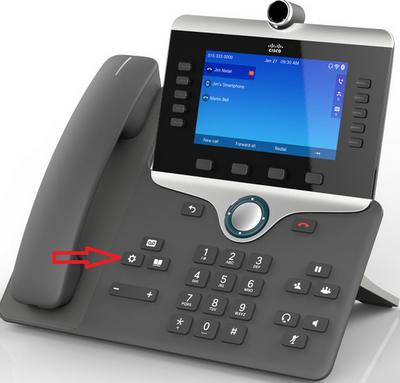
Step 1. Press the Settings button on the phone.
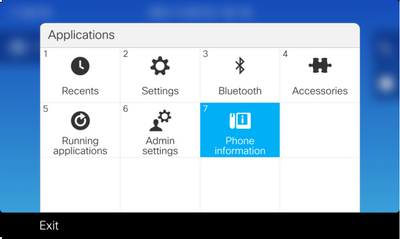
Step 2. Navigate to Phone Information.
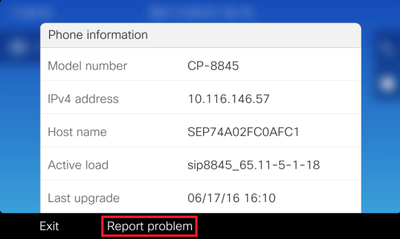
Step 3. Press soft key Report problem.
Step 4. Select Other in the Problem Description.
Step 5. Press the Submit soft key on the phone.
Step 6. Browse to the phone web interface and select Console Logs. Once at the console logs website, scroll to the bottom of the page and notice the Problem Report Tool Logs. Download the prt-xxxxxxxxxx.tar.gz file.
Note: The xxxxxxxxxx in the example name prt-xxxxxxxxxx.tar.gz displays the date and time the PRT file is created. It looks similar to this: prt-20160721-163034-1C6A7AE05D37.tar.gz.
Detailed Creation Steps
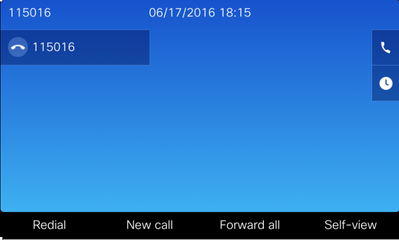
Begin at the endpoint home screen.
From the endpoint keypad, press the Settings button
On the Applications menu, press Phone information as shown in the image.
The Report problem button appears in a black ribbon at the bottom of the screen.
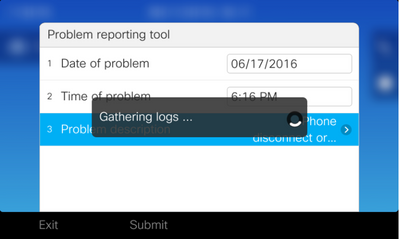
The Problem reporting tool screen is presented on the phone. Enter the date and time that indicates when the issue occurred.
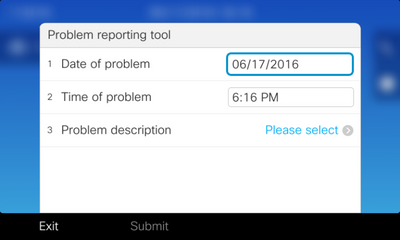
Once the date and time of the problem are entered, press the Problem description
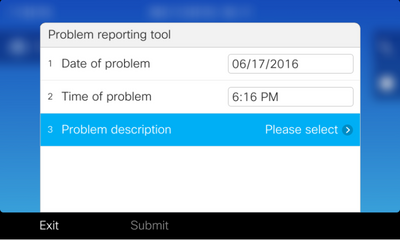
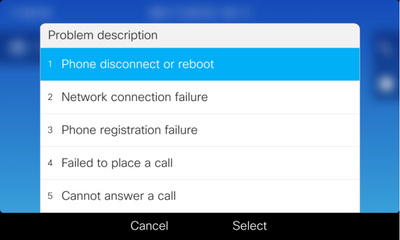
Make a selection from the Problem description list. This example shows that Phone disconnect or reboot is selected as the description of the problem.
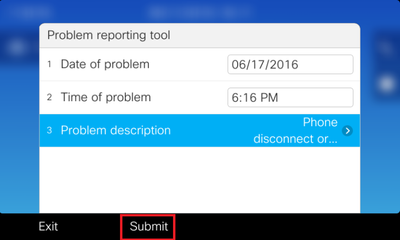
The Problem reporting tool page opens with the Submit button activated.
Gathering logs display on the screen when you click the submit button as shown in the image.
An error is displayed on the phone screen. Ignore this error as access to the PRT File from the phone web interface is possible.
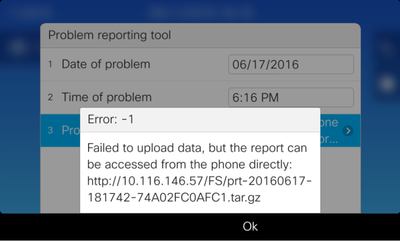
Tip: In order to avoid this error message, refer to Problem Report Tool Upload Enhancement.
Detailed Collection Steps
To navigate to the phone web interface enter the phone IP Address in a web browser.
Note: In order to enable web access, refer to Enabling Web Access on the Phone .
Note: In the newer software versions, the error displayed on the phone screen indicates the path where the last PRT is stored, is not shown within the IP Phone. The PRT file can be collected directly from the IP Phone once the file name in the event log is reviewed. This method can be used for not registered IP Phones, like the ones over MRA.
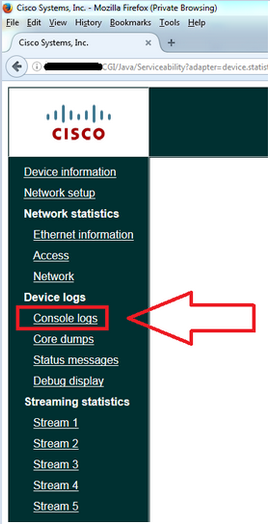
Click on Console logs as shown in the image.
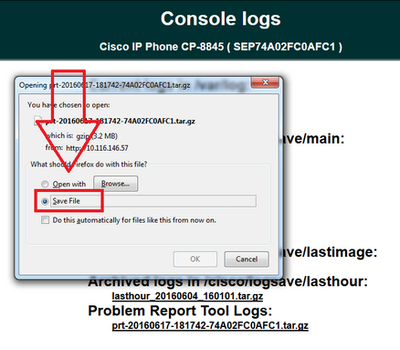
At the bottom of the Console logs, page finds the section Problem Report Tool Logs as shown in the image.
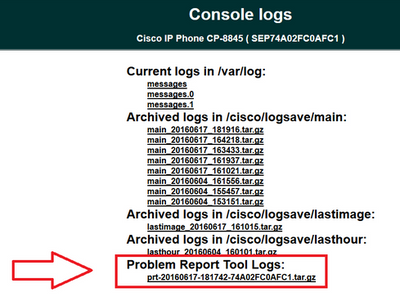
Click on the PRT you want. A new pop up appears for you to download the prt-xxxxxxxxxx.tar.gz file.
Note: The file can automatically download based on your browser settings.
PRT Collection Procedure for 8821 IP Phone
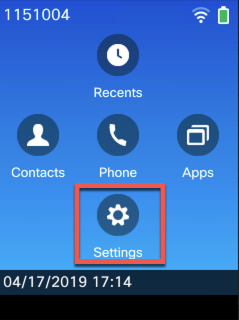
Step 1. Press the down button to select Settings on the phone.
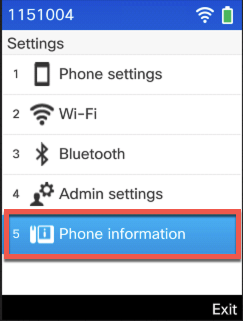
Step 2. Navigate to Phone Information.
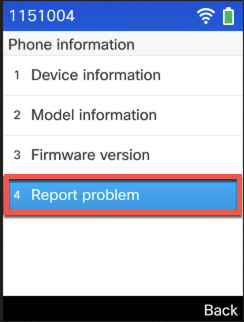
Step 3. Navigate to Report problem.
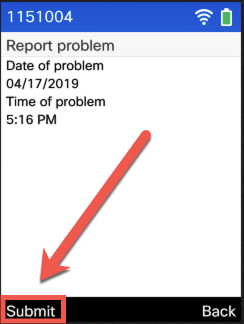
Step 4. Press the Submit soft key on the phone.
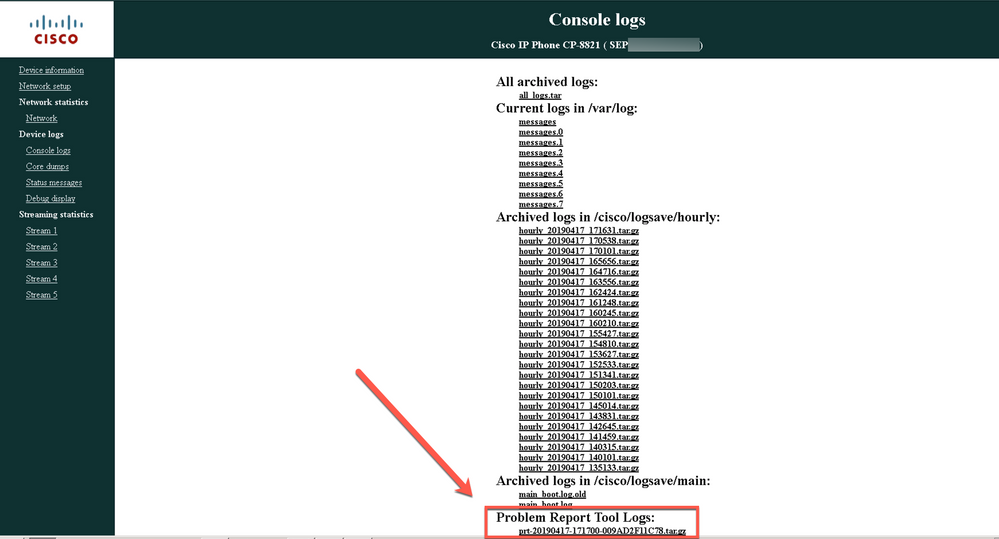
Step 5. Browse to the phone web interface and select Console Logs. St the console logs website, scroll to the bottom of the page and notice the Problem Report Tool Logs. Download the prt-xxxxxxxxxx.tar.gz file.
Detailed Creation Steps for 8821 IP Phone
Begin from the home screen on the 8821. Then press the down button on the keypad in order to select Settings.
Select Phone information as shown in this image:
Then select Report problem as shown in this image:
Click Submit.
Detailed Collection Steps for 8821 IP Phone
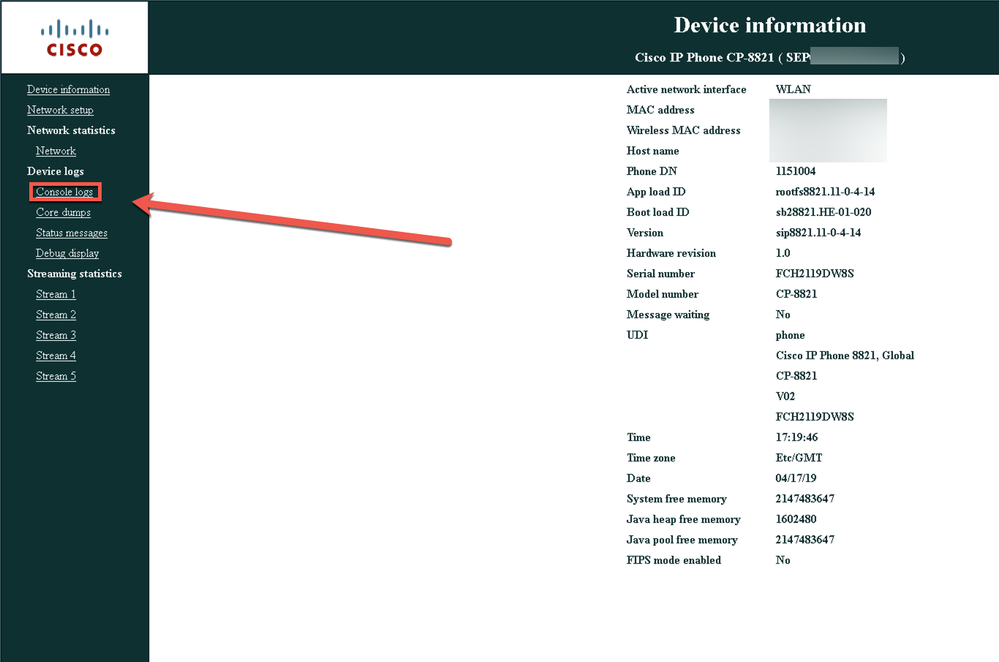
Log into the 8821 web interface and select Console logs.
Then, select Problem Report Tool Logs as seen here in order to download the PRT file.
Related Information


 Feedback