Introduction
This document describes the configuration example for Terminal Access Controller Access-Control System (TACACS+)
authentication and authorization on the Cisco Prime Infrastructure (PI) application.
Prerequisites
Requirements
Cisco recommends that you have knowledge of these topics:
- Define PI as a client in the Access Control Server (ACS)
- Define the IP address and an identical shared-secret key on the ACS and PI
Components Used
The information in this document is based on these software and hardware versions:
- ACS Version 4.2
- Prime Infrastructure release 3.0
The information in this document was created from the devices in a specific lab environment. All of the devices used in this document started with a cleared (default) configuration. If your network is live, make sure that you understand the potential impact of any command.
Configure
Configurations
Add ACS as TACACS Server in PI
Complete these steps in order to add ACS as a TACACS server:
Step 1. Navigate to Administration > Users > Users, Roles & AAA in PI
Step 2. From the left sidebar menu, select TACACS+ Servers , under Add TACACS+ servers click Go and the page appears as shown in the image:

Step 3. Add the IP address of the ACS server.
Step 4. Enter the TACACS+ shared secret configured in ACS server.
Step 5. Re-enter the shared secret in the Confirm Shared Secret text box.
Step 6. Leave the rest of the fields on their default setting.
Step 7. Click Submit.
AAA Mode Settings in PI
In order to choose an Authentication, Authorization, and Accounting (AAA) mode, complete these steps:
Step 1. Navigate to Administration > AAA.
Step 2. Choose AAA Mode from the left sidebar menu, you can see the page as shown in the image:

Step 3. Select TACACS+.
Step 4. Check the Enable Fallback to Local box, if you want the administrator to use the local database when the ACS server is not reachable. This is a recommended setting.
Retrieve user role attributes from PI
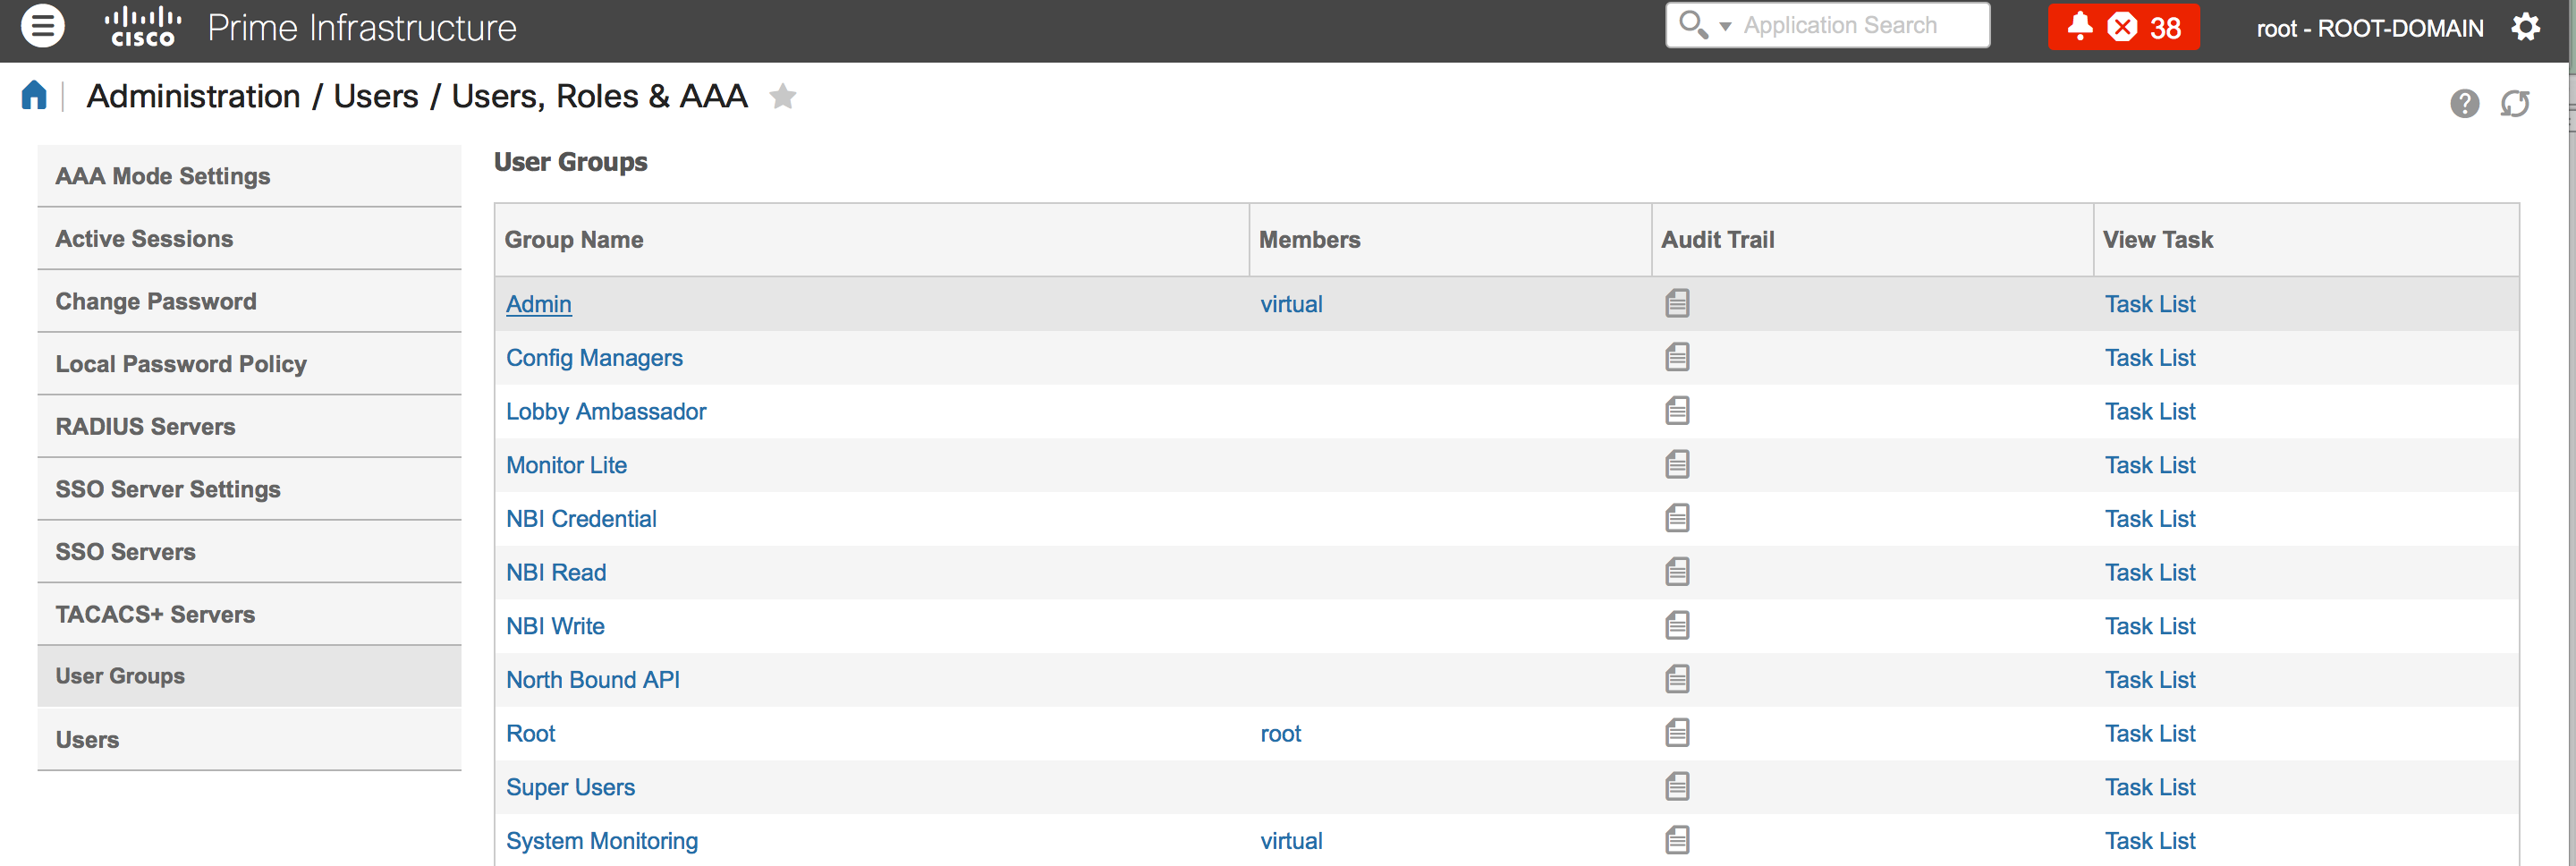
Step 1. Navigate to Administration > AAA > User Groups. This example shows administrator authentication. Look for the Admin Group Name in the list and click the Task List option on the right, as shown in the image:

Once you click Task List option, the window appears, as shown in the image:

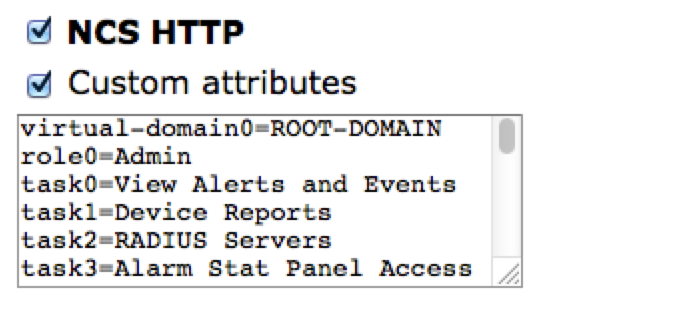
Step 2. Copy these attributes and save it on a notepad file.
Step 3. You may need to add custom virtual domain attributes in the ACS server. Custom virtual domain attributes are available in the bottom of same Task list page.

Step 4. Click on click here option to get Virtual domain attribute page, and you can see the page, as shown in the image:

Configure ACS 4.2
Step 1. Log in to the ACS Admin GUI, and navigate to Interface Configuration > TACACS+ page.
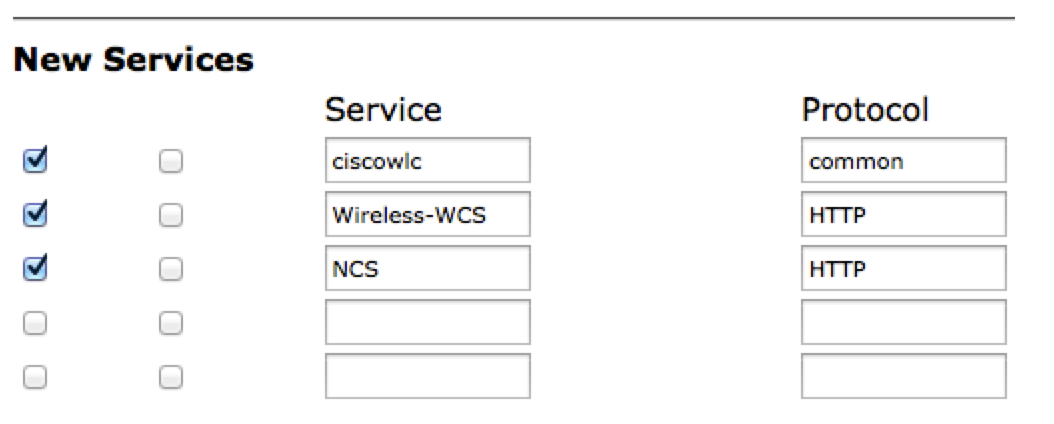
Step 2. Create new service for prime. This example shows a service name configured with name NCS, as shown in the image:

Step 3. Add all the attributes from notepad created in Step 2 to user or Group configuration. Ensure to add virtual-domain attributes.

Step 4. Click Ok.
Verify
Log in to the prime with the new user name you created and confirm that you have the Admin role.
Troubleshoot
This section provides information you can use in order to troubleshoot your configuration.
Review usermgmt.log from prime root CLI available in /opt/CSCOlumos/logs directory. Check if there are any error messages.
2016-05-12 15:24:18,517 [http-bio-443-exec-10] DEBUG usermgmt - [        [TacacsLoginModule] user entered username: 138527]
2016-05-12 15:24:18,517 [http-bio-443-exec-10] DEBUG usermgmt - [        [TacacsLoginModule] Primary server=172.18.70.243:49]
2016-05-12 15:24:18,517 [http-bio-443-exec-10] DEBUG usermgmt - Thread Id : [835], Entering Method : [login], Class : [com.cisco.xmp.jaas.tacacs.TacacsLoginClient].
2016-05-12 15:24:18,517 [http-bio-443-exec-10] DEBUG usermgmt - Thread Id : [835], Entering Method : [login], Class : [com.cisco.xmp.jaas.tacacs.SecondaryTacacsLoginClient].
2016-05-12 15:24:18,518 [http-bio-443-exec-10] INFO  usermgmt - [Tacacs:connectTacacs()] : [prepare to ping TACACS+ server (> 0):/172.18.70.243 (-1)].
2016-05-12 15:24:18,619 [http-bio-443-exec-10] INFO  usermgmt - [Tacacs:connectTacacs()] : [Tacacs: Num of ACS is  3].
2016-05-12 15:24:18,619 [http-bio-443-exec-10] INFO  usermgmt - [Tacacs:connectTacacs()] : [Tacacs:activeACSIndex is  0].
2016-05-12 15:24:18,619 [http-bio-443-exec-10] INFO  usermgmt - [Tacacs:connectTacacs()] : [Tacacs: Unable to connect to Server 2: /172.18.70.243 Reason: Connection refused].
2016-05-12 15:24:18,619 [http-bio-443-exec-10] DEBUG usermgmt - [        [Thu May 12 15:24:18 EST 2016] [TacacsLoginModule] exception in client.login( primaryServer, primaryPort,seconda..: com.cisco.xmp.jaas.XmpAuthenticationServerException: Server Not Reachable: Connection refused]
This example shows a sample of error message, which could be due to various reasons like connection refused by a firewall, or any intermediate device etc.
