Introduction
This document describes the procedure to be followed for the graceful shutdown and restart of compute node.
This procedure applies for an Openstack environment using NEWTON version where ESC does not manage Cisco Prime Access Registrar (CPAR) and CPAR is installed directly on the VM deployed on Openstack. CPAR is installed as a compute/VM.
Background Information
Ultra-M is a pre-packaged and validated virtualized mobile packet core solution that is designed in order to simplify the deployment of VNFs. OpenStack is the Virtualized Infrastructure Manager (VIM) for Ultra-M and consists of these node types:
- Compute
- Object Storage Disk - Compute (OSD - Compute)
- Controller
- OpenStack Platform - Director (OSPD)
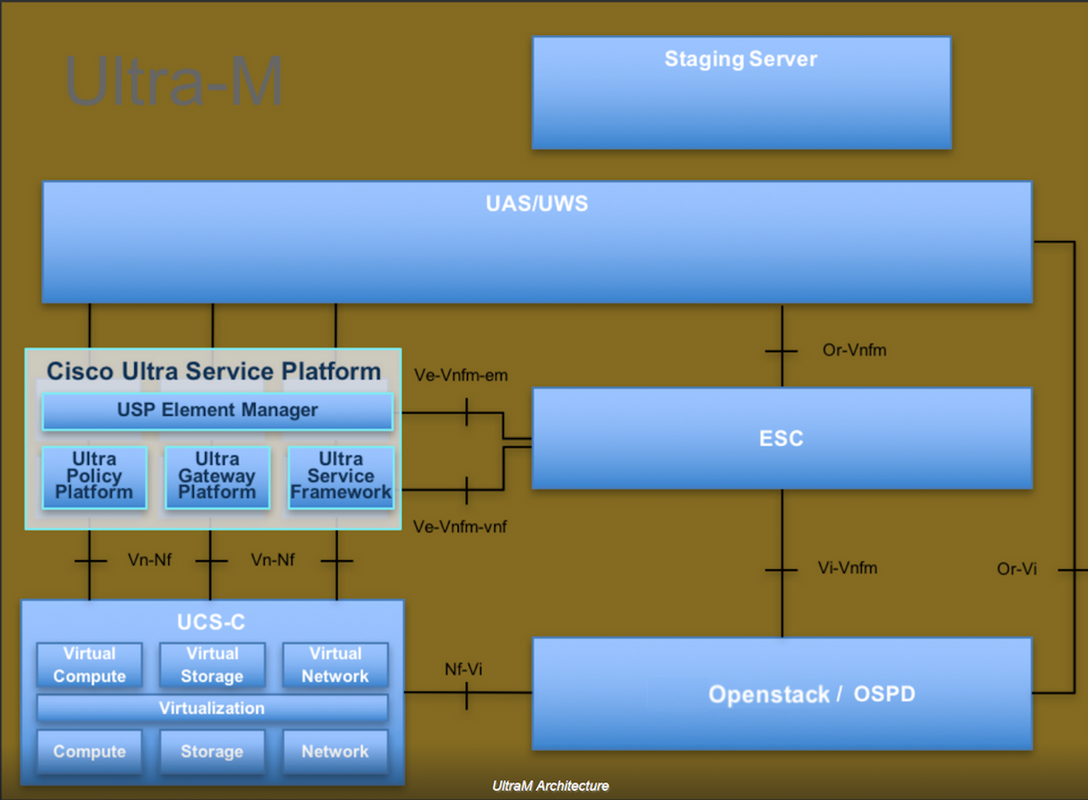
The high-level architecture of Ultra-M and the components involved are shown in this image:

This document is intended for Cisco personnel who are familiar with Cisco Ultra-M platform and it details the steps required to be carried out at OpenStack and Redhat OS.
Note: Ultra M 5.1.x release is considered in order to define the procedures in this document.
CPAR Instance Shutdown
It is important not to shutdown all 4 AAA instance within one site (city) at the same time. Each AAA instance will need to be shutdown one by one.
Step 1. Shutdown CPAR application with this command:
/opt/CSCOar/bin/arserver stop
A message which states “Cisco Prime Access Registrar Server Agent shutdown complete.” Should show up
Note: If a user left a CLI session open, the arserver stop command won’t work and this message is displayed:
"ERROR: You can not shut down Cisco Prime Access Registrar while the
CLI is being used. Current list of running
CLI with process id is: 2903 /opt/CSCOar/bin/aregcmd –s"
In this example the process id 2903 needs to be terminated before CPAR can be stopped. If this is the case please termintate this process through this command:
kill -9 *process_id*
Then repeat the step 1.
Step 2. Verify that CPAR application is indeed shutdown with this command:
/opt/CSCOar/bin/arstatus
These messages should appear:
Cisco Prime Access Registrar Server Agent not running
Cisco Prime Access Registrar GUI not running
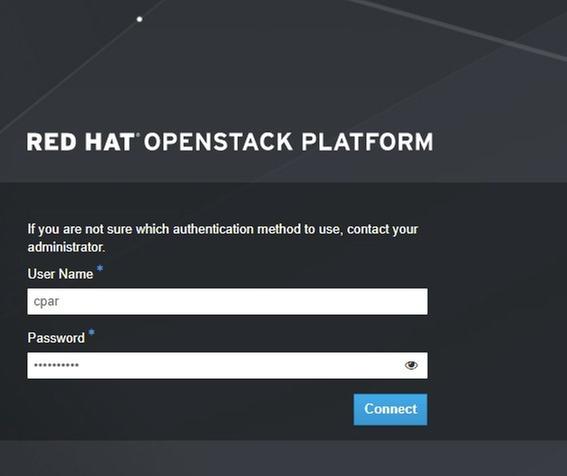
Step 3. Enter the Horizon GUI website that corresponds to the Site (City) currently being worked on, refer to this for the IP details. Please enter with cpar credentials for customized view:

Step 4. Navigate to Project > Instances, as shown in the image.

If the user used was cpar, then only the 4 AAA instances appear in this menu.
Step 5. Shut down only one instance at a time, please repeat the whole process in this document.
To shutdown the VM navigate to Actions > Shut Off Instance:

and confirm your selection.
Step 6. Validate that the instance was indeed shut down by checkin the Status = Shutoff and Power State = Shut Down

This step ends the CPAR shutdown process.
CPAR Application Compute Restart and Health check
CPAR Instance Start
Please follow this procedure, once the RMA activity is completed and CPAR services can be re-established in the Site that was shut down.
Step 1. Login back to Horizon, navigate to Project > Instance > Start Instance.
Step 2. Verify that the status of the instance is active and the power state is Running, as shown in the image.

CPAR Instance Post Startup Health Check
Step 1. Login via Secure Shell (SSH) to the CPAR instance.
Execute the command /opt/CSCOar/bin/arstatus at OS level
[root@wscaaa04 ~]# /opt/CSCOar/bin/arstatus
Cisco Prime AR RADIUS server running                  (pid: 4834)
Cisco Prime AR Server Agent running                    (pid: 24821)
 Cisco Prime AR MCD lock manager running          (pid: 24824)
 Cisco Prime AR MCD server running                     (pid: 24833)
Cisco Prime AR GUI running                                    (pid: 24836)
SNMP Master Agent running                                   (pid: 24835)
[root@wscaaa04 ~]#
Step 2. Execute the command /opt/CSCOar/bin/aregcmd at OS level and enter the admin credentials. Verify that CPAR Health is 10 out of 10 and the exit CPAR CLI.
[root@rvraaa02 logs]# /opt/CSCOar/bin/aregcmd
Cisco Prime Access Registrar 7.3.0.1 Configuration Utility Copyright (C) 1995-2017 by Cisco Systems, Inc.  All rights reserved. Cluster:
User: admin Passphrase:

Logging in to localhost

[ //localhost ]
LicenseInfo = PAR-NG-TPS 7.2(100TPS:) PAR-ADD-TPS 7.2(2000TPS:) PAR-RDDR-TRX 7.2()
PAR-HSS 7.2()
Radius/ Administrators/

Server 'Radius' is running, its health is 10 out of 10


--> exit
Step 3. Execute the command netstat | grep diameter and verify that all DRA connections are established.
The output mentioned here is for an environment where Diameter links are expected. If fewer links are displayed, this represents a disconnection from the DRA that needs to be analyzed.
[root@aa02 logs]# netstat | grep diameter
tcp         0            0 aaa02.aaa.epc.:77 mp1.dra01.d:diameter ESTABLISHED
tcp         0            0 aaa02.aaa.epc.:36 tsa6.dra01:diameter ESTABLISHED
tcp         0            0 aaa02.aaa.epc.:47 mp2.dra01.d:diameter ESTABLISHED
tcp         0            0 aaa02.aaa.epc.:07 tsa5.dra01:diameter ESTABLISHED
tcp         0            0 aaa02.aaa.epc.:08 np2.dra01.d:diameter ESTABLISHED
Step 4. Check that the TPS log shows requests being processed by CPAR. The values highlighed represent the TPS and the ones that needs attention. The value of TPS should not exceed 1500.
[root@aaa04 ~]# tail -f /opt/CSCOar/logs/tps-11-21-2017.csv 11-21-2017,23:57:35,263,0
11-21-2017,23:57:50,237,0
11-21-2017,23:58:05,237,0
11-21-2017,23:58:20,257,0
11-21-2017,23:58:35,254,0
11-21-2017,23:58:50,248,0
11-21-2017,23:59:05,272,0
11-21-2017,23:59:20,243,0
11-21-2017,23:59:35,244,0
11-21-2017,23:59:50,233,0
Step 5 Look for any “error” or “alarm” messages in name_radius_1_log.
[root@aaa02 logs]# grep -E "error|alarm" name_radius_1_log
