Introduction
This document describes how to use Prime Collaboration Deployment (PCD) as a Secure File Transfer Protocol (SFTP) server in order to provide a remote server option for tasks such as upgrades, backups and restores.
Prerequisites
Requirements
Cisco recommends that you have knowledge of:
- Cisco Unified Communications Manager (CUCM) version 11.5(1) or later
- PCD version 11.6(2) or later
- File transfer clients (such as Filezilla) is also recommended
Components Used
The information in this document is based on these software and hardware versions:
- CUCM version 11.5SU6
- PCD version 11.6(2)
- Filezilla
The information in this document was created from the devices in a specific lab environment. All of the devices used in this document started with a cleared (default) configuration. If your network is live, ensure that you understand the potential impact of any command.
Background Information
The Disaster Recovery System (DRS), which can be invoked from Cisco Unified Communications Manager Administration, or from any Instant Messaging and Presence node, provides full data backup and restore capabilities for all servers in a CUCM cluster. The Disaster Recovery System allows you to perform regularly scheduled automatic or user-invoked data backups.
The Disaster Recovery System performs a cluster-level backup, which means that it collects backups for all servers in a CUCM cluster to a central location and archives the backup data to the physical storage device.
In order to back up data to a remote device on the network, you must have an SFTP server that is configured. Cisco allows you to use any SFTP server product, but PCD is the only SFTP supported by Cisco Technical Assistance Center (TAC).
Configure
Use PCD as a Backup Repository
Step 1. Open Filezilla and log in to your PCD server with this information:
- Host: <IP or hostname of your PCD server>
- Username: adminsftp
- Password: <Your PCD Application password>
- Port: 22
Step 2. Select the /backup directory and open it.
Step 3. Right-click on the file list that reads Empty Directory Listing, and select Create Directory, as shown in the image.
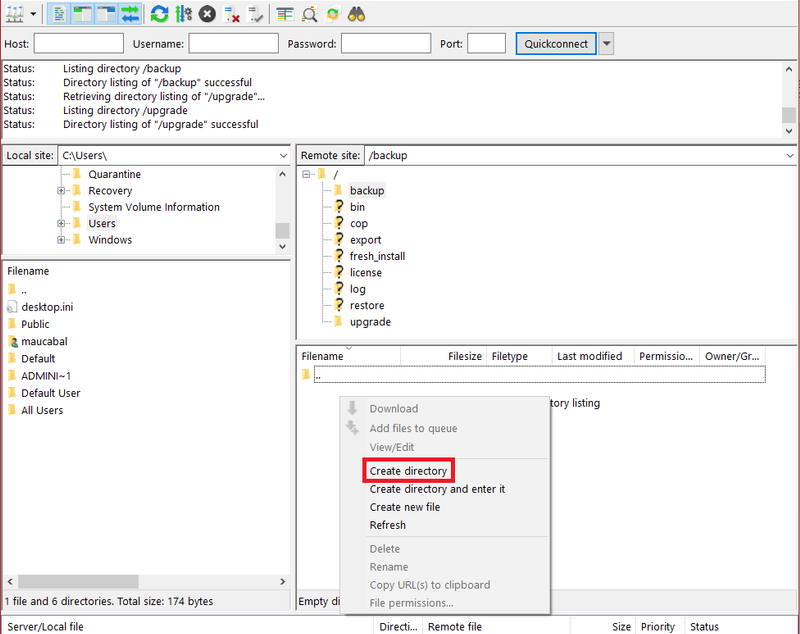
Step 4. Name your new directory CUCM_BU and select OK.
Note: Due to Linux permission restrictions, creation of new directories is not possible under root ("/") directory, you can create a directory in any sub-directory instead.
Step 5. On CUCM, navigate to Disaster Recovery System > Backup > Backup Device > Add New.
Step 6. Enter the values shown in the image and then select Save.
- Backup Device Name: PCD_SFTP
- Host name/IP Address: <IP or hostname of your PCD server>
- Path name: /backup/CUCM_BU
- Username: adminsftp
- Password: <Your PCD Application password>
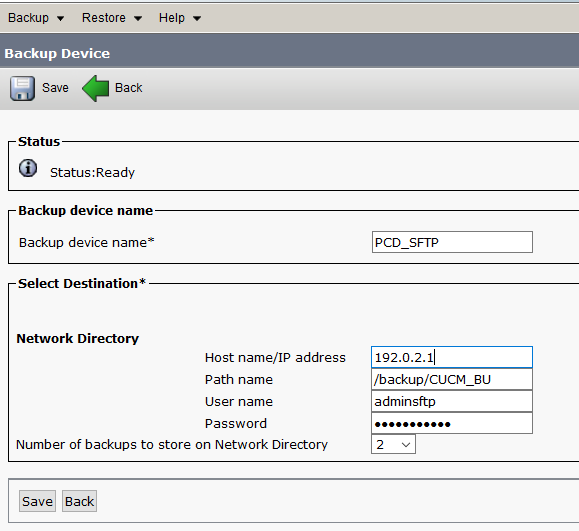
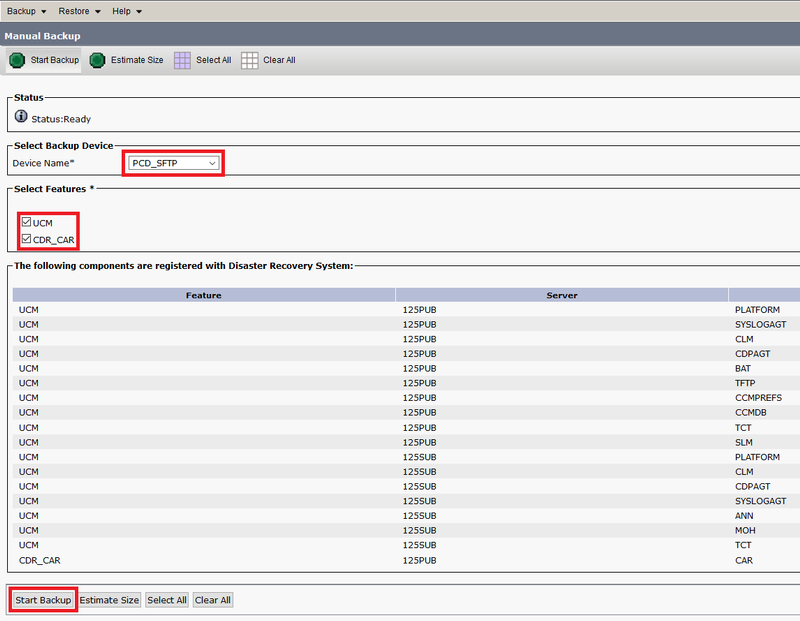
Step 7. Navigate to Backup > Manual Backup, select PCD_SFTP as the Backup Device, both UCM and CDR_CAR as Selected Features and select Start Backup.
Step 8. Once the backup is finished, you can navigate to the file transfer client and verify the backup files, as shown in the image.

Use PCD as a Recovery Repository
Step 1. On CUCM, navigate to Disaster Recovery System > Restore > Restore Wizard, select PCD_SFTP as the Device and select Next.
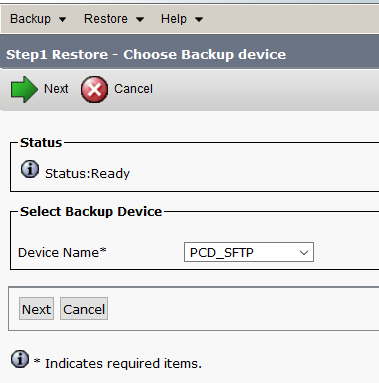
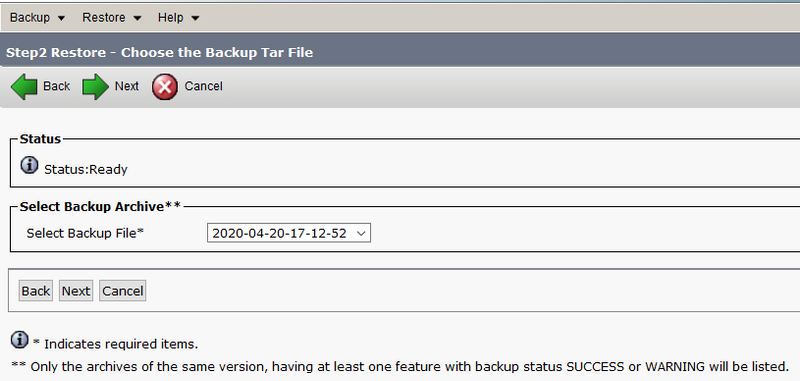
Step 2. Select the backup file you want to restore from and select Next, as shown in the image.
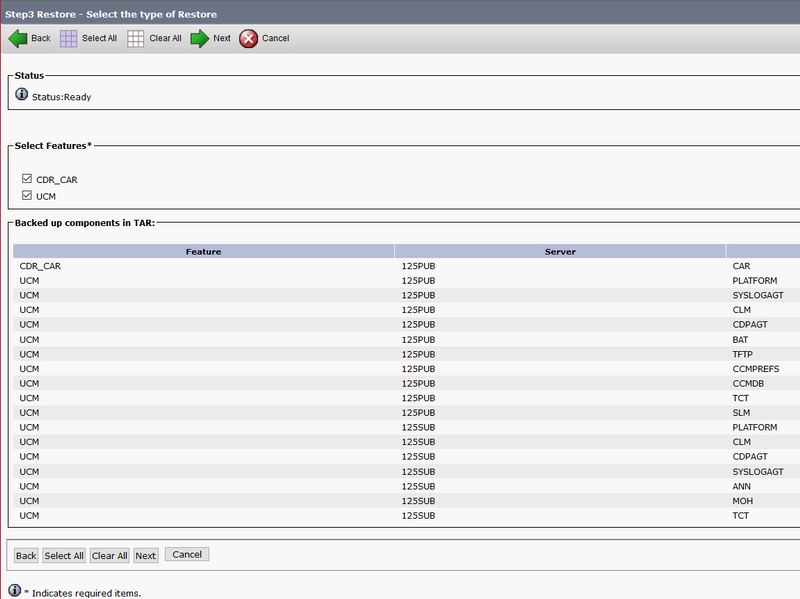
Step 3. Select UCM and CDR_CAR and then select Next.
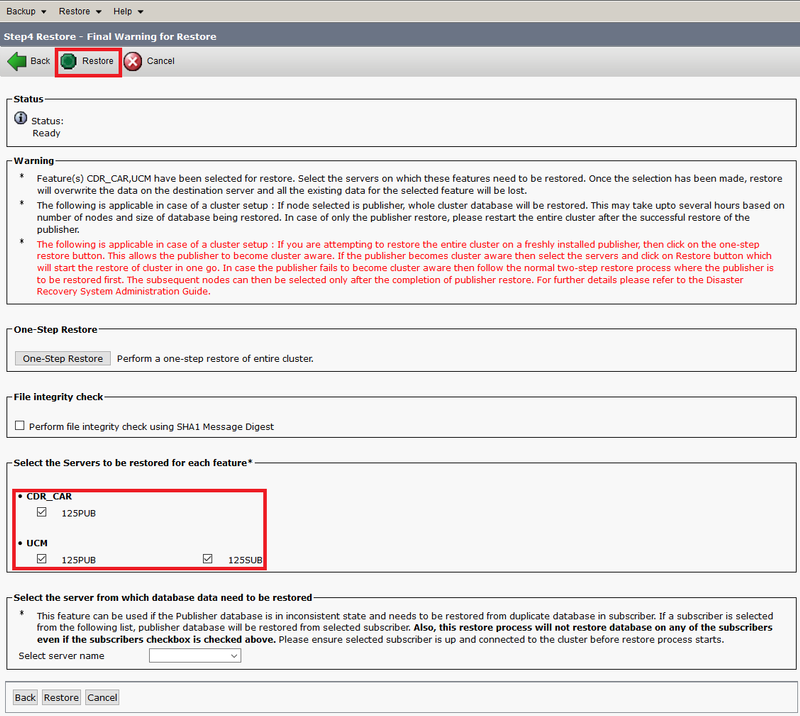
Step 4. Select the nodes you want to restore and then select Restore.
Use PCD as a Remote Filesystem for Upgrades
Step 1. Open Filezilla and log in to your PCD server with this information.
- Host: <IP or hostname of your PCD server>
- Username: adminsftp
- Password: <Your PCD Application password>
- Port: 22
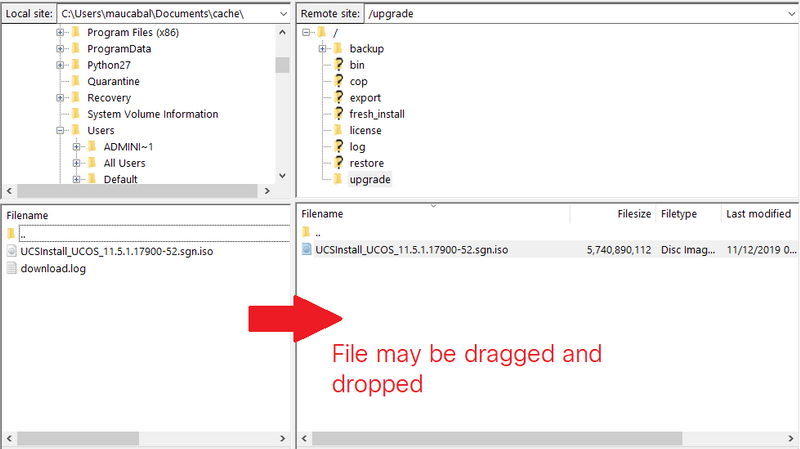
Step 2. Navigate to the /upgrade directory and open it.
Step 3. Copy the upgrade file from your computer to the /upgrade directory, as shown in the image.
Step 4. On CUCM, navigate to Unified OS Administration > Software Upgrades > Install/Upgrade.
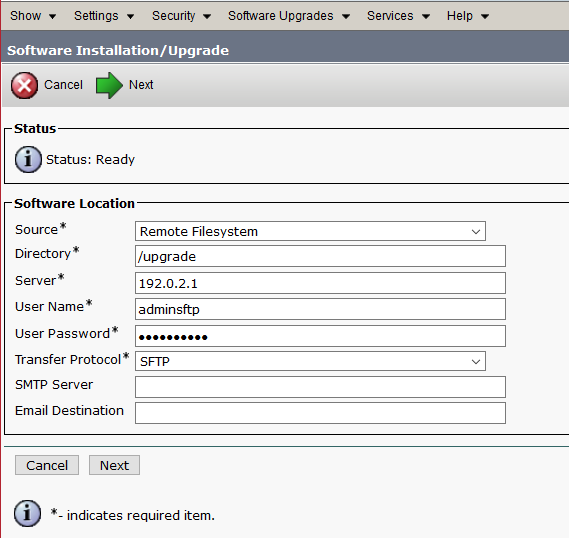
Step 5. Enter the values shown in the image and then select Next.
- Source: Remote Filesystem
- Directory: /upgrade
- Server: <IP or hostname of your PCD server>
- Username: adminsftp
- User Password: <Your PCD Application password>
- Transfer Protocol: SFTP
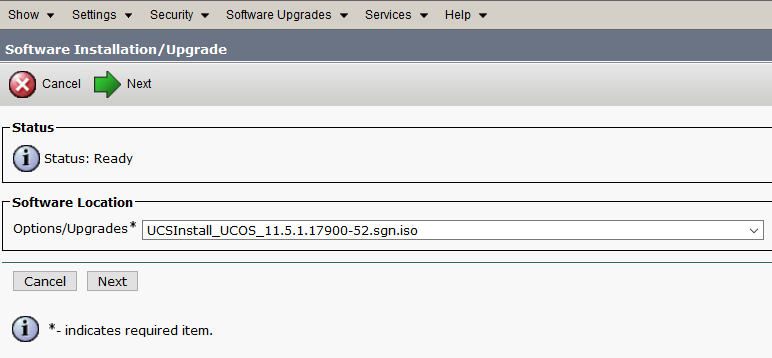
Step 6. Select the upgrade file you want to apply, and select Next.
Step 7. Proceed with the upgrade as required.
Verify
The verification procedure is actually part of the configuration process.
Troubleshoot
There is currently no specific troubleshooting information available for this configuration.
