Introduction
This document describes how to configure and troubleshoot Unified Contact Center Enterprise (UCCE) and Unfied Contac Center Express(UCCX) devices for Prime Collaboration Assurance (PCA)
Prerequisites
Requirements
- PCA globaladmin log in
- PCA Contact Center licenses to support all of the logged in agents
- Contact Center Domain User Log in and UCCE Diagnostic Portico access
- UCCE Windows Simple Name Management Protocol (SNMP) Read Only (RO) community string
Components Used
The information in this document does not pertain to any specific PCA or Contact Center Versions
The information in this document was created from the devices in a specific lab environment. All of the devices used in this document started with a cleared (default) configuration. If your network is live, make sure that you understand the potential impact of any command.
Background information
Note:If a UCCE 11.6 is managed with a PCA 11.6 then you will need to upgrade to PCA 12.1 for the Hypertext Transfer Protocol (HTTP) to pass.
UCCE 11.6 utilizes TLS version 1.2 that PCA 11.6 does not support.
PCA UCCE Configuration
Step 1. First, ensure your UCCE's are in a Managed state.
Navigate toInventory > Inventory Management > Manage Credentials > Create a profilefor your UCCE devices, as shown in the image.
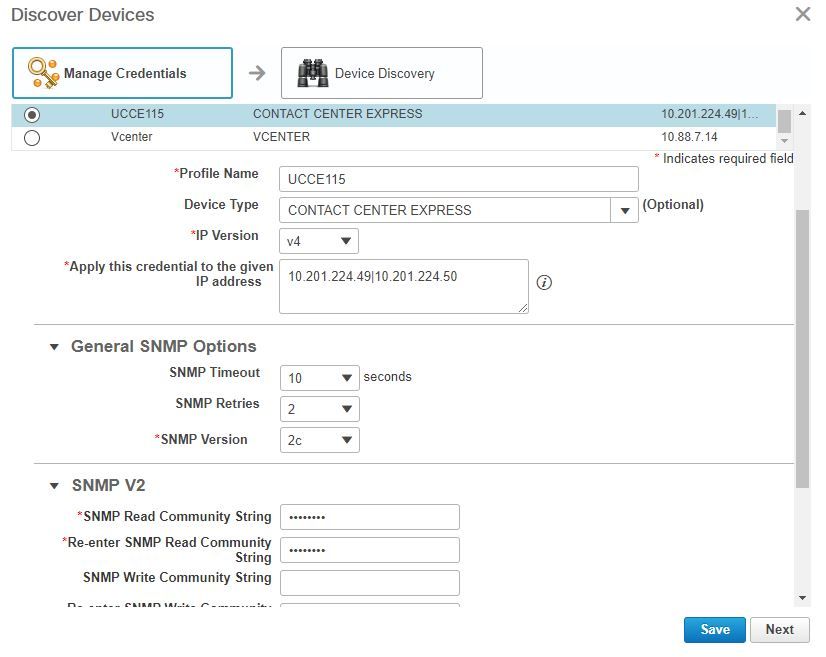
Note: You must enter the HTTP credentials in the format: hcsdc2\administrator, when you add UCCE in the PCA user interface. Where hcsdc2 is the windows domain and administrator is the account you log in
UCCE HTTP Diagnostic Portico and SNMP Setup
HTTP Diagnostic Portico Setup
Step 1. In order for the HTTP credentials to pass in PCA, ensure the Domain\Administrator User can access the diagnostic portico.
https://<UCCE_IP>:7890/icm-dp/rest/DiagnosticPortal/GetProductVersion
If the Domain Administrator does not have access to the link with the same credentials, then PCA is not be able to retrieve the needed information and the HTTP credentials fails.
Step 2. Open Internet explorer from your Windows Server.
Step 3. Input into the browser: https://<UCCE_IP>:7890/icm-dp/rest/DiagnosticPortal/GetProductVersion.
Step 4. When prompted to log in, use the same credentials you used to log in to your windows server as Domain\Administrator and that administrator's password.
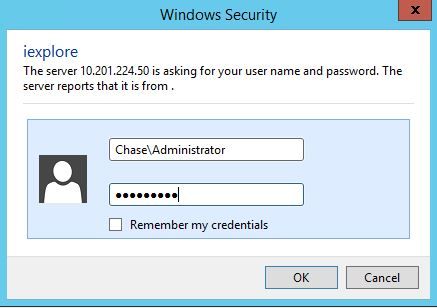
Step 5. Once logged in you receive a version description of your UCCE, this indicates HTTP pass in PCA.

SNMP Setup
Enable the SNMP Service
Step 1. Click on the windows icon to bring you to the start Menu.
Step 2. Click on the search bar and input run and hit enter.
Step 3. Once the prompt appears input in services.msc.
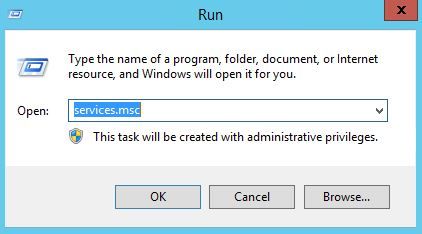
Step 4. The services menu comes up. Select Cisco Contact Center SNMP Agent and ensure is in Running state.
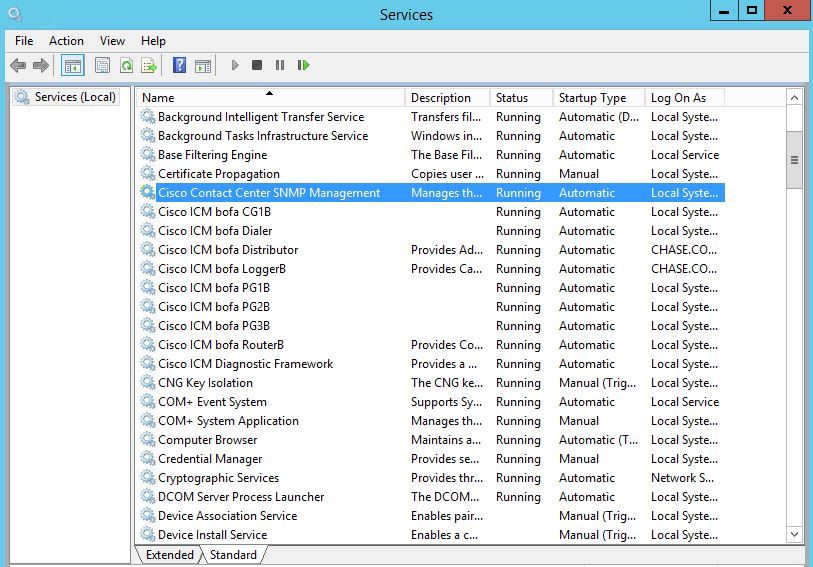
Step 5. If it is not in Running state, rlight click the service, then click on properties.
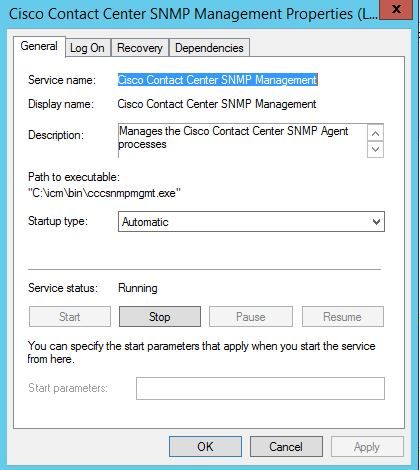
Step 6. Ensure the Startup type is Automatic then click on start for the service.
Step 7.Select Apply in order to save the settings.
Enable the SNMP Snap-in agent and create the community string
Step 1. Click on the windows icon to transfer you to the start Menu.
Step 2. Click on the search bar and type in run and click enter.
Step 3. Once the prompt appears type in mmc /32.
Step 4. Select File> Add/Remove Snap-In, as shown in the image.
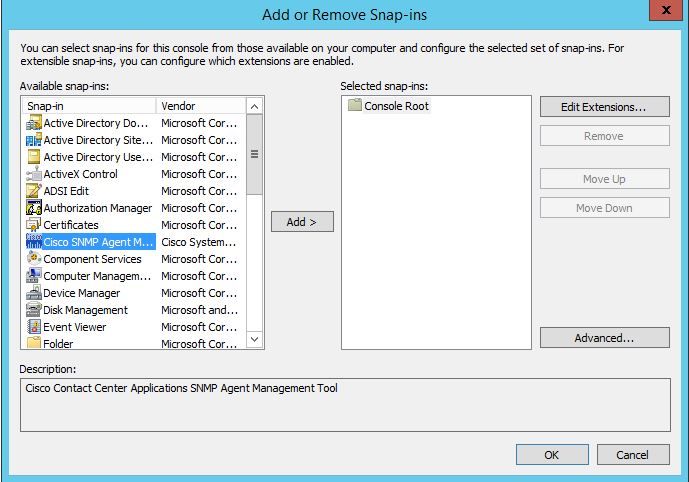
Step 5. Select the Cisco SNMP Agent Management Tool and click on the Add > button in the middle, then select ok.
Step 6.Once step 5 is completed click on the CommunityNames Button for SNMP V1/V2c, right click and click on configure.
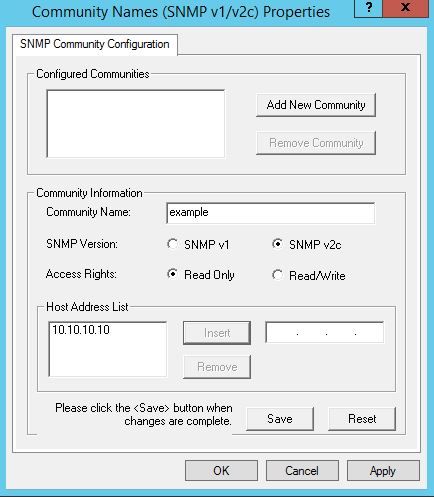
Step 7. Add in your community name, select your SNMP Version and then enter in your PCA server and click insert.
Step 8. After you click save and apply, close out of the mmc. It asks to save it on the console, click yes and now your UCCE is ready to be discovered in PCA.
If the Diagnostic's Portico does not display after you enter your credentials
Step 1. Click on the windows icon to transfer you to the start Menu.
Step 2. Click on the search bar and type in run and hit enter.
Step 3. Once the prompt appears type in services.msc.
Step 4. Stop the Apache service.
Step 5. Delete the folders cceadmin, unifiedconfig, setup from c:\icm\tomcat\webapps.
Step 6. Start the Apache service again after you wait 2 minutes, and the deleted folders must regenerate.
Step 7. Now, log into the Diagnostic's Portico.
UCCX Configuration
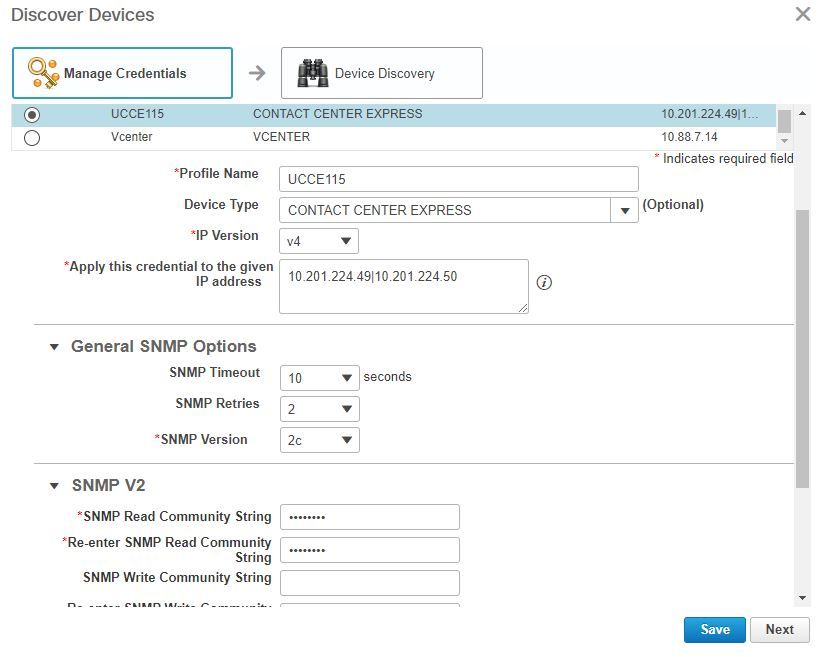
Step 1. Ensure your UCCE's are in a Managed state.
Navigate toInventory > Inventory Management > Manage Credentials > Create a profilefor your UCCX devices.
HTTP Setup
Step 1. Your Administrator Web User Interface (UI) should have been setup when you installed the windows server and is used for the HTTP credential set when entered into PCA.
Step 2. If you have lost or forgot your UI password, please log in to the Command Line Interface (CLI) of your UCCX.
Step 3. Next, enter: utils reset_application_ui_administrator_name and utils reset_application_ui_administrator_password to reset the account.
Step 4. Now, you must be able to login to the UI.
SNMP Setup
Step 1. Log in to the UI and use your HTTP credentials.
Step 2. In the top right click on the Navigation drop down then select Cisco Unified Serviceability.
Step 3. Select SNMP and then select your desired SNMP version.
Step 4. Click on server and select your UCCX then click find and then Add New.
Step 5. Enter in your community string name and ip address. After you insert in the ip, select ReadOnly for the Access Privileges, then click save.
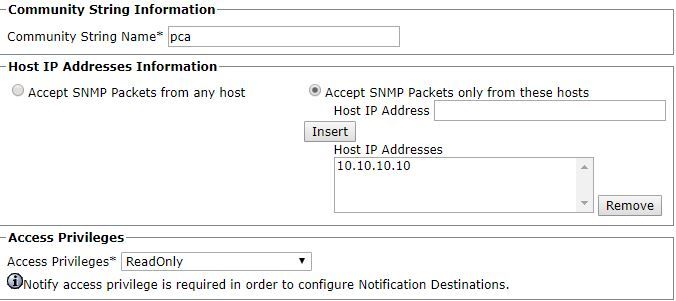
Step 6. Now, you must be able to comeplete a successfull discovery of your UCCE/UCCX.
Troubleshoot
If discovery for HTTP and SNMP fails you are able to review the logs
Step 1. Navigate to System Administration>Log Management.
Step 2. Set 14 Discovery, Inventory to debug.
Step 3. Recreate the issue and collect the logs.
Step 4. Open up the zip file and navigate to the locations for useful logs.
/opt/emms/emsam/log/Inventory/
AccessLevelDiscovery.log
Discovery.log
Inventory.log
Inventory.stdout.log
Inventory.stderr.log
InventoryDiscovery.log
snmp.log
/opt/emms/emsam/log/Poller/
ContactCenterPollingHandler.log
Poller.stderr.log
Poller.stdout.log
poll.log
ContactCenterRestPollingHandler.log
Note: If UCCE performance counters are not displayed correct in PCA, use this link in order to ensure that you are able to access the Diagnostic Portico and retrieve them: https://PCA_IP:7890/icm-dp/rest/DiagnosticPortal/GetPerformanceInformation.
