Introduction
This article describes step-by-step, the procedure to migrate from Prime Collaboration Assurance (PCA) 11.x to PCA 12.1.
Prerequisites
Requirements
Cisco recommends that you have knowledge of these topics:
- PCA 11.x in the Supported Migration Versions
- Data Migration Assistant (DMA) File Downloaded from the Cisco Clould Orchestrator (CCO) Server
- Secure FTP (SFTP) Server
Components Used
The information in this document is based on these software and hardware versions:
The information in this document was created from the devices in a specific lab environment. All of the devices used in this document started with a cleared (default) configuration. If your network is live, ensure that you understand the potential impact of any command.
Configure
Step 1. Install the RPM File
- Download the rpm file from the CCO site. This file is required to generate the backup on the PCA 11.x server in a format readable by the PCA 12.X platform.
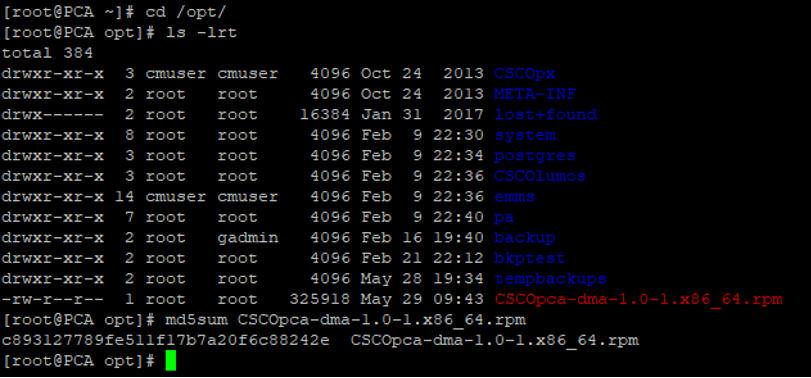
- Place the file under/opt and verify the file integrity and verify the md5sum.
Match the md5sum with the one mentioned on the CCO site:


- Ensure that the rpm is installed successfully:

Step 2. Initiate the Backup on 11.X Server with the Package Installed
- Run this script in order to initiate the backup. It will prompt you for parameters for the SFTP sever like the IP, Port Number, Username, Path.
./pcandma.sh
Note: The path should be relative to the user directory path. For eg. if the user directory is USER1, then you need to create a folder under this directory which will be the path under which the backup will be placed.
/USER1/PCA/pca
pca is the hostname of the server (the backup will be picked from here).
PCA is the path that was mentioned.

- The script checks if the destination folder is present. If not then it creates the folder.

- If the directory does not exist, PCA automatically creates one:

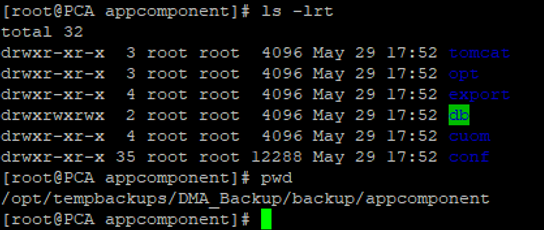
- The backup is stored on the local server at the path /opt/tempbackups/DMA_Backup/backup/appcomponent before transferring to the SFTP server.

- After DMA backup is completed, the file gets placed in the SFTP server at the destination folder.

- You might see some delay while the services start. You will see some logs as follows:
It is recommended that you wait for all the services to come up.

Step 3. Use DMA to Migrate Data to PCA 12.X
- You need to install the Engineering Special (ES) patch to get the option Enabled for DMA restore in PCA 12.1.
The DMA option is available starting ES1.
It is recommended you install the latest ES patch before you initiate the DMA.
You can read the read-me file for the ES before you initiate the DMA.
- Specify the SFTP server details as shown here. Verify the SFTP connectivity.
Note: The path should be relative to the user directory path.
If the user directory is USER1.
pca is the hostname of the server (the backup will be picked from here).
PCA is the path that was mentioned when the DMA backup was generated.

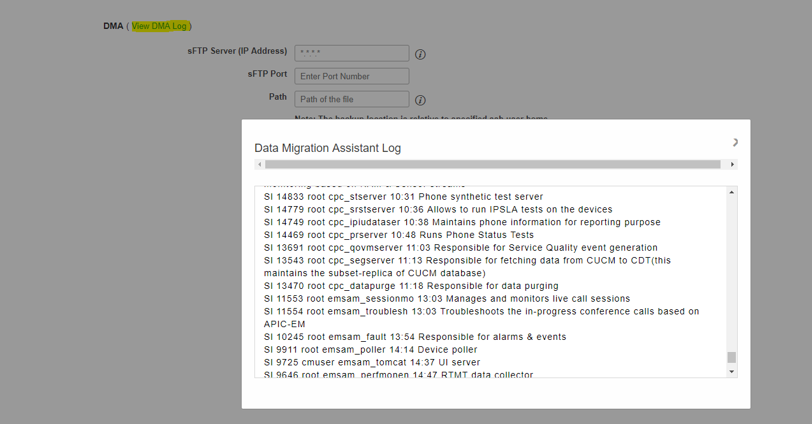
- Once the DMA process starts, you can monitor the logs with the use of the View DMA Log, on the DMA screen.

- When you run the DMA process, the GUI might logout. If you login again, it will direct it to a fresh DMA page.
If you enter the details and run DMA again, you will be prompted with status that the DMA is already running.
- Alternatively you can also check the status log from the CLI with the use of the log file log.
This file is deleted at the end of DMA operation.
Or you can check from the View DMA Log option in the GUI itself.

- DMA is a 20 step process. At the end of these 20 steps, the services will be restarted.
After the service restart is completed, the VM reloads. You will lose control to CLI and GUI till the reboot is complete.
Once the VM reboots, check the service status on the serviceability page.
Wait for all the service to come up.
Verify
Use this section in order to confirm that your configuration works properly.
Once all the services are up and running, you can login to validate your Data in PCA.
Troubleshoot
This section provides information you can use in order to troubleshoot your configuration.
Logs on PCA 11.x:
- pcaninfra.log
- analytics_dma.log => For Analytics backup creation.
- assurance_backup_dma.log => For Assurance backup creation.
- dma_assurance_backup_file_tran.log => for assurance backup file transfer
- dma_backup_file_tran.log => for analytics backup file transfer
- dma_backup_sftp.log
- dma_debug.log
- pcandma.log => it is observed in some cases the PCA services take sometime to start the services back once the DMA script runs.
Logs on PCA 12.x:
- pcandma.log => provides detailed information on the restore and updates the failure.
- analytics_dma.log
- assurance_backup_dma.log
- assurance_restore_dma.log
- dma_assurance_restore_file_tran.log
- dma_backup_file_tran.log
- dma_debug.log
- dma_status.log => this file will be deleted at the end of the DMA script.


 Feedback