Introduction
This document describes how to create SAN certificates for pxGrid integration between Industrial Network Director (IND) and Identity Services Engine.
Background Information
When creating certificates in Cisco ISE for pxGrid use, server short hostnames cannot be entered into the ISE GUI as ISE allows only the FQDN or IP address.
To create certificates that include the hostname as well as FQDN, a certificate request file must be created outside of ISE. This can be done using OpenSSL to create a Certificate Signing Request (CSR) with Subject Alternative Name (SAN) field entries.
This document does not include comprehensive steps to enable pxGrid communication between the IND server and the ISE server. These steps can be used after pxGrid has been configured, and it has been confirmed that the server hostname is required. If this error is found in the ISE Profiler log files, communication requires the hostname certificate.
Unable to get sync statusjava.security.cert.CertificateException: No subject alternative DNS name matching <IND server hostname> found.
Steps for initial deployment of IND with pxGrid communication can be found at https://www.cisco.com/c/dam/en/us/td/docs/switches/ind/install/IND_PxGrid_Registration_Guide_Final.pdf
Applications Required
- Cisco Industrial Network Director (IND)
- Cisco Identity Services Engine (ISE)
- OpenSSL
- In most modern Linux versions, as well as MacOS, the OpenSSL package is installed by default. If you find that commands are not available, please install OpenSSL using your operating system’s package management application.
- Information about OpenSSL for Windows can be found at https://wiki.openssl.org/index.php/Binaries
Additional Information
For the purpose of this document, these details are used:
- IND Server hostname: rch-mas-ind
- FQDN: rch-mas-ind.cisco.com
- OpenSSL configuration: rch-mas-ind.req
- Certificate request file name: rch-mas-ind.csr
- Private key file name: rch-mas-ind.pem
- Certificate file name: rch-mas-ind.cer
Process Steps
Create the certificate CSR
- On a system with OpenSSL installed, create a request text file for OpenSSL options including SAN information.
- Most “_default” fields are optional, as answers can be entered while running the OpenSSL command in step #2.
- SAN details (DNS.1, DNS.2) are required and must include both the DNS short hostname, and server’s FQDN. Additional DNS names can be added if needed, using DNS.3, DNS.4, and so on.
- Example request file text file:
|
[req]
distinguished_name = name
req_extensions = v3_req
[name]
countryName = Country Name (2 letter code)
countryName_default = US
stateOrProvinceName = State or Province Name (Full Name)
stateOrProvinceName_default = TX
localityName = City
localityName_default = Cisco Lab
organizationalUnitName = Organizational Unit Name (eg, IT)
organizationalUnitName_default = TAC
commonName = Common Name (eg, YOUR name)
commonName_max = 64
commonName_default = rch-mas-ind.cisco.com
emailAddress = Email Address
emailAddress_max = 40
[v3_req]
keyUsage = keyEncipherment, dataEncipherment
extendedKeyUsage = serverAuth, clientAuth
subjectAltName = @alt_names
[alt_names]
DNS.1 = rch-mas-ind
DNS.2 = rch-mas-ind.cisco.com
|
- Use OpenSSL to create CSR with DNS short hostname in SAN field. Create a private key file in addition to CSR file.
- Command:
openssl req -newkey rsa:2048 -keyout <server>.pem -out <server>.csr -config <server>.req
- When prompted, enter a password of your choice. Be sure to remember this password, as it is used in later steps.
- Enter a valid email address when prompted or leave the field blank and press <ENTER>.

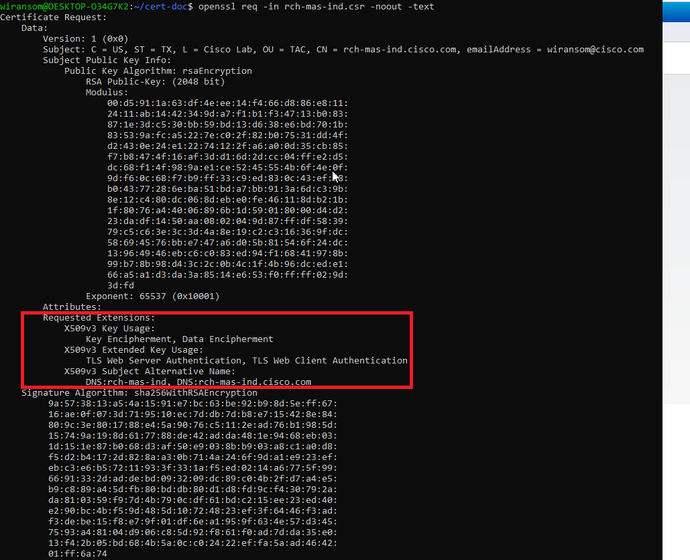
- If desired, verify the CSR file information. For a SAN certificate, check for “x509v3 Subject Alternative Name” as highlighted in this screenshot.
- Command line:
openssl req -in <server>.csr -noout -text
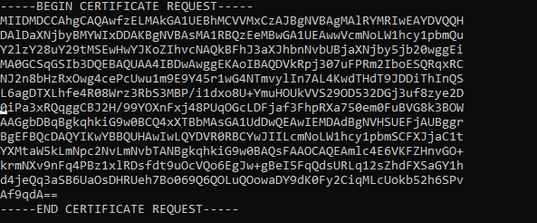
- Open the CSR file in a text editor. For security reasons, the sample screenshot is incomplete and edited. The actual generated CSR file contains more lines.
- Copy the private key file (<server>.pem) to your PC as it is used in a later step.
Use Cisco ISE to generate a certificate, using the created CSR file information
Within the ISE GUI:
- Remove the existing pxGrid client.
- Navigate to Administration > pxGrid Services > All Clients.
- Find and select the existing client hostname, if listed,
- If found and selected, click the Delete button, and choose “Delete Selected.” Confirm as needed.
- Create the new certificate.
- Click on the Certificates tab on the pxGrid services page.
- Choose the options:
- “I want to”:
- “Generate a single certificate (with certificate signing request)”
- “Certificate Signing Request Details:
- Copy/paste the CSR details from the text editor. Be sure to include the BEGIN and END lines.
- “Certificate Download Format”
- “Certificate in Privacy Enhanced Electronic Mail (PEM) format, key in PKCS8 PEM format.”
- Enter a certificate password and confirm it.
- Click the Create button.
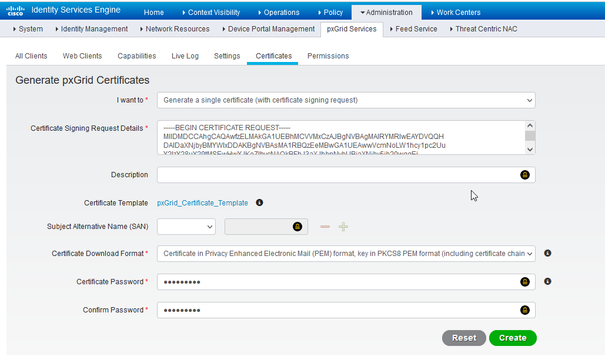
- This creates and downloads a ZIP file that contains the certificate file as well as additional files for the certificate chain. Open the ZIP and extract the certificate.
- The filename is normally <IND server fqdn>.cer
- In some versions of ISE, the filename is <IND fqdn>_<IND short name>.cer
Import the new certificate into the IND server, and enable it for pxGrid use
Within the IND GUI:
- Disable the pxGrid service, so the new certificate can be imported and set as the active certificate.
- Navigate to Settings > pxGrid.
- Click to disable pxGrid.
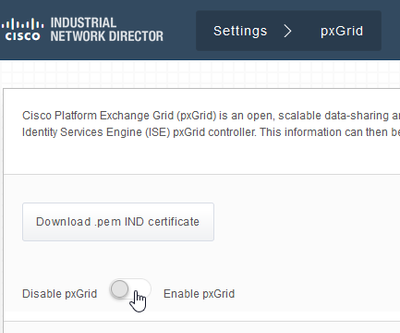
- Import the new certificate into System Certificates.
- Navigate to Settings > Certificate Management.
- Click onto “System Certificates”
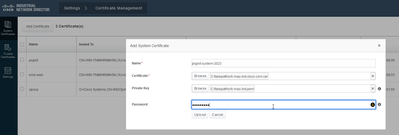
- Click “Add Certificate.”
- Enter a certificate name.
- Click “Browse” to the left of “Certificate”, and locate the new certificate file.
- Click “Browse” to the left of “Certificate”, and locate the private key saved when creating the CSR.
- Enter the password previously used when creating the private key and CSR with OpenSSL.
- Click “Upload.”
- Import the new certificate as a trusted certificate.
- Navigate to Settings > Certificate Management, click on “Trusted Certificates.”
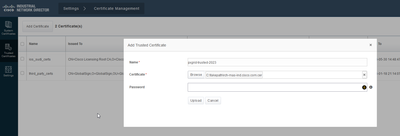
- Click “Add Certificate.”
- Enter a certificate name; this must be a different name than the one used on System Certificates.
- Click “Browse” to the left of “Certificate” and locate the new certificate file.
- The password field can be left empty.
- Click “Upload.”
- Set pxGrid to use the new certificate.
- Navigate to Settings > Certificate Management, click on “Settings.”
- If not already done, select “CA Certificate” under “pxGrid.”
- Select the system certificate name created during the certificate import.
- Click Save.
Enable and register pxGrid with the ISE server
Within the IND GUI:
- Navigate to Settings > pxGrid.
- Click the slider to Enable pxGrid.
- If this is not the first time registering pxGrid with ISE on this IND server, choose “Connect Using the Existing Node.” The IND node and ISE server information automatically populates.
- To register a new IND server to use pxGrid, if needed, choose “Register a New Node”. Enter the IND node name and choose ISE servers as needed.
- If the ISE server is not listed within the dropdown options for Server 1 or Server 2, it can be added as a new pxGrid server using Settings > Policy Server
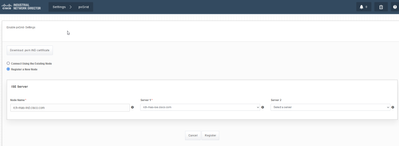
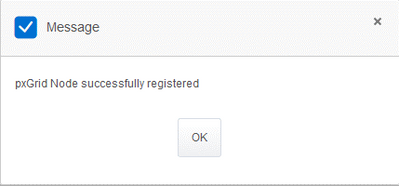
- Click Register. A confirmation is shown on-screen.
Approve registration request in ISE server
Within the ISE GUI:
- Navigate to Administration > pxGrid Services > All Clients. A request Pending Approval shows as “Total Pending Approval(1).”
- Click on “Total Pending Approval(1)” and select “Approve All.”

- On the pop-up that appears, click “Approve All.”

- The IND server shows as a client, as shown here.

Activate pxGrid service in IND server
Within the IND GUI:
- Navigate to Settings > pxGrid.
- Click on “Activate.”
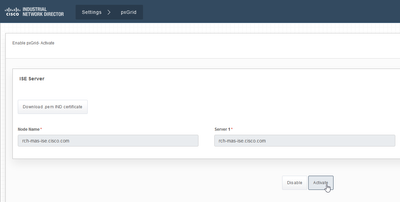
- A confirmation is shown on-screen.


 Feedback